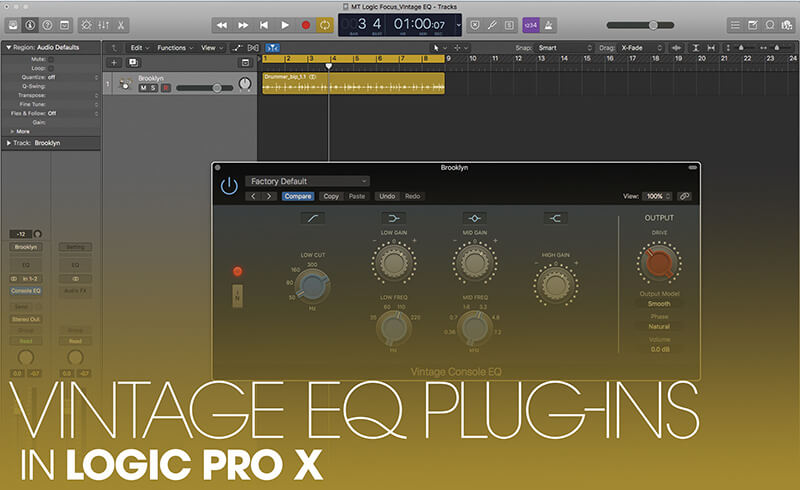
Vintage EQ plug-ins in Logic Pro X
Logic Pro X’s new Vintage EQ plug-ins can transform the sound of your mixes, with a unique retro vibe. Mark Cousins steps back in time… Logic Pro’s Channel EQ certainly offers everything you could ever want from a contemporary equalizer in the digital world – from high-resolution spectral analysis, through to the precision of Middle-and-Side […]
Logic Pro X’s new Vintage EQ plug-ins can transform the sound of your mixes, with a unique retro vibe. Mark Cousins steps back in time…

Logic Pro’s Channel EQ certainly offers everything you could ever want from a contemporary equalizer in the digital world – from high-resolution spectral analysis, through to the precision of Middle-and-Side operation.
However, having grown up listening to countless records produced using classical analogue equalizers, there’s a lot to be said for EQ that has a more vintage edge to it, even though it may lack the accuracy and precision of its digital counterpart.
Following in the footsteps of plug-in developers like Waves and Universal Audio, Logic’s new Vintage EQ plug-in collection offers analogue modelled EQ as standard, with three different classical equalizers to explore.
If you’re used to Logic’s Channel EQ plug-in, the first experience of using the Vintage EQ can seem a little daunting, especially as you won’t be aware of quirks and operational features of the Vintage EQ models on offer. Although Apple can’t reveal the actual equalizers that have been modelled, it’s pretty obvious to visually identity them as a Neve 1073, API 560, Pultec EQP-1A and MEQ-5.
Console yourself
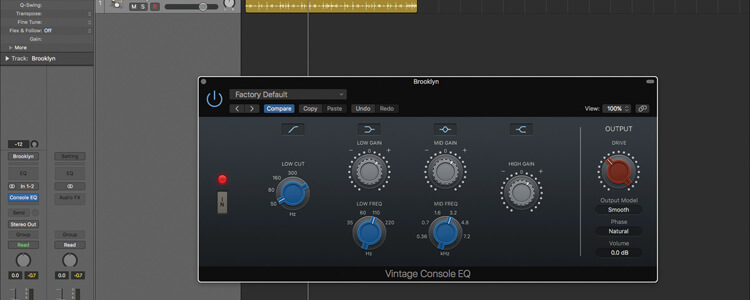
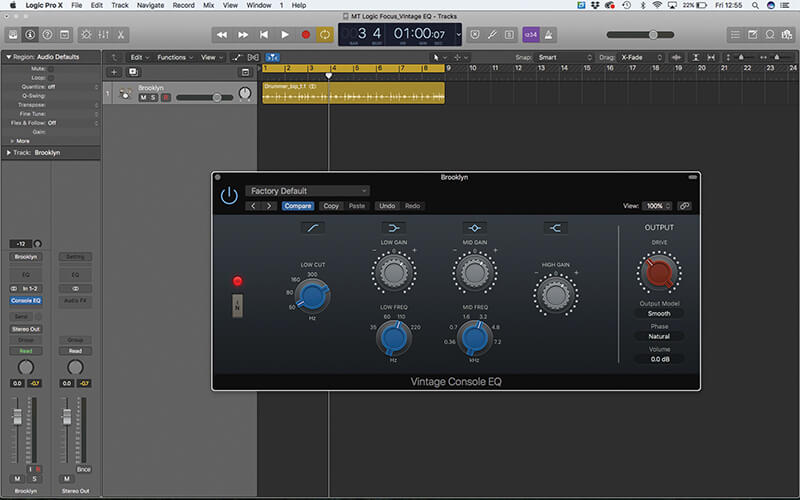
The Neve 1073 is what Logic refers to as the Vintage Console EQ, arguably harking back to its original inclusion as part of a Neve A88 console. Like many console EQs produced in the 70s, the 1073 is a relatively simple equalizer: with a low-cut, two shelving sections and an adjustable mid cut/boost.
Like all these Vintage EQ plug-ins, the Vintage Console EQ isn’t a tool you’d turn to for surgically-precise timbral modification, but more a broader ‘brush stroke’ for changing the colour and representation of a sound. As the name suggests, the Vintage Console EQ is a great ‘mixing’ equalizer, with a set of simple, focussed controls.
The low-end can be controlled using the combination of a passive (18dB/octave) high-pass filter along with a low shelving Equalizer with an adjustable frequency setting (from 35-220Hz). One key difference to note is that the original 1073 had stepped controls, while the newer Vintage Equalizer has sweepable frequency controls that let you ‘tune-in’ to a specific frequency. Mids are catered for with a semi-parametric band (from about 360Hz to 7kHz), leaving the tops covered by a silky shelving EQ set at 12kHz.
Graphic content
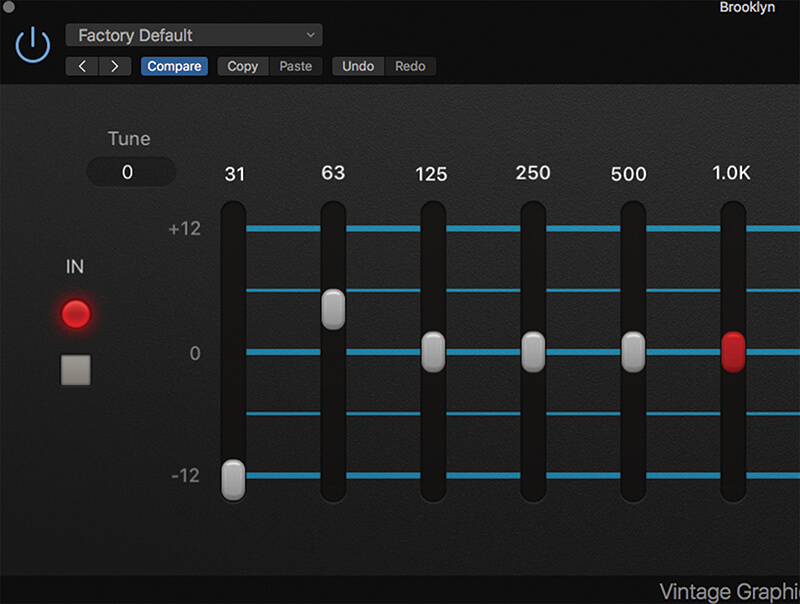
The API 560, otherwise known as Vintage Graphic EQ, is interesting as it’s Logic’s only example of a graphic equalizer. On the whole, Graphic EQs tend to get a bad name in the studio, mainly because the band divisions are relatively coarse by comparison to a fully-sweepable parametric equalizer. That said, the API 560 is still a well-loved sound-shaping tool, partly thanks to its Proportional Q.
Put simply, Proportional Q means relatively small amounts of cut or boost will result in a musically-wide Q setting. Push the frequency harder, though, and Q will become sharper, applying a more focussed cut or boost to the signal.
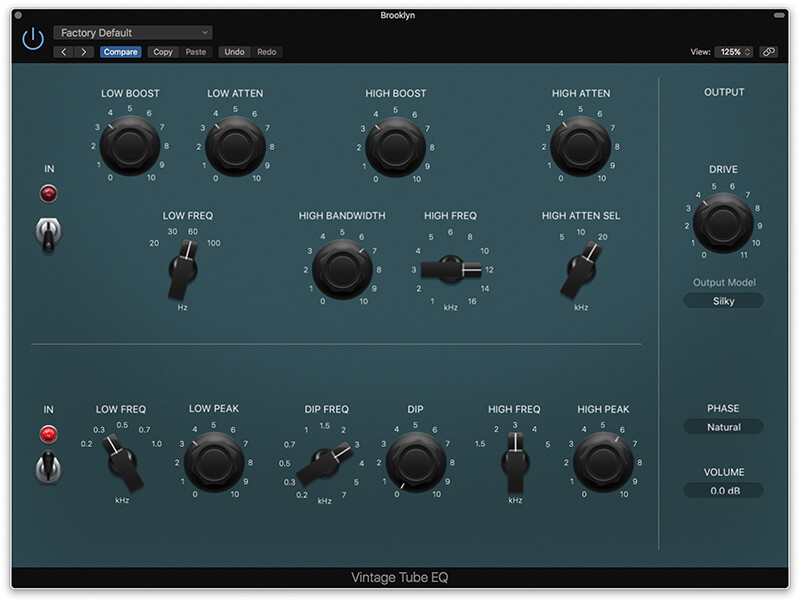
Of all three equalizers, it’s arguably the Vintage Tube EQ that delivers the least precision, but the largest amount of mojo. Technically speaking, the single plug-in is actually a replication of two valve equalizers – the shelving-like Pultec EQP-1A and the more mid-range-focussed MEQ-5 – hence the two power switches on the plug-in.
The controls on the Pultec are slightly unconventional – for example, the Low section provides both a Low Boost and Low Attenuation that can be applied at the same time! Though somewhat counter-intuitive, the walk-through details some of the unique sonic quirks that the Pultec is famed for, which, of course, can be perfectly replicated on the Vintage Tube EQ.
Driving school
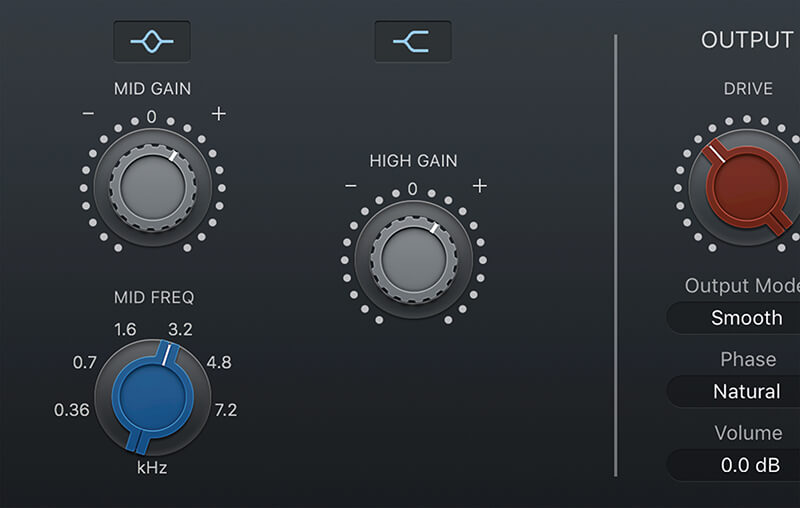
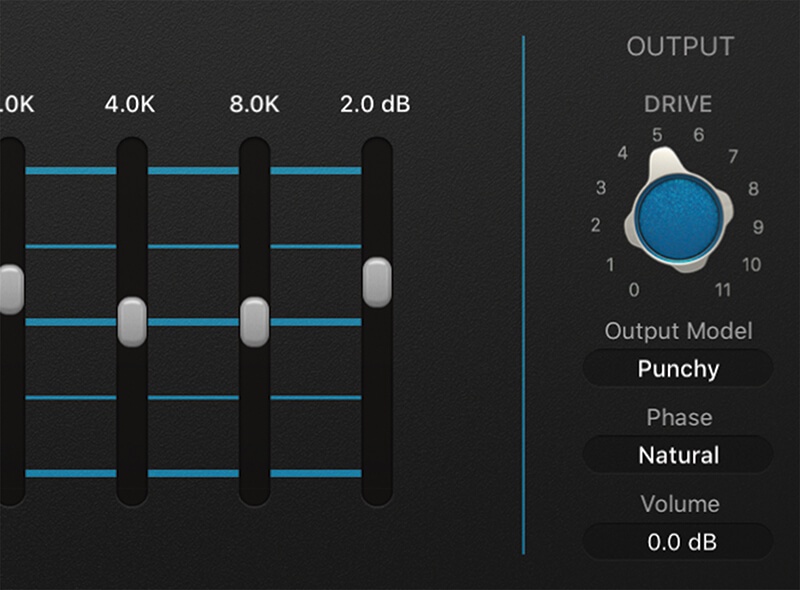
One feature common to all three Vintage equalizers is a Drive control, designed to replicate the small amount of soft saturation the original hardware equalizers would produce. In practical terms, the Drive control adds a small amount of ‘sizzle’ to the output, in much the same way as increasing the saturation on a digital photograph.
It’s worth noting that you can use the Drive control even with the EQ flat, which is useful as a subtle enhancement technique in its own right, or alternatively, switch the various Drive characteristics between the different units (so that the Neve’s ‘Drive’ is paired with the API Graphic, for example).
The addition of the Vintage EQ plug-ins to Logic’s sonic arsenal significantly improves the quality of mixes you can produce. Like all pieces of ‘classic’ audio hardware, though, it’s worth appreciating the finer sonic details and operational quirks that have made these devices studio stalwarts.
In many cases, it’s often the interaction between multiple bands and controls – like the aforementioned Low Boost and Attenuation on the Pultec – that go a long way to define these units’ signature sound. Whatever you’re equalising, therefore, there’s a whole new sonic world to explore, thanks to the Vintage EQ plug-ins.
Using vintage EQ plug-ins: step-by-step
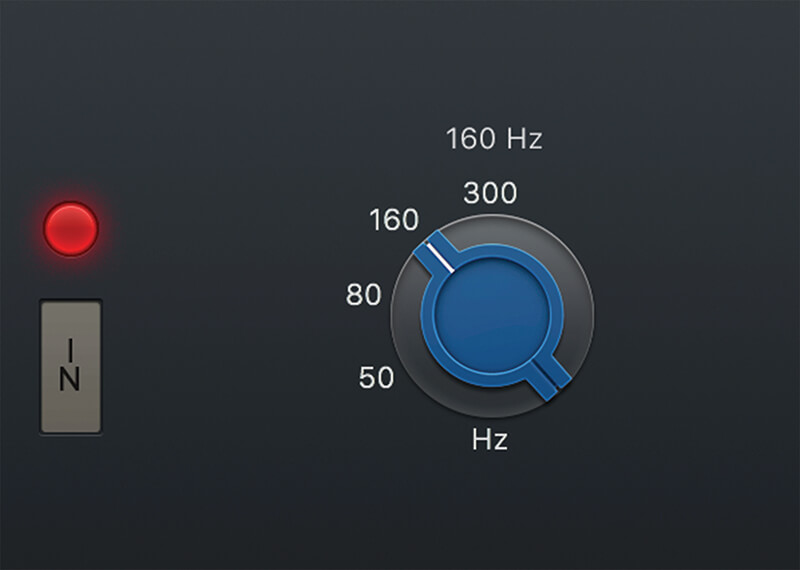
1. The Vintage Console EQ’s high-pass filter is a great way of keeping the low-end in check. Click on the outside to move in the original stepped increments or use the pot to sweep across the full range.
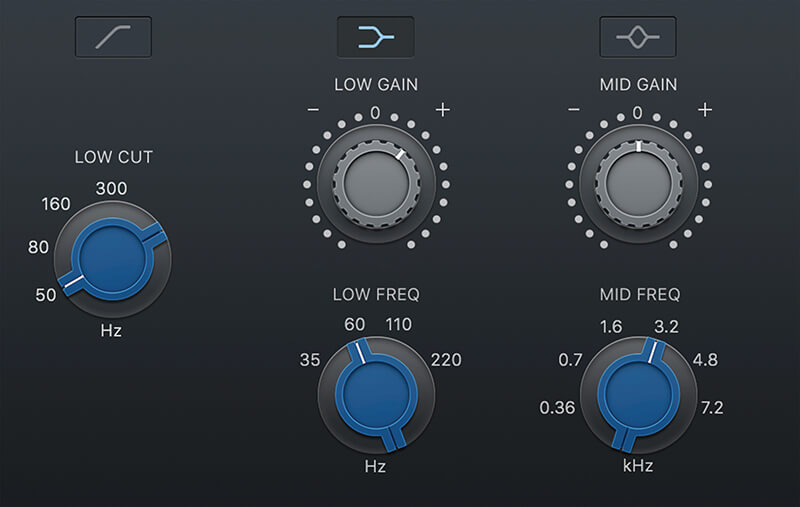
2. The Low Gain control works as a shelving equalizer, with a stepped (or fully variable) frequency control beneath the gain control. Try a 60Hz boost on the drums to reveal the low-end of the kick.
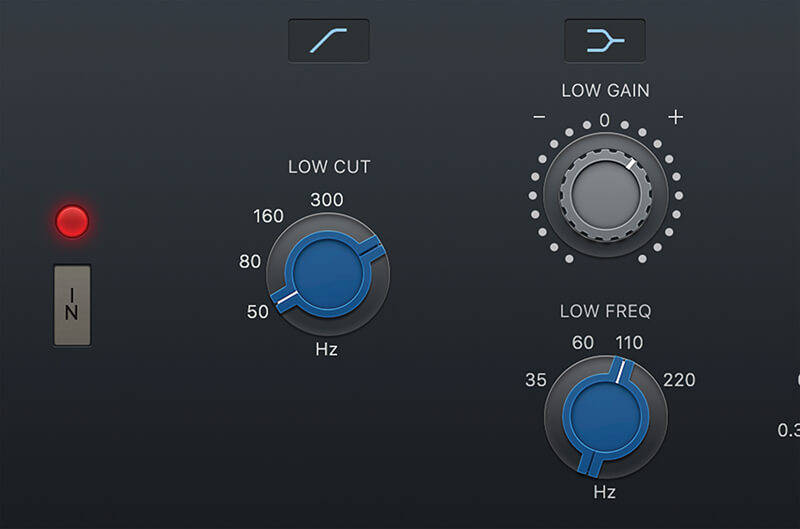
3. One well-loved technique with the original 1073 was a combination of deep high-pass filtering (at 60Hz) combined with a low shelving boost at 110Hz. The result is a tight, focussed bass-lift that keeps the extreme low-end clean.
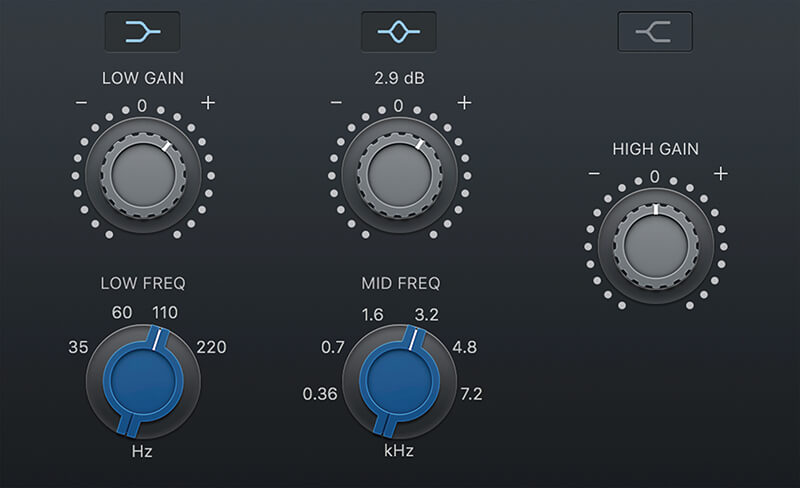
4. You can either tame or boost the mid-range using the semi-parametric mid. In the example with the drums, listen to how a 3.2kHz boost brings out the detail in the snare work.
5. The High Gain is another shelving control, this time set at a fixed position of 12kHz. It’s worth comparing the difference between the 1073 and the Channel EQ, with the 1073 exhibiting a more musical treble extension.
6. Adding Drive brings out the soft saturation modelled from the original analogue hardware. You can either add it to your existing EQ curve, or simply use it without any EQ being applied for a subtle touch of extra colour.

Volume Correction The combination of a healthy dose of Drive combined with an additive EQ setting can start to push the output levels of the plug-in. Use the Volume control to tame the output level, which is also useful if you need to objectively compare before and after EQ.
7. The Vintage Graphic EQ takes a different approach with 10 separate bands of cut or boost. On the drums, it’s interesting to work through each band and see what it has to offer.

8. This setting combines a low-cut at 30Hz, a small low-end boost at 63Hz for the kick and a dip around 250Hz to minimize the ‘weight’ behind the kit. This ‘multiband’ approach works well on an instrument like drums.
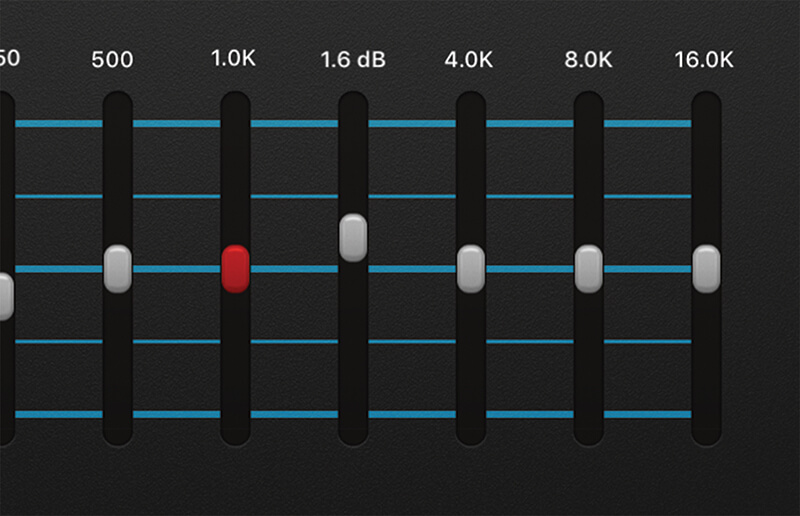
9. As we saw on the Vintage Console EQ, the snare can be brought out around 2Hz. Try experimenting with extreme settings of cut and boost and note how Q becomes sharper at the extreme ends of the scale.
10. The upper band is set relatively high – at 16kHz – and can be a great way of adding ‘air’. Of course, the positioning and relative spacing of these bands forms a big part of the sound of the API 560.
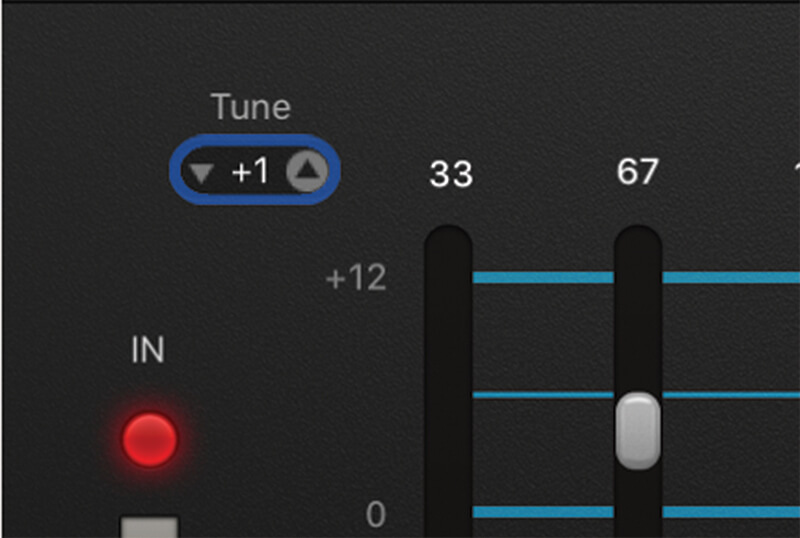
11. By default, the Vintage Graphic EQ is tuned to B (or thereabouts), with the 500Hz positioned at the B above middle C. Use tune to shift this position in relation to the key of your track.
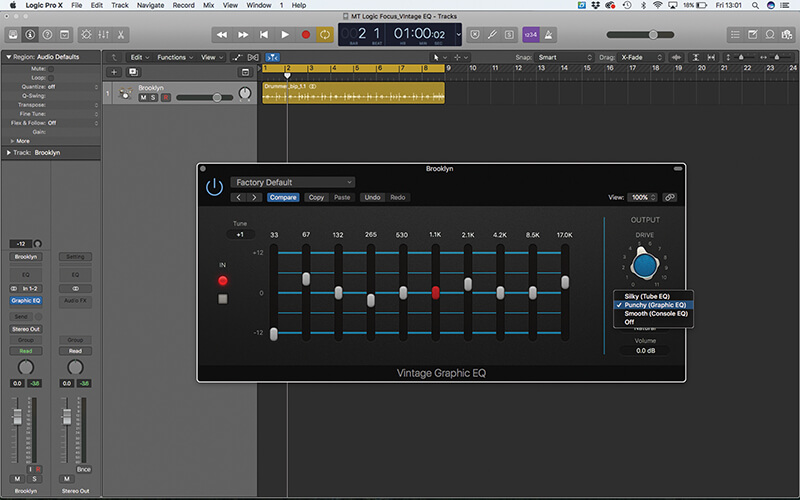
12. It’s worth noting that you can switch the Drive characteristics between the various Vintage EQ models. The Vintage Graphic EQ sounds good with either the Silky or Smooth mode.
Phase Linear On traditional hardware equalizers, phase can be modified around the frequency point as a by-product of applying the cut/boost. These phase-shifts are modelled in digital form, but it’s also possible to work with Phase Linear EQ by changing the Phase parameter.
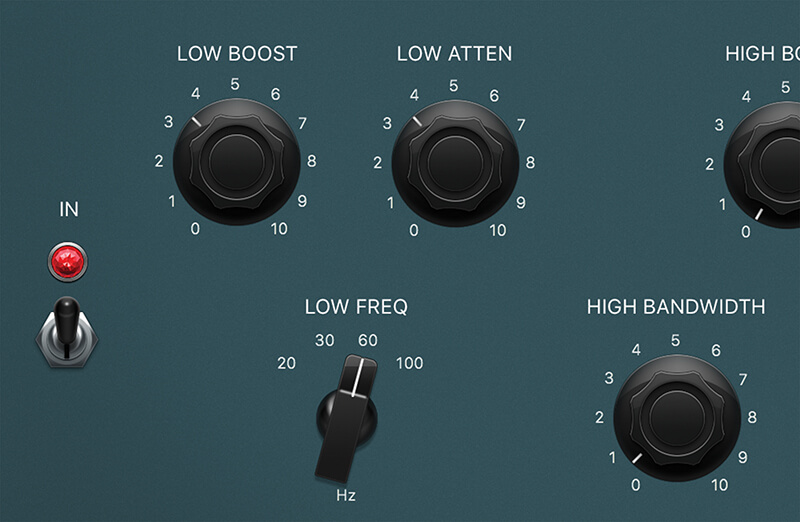
13. The classic Pultec Low-End trick uses a combination of Boost and Attenuation at 60Hz. The additional Attenuation cuts slightly above the cut-off point, clearing some low-mids ahead of the bass boost. Read our quick guide to the Low-End Trick here.
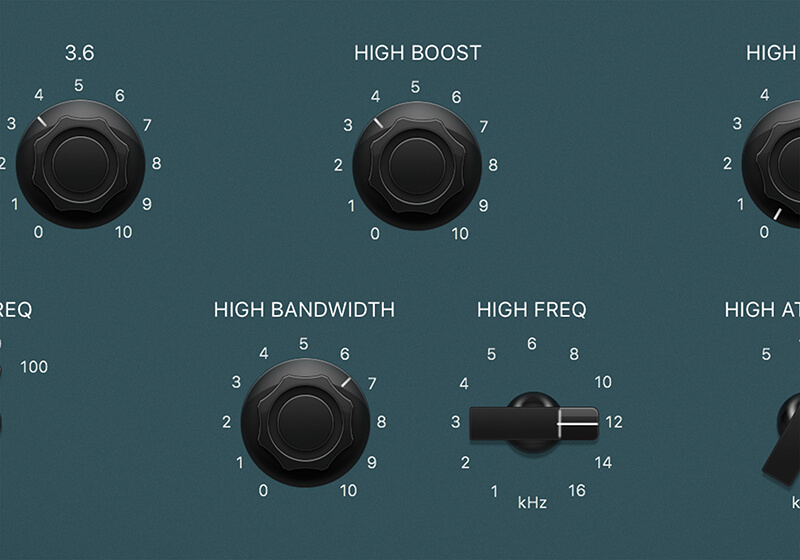
14. The Pultec creates a silky top-end boost that sounds great on strings. Set the Frequency between 12 and 16kHz with a wide Bandwidth. Now add boost to get the desired amount of silky, ‘air’ lift.
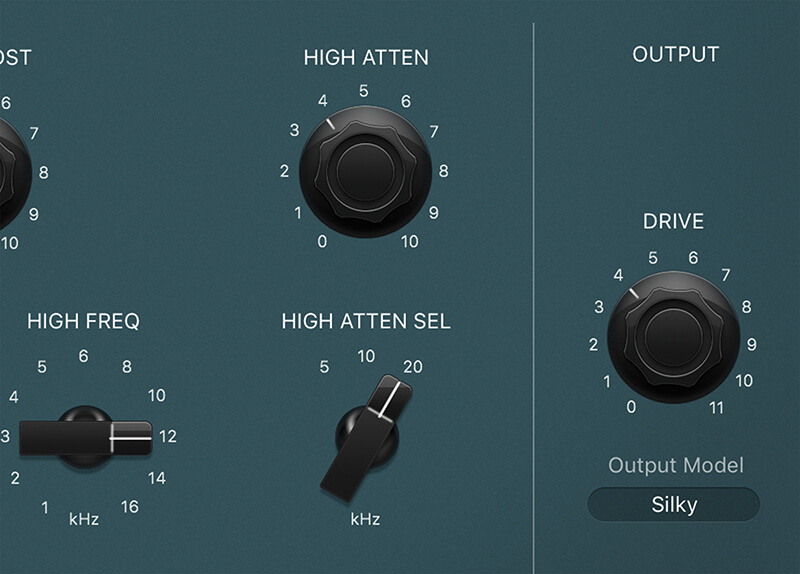
15. An alternative to high-end boost is the Attenuator, which can be thought of as a relatively soft low-pass filter. Use it to darken a drum loop or an aggressive hi-hat without it sounding noticeably ‘filtered’.
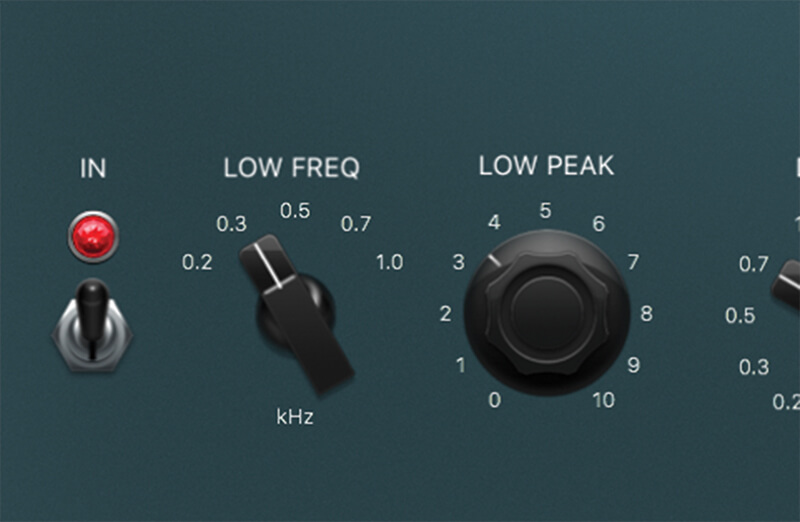
16. The bottom section is technically a separate equalizer – the MEQ-5. The first section is a Peak control, covering a frequency range of 200Hz to 1Khz. Try adding some weight to the drums around 0.3kHz.
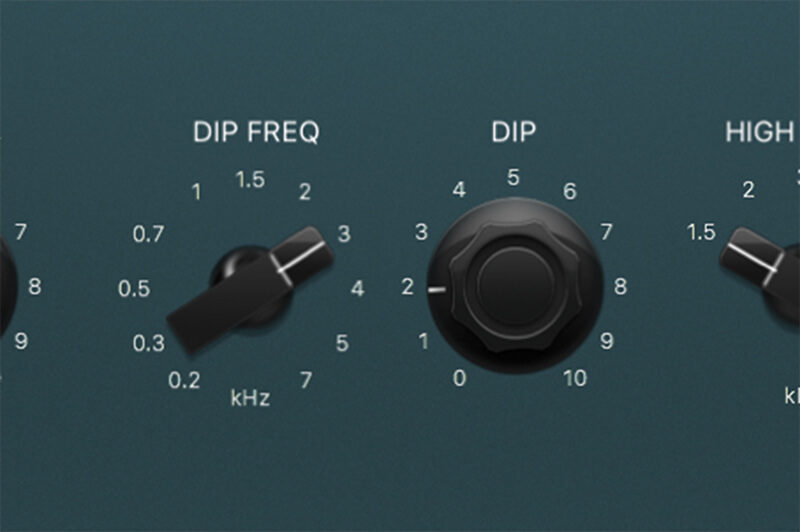
17. The central section of the MEQ-5 is a Dip control. As with all things Pultec, think broader brush strokes – here we’ve used a Dip around 3kHz to tame some of the edginess on the drums.
18. The final section is another Peak, this time covering the high mids. Both Peak controls exhibit a different Q setting based on the frequency, which is a usual (though characterful) response.
