Using MIDI in Pro Tools 2018: Step-By-Step (Continued)
Mike Hillier continues his exploration of 2018’s new features, and how they factor into using MIDI in Pro Tools. Read part 1 before continuing if you missed it… 7. This creates an unusual pattern as the bass notes now go down rather than up. Experiment with using the octave up by holding Shift+Up to transpose […]
Mike Hillier continues his exploration of 2018’s new features, and how they factor into using MIDI in Pro Tools. Read part 1 before continuing if you missed it…
7. This creates an unusual pattern as the bass notes now go down rather than up. Experiment with using the octave up by holding Shift+Up to transpose the notes. To work musically you will want to shift the other A notes in these bars up.
8. Velocity information can also be altered with key commands. Highlight all of the eighth-notes, ignoring the held bass notes, and press Start+Up/Down (PC) or Cmd+Up/Down (Mac) to move these up or down in velocity by 5.
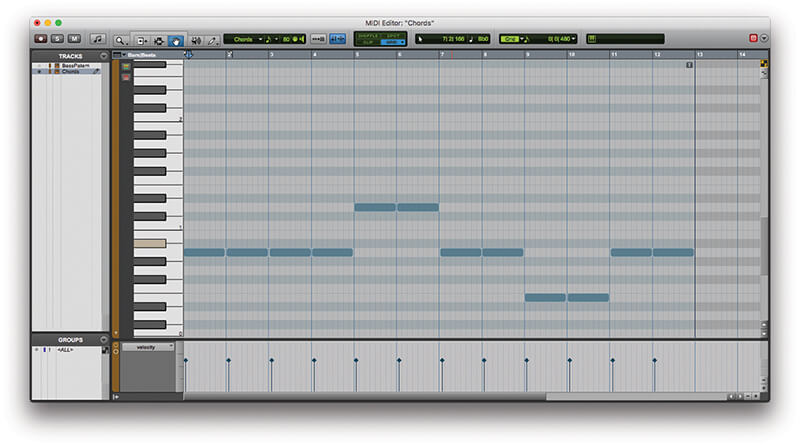
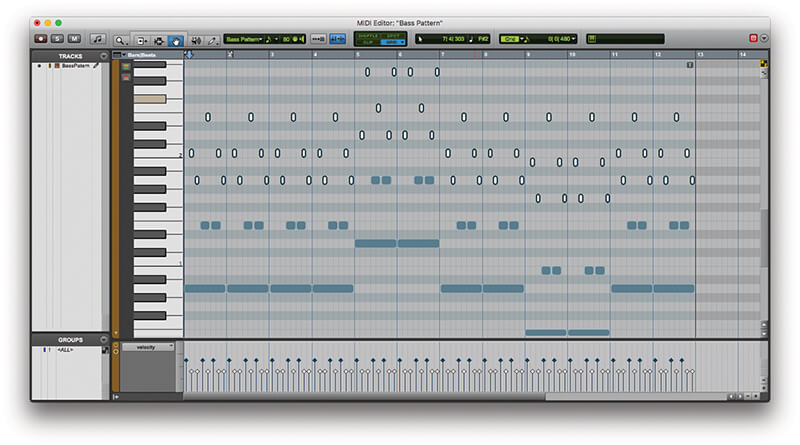
9. Transposing notes in a key is also useful for quickly creating chords. Duplicate the Bass Pattern track and remove all of the notes other than the root note in each bar.
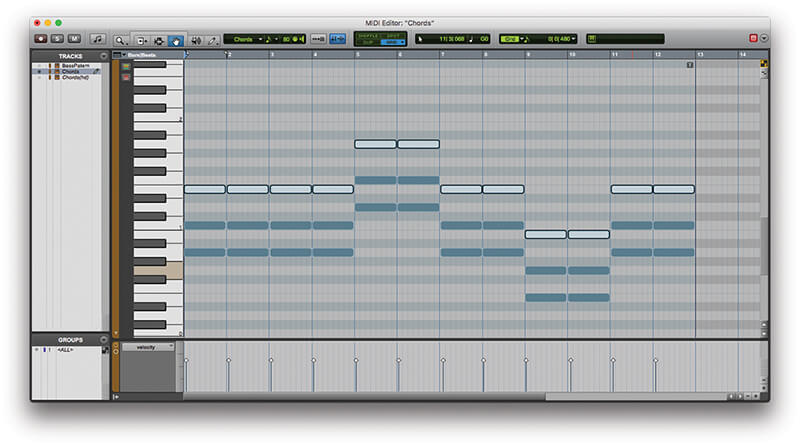
10. With the remaining notes highlighted, press Start+Alt+Up (PC) or Ctrl+Alt+Up (Mac) to duplicate the note up one step. Press Start+Up (PC) or Ctrl+Up (Mac) to move the note from the second to the third interval. Repeat to add a fifth.

11. You should now have some basic block chords playing along with your bass pattern, but they’re very low in the arrangement. We’ll move them up by a couple of octaves using Shift+Up.
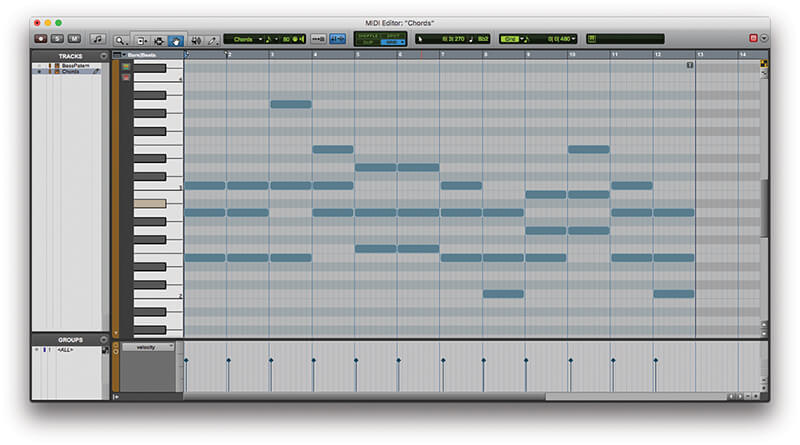
12. It fits better, but it’s a little boring. However, it’s easy to experiment with different inversions of the chords by transposing individual notes up or down by an octave to bring a little more harmonic movement into a 12-bar blues.

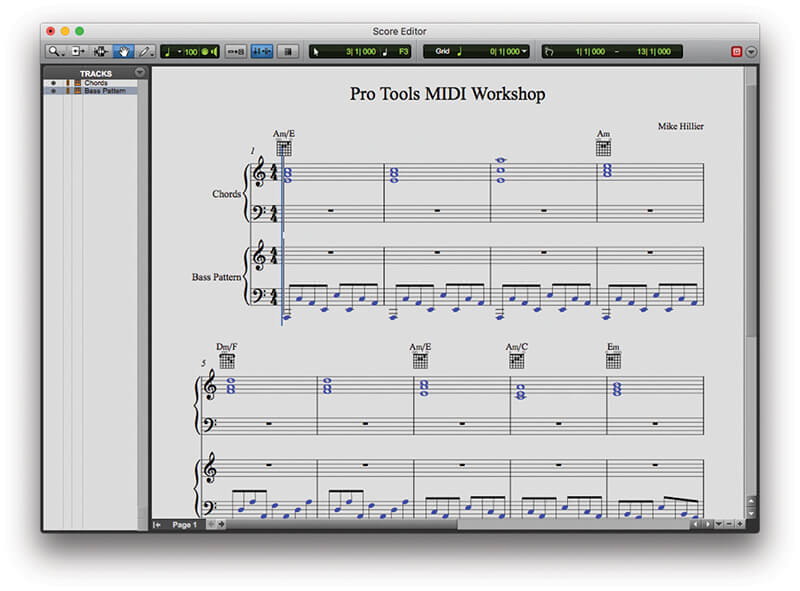
Score editing While Pro Tools does come with a Score Editor with some basic layout and printing options available, you can also export directly into Sibelius for more detailed score editing and layout.
![]()
13. We can extract the chords from a highlighted clip or clips to the Chord Ruler using the new Event>Extract Chords from Selection tool. This saves us having to fill this out manually, if it is required.
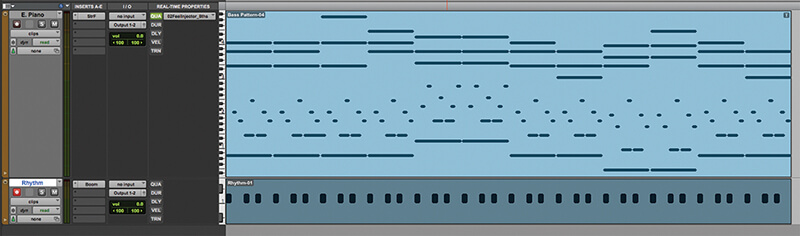
14. Having the two parts on separate channels is useful for editing, but it requires twice as many system resources. Ideally we need to copy and paste one part onto the other, but we can’t do this with simple copy/paste tools.
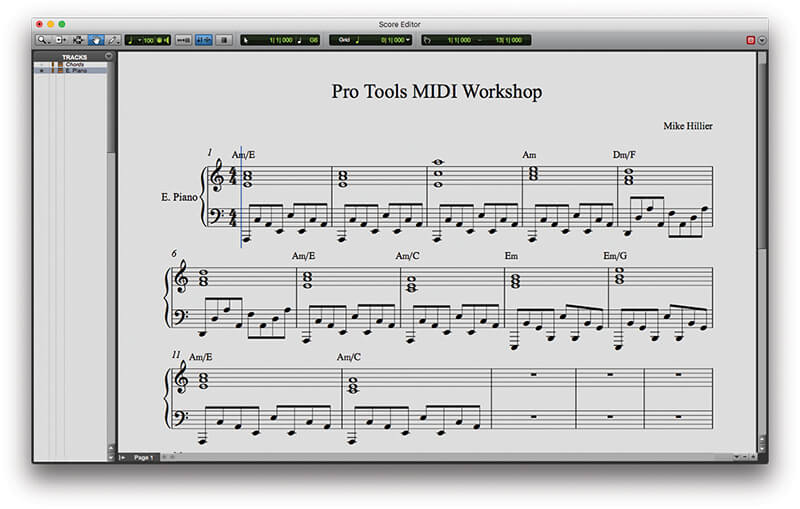
15. In the Edit Window highlight the Chords clip and use Ctrl+C (PC) or Cmd+C (Mac) to copy the MIDI data to the clipboard, then highlight the Bass Pattern clip and press Alt+M to merge the data from the clipboard with the existing MIDI.
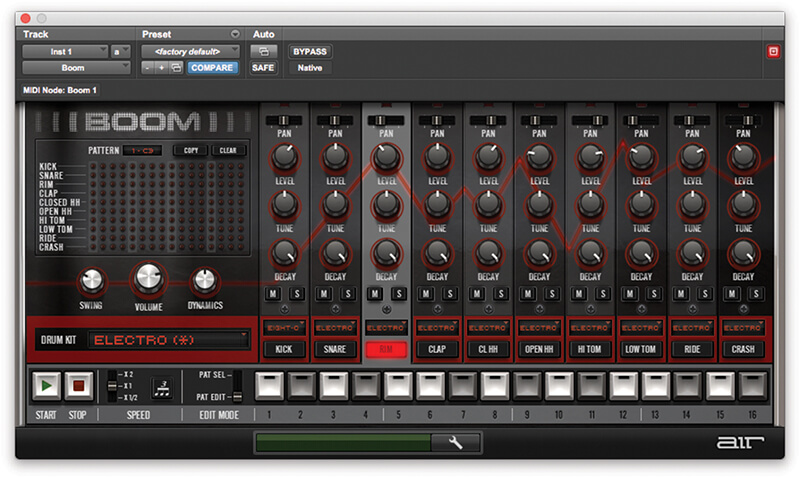
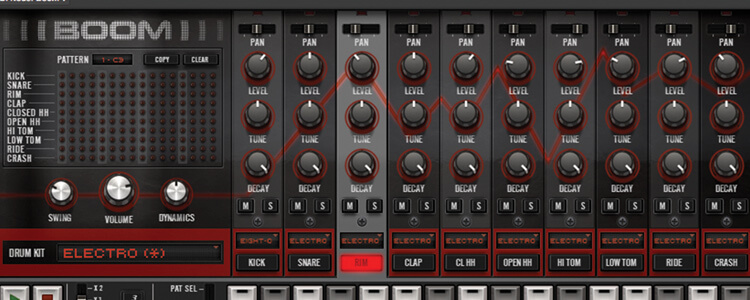
16. When jamming along to tracks with MIDI instruments Pro Tools now enables us to recover a performance. Add another Instrument track to the session with an instance of the Boom drum machine (or some other instrument).
17. With the channel record-enabled hit play and jam along to come up with a rhythm track for the piece. For reference, Boom uses GM mapping for the instruments, putting the Kick on C1, Rim on C#1 and Closed Hat on F#1 and G#1.
18. Like before, when you hit stop the MIDI data won’t show up, as you weren’t recording, only in record enable. But you can bring the MIDI back by going to by Event>Retrospective Record or by pressing Shift+C.