Track Alternatives in Logic Pro X: Step-by-Step (Continued)
Still amped with excitement at the addition of Track Alternatives to Logic Pro, Mark Cousins shows us how well they can work with multi-track recordings… 7. Track Alternatives also work really well with multi-track recordings, as long as you remember to check a few additional details. In this example we’re working with a drum kit, […]
Still amped with excitement at the addition of Track Alternatives to Logic Pro, Mark Cousins shows us how well they can work with multi-track recordings��…
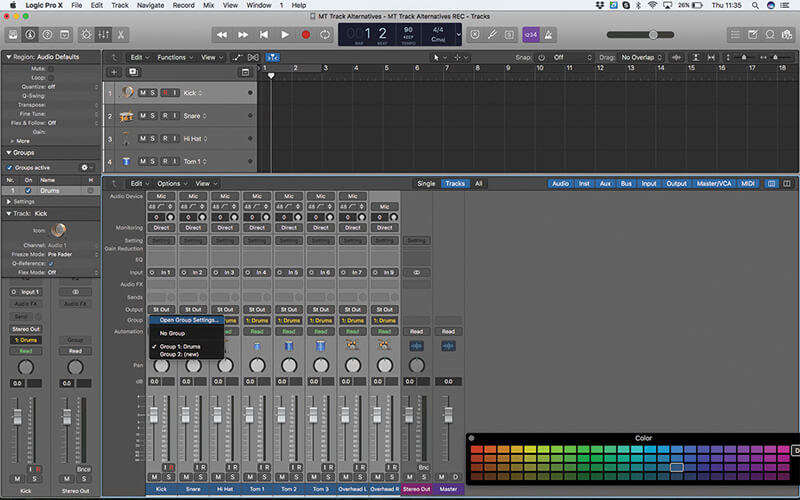
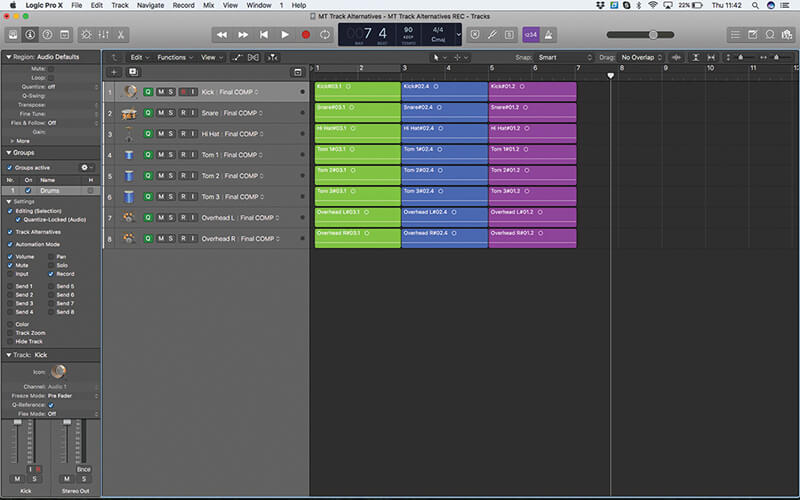
7. Track Alternatives also work really well with multi-track recordings, as long as you remember to check a few additional details. In this example we’re working with a drum kit, which we’ve placed into its own Fader Group.
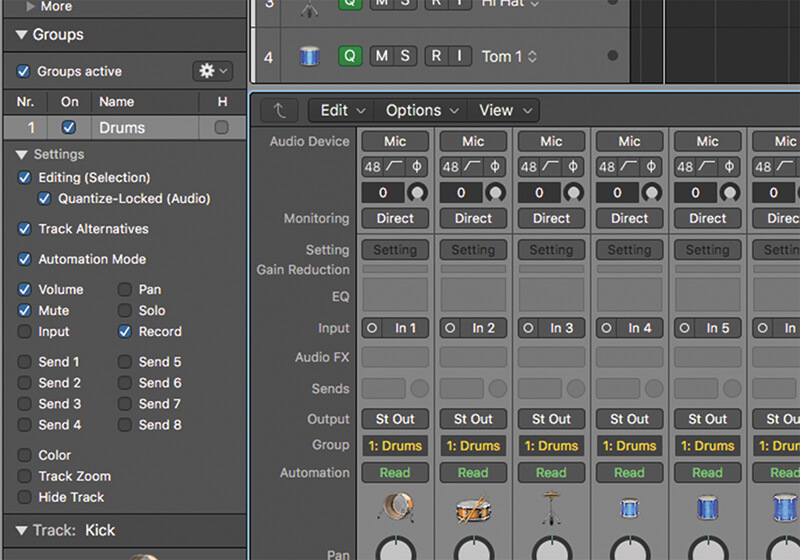
8. Use Group Settings (as part of the Inspector) to configure the Group to work with Editing (Selection) and Quantize-Locked (Audio). Activate the Track Alternatives check-box. All edits will now work simultaneously.
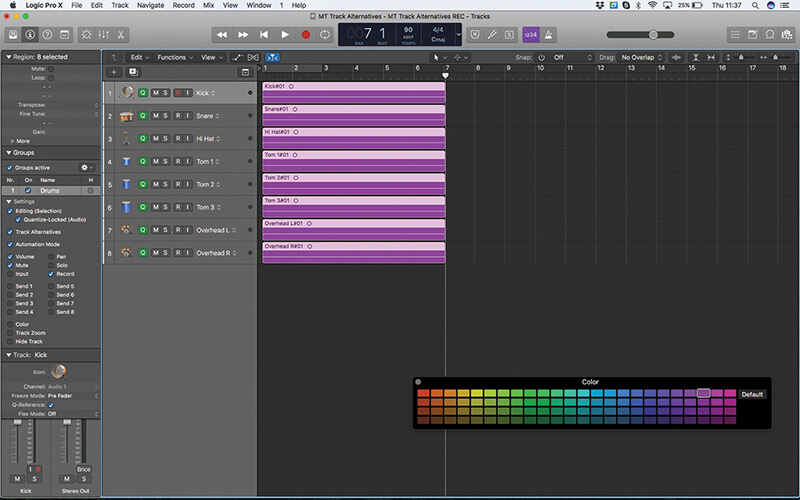
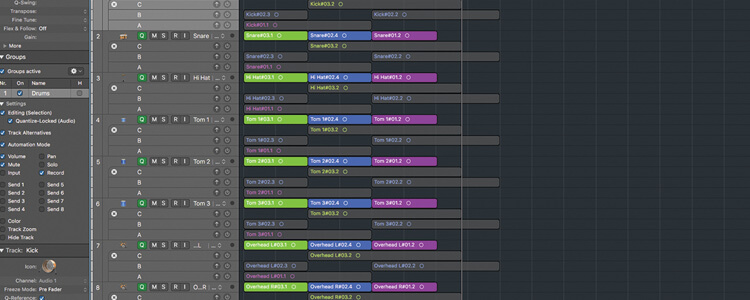
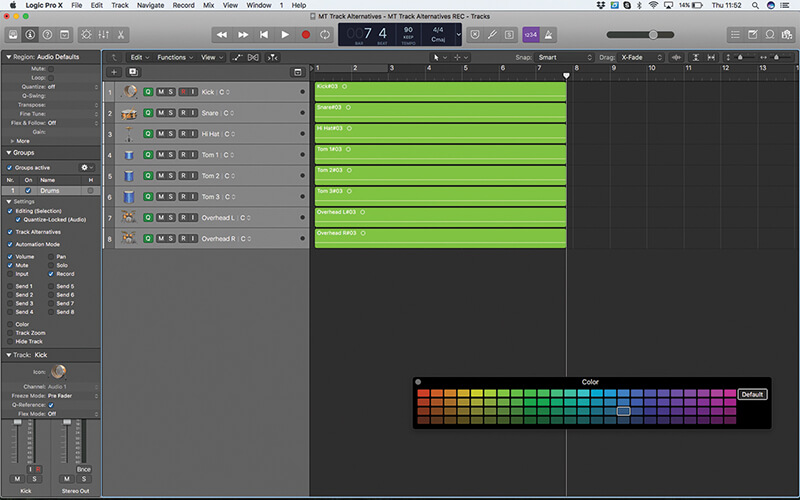
9. Record your first take of drums. Once the recording has finished, you might want to consider colour coding the regions (using the menu option View > Show Colors) so that you can differentiate between the different takes.

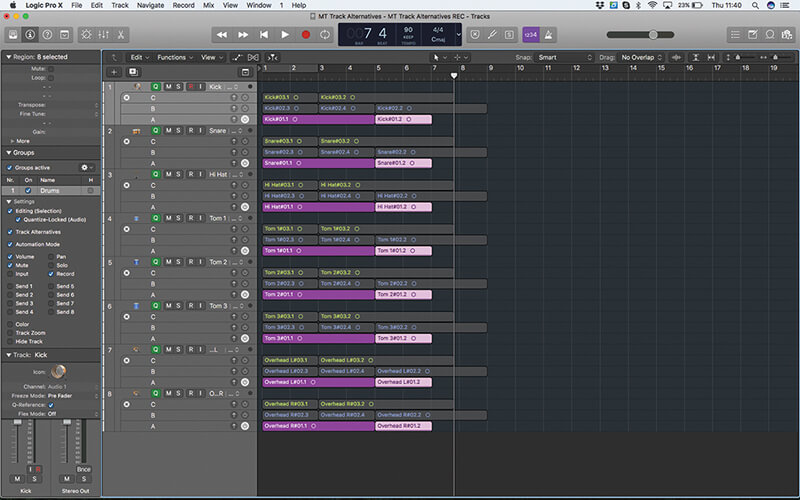
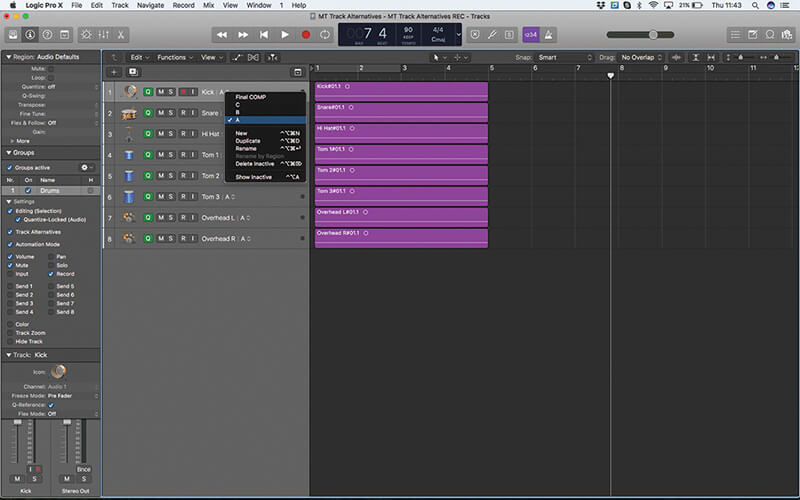
10. Create a New Track Alternative on one of the current tracks. As the Groups are active, all the current Tracks will be assigned a new empty Track Alternative labelled as B. Alternative A forms the first take, therefore.
11. Each time you record a new take, create a New Alternative and set the colour assignment to help you visually identify the different take. You can quickly toggle between the Alternatives to hear the different takes.
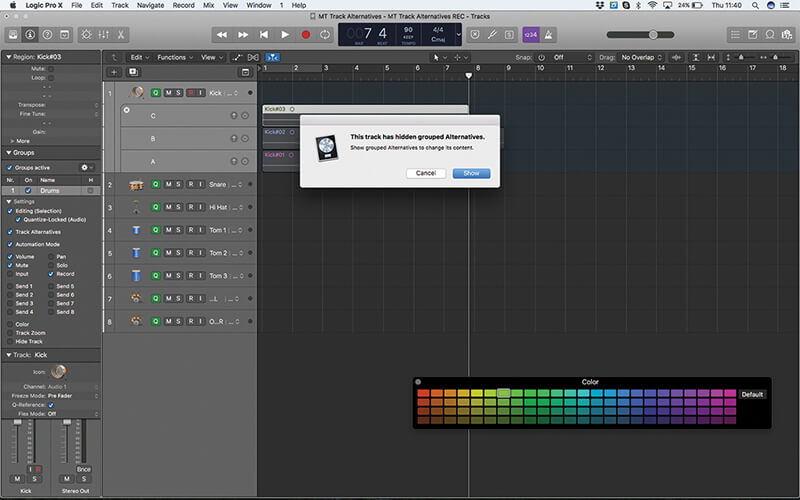
12. Using the Show Inactive feature will expand one of the tracks. As soon as you make any changes (like activate another take) Logic will prompt you to expand all the tracks. Click on the Show button to accept.

Track Alternatives These walkthroughs illustrate Track Alternatives in their various forms. We start with reference to working with MIDI regions and take a look at how the process of using Track Alternatives and Grouping can transform how you work with multi-track recordings…
13. Create a new Final Comp Track Alternative, using the Rename option in the Track Alternatives menu to label it. To begin the edit, listen through to the takes and edit out your favourites sections as separate regions.
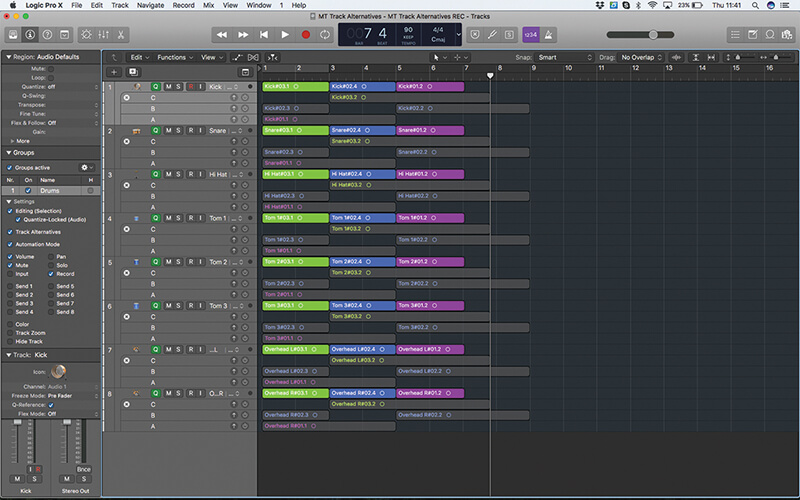
14. Once you’ve edited the regions, drag them onto the uppermost track lane to form the final comp. As the Group is active, all the edits on one track will be mirrored on the other, so you only need to drag one region.
15. Once you’ve finished the comping process, use the Track Alternatives menu option Hide Inactive to clear the ‘exploded’ track view. The colour coding is now particularly useful as a means of seeing what take you’ve used.
16. Even though you’ve created the final comp, you can switch back to the early takes simply by switching the Alternatives selection. Quick edits can always be achieved between Alternatives using a cut/paste technique.
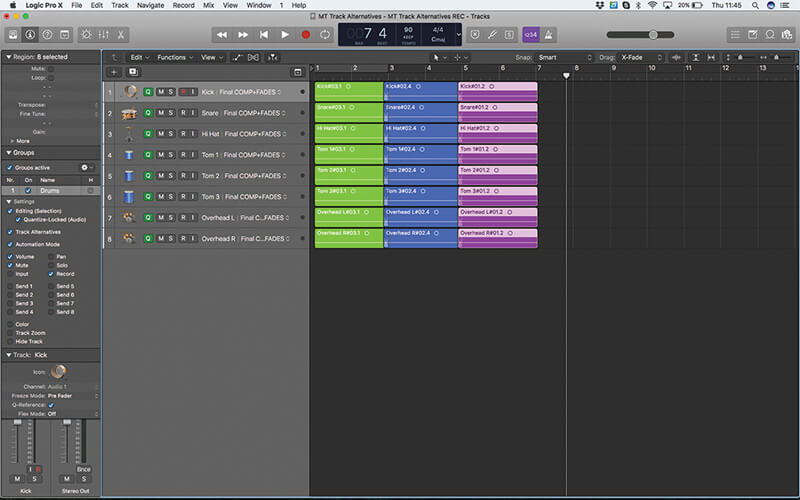
17. With the final edits in place, you’ll probably want to apply a few crossfades to ensure the transition between takes. Again, with Groups active, you’ll only need to perform the crossfade on a single region.
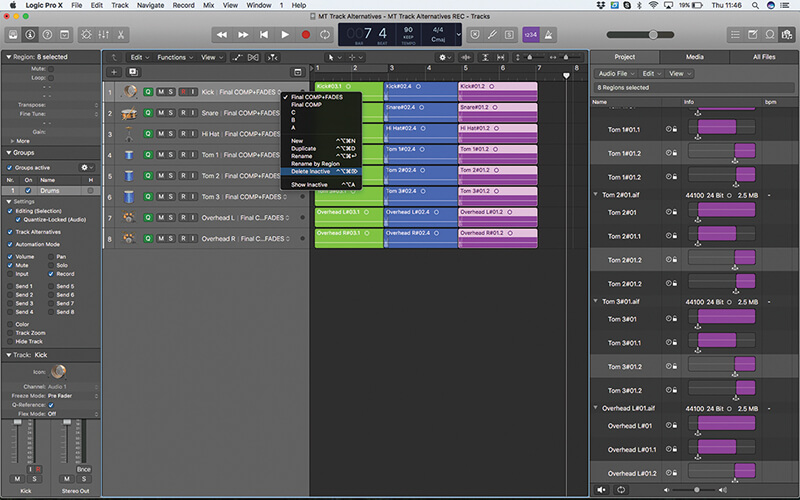
18. Using the Delete Inactive will remove the unused Track Alternatives. However, it’s worth remembering that the original audio still remains in the Project Audio Browser if you need to return to an earlier take.
