Weekend Workshop: Sync sound design to video with Audio Design Desk Create
Learn to quickly synchronise pre-recorded sound to visual media with Audio Design Desk’s free version.
Weekend Workshop Audio Design Desk
In May of this year, Audio Design Desk was released to an unsuspecting audience of sound designers and composers in the world of media. This innovative new DAW is making huge waves and has already changed the way sound and music is synchronised to picture.
Developed by composer and filmmaker Gabriel Cowan, ADD.app transforms the menial tasks of searching, placing and swapping sound into a speedy and joyous task via real-time performance. The software is currently only available for Mac OSX, but with a Windows version on the horizon, the future is looking bright for this groundbreaking application.
In this Weekend Workshop, we’ll be using the free version of the software to demonstrate how you can easily employ the skills of a sound designer and Foley artist for that media project you’ve always wanted to work on!
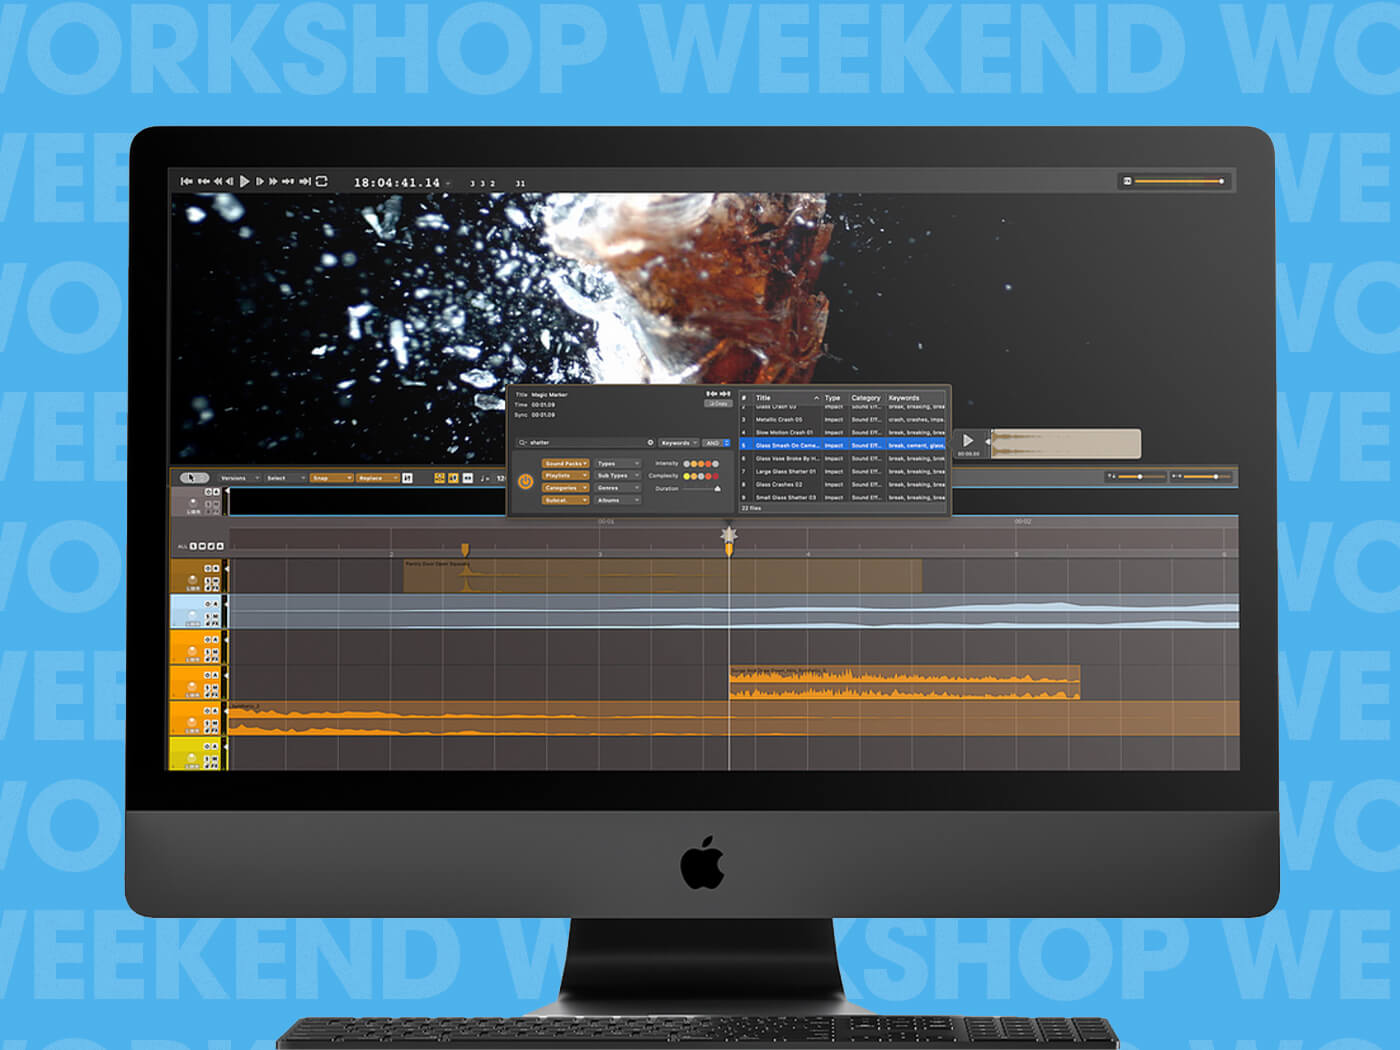
In this workshop, we’re starting with a piece of silent footage and we’re aiming to make it sounds utterly believable.
What You’ll Need:
- A Mac with OSX 10.13+, 8 GB RAM, 1 GB Free Disk Space
- Audio Design Desk Create (Free Download)
1. Get installed and get involved
Before we begin diving into using the free ‘Create’ version of Audio Design Desk we need to download it from www.add.app/download. The free version is packed with awesome features and sounds but is, of course, limited compared to the full paid ‘Produce’ and ‘Pro’ tiers. Audio Design Desk Create includes 2500 AAC sounds for the library, but you can record or source and add your own into the library very easily.
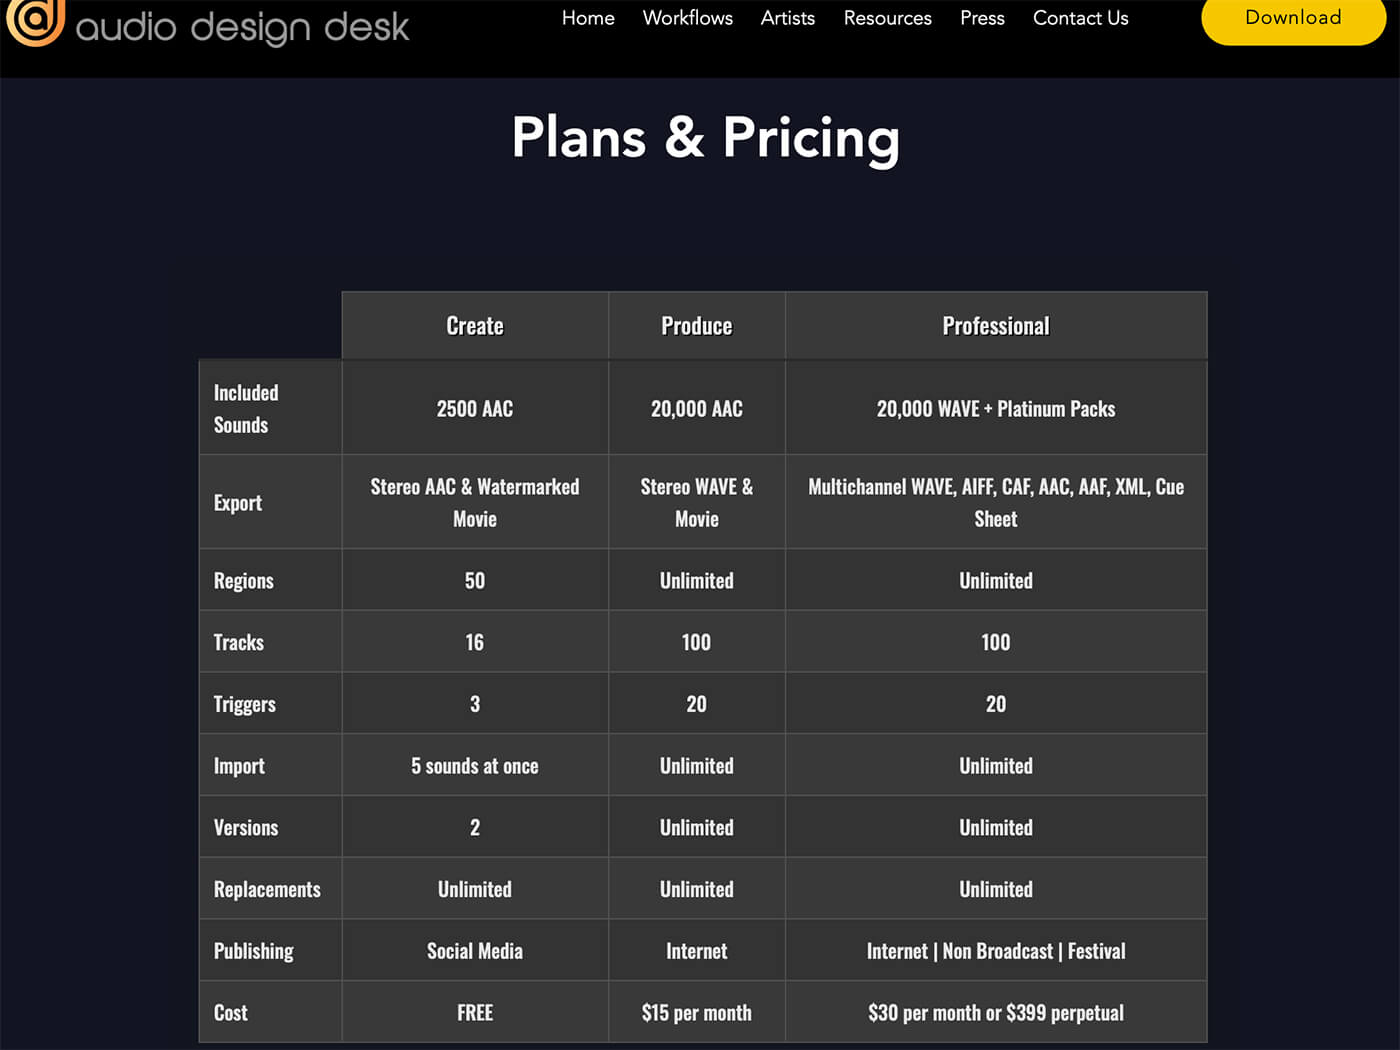
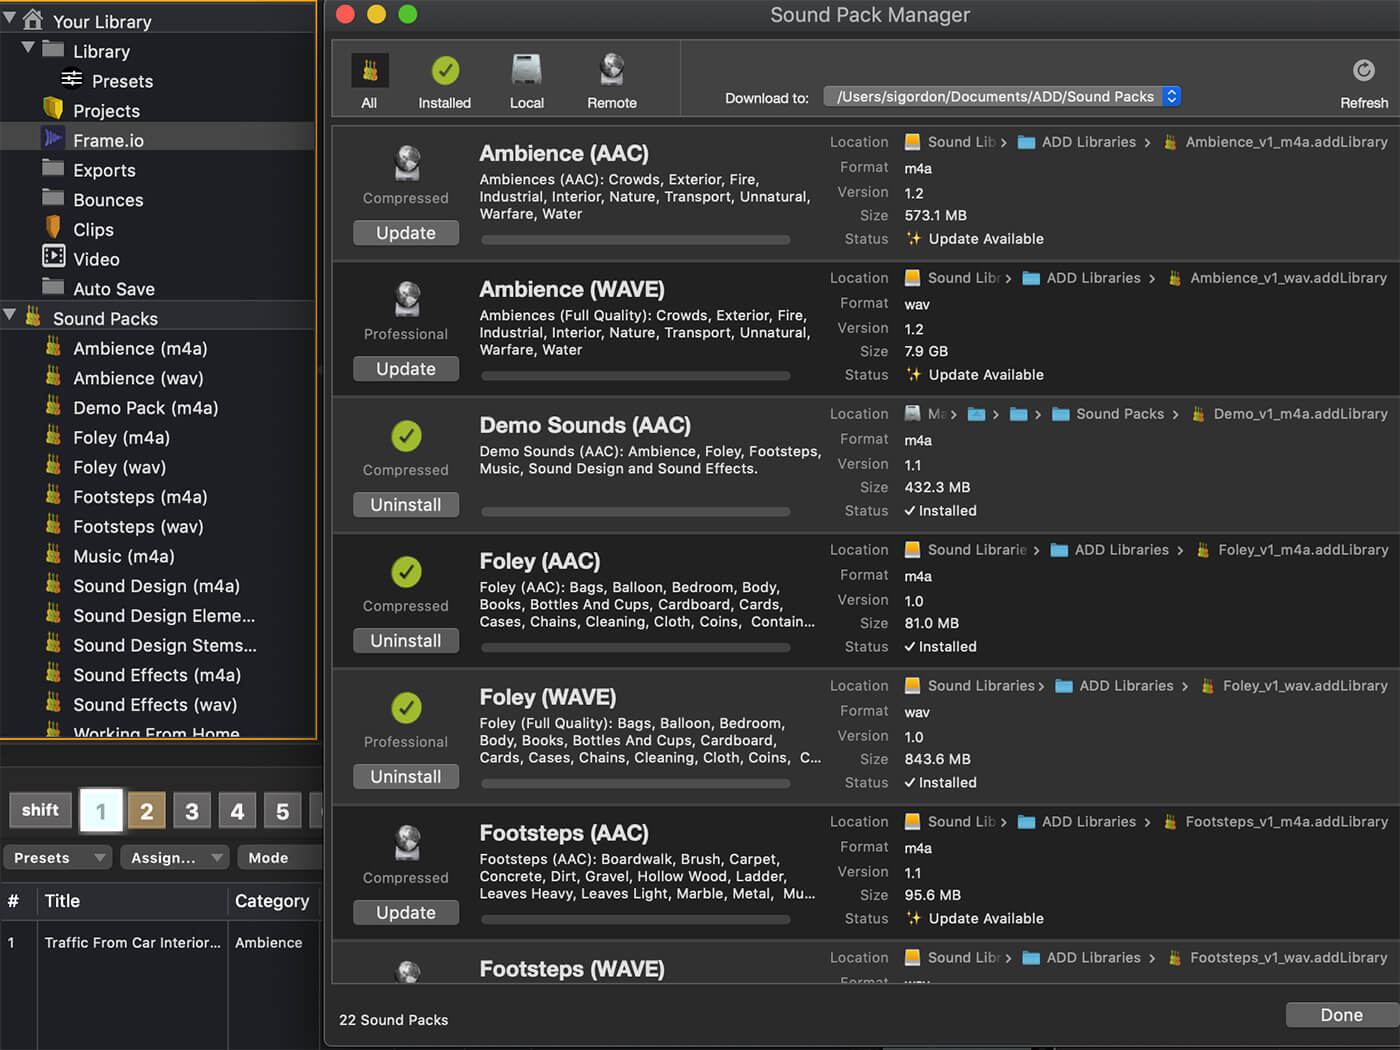
The number of regions, tracks and triggers you have are limited in Create, but you can replace sounds an unlimited number of times. You can also create two versions of your project, choosing a final export between them. Once installed, you’ll need to download the audio content via the Sound Pack manager. You can do this either by right-clicking the Sound Packs logo in the library pane or via the library dropdown menu on the application toolbar.
2. Importing visual media
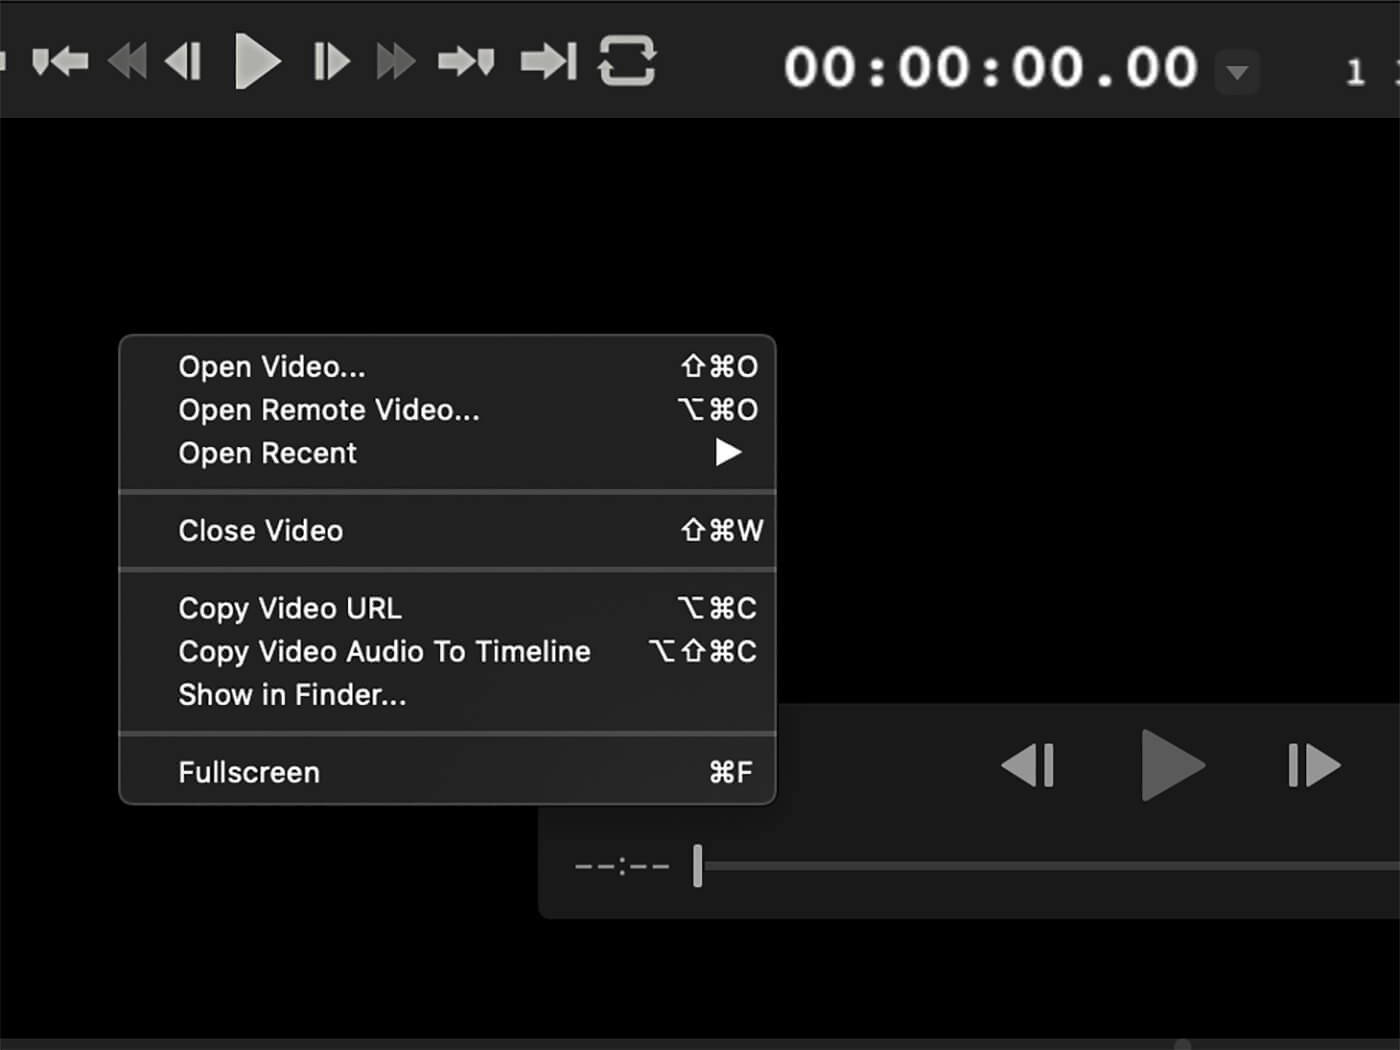
So now it’s installed, let’s get to work. First up you need to get your chosen media clip into Audio Design Desk. Open the app, and launch a new project from the splash pop up. There are five resizable and detachable windows in ADD. The ‘Video Window’ is what you need for your media. Right-click in this window and a menu appears. Here, you can copy a URL from an external website or video streaming site. The media then appears in this window and also downloads to the project folder.
The other option is to import locally from your hard drive. For this demo, we are using a 45-second copyright and royalty-free clip with no sound so that we can build up the layers of sound that are appropriate to the narrative. In this example, it’s a driver’s view of a journey through a village in an exotic location.
If the sound is already part of your chosen clip, it will be extracted and added to an audio track when imported. You can edit or even delete this later if you so desire. Once imported, it’s time to learn some simple playback shortcuts. ADD is built upon a need for speed, so learning the core key commands is fundamental in speeding up workflow. For example, the spacebar is play/stop, enter is zero return, and arrow left/right is per frame forward/back.
3. Spotting Visual Media
When working with any media clip, post-production editors generally begin the process by ‘spotting’ the sound and compositional elements required for the narrative. Spotting just means deciding when sounds should be played. This typically involves studying the clip closely and making a list of the necessary sonic elements. These elements could include sound effect stems made up of background and ambient sounds that don’t sync to visuals, hard sound effects (that coincide with events on screen), Foley (sounds made by people) and other manipulated sound effects.
Dialogue and production stems, recorded on set with multiple microphones, may also be available. If you’re lucky, you might even have some recorded room tone. Music stems can also be spotted and could comprise either composed, sourced or diegetic music (heard by characters).
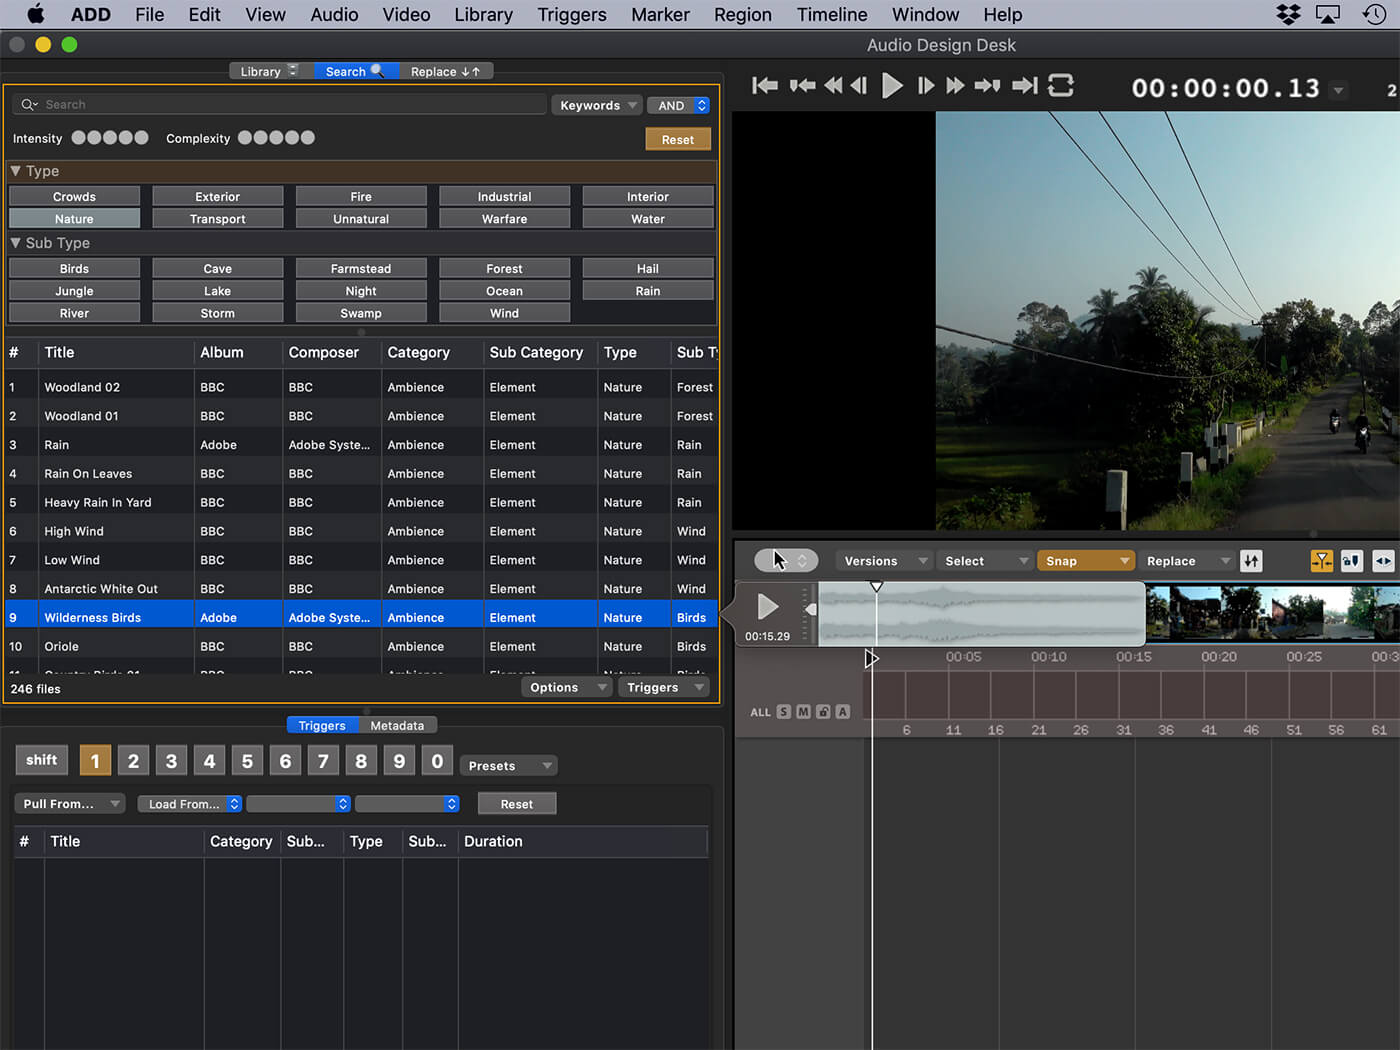
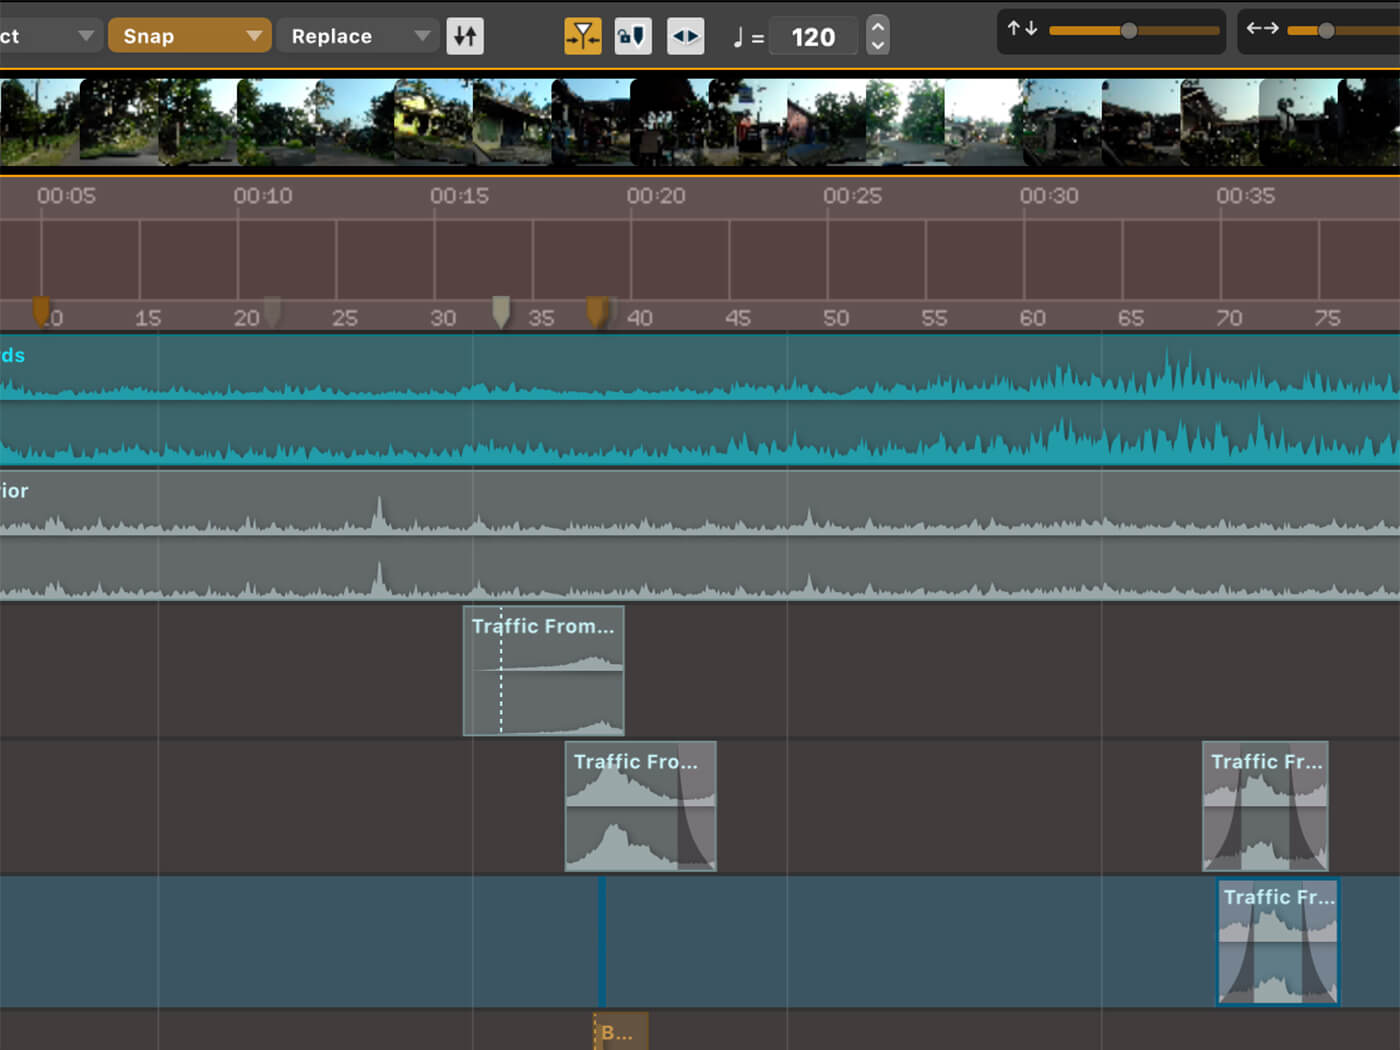
With the exception of on-set dialogue, we can find all of our sounds within Audio Design Desk’s library. The free version only contains 10% of the full ADD library but we found almost all of the sounds required for our clip in the free version. Using the search function in the ‘Library Window’ we used keywords to first add the ambient layers in the clips.
Initially, we require internal car hum, slight ‘travelling’ wind and outdoor ambience as we are assuming the windows in the car are down in the clip, even though we cannot see them.
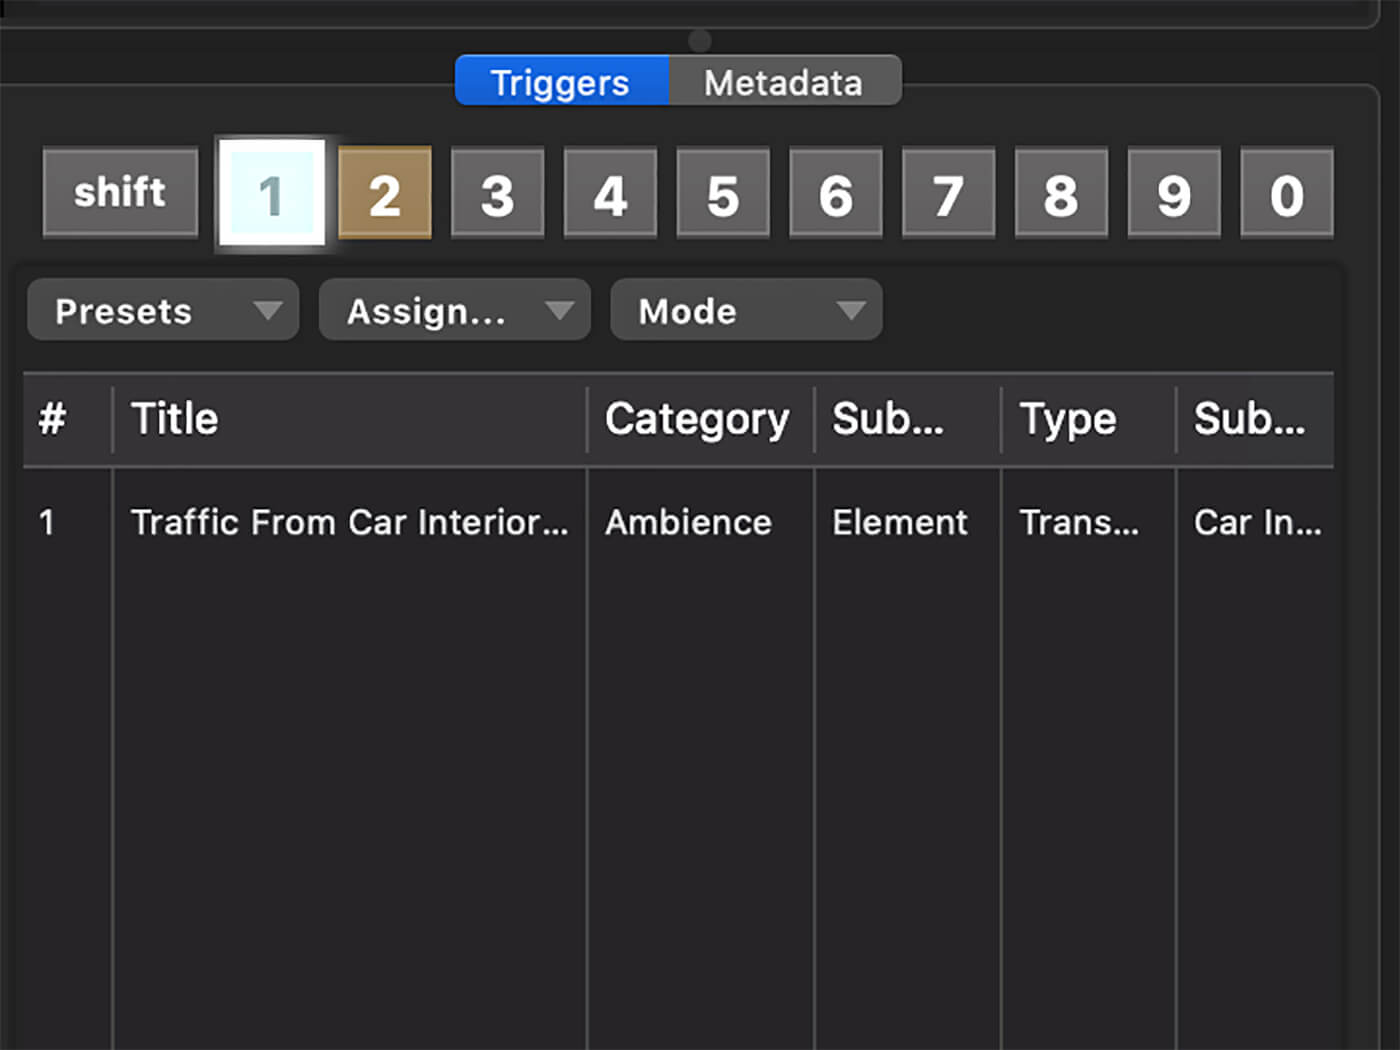
In this example, we’ve decided to add a bit of our own story to this clip. That’s the great thing about interpreting a narrative – we can add sound and music that may not be seen. The start of the clip reveals that we are in a hot country, early to midday so use the search engine filter (Ambience>Element>Nature), and within seconds you’ll have several suitable options. These can then be assigned to one of three triggers (10+ in the full version) or dragged directly into ‘Timeline Window’ which creates a track for the audio.
We repeated this process for the in-car hum and the gentle wind caused by the car windows being open. Spotting is instant with this process, gone is the tedious list-making, recording and sourcing. Within minutes we had our ambient tracks. Because these ambient tracks don’t have to sync to the visual – they’re all about creating a believable space – you don’t need the triggering tools. We’ll explain more about those later.
4. We are now Foley artists
Our clip for this tutorial does not fully require the internal sounds a Foley artist performs in a closed space, however, we do require the same precision timing when performing the other sounds in the clip. These sounds include passing cars and motorbikes, a car horn for a bit of cliché, as well as a tuned radio and a low-volume backing track that was recorded in our car.
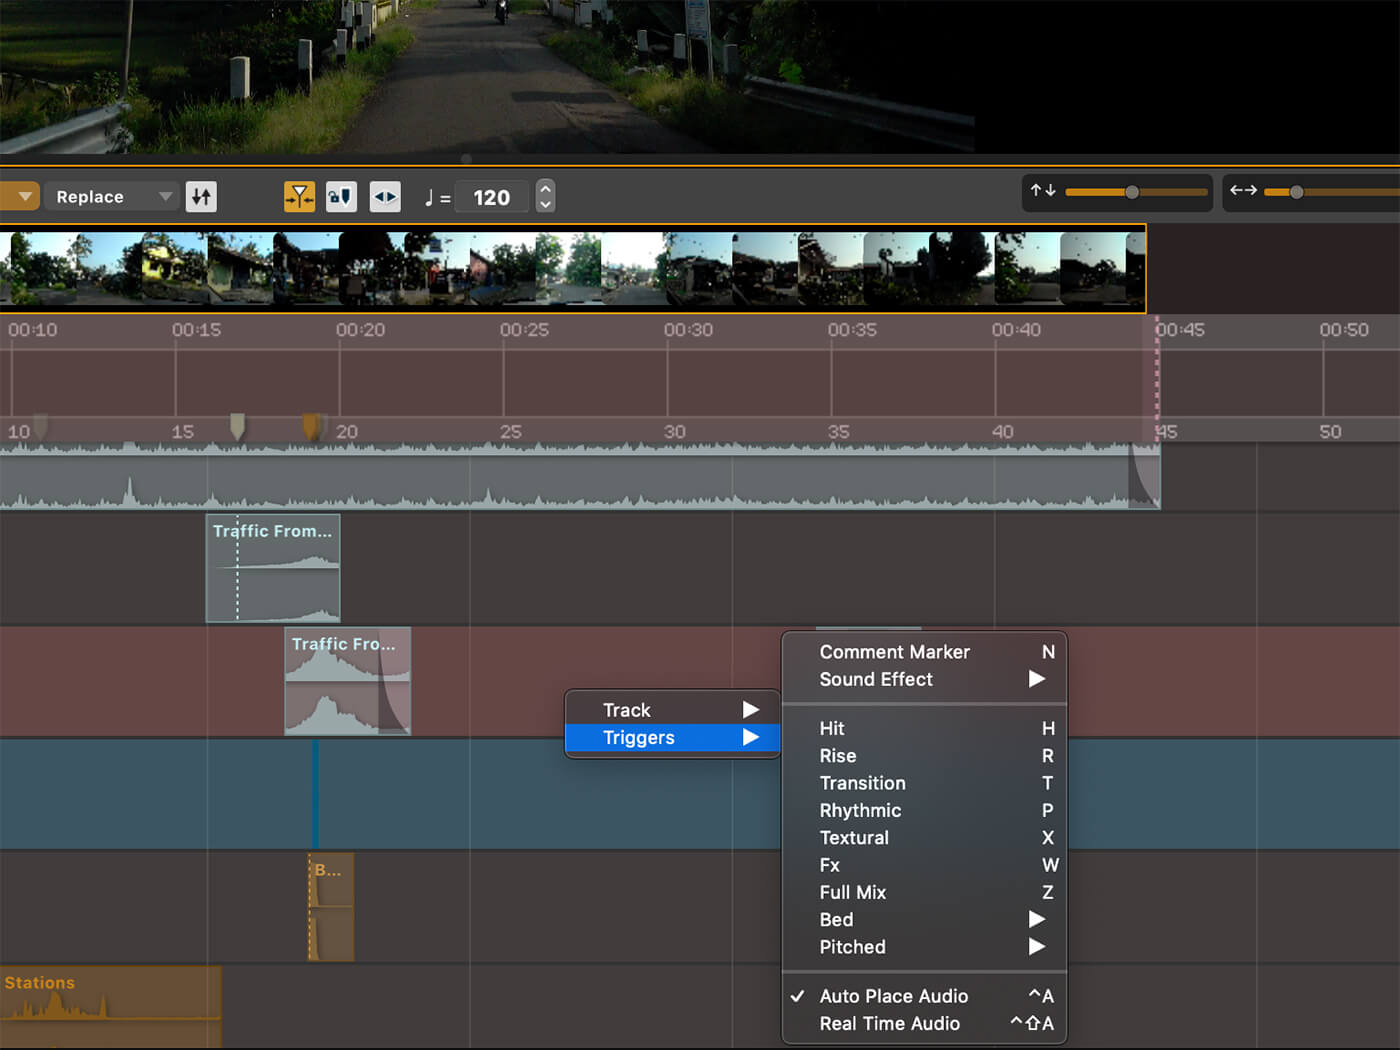
We sourced these sounds in the ADD library by just browsing titles. Once you find a suitable one, assign it to a trigger by dragging it to ADD’s three Triggers (there are 10 in the full version). These can then be performed in real-time using the corresponding numbers on our QWERTY keyboard. It’s as simple as hitting the car sound effect trigger every time you see a car go by on the screen.
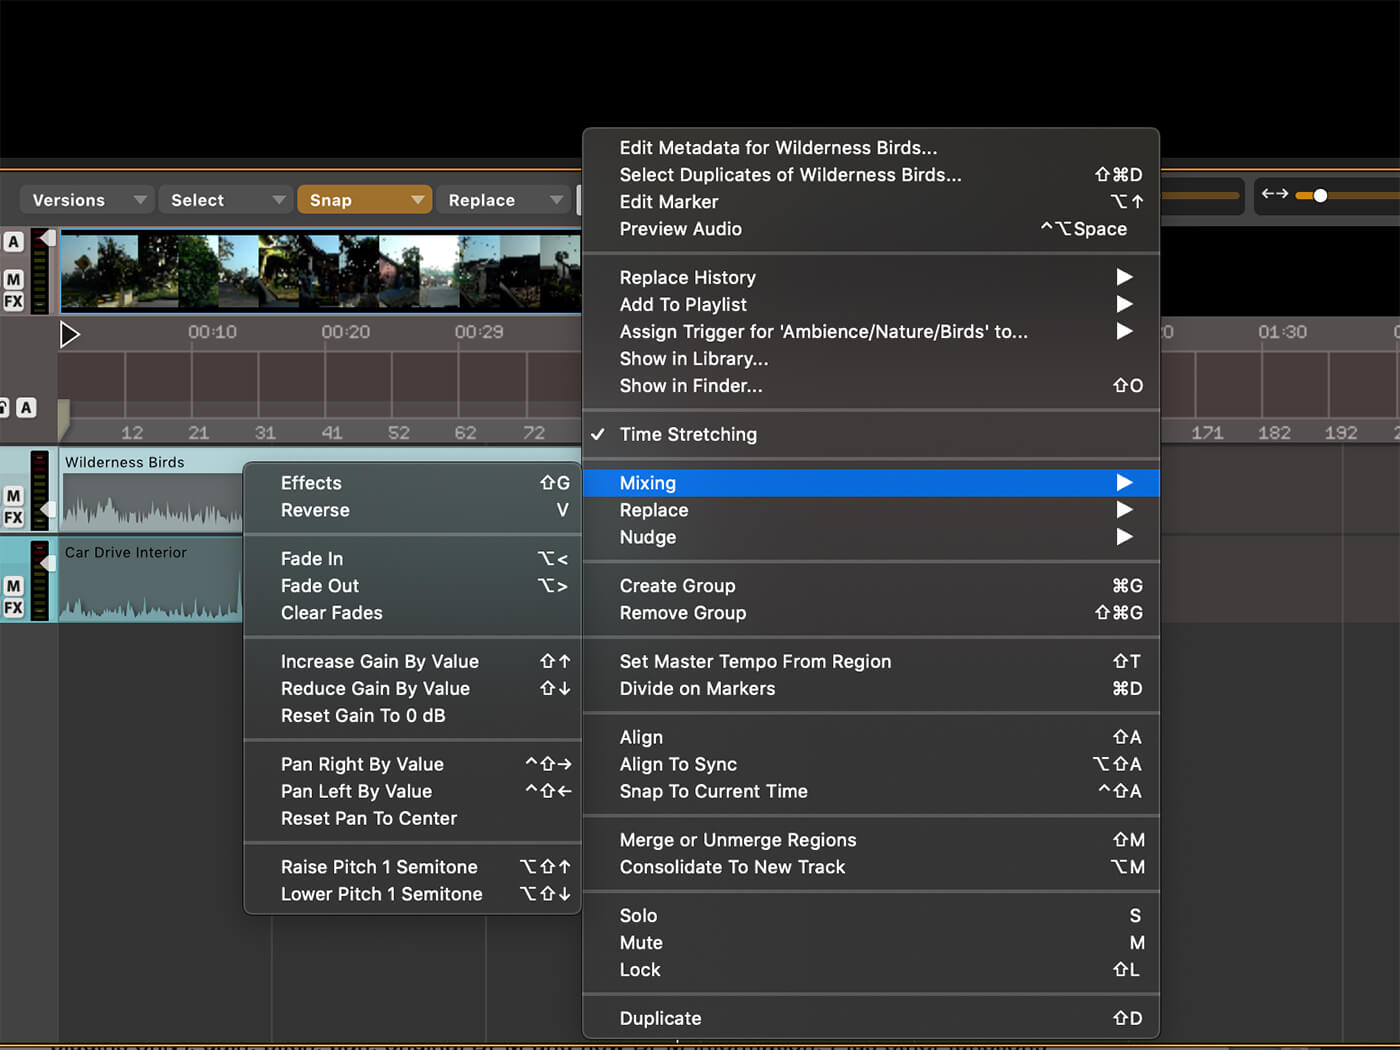
As well as the numbered triggers, letters on the QWERTY keyboard also insert specific sounds into the timeline. Among these are H for hit sounds, R for rise sounds, T for transitions and so on. The beauty of assigning sound effects by type is that you can quickly try alternatives if your current sound isn’t working with your narrative. The shortcuts and menu can also be explored by right-clicking in a track lane.
5. Mix
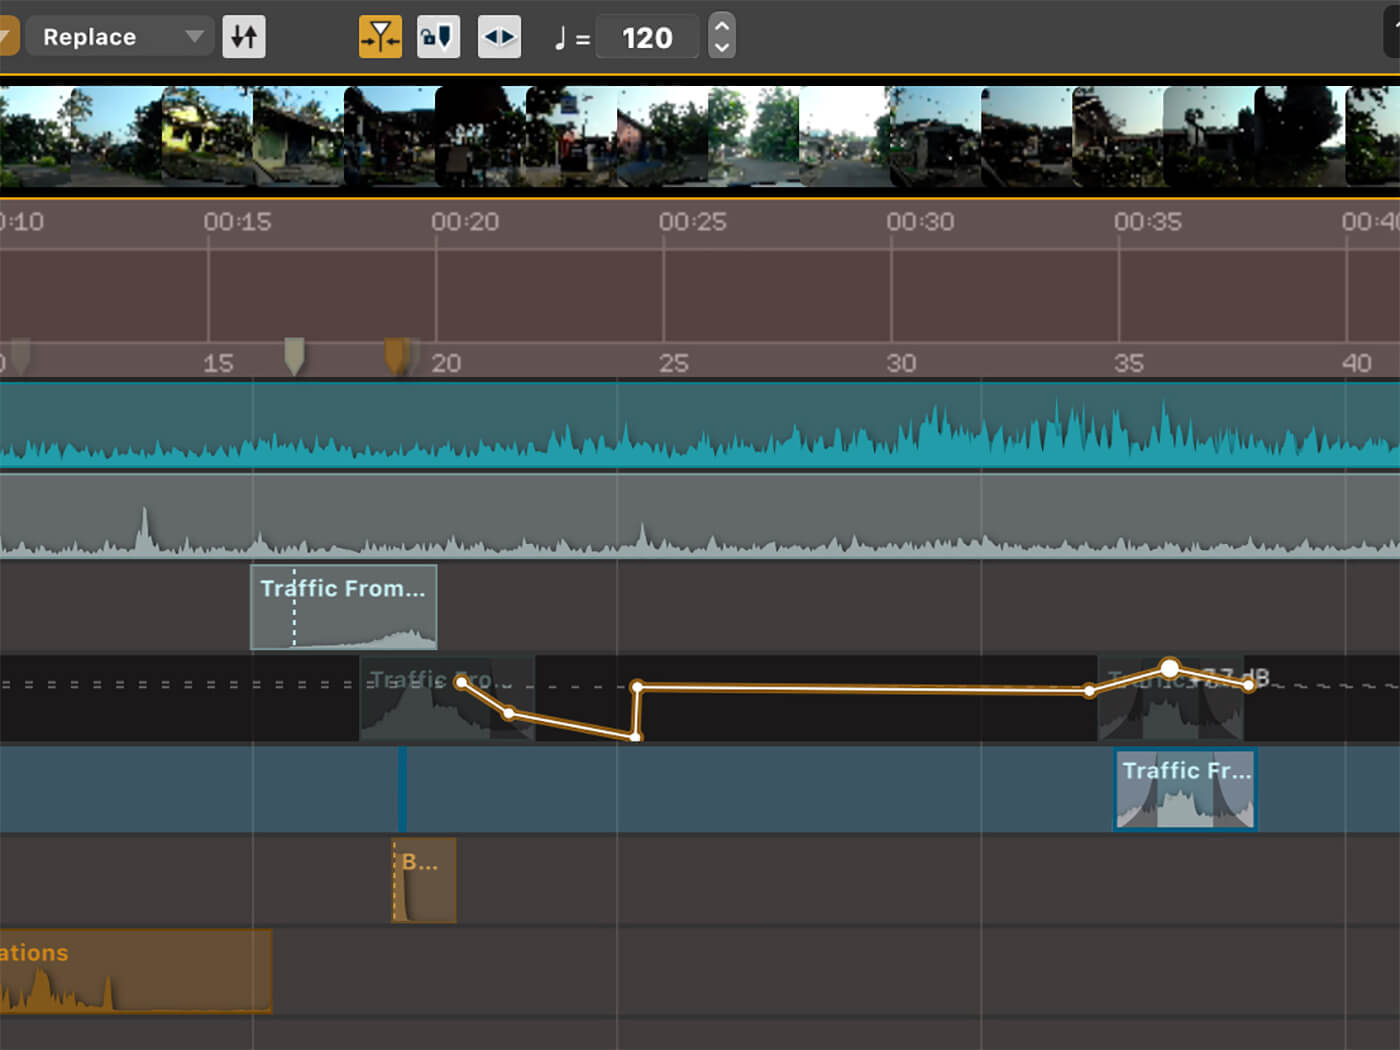
Once all the sounds are recorded into ADD through performance (play and trigger), or by drag and drop, the next process is to tighten the synchronisation of the recorded audio to video. Sync can be achieved manually by zooming and dragging the actual audio files. Our preference, though, is to move the trigger markers.
You may want to loop around a section to make things easier. Use the loop icon in the video window and then drag the start and end points in the arrange window to create your preferred loop. When sync is complete, take a breath and review your success, but as you do, take into consideration where each sound now needs to be. Think about stereo placement and depth of field. In our clip, we imagined we were the two people in the car having a conversation (sourced from another online sound library). From that perspective, how would we hear everything around us?
The aim of any sound design project for visual media is to make it believable. For example, to mimic the traffic passing on the right of the vehicle in the video, we panned the sounds to the right and used automation for volume changes over time. You can switch on automation in each track header; however, only volume automation is available in ADD at the moment, third-party effect automation is yet to be added.
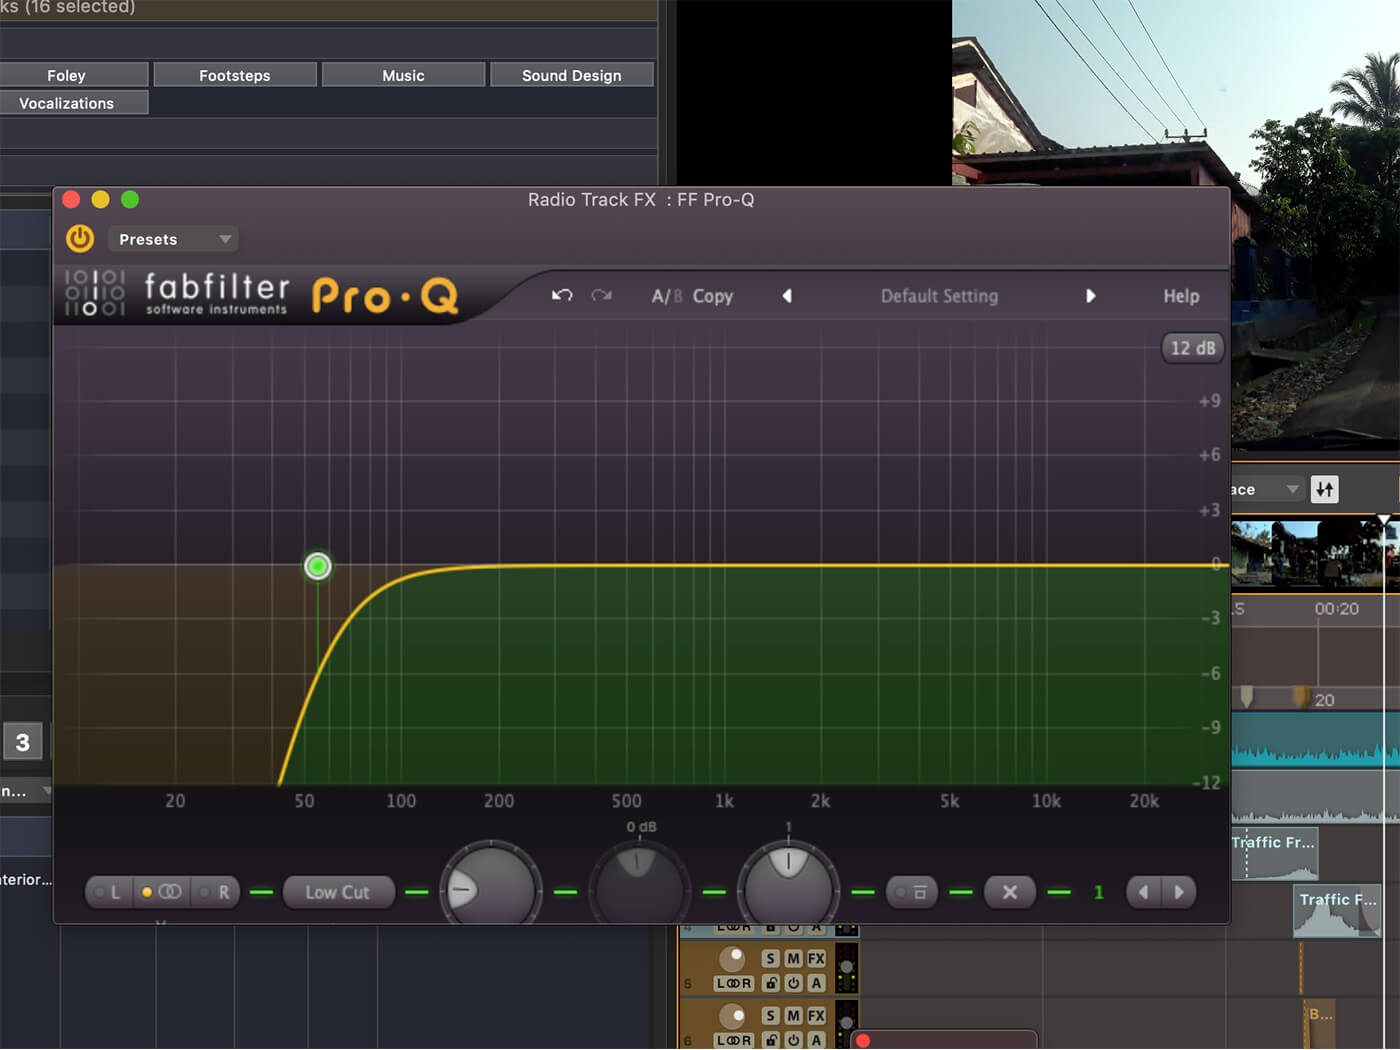
Once the positioning of the sound is complete, we can add ambient effects such as reverb. ADD doesn’t come with any stock processing effects, you’ll have to rely on your own third-party effects. Remember to search the MusicTech vaults for those all-important free third-party processors. There are some fantastic ones out there that will be perfect for a project like this.
In this project, we used little reverb as our ambient audio contained the right amount in the recordings, but every project will be different. In this instance, we needed a little external reverb for the car horn as well as a little EQ to enhance the lower frequencies making the sound feel closer.
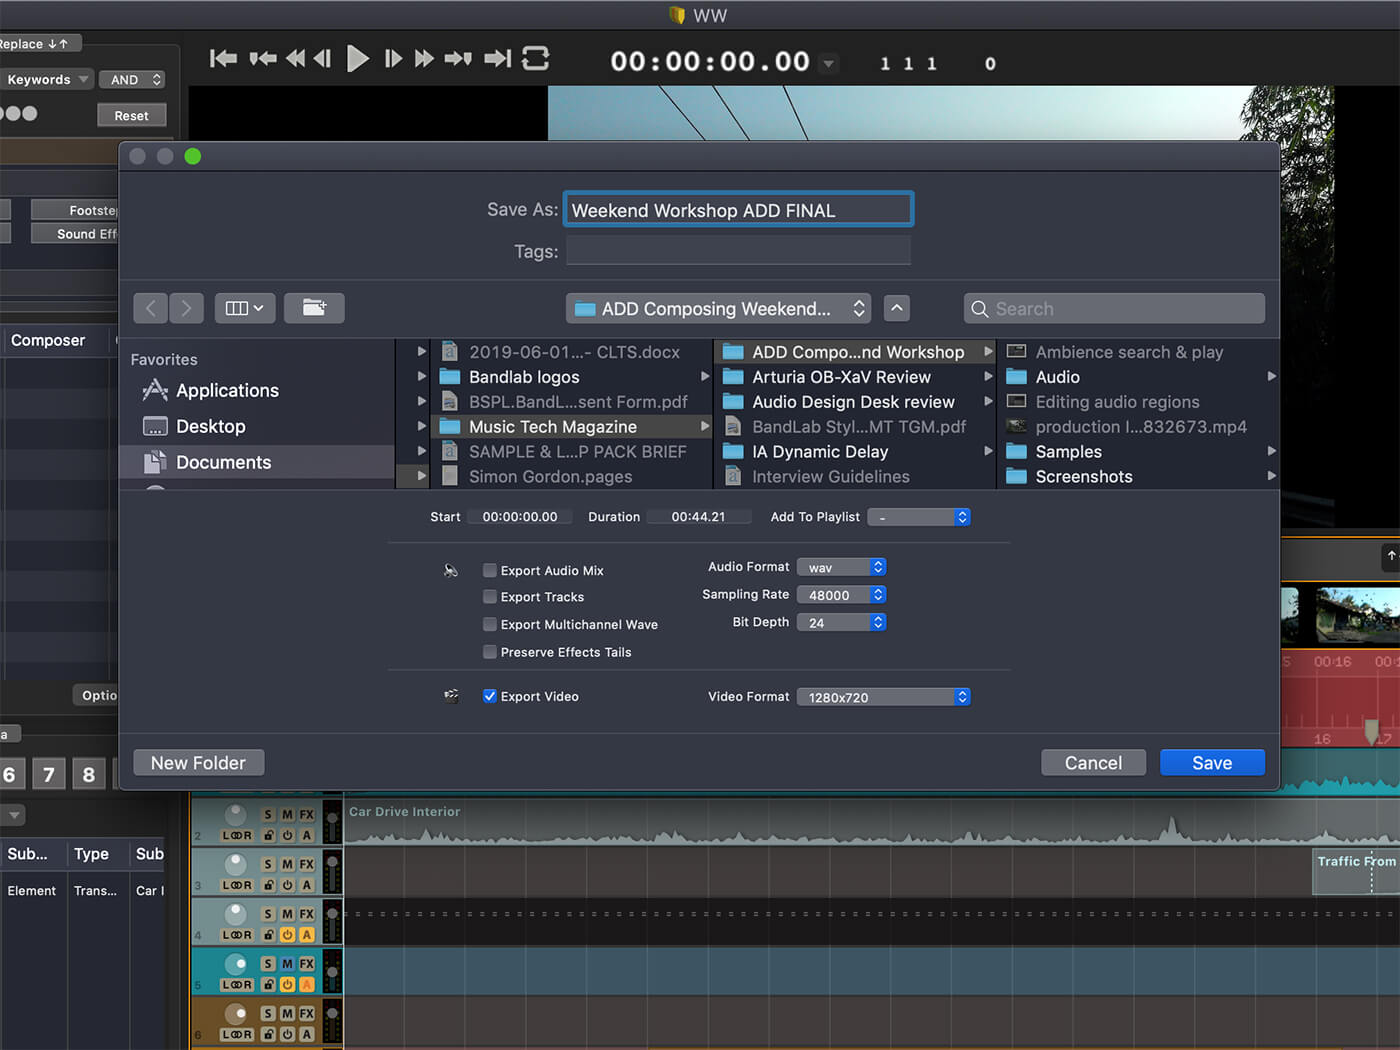
6.Export
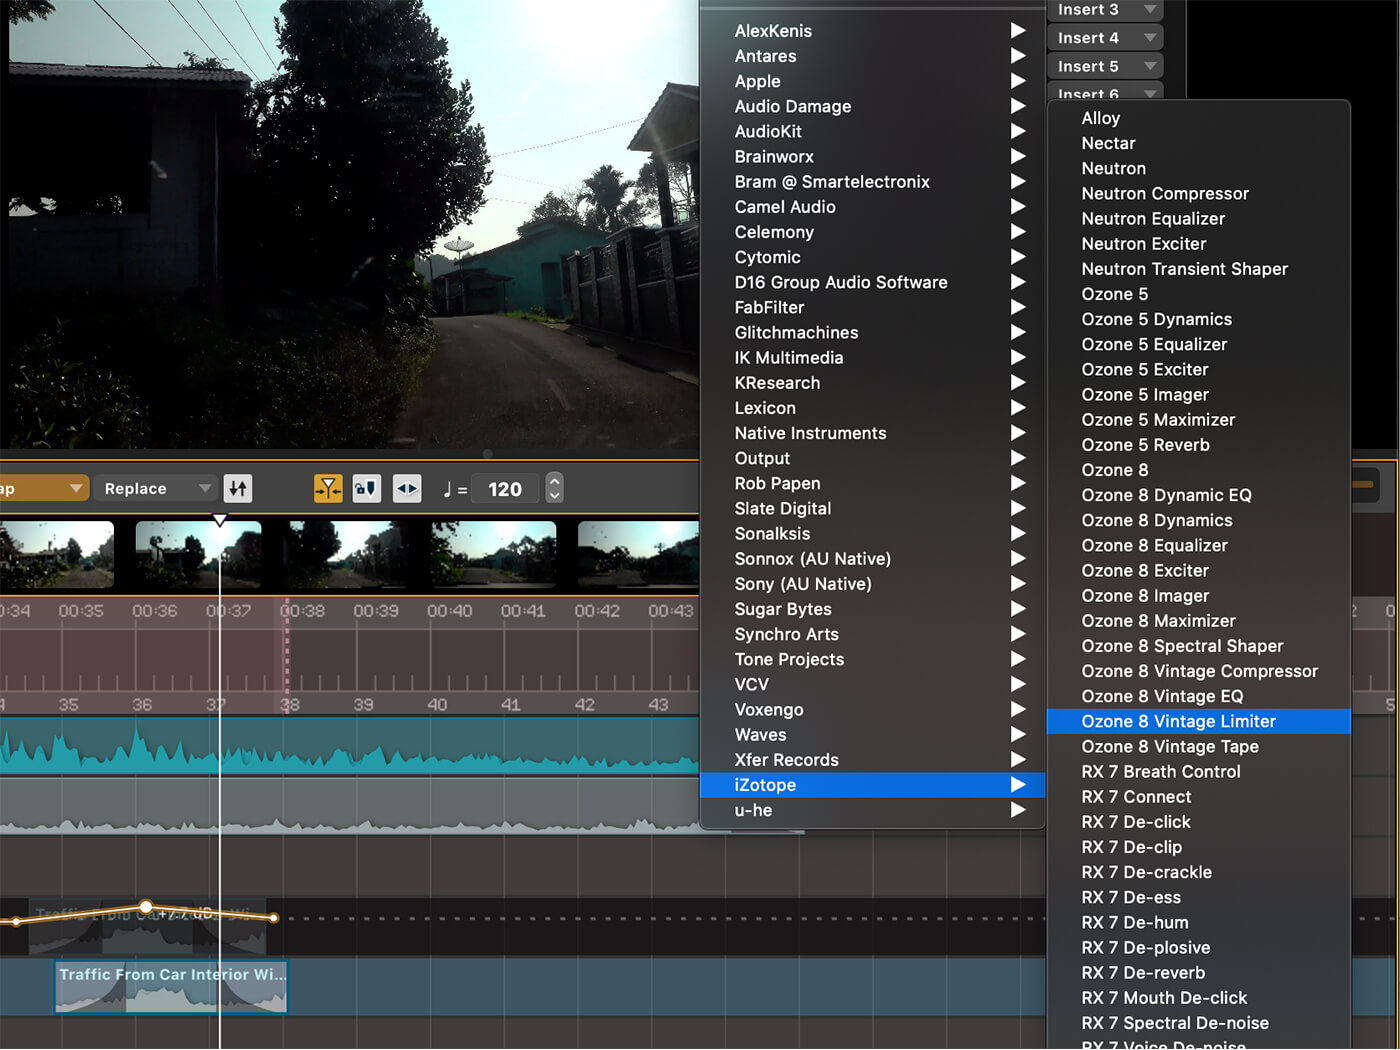
Before exporting the completed project, we first added a limiter on the master output (top right of ADD) for a little more balance and loudness. To export, File>Bounce launches the export options window where we’re presented with several choices for both audio and video.
We exported video (with embedded audio) at the default resolution of 1280 x 720, however, there are many higher and lower rates available. Another choice was to render out the final audio and individual track audio. If you wish to take the project into the likes of Premiere Pro, or Pro Tools, then AAF or XML exports are also available under the file menu.
Here’s the result of our layering of sound:
If it’s not already apparent, we love ADD. Its an incredibly inspiring tool that takes away so much labour in synchronising sound to visual media. This free version is simply irresistible and can open up your options faster than anything that has come before. We can wait to see and hear some of your projects!
Share your results and tell us what tutorials you’d like to see in the MusicTech Creator Community on Facebook.
Check out more Weekend Workshops here.