How to layer kicks in Pro Tools
Why pick only one kick-drum sample, when two can bring more power to your mix? Here’s how to layer your kick samples in Pro Tools.
There are hundreds of thousands of kick-drum samples to choose from and many, many more instruments capable of generating kicks. but scouring through all of the samples often isn’t enough. You might find one kick sample that has a deep, low-end weight you like, but doesn’t cut through the mix strongly enough, while another kick sample might cut through with plenty of energy, but not carry the low end. By layering multiple samples into a single sound it is possible to combine the relative strengths of two or more samples, to create your own, new sound, something unique to you, with the perfect characteristics for your mix.
The simplest way of doing this is simply to layer one kick on top of the other in the mix, aligning the start time of each, such that the two samples play at the same time – being very careful to check that the polarity of the two samples is aligned. This will give you something of the sound of the two signals. The only problem is that as well as giving you the best of both worlds, you’ll get the worst bits of both samples, too.
But will it blend?
Instead, what we have to do here is to blend the two samples together, removing the parts of both that we don’t like, and leaving only the best of both. This can involve chopping the samples up a little, altering the amplitude envelope of each in the process; or it can be a simpler task of simply EQing the two samples to leave only the best parts.
In this tutorial, we’ve crafted two kick samples, one with a sharp attack and long tonal tail, while the other has a shorter tail, but a deeper, more weighty body. We want to try and use the attack of the first sample, along with the body of the second to make a single kick drum that kicks harder than either of the two samples alone.
We start by altering the envelope of the two samples, such that we instantly lose some of the long tonal tail from the first kick sample, being sure to keep all of the attack. Pro Tools allows for incredible control over the amplitude envelope, in ways that no sampler can come even close to. For now, though, we’re just using simple fades. Feel free to dig in with volume automation if you want greater control.
Once we’ve shaped the two kicks we’re going to add EQ to both, to further isolate the sounds we want from each, using a high-pass filter to remove the low-end from one sample and a similarly placed low-pass filter on the second sample to remove any high end that could be clashing between the two kicks.
Holding it together
Finally, we try to glue the kicks together a little to bin them together as a single element. To do this, we’ve bussed the two samples to a single Kick buss channel, and added an instance of the Avid Channel Strip plug-in. Experimentation doesn’t have to end here, though: if the two samples you use are pitched apart, you could try pitch-shifting one to more closely match the other. However, any heavy processing like this can also have the effect of altering the characteristics of the kick that you liked in the first place, so be sure to experiment with a variety of different pitch-shift algorithms to try and keep the parts of the sound that you like most.
Of course, while kicks are the obvious choice for this kind of treatment, you can perform similar actions on other, similar sounds within your mix, most obviously snare hits – but we’ve also seen this done with crashes, chopping together the wash from one sound with a more aggressive attack.
In fact, it’s not even necessary to stick to a single sample type when performing this kind of sound-design activity. We’ve had great results adding the attack of a wood block to a deep kick drum sound, to create a sound that sounds more like a traditional kick drum than either of the samples we began with. Once you get the hang of designing your own sounds like this, it’s hard to go back to just using one sample.
Layering kicks in Pro Tools: step-by-step
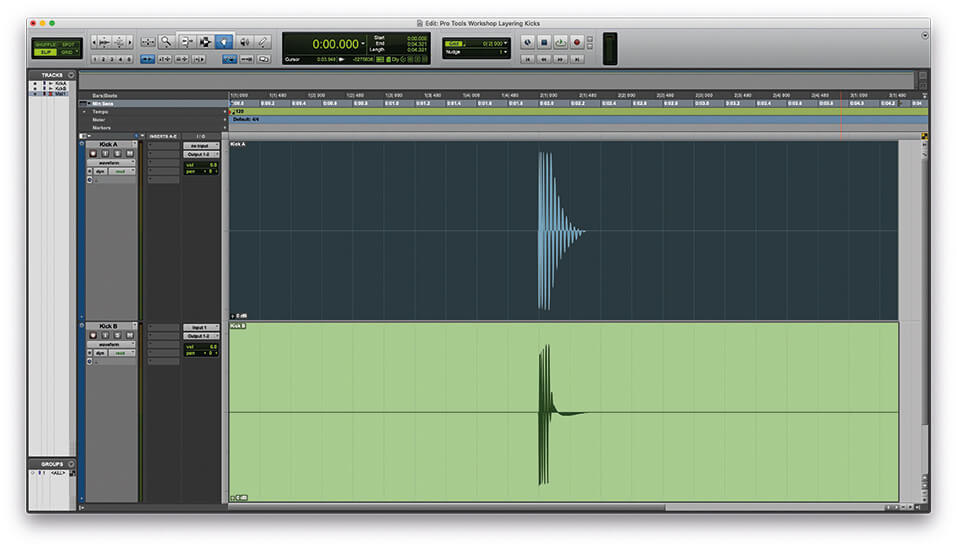
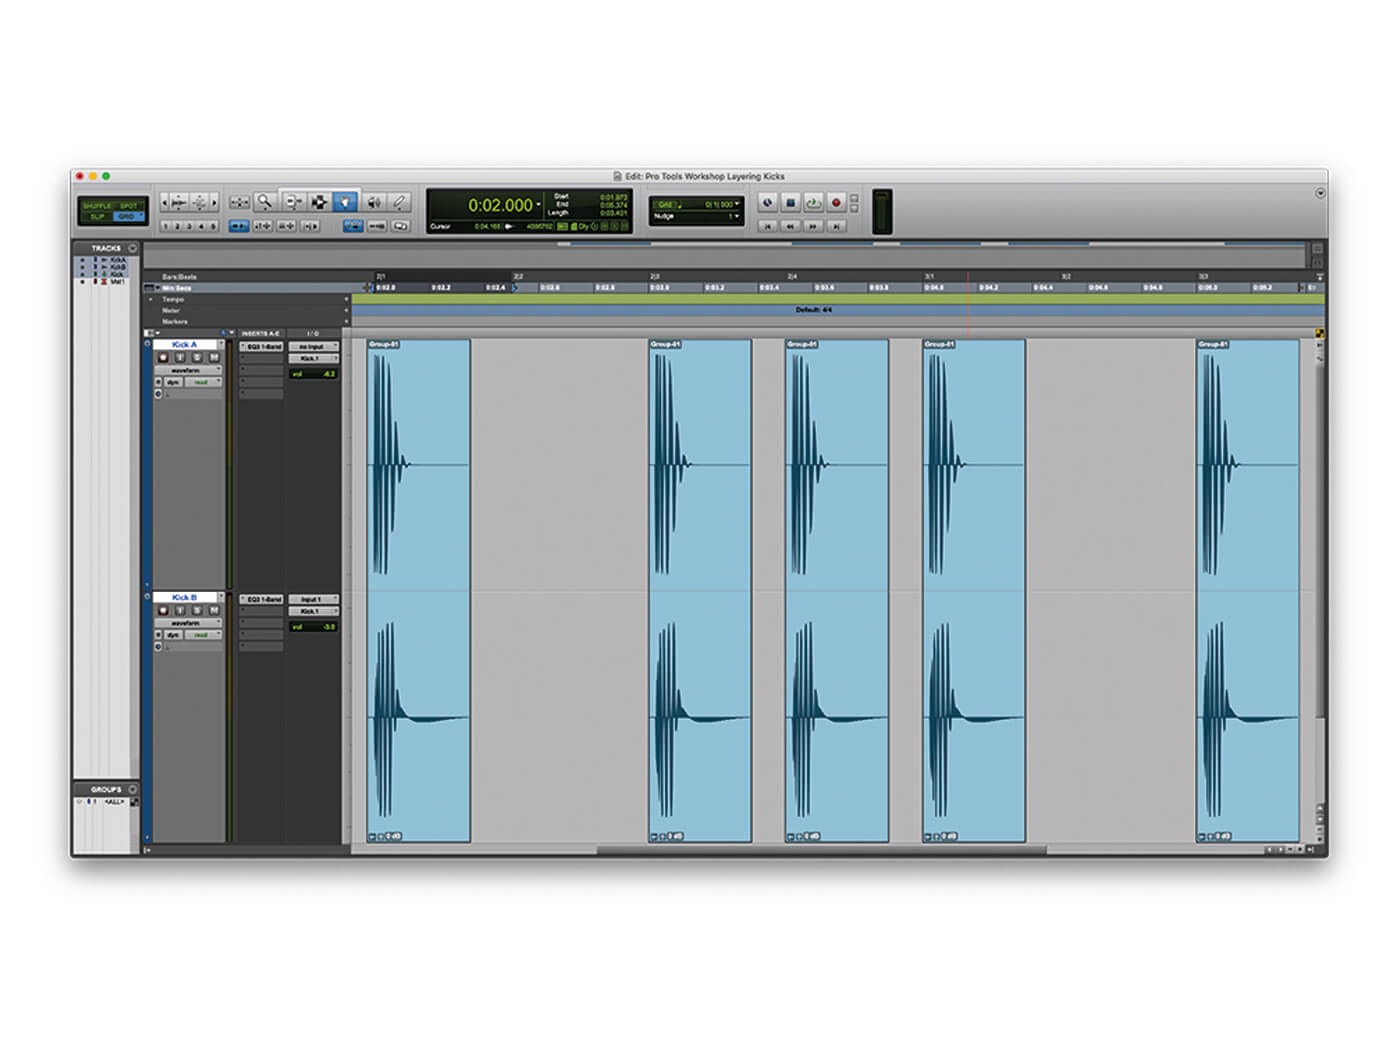
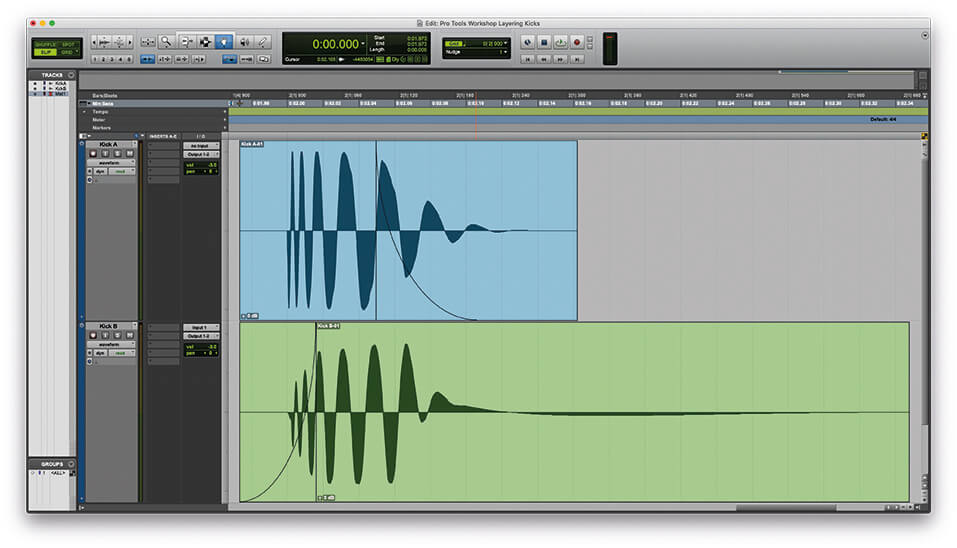
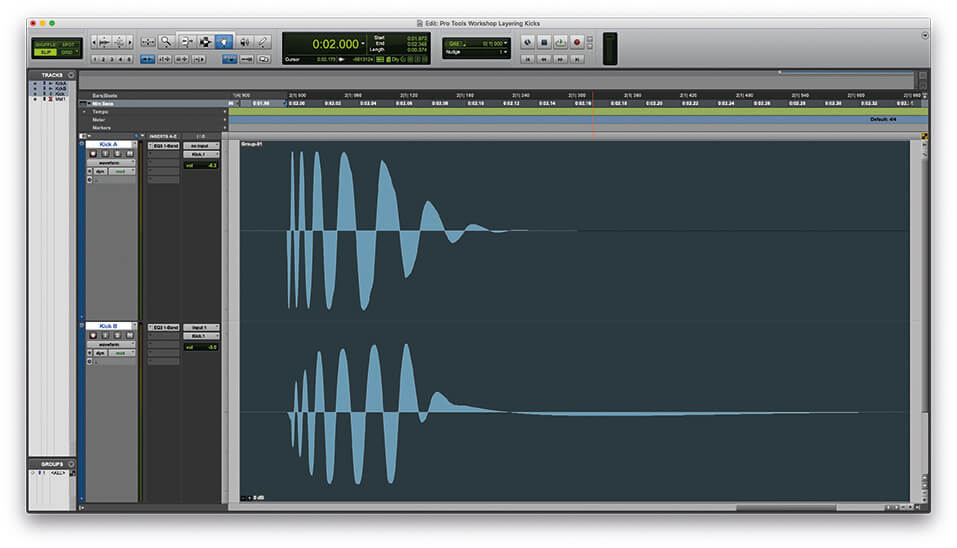
1. Open the Pro Tools Workshop file. The project contains two single kick-drum samples, named Kick A and Kick B. Solo each one in turn and take a listen to them.

2. We’ve bussed the two samples to a single master buss and turned the individual channels down by 3dB. This is because while neither sample peaks on its own, they do push the master buss into clipping when played together.
3. We want to use Kick A for the attack, and Kick B for the body. So let’s start by altering the envelope of Kick A. Place the cursor just after the end of the waveform and press [S] to quickly edit the end of the sample. You can do the same at the front by pressing [A].

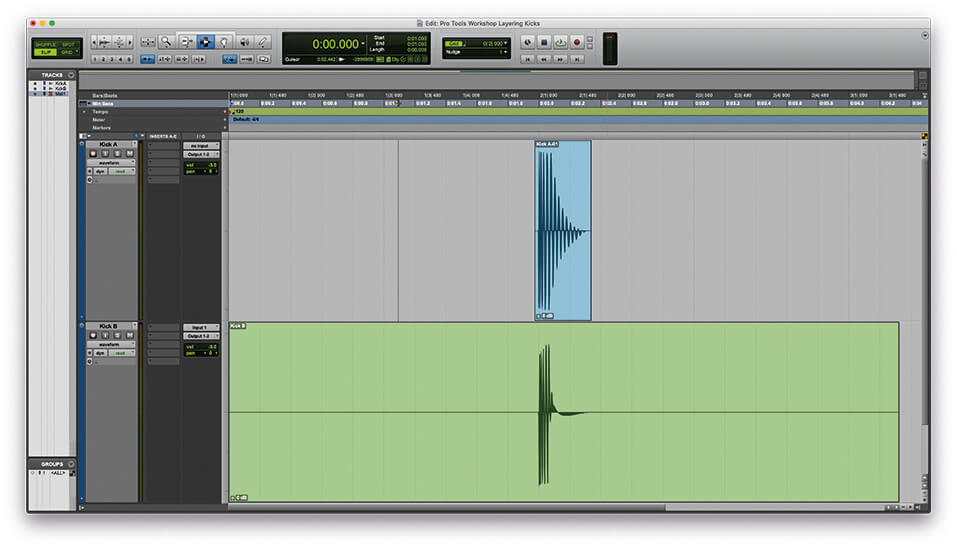
4. Now apply a fade over the end of the sample by highlighting a region you would like to fade over and pressing [F]. You can fine-tune the length of this fade with the Trim Tool [F6].
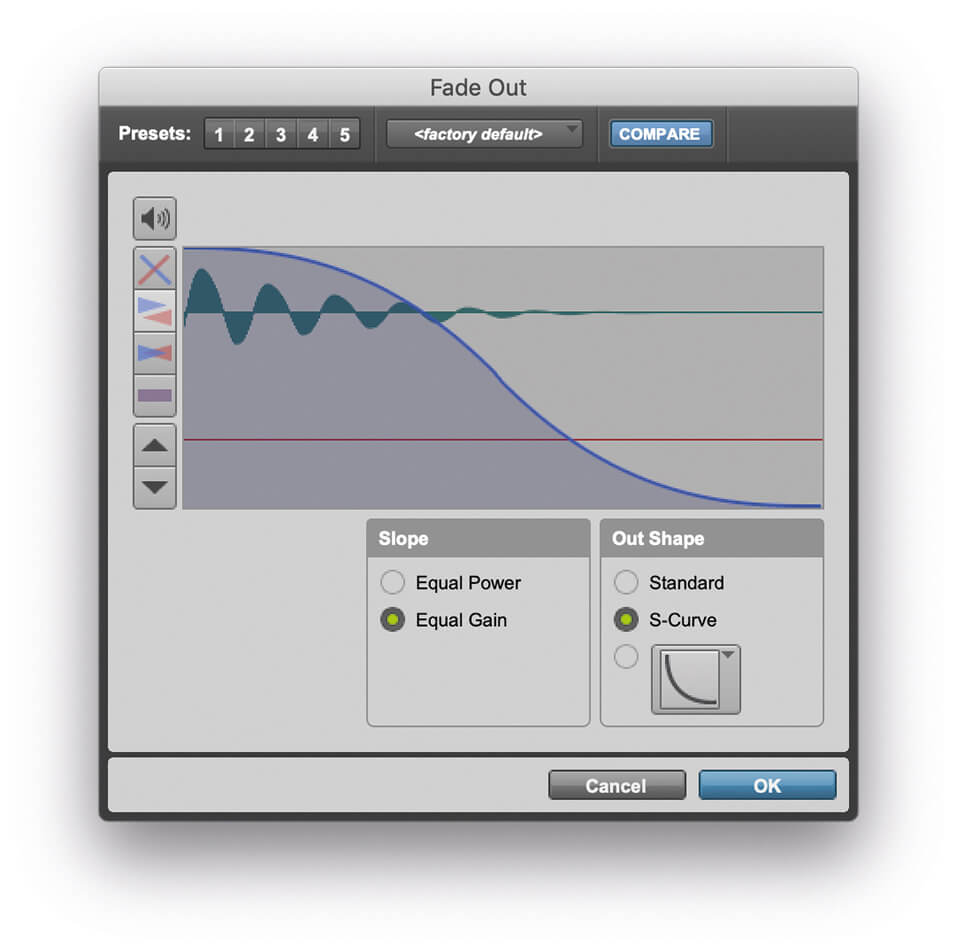
5. Double-clicking on the fade with the Grabber Tool selected [F8] will open the Fades dialogue window. From here you can further edit the shape of the fade, using linear, curved or S-shaped fades as you see fit.
6. You can do something similar to the second sample, however, remember we want to try and keep the body of this sample as strong as possible.
![]()
CLASSIC TRICK Kick drums don’t have to be layered with other kick drums. A classic drum ’n’ bass trick is to layer the kick with a 40Hz sine wave gated to the attack of the main kick. A great alternative to this is to use a triangle or sawtooth wave instead of a sine wave for greater low-end weight. Be sure to mix it in low.
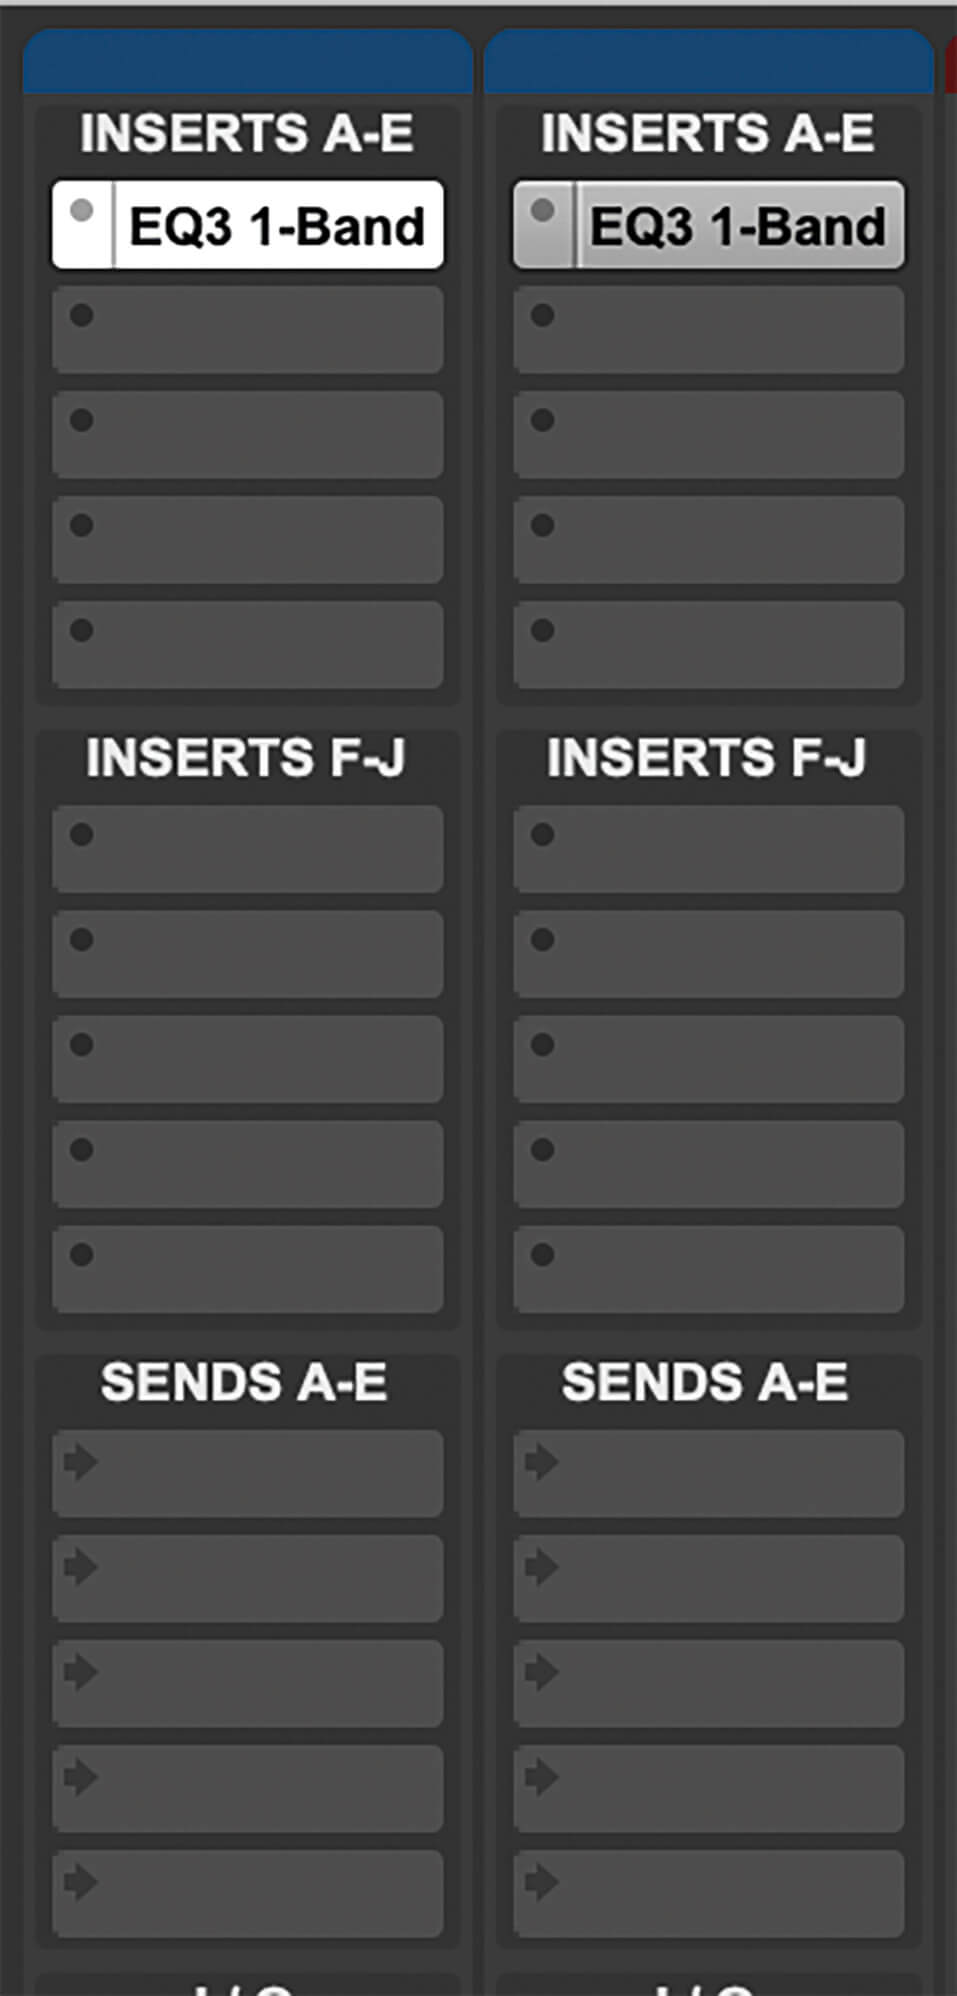
7. Add an instance of your favourite surgical EQ to both channels. We’re using the simple one-band version of Avid EQ III here as an example, but you could use any EQ with high- and low-pass filters.
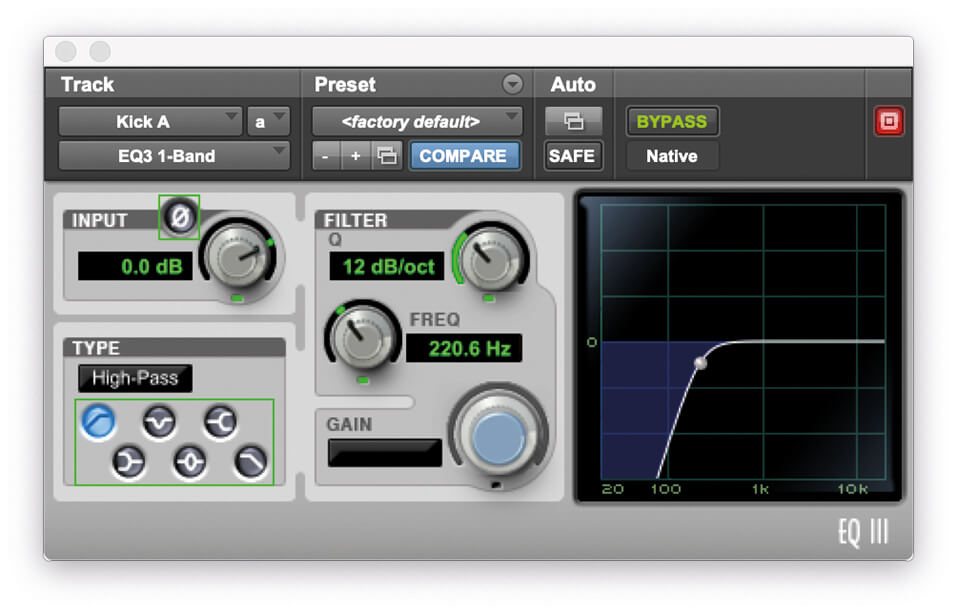
8. On the EQ for Kick A, apply a 12dB/octave high-pass filter at around 100Hz and with the channel solo’d and looping, listen to how the kick sound responds. We want to pull out all of the low-end energy without spoiling the energy of the attack.

9. On the EQ for Kick B, apply a 12dB/octave low-pass filter at around 300Hz. Again, solo the channel and listen to the effect the EQ is having on the kick sound.
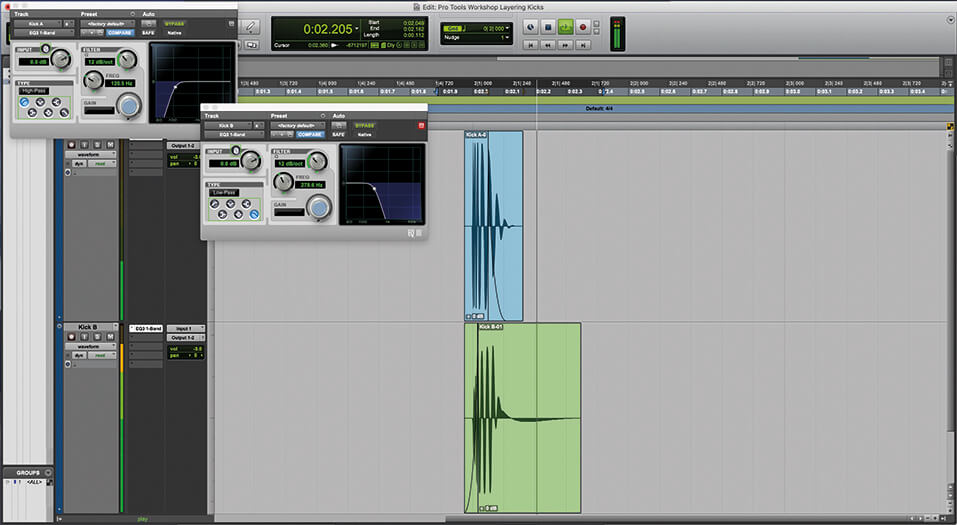
10. With both samples playing over each other, fine-tune your EQ settings. It is critically important that you do any fine-tuning in context, not with the channels in solo, as the overall sound will be very different to the sound of either one sample.
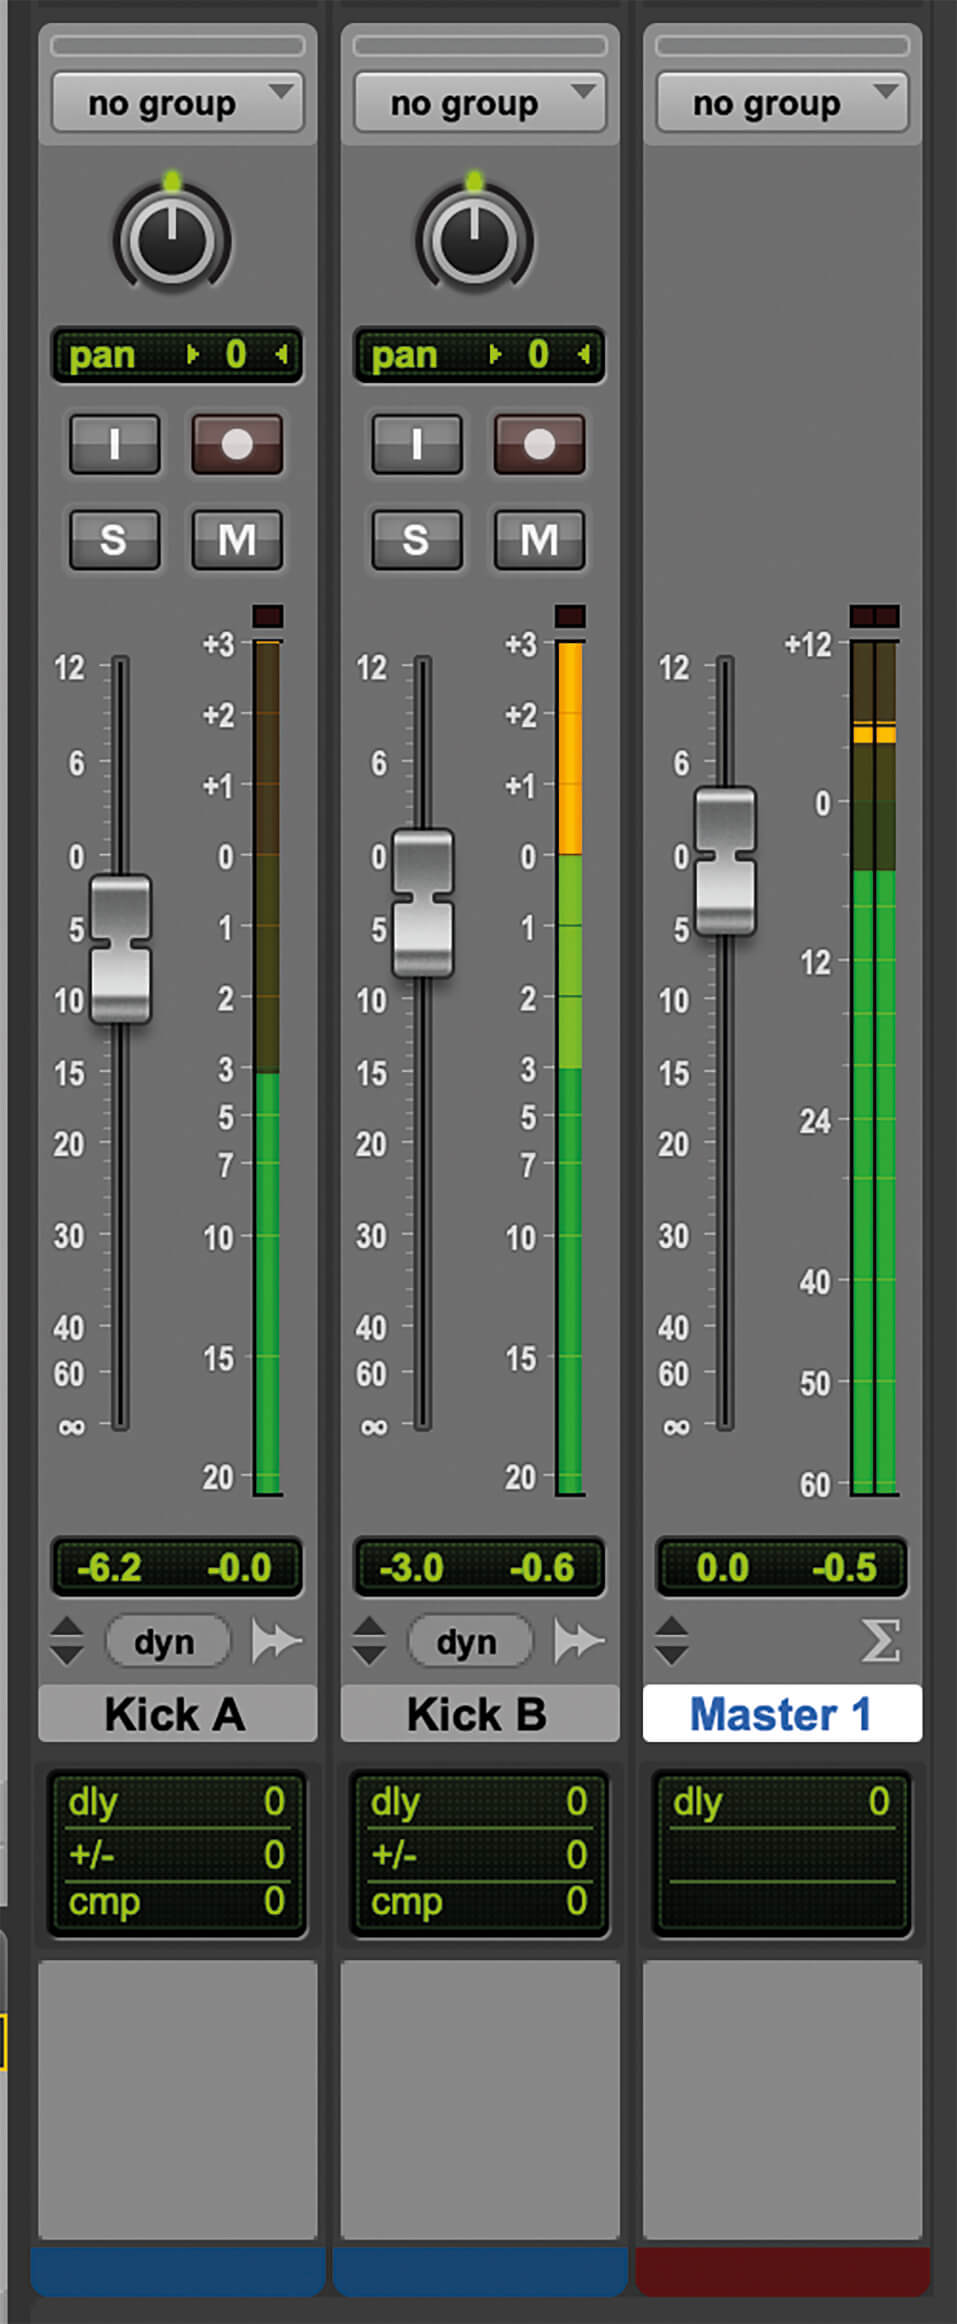
11. As well as fine-tuning the EQ balance of the two samples, you can also fine-tune the overall balance between the two samples at this stage, simply by adjusting the faders. To our ears, there is now too much attack to this kick, so we’re going to drop Kick A slightly.
![]()
REVERSE THE POLARITY Pay very close attention to the polarity of your samples. You can test this by regularly flipping the polarity of one sample and listening for which way round has the strongest bottom end. Remember, applying EQ will alter the phase relationships of the remaining audio, so even if it was in phase before you applied EQ, it might not be afterwards.
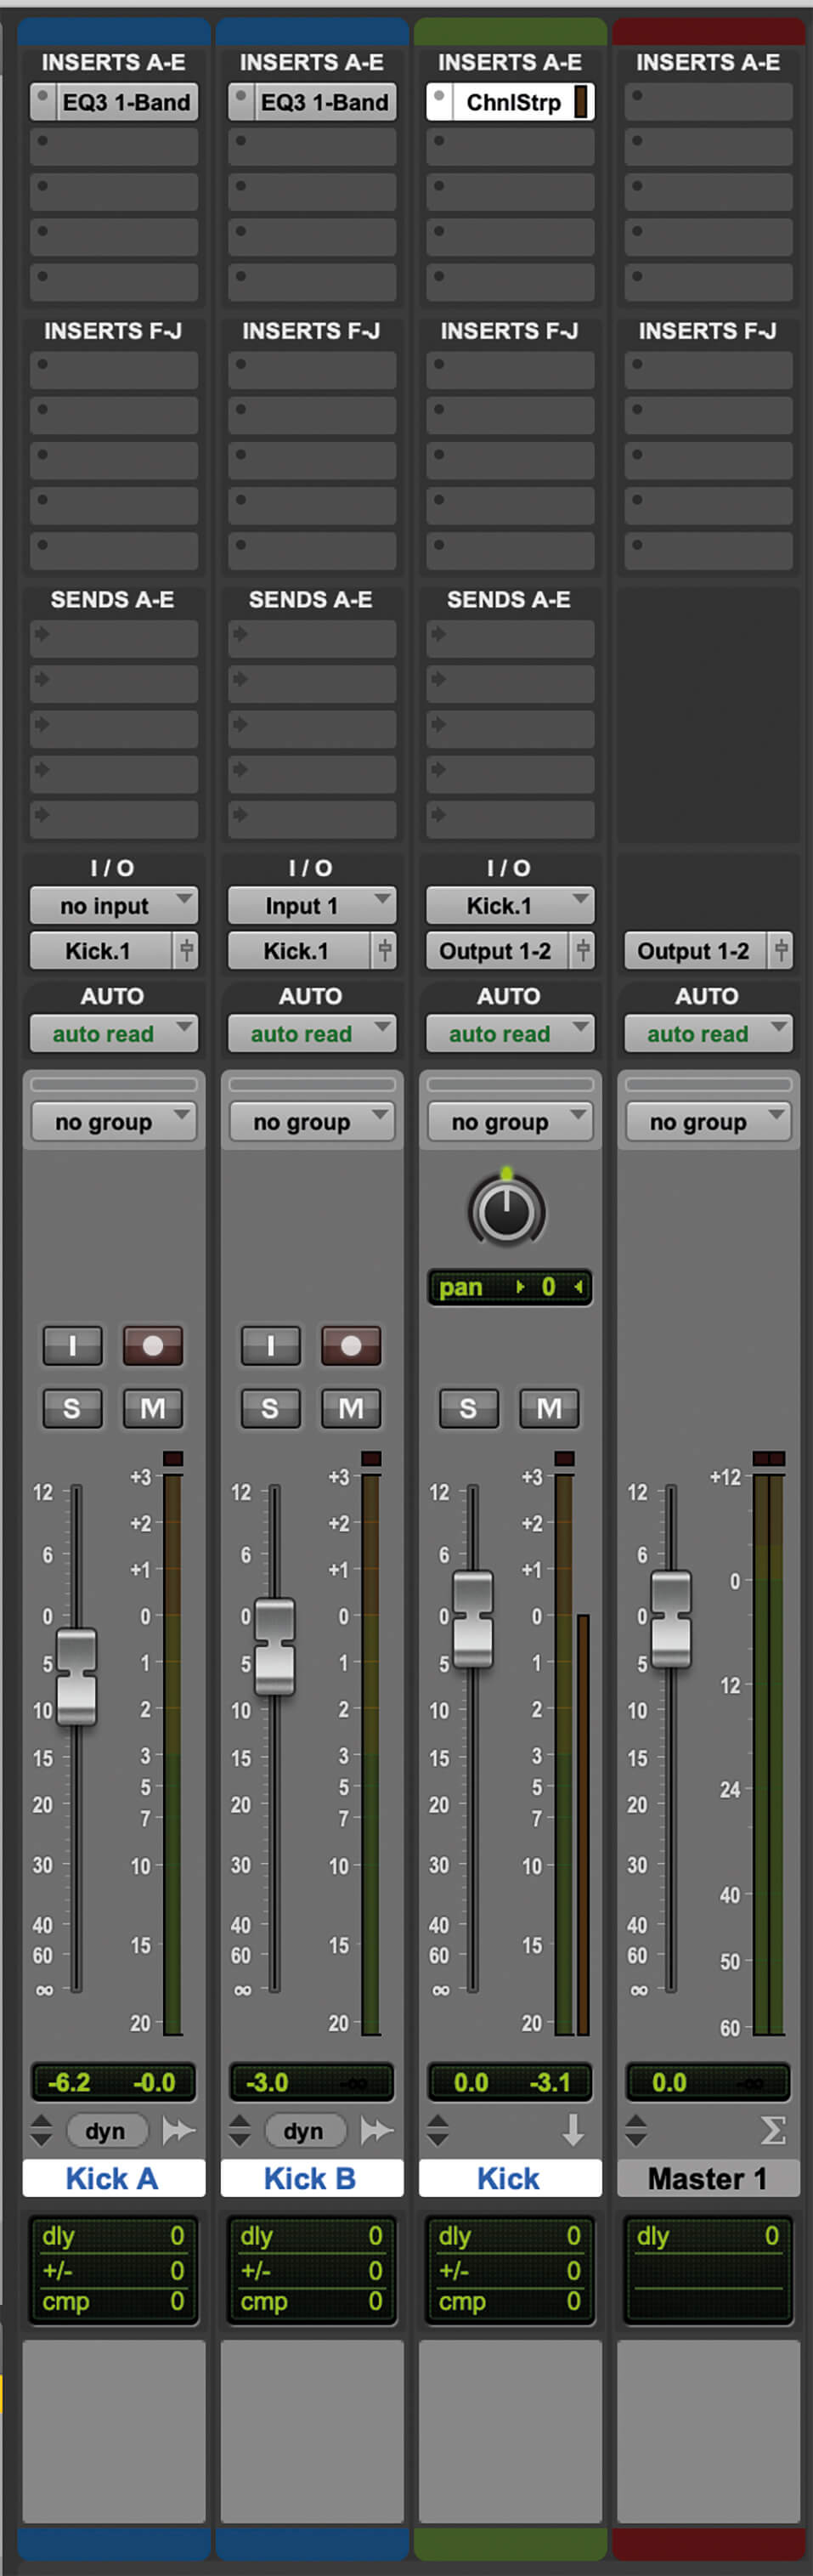
12. Finally, buss the two channels to a single channel and add an instance of Avid Channel Strip plug-in to the buss channel.
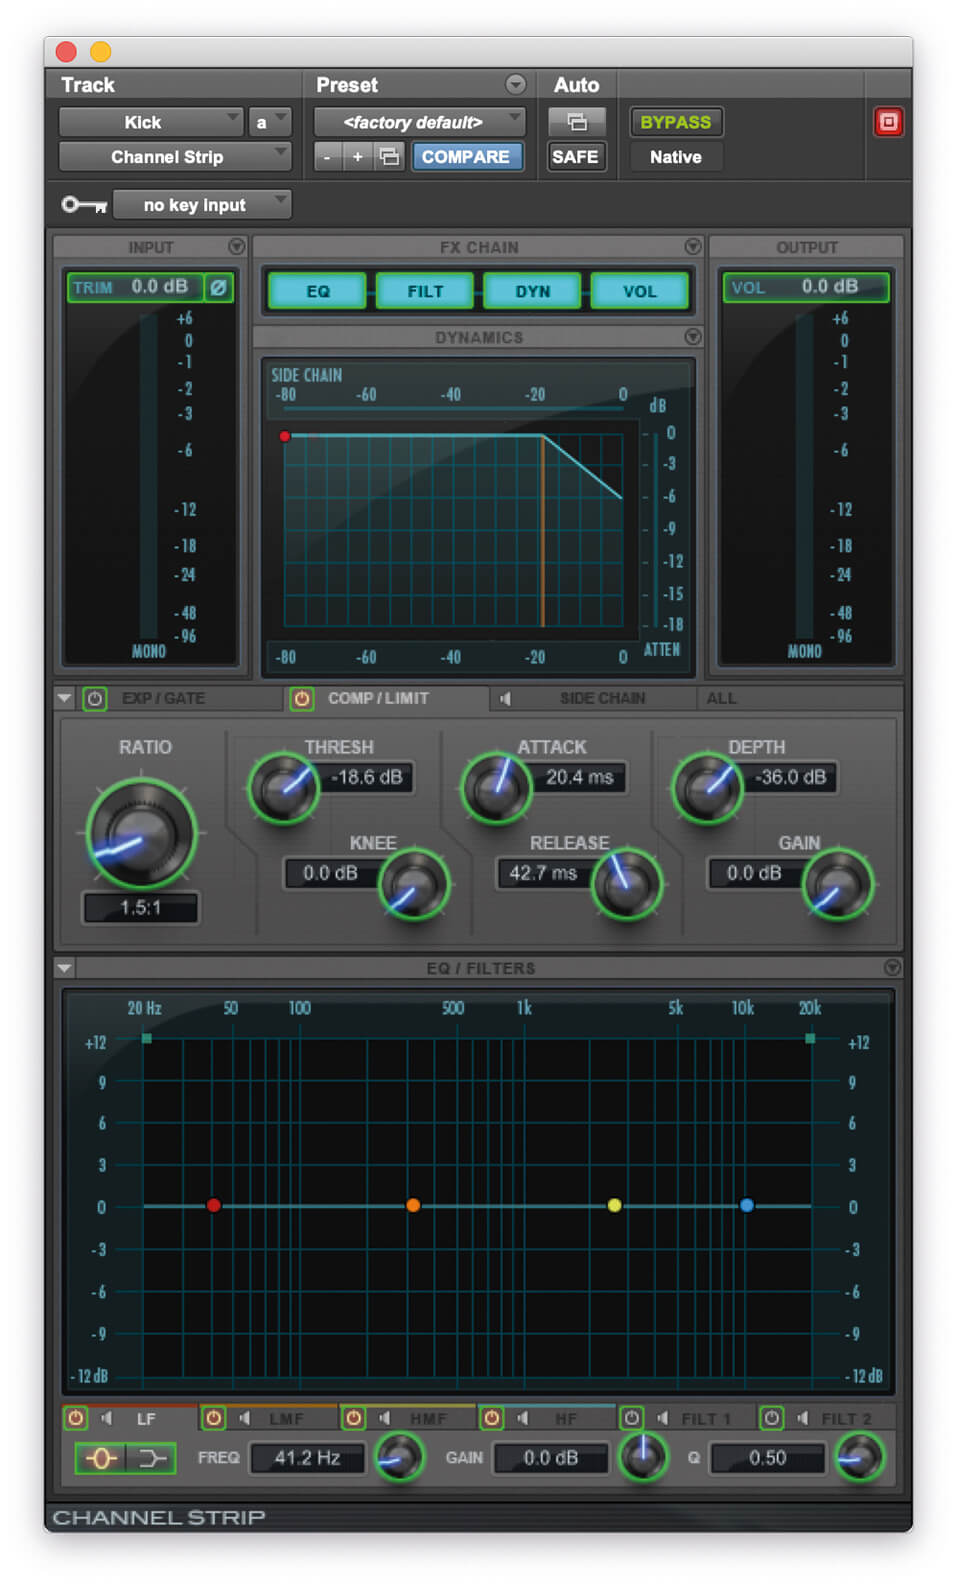
13. In the Channel Strip, we’re going to add additional glue using a very low-ratio compressor with a fairly low threshold.
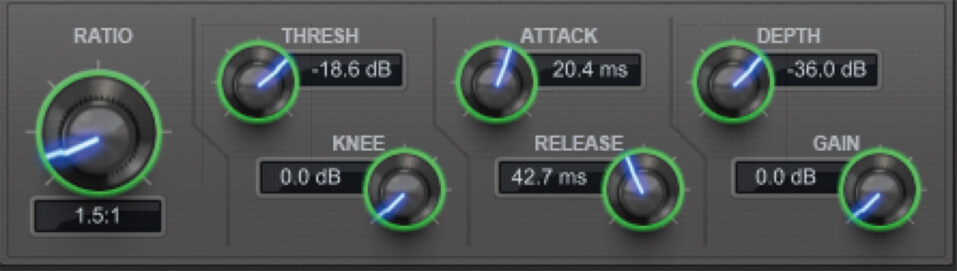
14. It’s imperative that you get the attack and release settings right when setting this, or your kick could turn into mush. We’re using a moderately slow attack of 20ms, which should give the front end of the kick plenty room to breathe, with a fairly fast attack of 40ms to shape the texture of the body and tail.
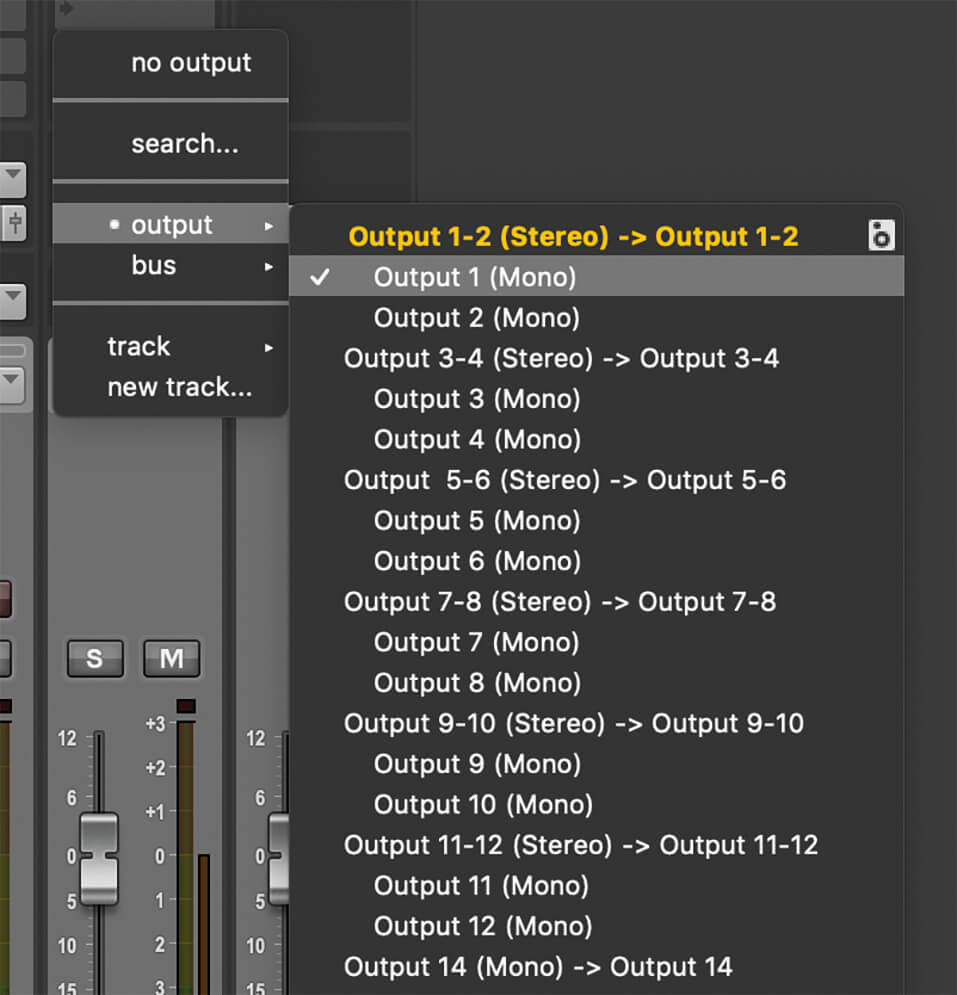
15. At this stage, we like to export our sample as a single WAV ready for use in this and many more projects. By setting the output of the buss channel to a mono location, we can bounce that as a single mono file, rather than making a mono file out of the summed stereo buss.
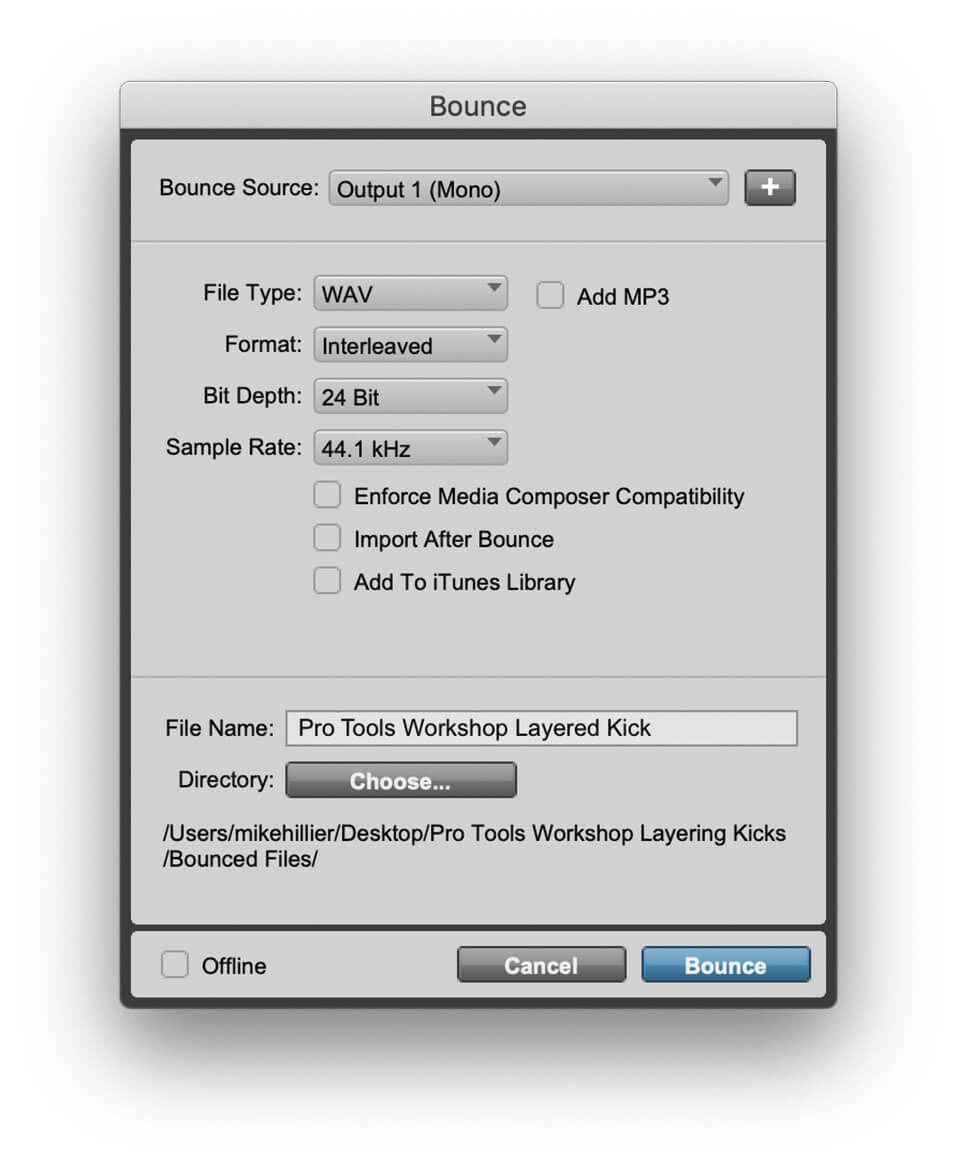
16. In the bounce window, be sure to set the Bounce Source to the same place as the output of the kick buss channel.
17. Alternatively, if you want to use the kick straight away in the project you’re working on, group the two samples as a single clip group by highlighting both clips and pressing Ctrl+Alt+G (PC) or Cmd+Opt+G (Mac).
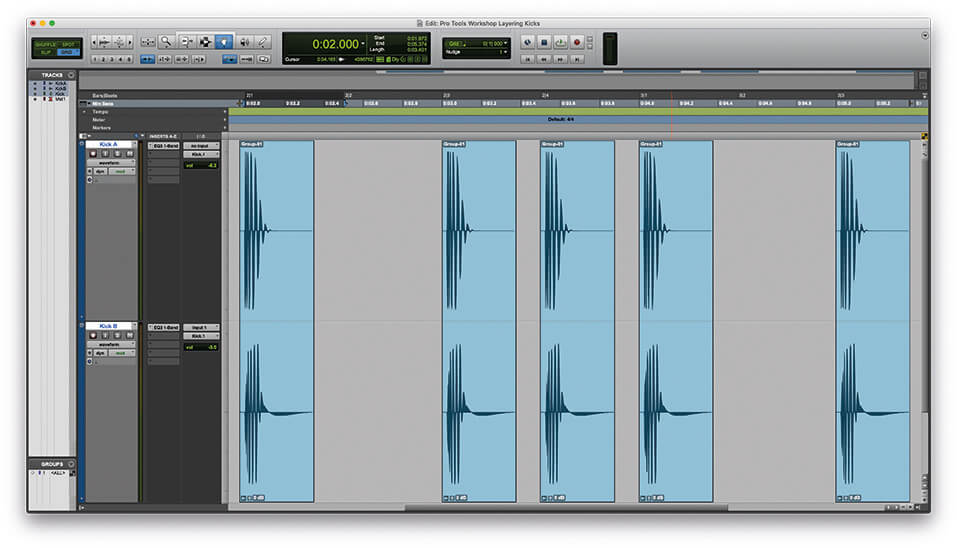
18. You can now copy the clip group and paste it to create your rhythm inside your project without bouncing the new sample out and reimporting it, enabling you to further alter the sound further down the line.
For more Pro Tools tutorials and workshops, check here.