Mastering Tutorial: Part Six – Running Parts – Step-by-Step
In this step-by-step guide Mike Hillier concludes this tutorial and the mastering series by exploring the use of DSP Quattro in finalising your track. Step By Step – Using DSP Quattro 1: Create a new CD Project in DSP Quattro and import each of the tracks you want on the CD. Once in DSP Quattro […]
In this step-by-step guide Mike Hillier concludes this tutorial and the mastering series by exploring the use of DSP Quattro in finalising your track.
Step By Step – Using DSP Quattro
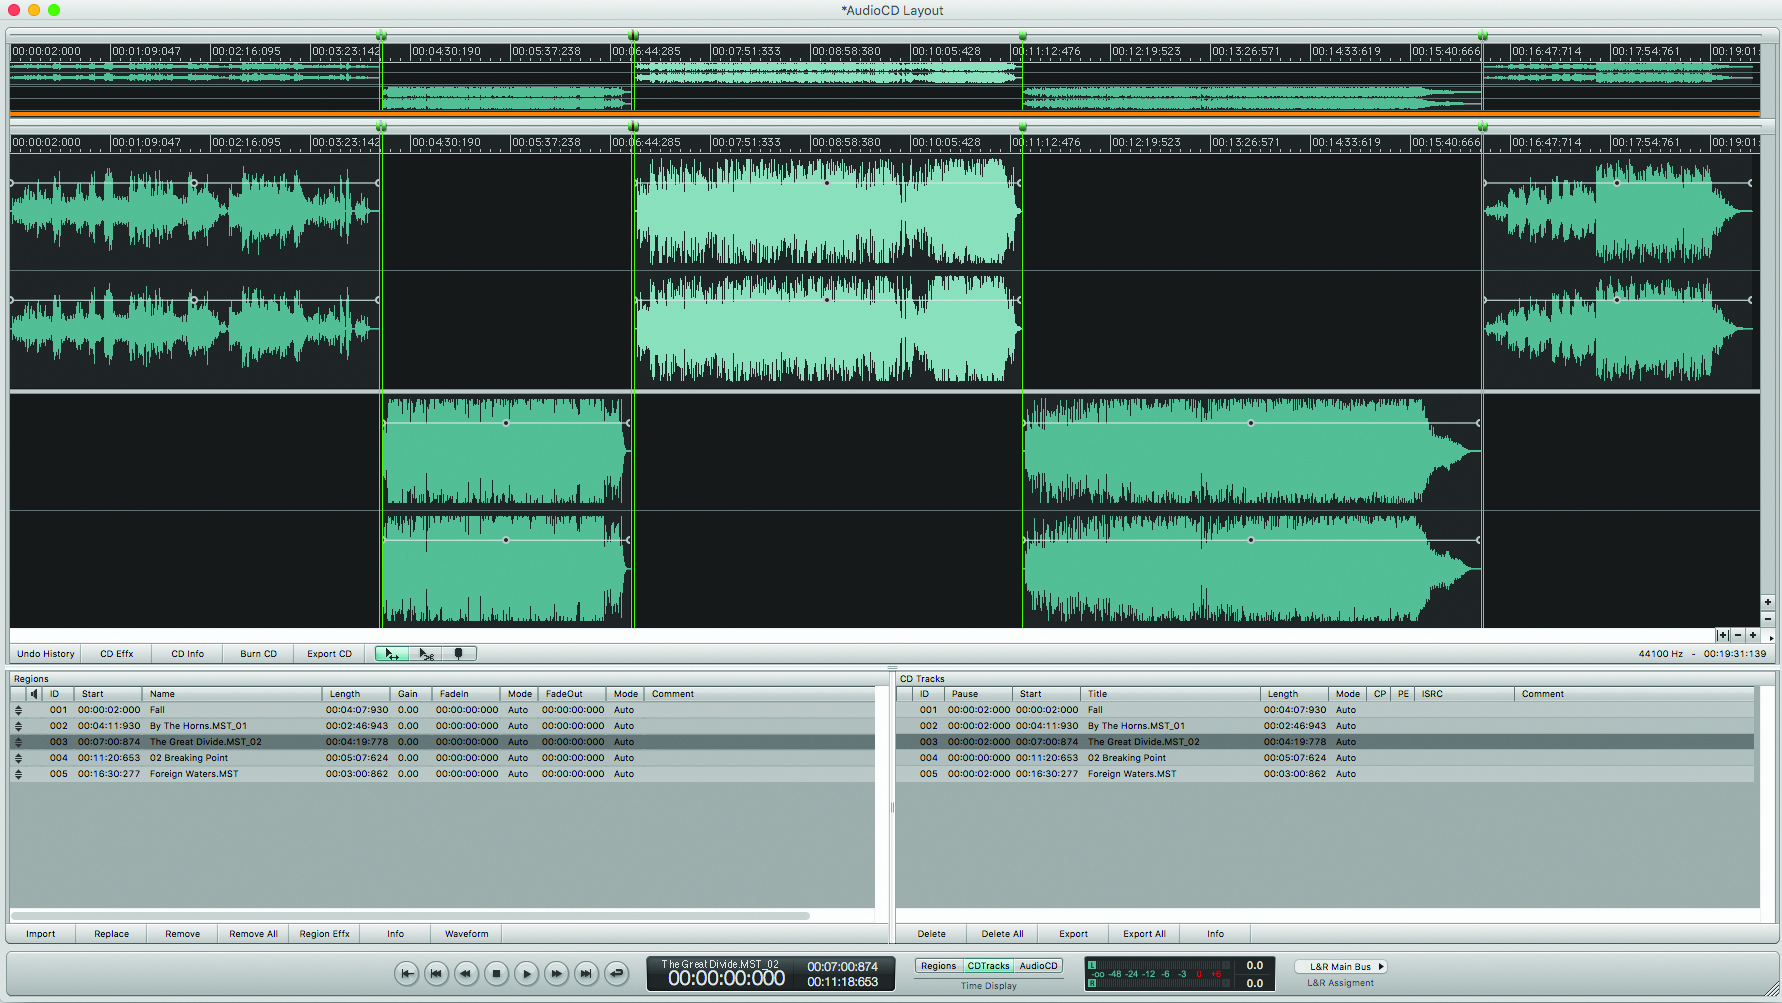
1: Create a new CD Project in DSP Quattro and import each of the tracks you want on the CD. Once in DSP Quattro you can alter the running order by simply dragging the tracks up and down in the Regions list at the bottom left.
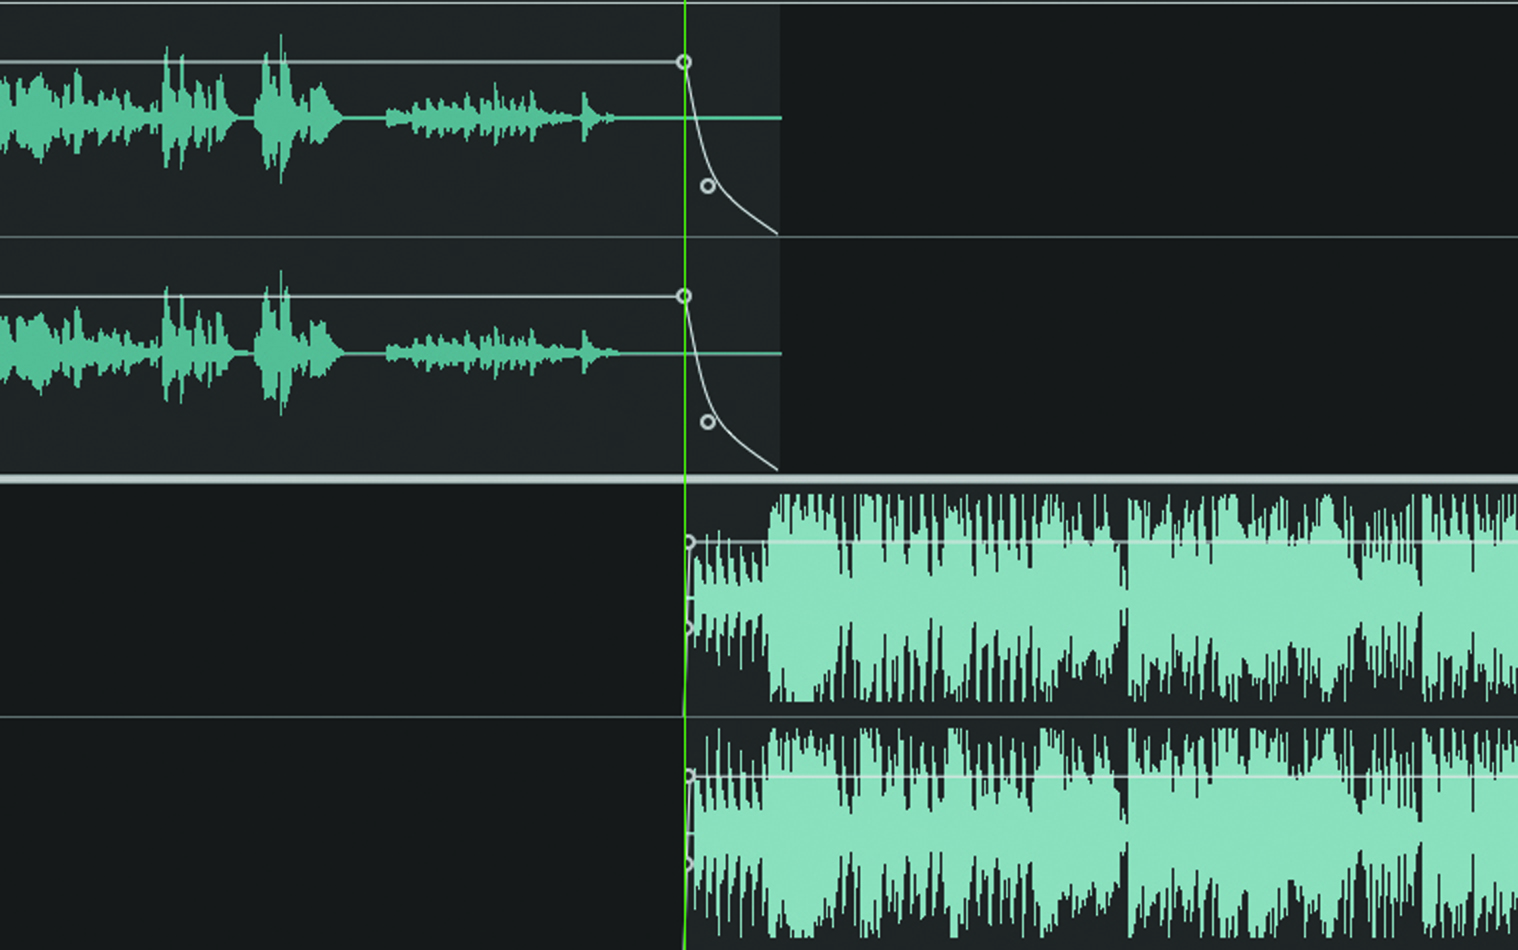
2: DSP Quattro will automatically place song markers between each region with gaps of two seconds. You can alter this by dragging the audio around the main timeline, to create longer or shorter gaps – or crossfades between the intro and outro of songs.
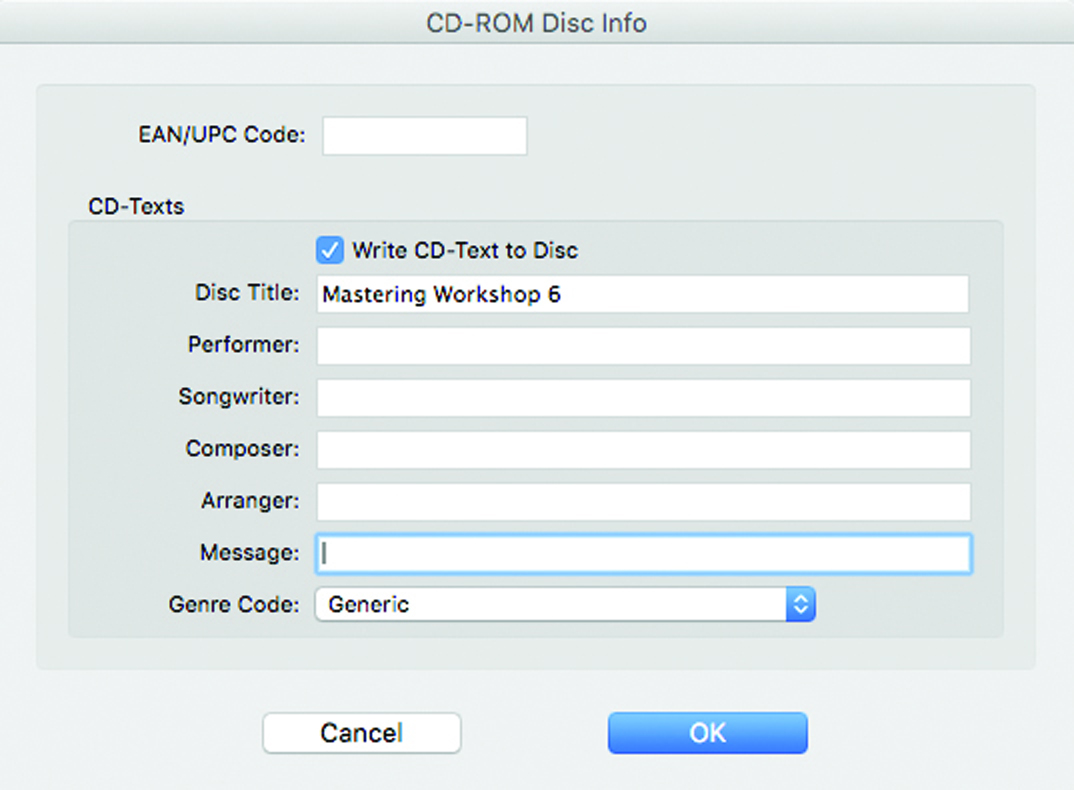
3: You can edit your disc’s metadata, including the album title and UPC/EAN code from the AudioCD>AudioCD Disc Settings window.
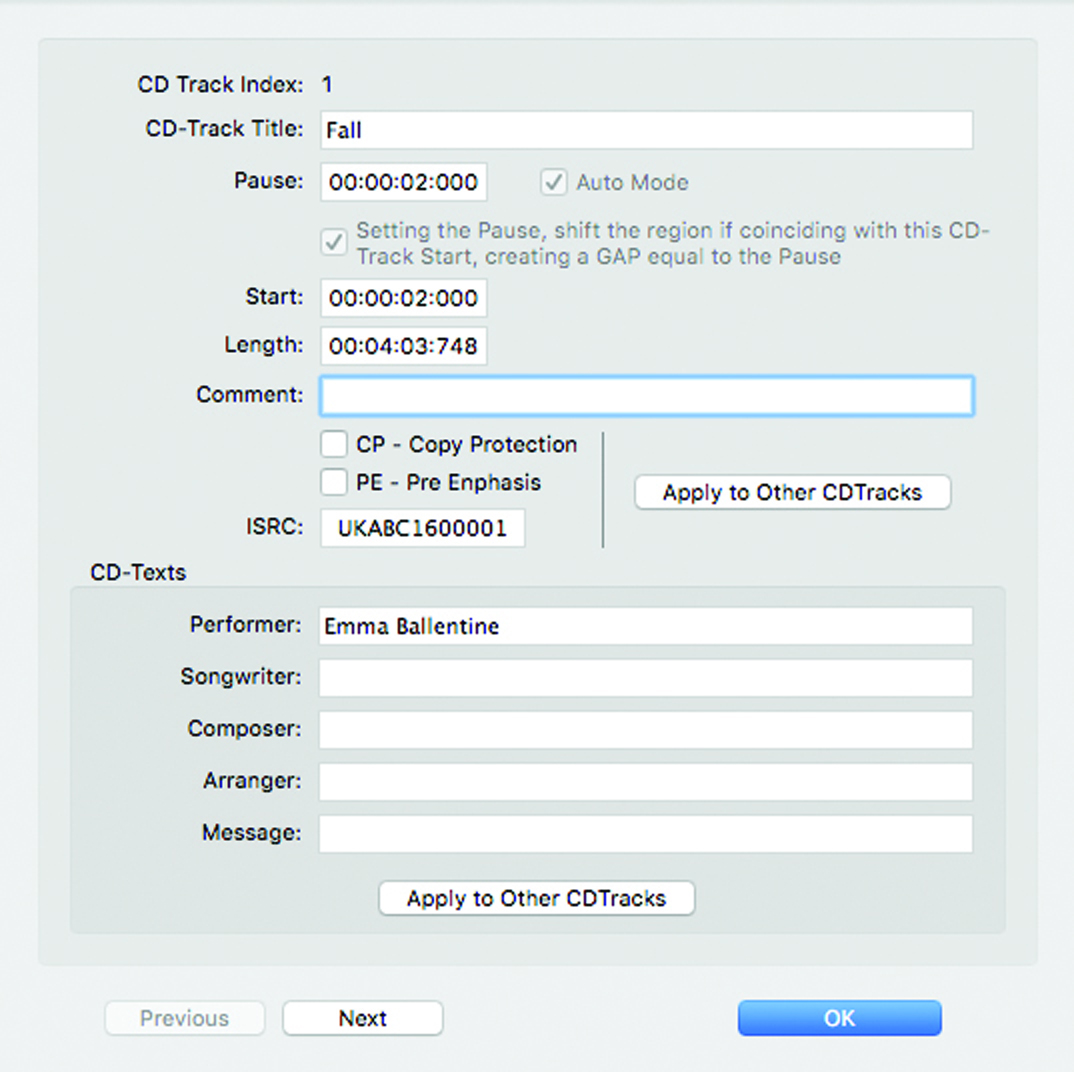
4: Song metadata, including the artist, song title, and ISRC codes can be edited from the AudioCD>Edit CD Track Parameters window. Again, be sure to spellcheck all song titles and artist names, and triple-check any ISRC codes you are embedding.
5: You can now render the DDP to a folder and send it to the client.
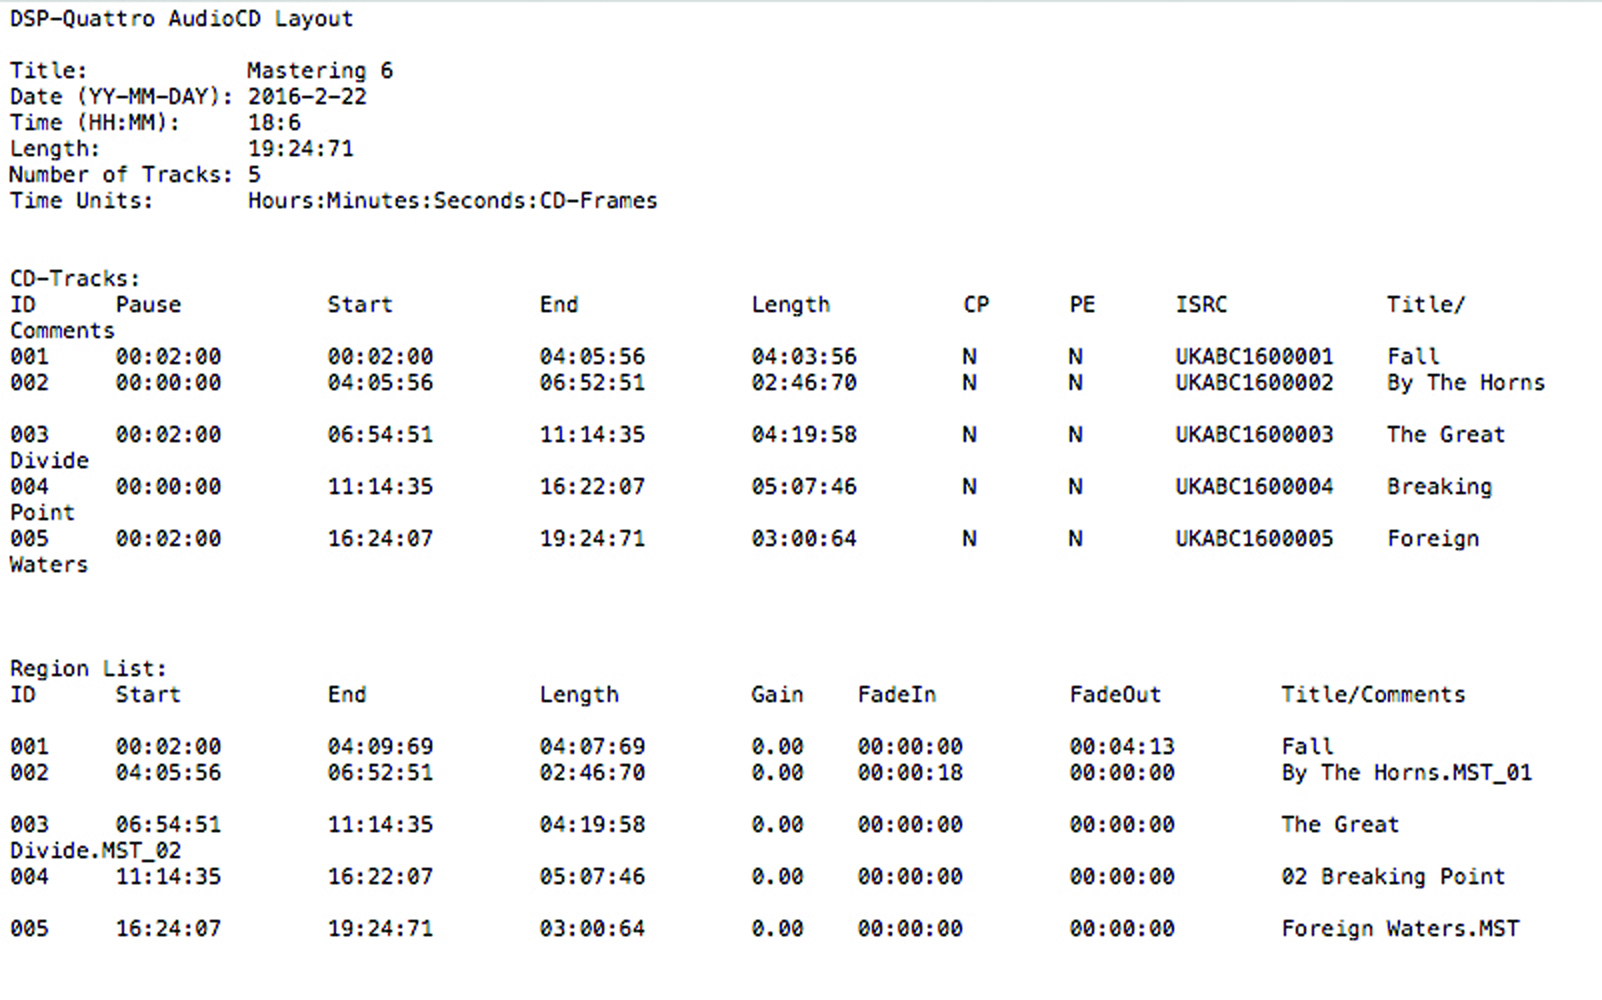
6: DSP Quattro also lets you write a text file with all the DDP data in it, which can be very useful for sending along with the DDP folder, as it enables the client to double-check your spelling.
