Working with Selection-Based Processing in Logic Pro X
Logic Pro X’s Selection-Based Processing offers a whole new way of working with audio plug-ins that takes them beyond the domain of the mixer. Let’s explore how this approach can refine your mixing.
Last month’s workshop took a detailed look at the possibilities of creative audio editing, particularly with respect to bouncing virtual instruments as audio regions. As part of that workshop, we touched on the concept of effects being bounced as an integral part of this process, mainly as part of the Bounce In Place dialogue box. What’s interesting, though, is that Logic includes a tool for so-called Selection-Based Processing, which in short, let’s you apply plug-ins to targeted parts of an audio region, printing the results as a new audio file. But why would you use Selection-Based Processing, and what can be achieved with it?
In most of our production activities in Logic Pro X, we’re used to audio plug-ins being a component of the Mixer – something that we apply to one or more tracks in the arrangement as part of the mixing process. With Selection-Based Processing, however, audio plug-ins can become an integral part of your workflow in the Arrange Area, and in particular, audio regions used in your project. The key to Selection-Based Processing is that it’s ‘targeted’, so that plug-ins are only applied to the selected region or a ‘Marqueed’ part of the region, rather than the whole track. By contrast, audio plug-ins applied on the Track Mixer are applied wholesale to all regions placed on that track.
Selective in your objective
There are three reasons why you might want to apply Selection-Based Processing. Firstly, and most importantly, there’s a corrective application, that uses plug-ins to reduce aspects like Mains Hum, Plosives, or excessive Sibilance that could inhibit an otherwise good recording. With defects like sibilance or plosives, you’ll want to deal with the occasional point where the problem occurs rather than modifying the track as a whole (using De-esser plug-ins and so on) across the channel insert points.
The second reason for using Selection-Based Processing, which goes back to last month’s workshop, is that it can be applied creatively so that audio plug-ins are hard-written into the audio file. Again, this might be because the plug-in you want to apply happens at a specific point in the arrangement (maybe the last few notes of a guitar solo are flanged, for example) or with time-based effects like reverb and delay, you want the effects embedded ahead of the part being reversed. For those that fear losing aspects of the original audio data, there are a number of workarounds that can be applied, which we’ll explore in a moment.
The final reason for Selection-Based Processing is that it’s a viable solution to reducing CPU load, printing more DSP-intensive plug-ins (like distortion) as an off-line render. This is also useful if you’re moving between systems, maybe where you have different sets of plug-ins between your laptop and desktop.
Natural selection
Technically speaking, Select-Based Processing isn’t a destructive process, in that a new audio file is created rather than the original data being modified in any way, although of course, the region in the arrangement will be the newly processed one. If you want to retain some backwards compatibility, therefore, consider using the Track Alternative feature, which can preserve an unedited version of the original region/s, or, as part of the Selection-Based Processing dialogue box, select the Create New Take option before you render the selection.
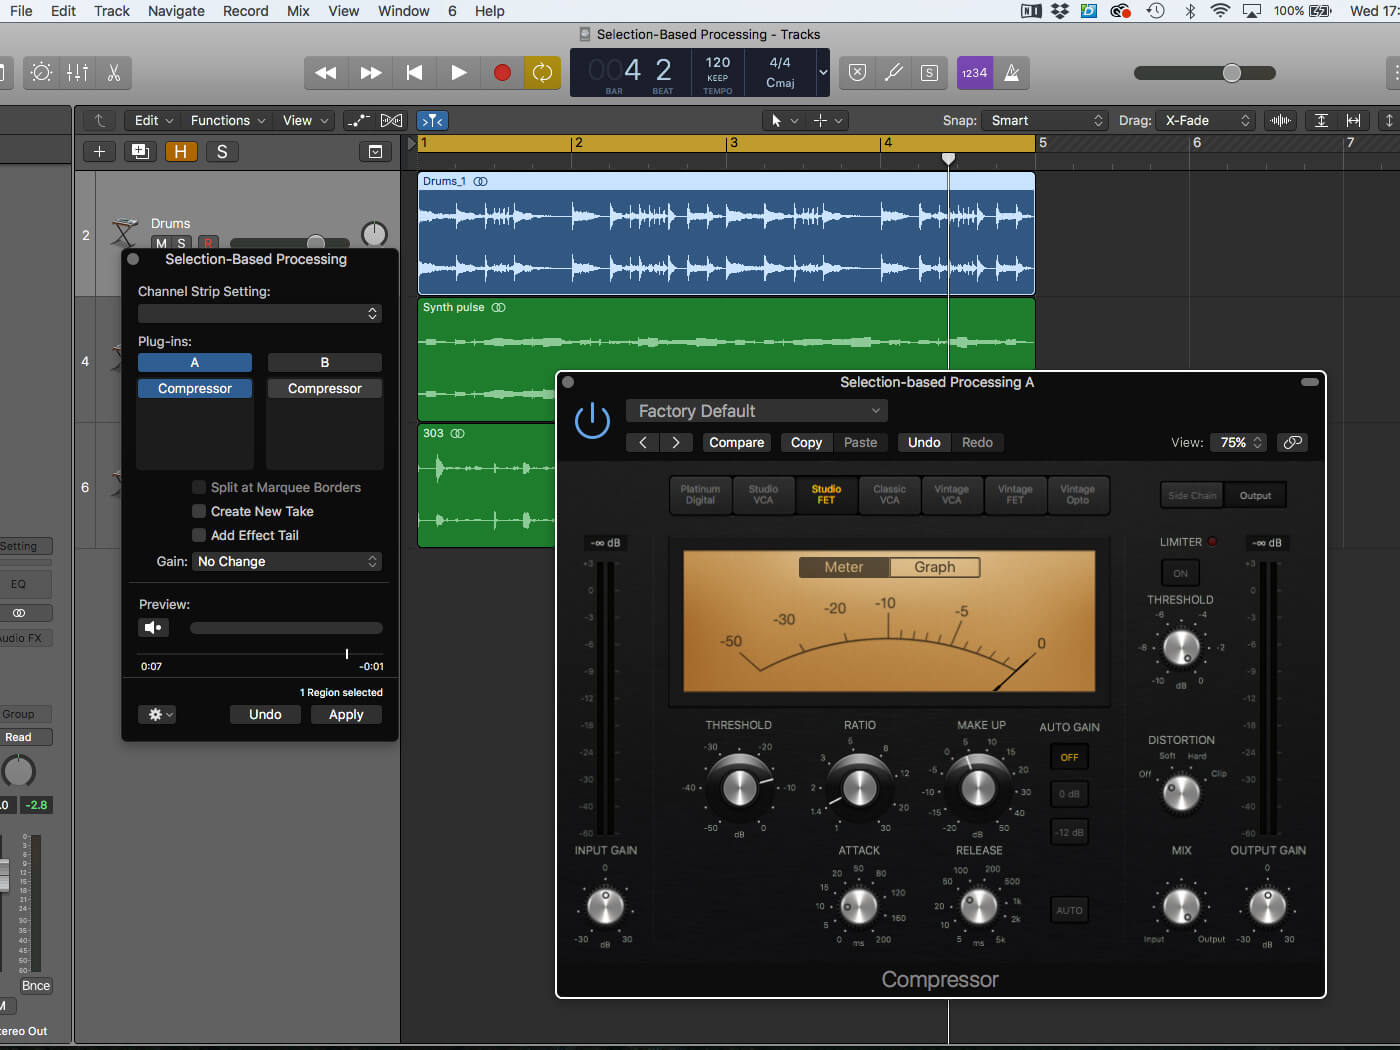
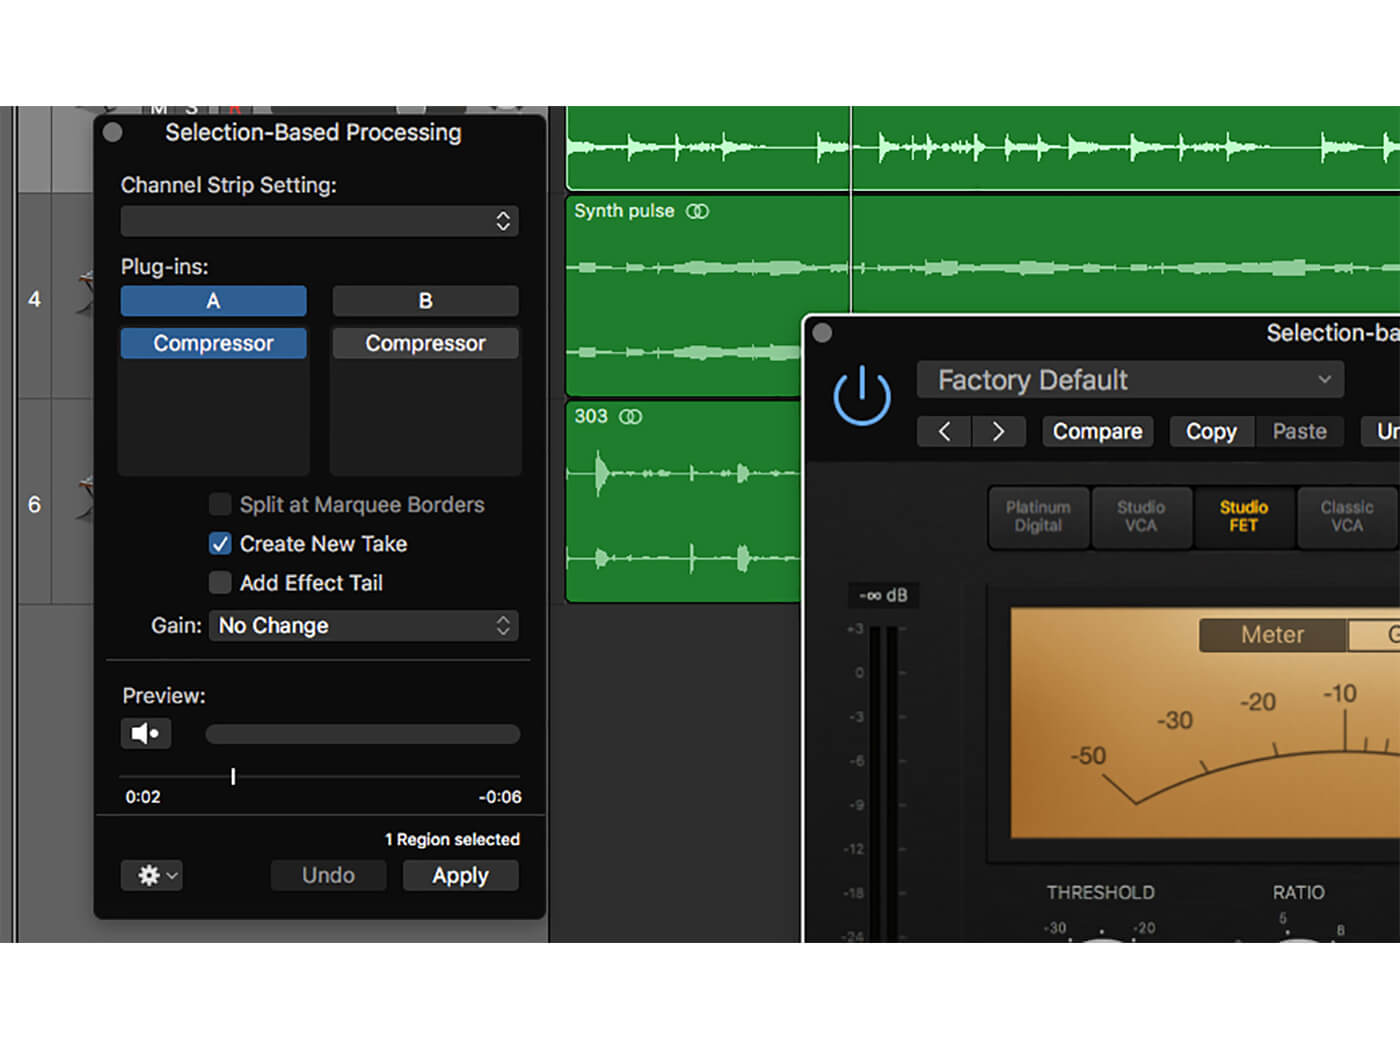
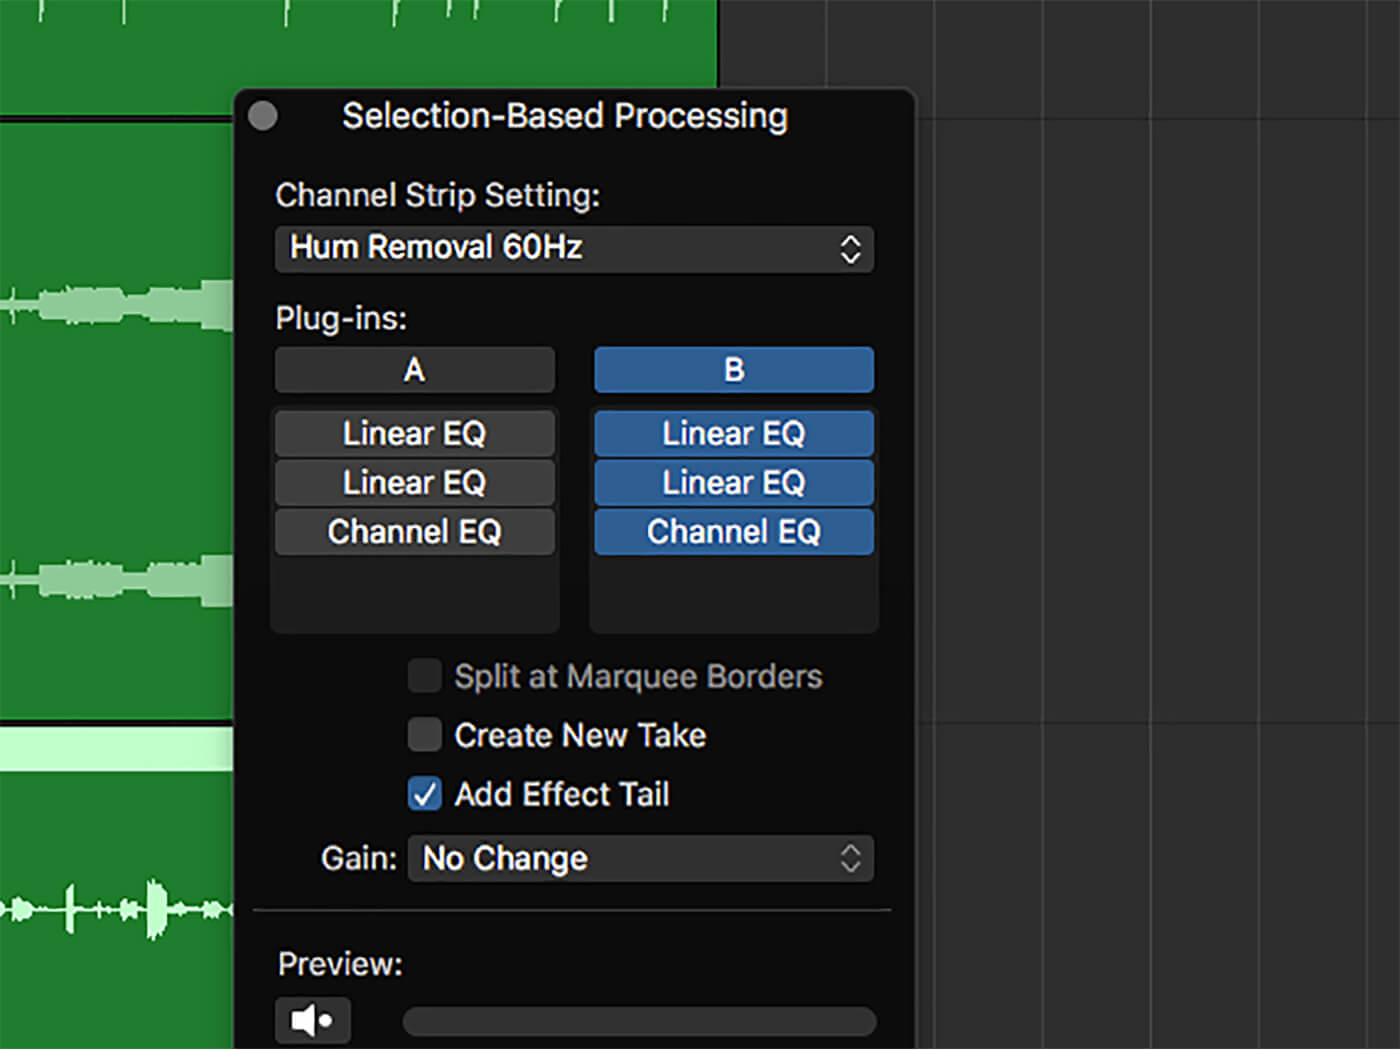
The dialogue box used to apply Selection-Based Processing has a few tricks worth exploring. First off, you can save and recall a series of Channel Strip presets that are unique to Selection-Based Processing. Most of the presets are based on the corrective application of the Selection-Based Processing, but you also find some of the more creative options under the Effects folder. You can also set two different paths – A and B – which can be used to audition two contrasting settings.
Effective decisions
Previewing the processing is essential if you want to avoid any nasty surprises, and of course, you can edit or refine any settings by double-clicking on the appropriate plug-in in the insert path. Use the cog’s drop-down menu to decide whether you hear the processing in isolation (with Solo enabled, in other words), or in the context of the whole mix. When you’ve found the perfect setting, hit Apply and Logic will then render the region with the effects in place.
One final point to note is the application of Time-based effects and how that impacts on the region length. Effects like reverb and delay can generate material that extends beyond the existing region boundaries – especially if you’re a fan of 10-second long reverb tails! By default, the region is extended, unless you tick the checkbox for Add Effect Tail, in which case the region will be extended to match the full duration of the effect.
As you’ll see from the walkthrough, Selection-Based Processing can be a powerful and flexible way of working with audio plug-ins that takes us outside the conventional paradigm of a mixer. Selection-Based Processing is a refreshing way of looking at an otherwise familiar set of tools, and lets you explore a signal processing in a more considered and refined way.
Selection-Based Processing in Logic Pro X: step-by-step
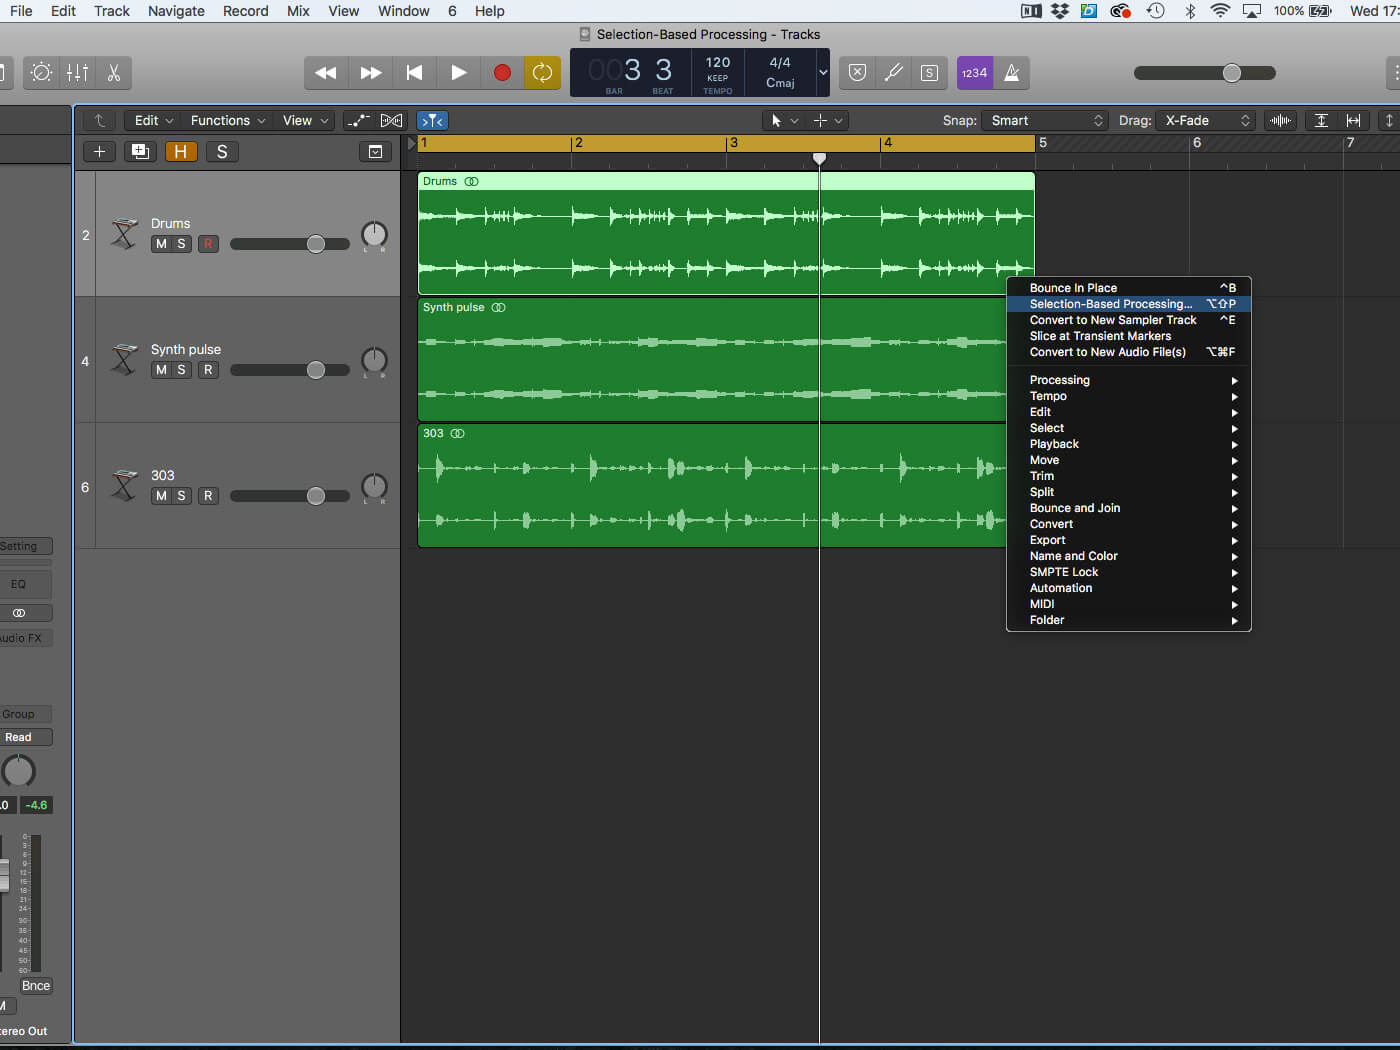
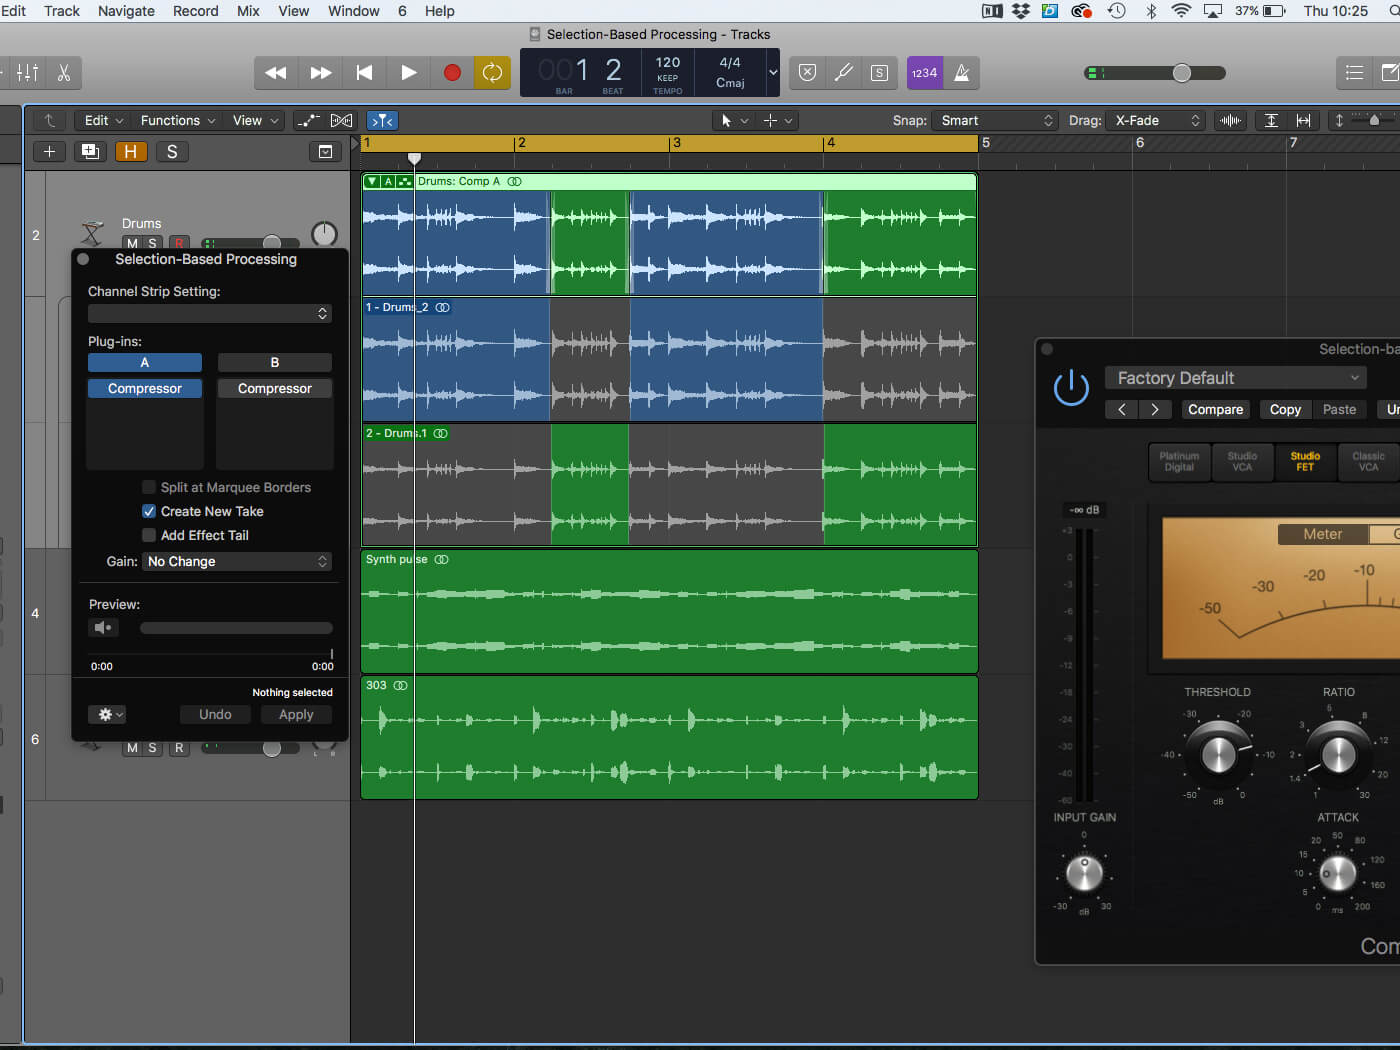
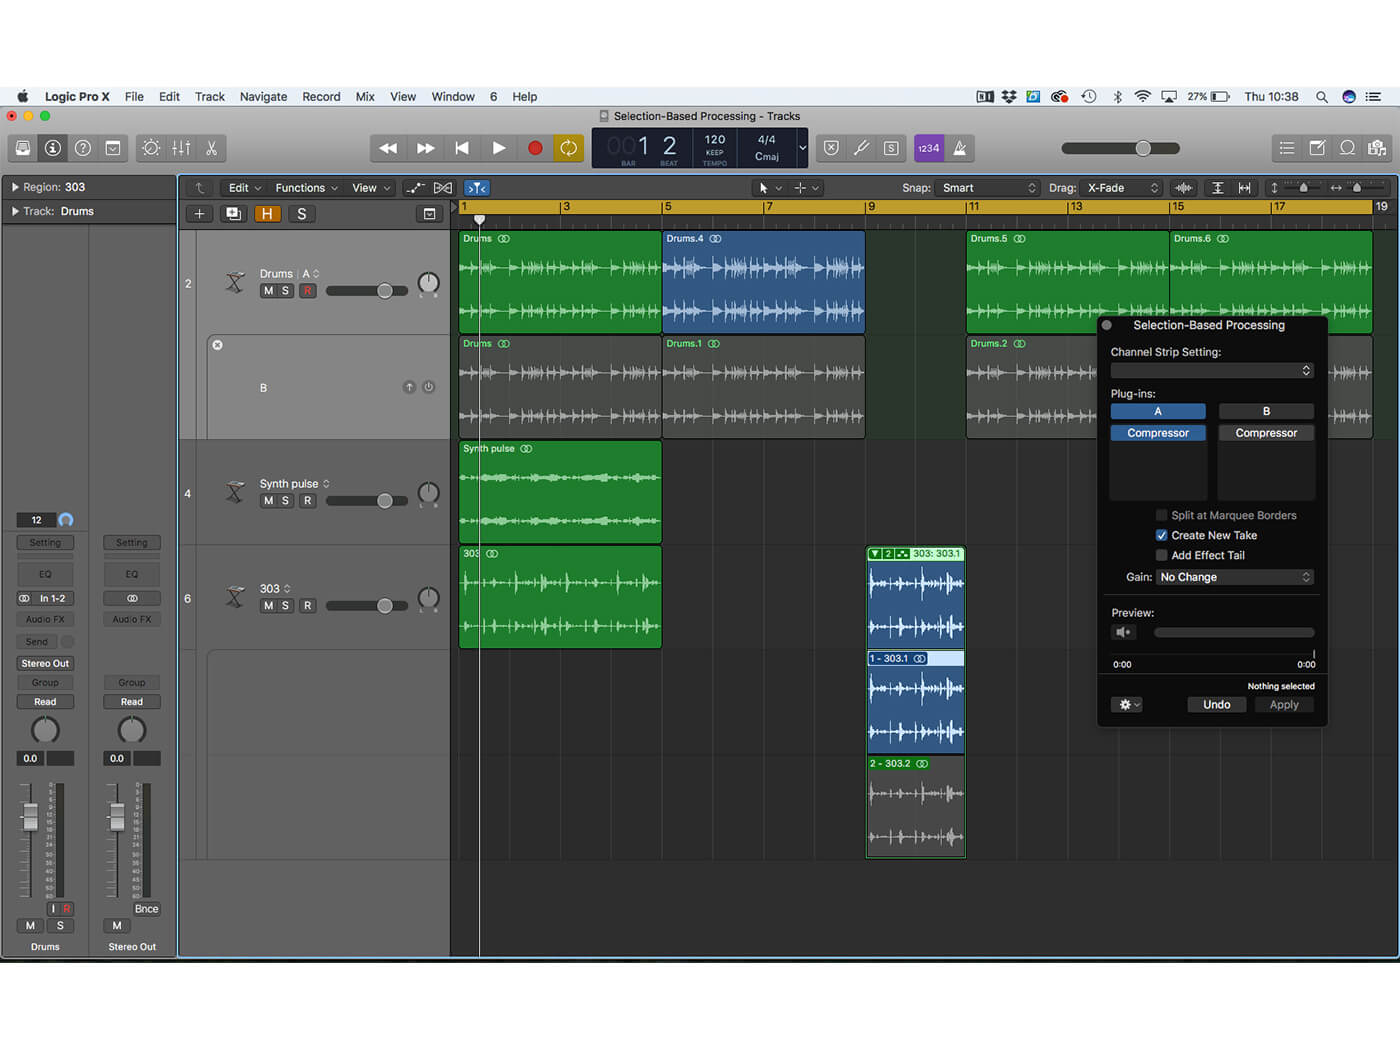
1. Selection-Based processing is either applied to a selected region, or a Marquee selection. Once selected, ctrl+click on the region and select Processing > Selection-Based Processing from the contextual menu.
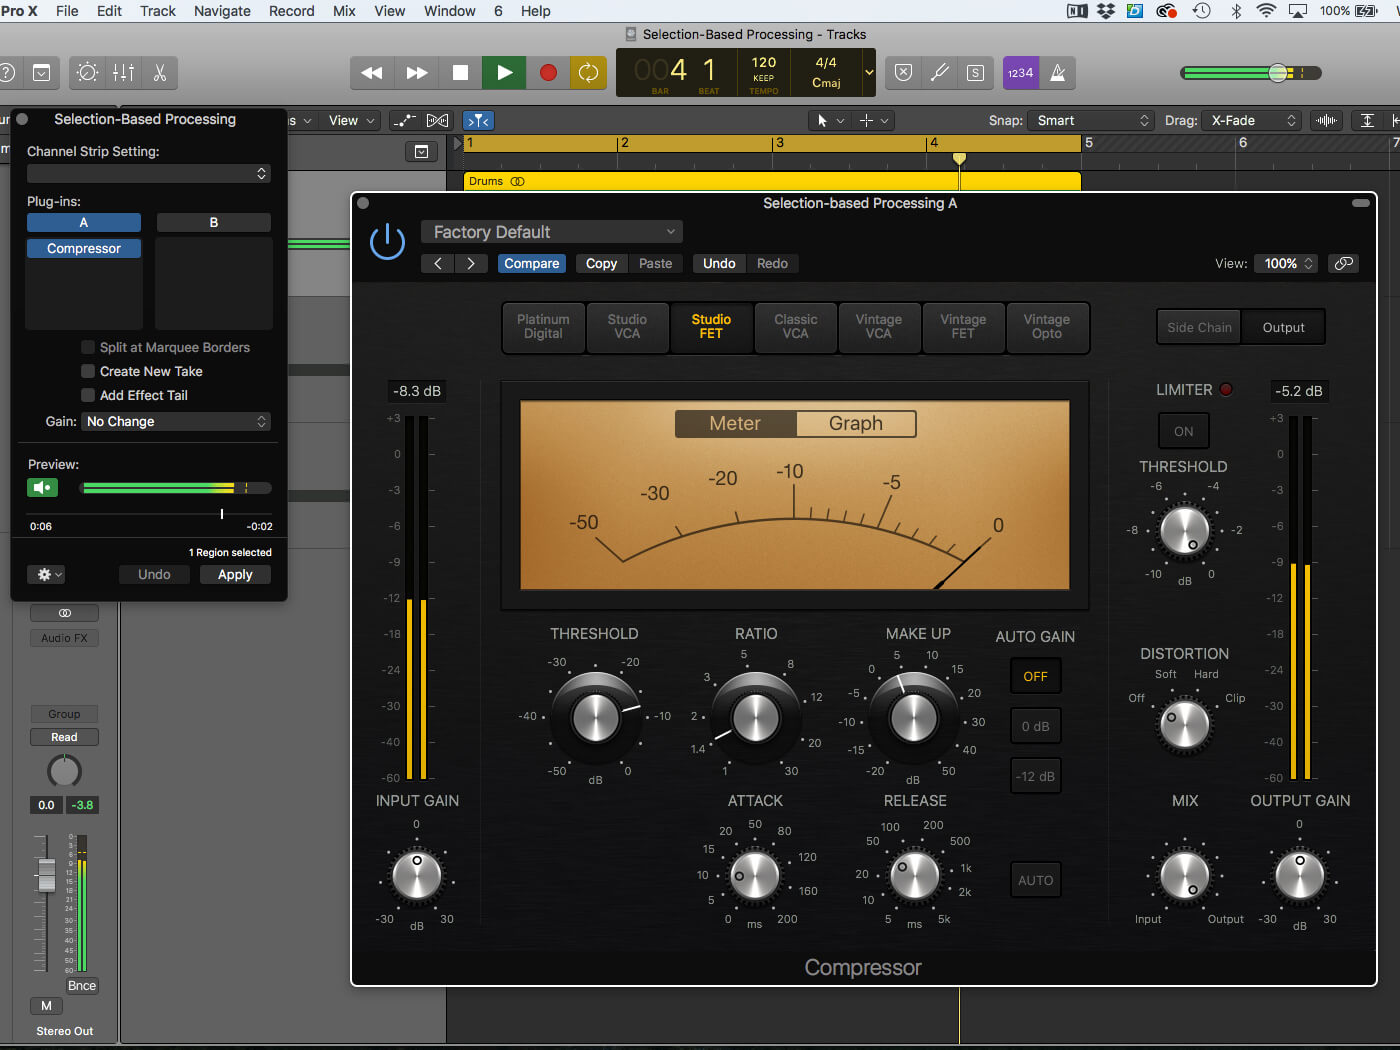
2. Pick the selection of plug-ins you want to apply, instantiating them into the insert slots for Paths A or B. Press the Preview button to hear the effect being applied to the region in question.
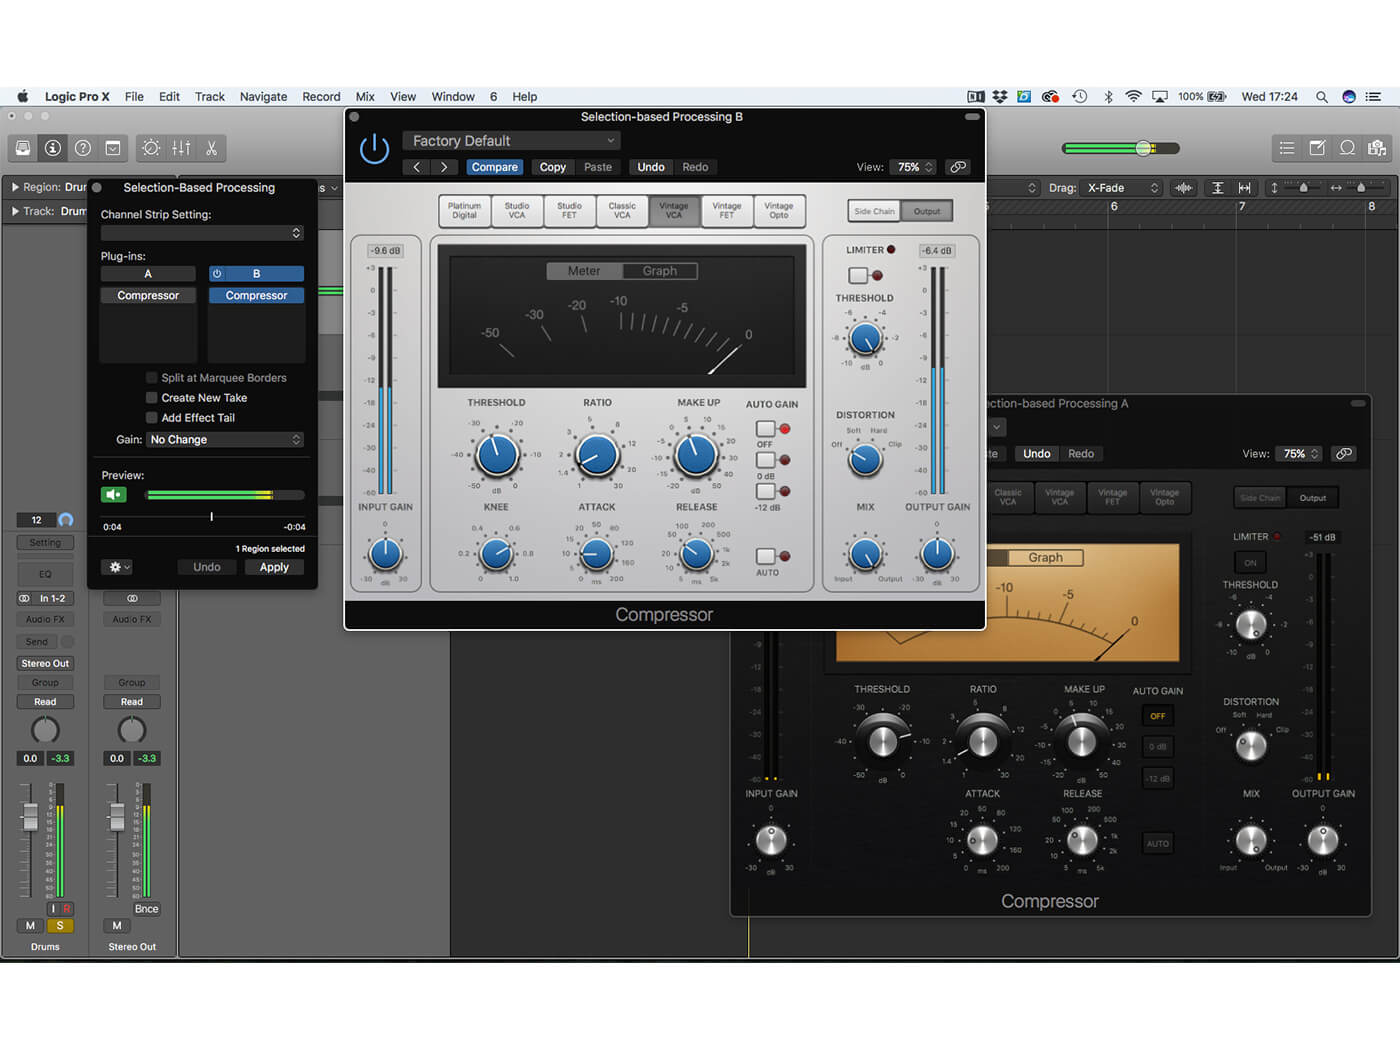
3. You can use the alternative path as a means of comparing and contrasting two different chains of plug-ins. In this case, we’re comparing a Vintage VCA compressor against an FET model to see what sounds best.
4. Press Apply to render the effect. Logic will create a new region from the newly created audio file with the effect printed as audio. At this point, we’ll press Undo and explore some other approaches.
5. One option, as part of the Selection-Based Processing dialogue box, is to press Create New Take when you apply the processing, which then allows you to use the Quick Swipe Comping feature.
6. Here’s the Selection-Based Processing applied as a New Take. This makes it easier to switch between processed and unprocessed versions, even to a point where you can dynamically comp between them.
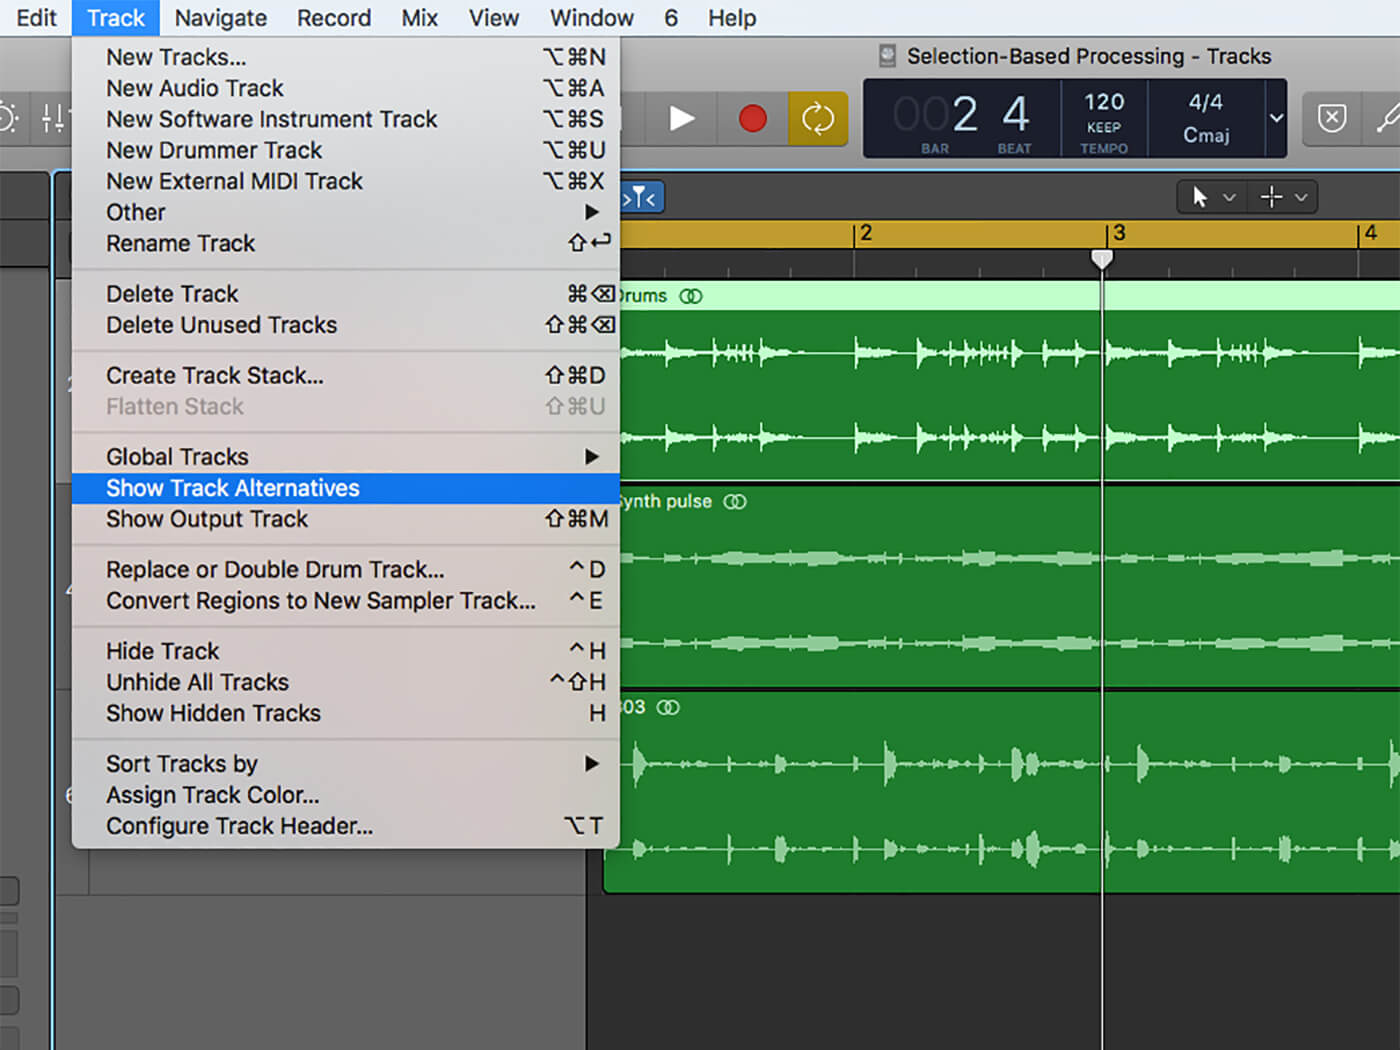
7. Another way of preserving some ability to revert back to unprocessed versions of the region is to use the Track Alternatives feature. To access the feature, go to the View menu and select Show Track Alternatives.
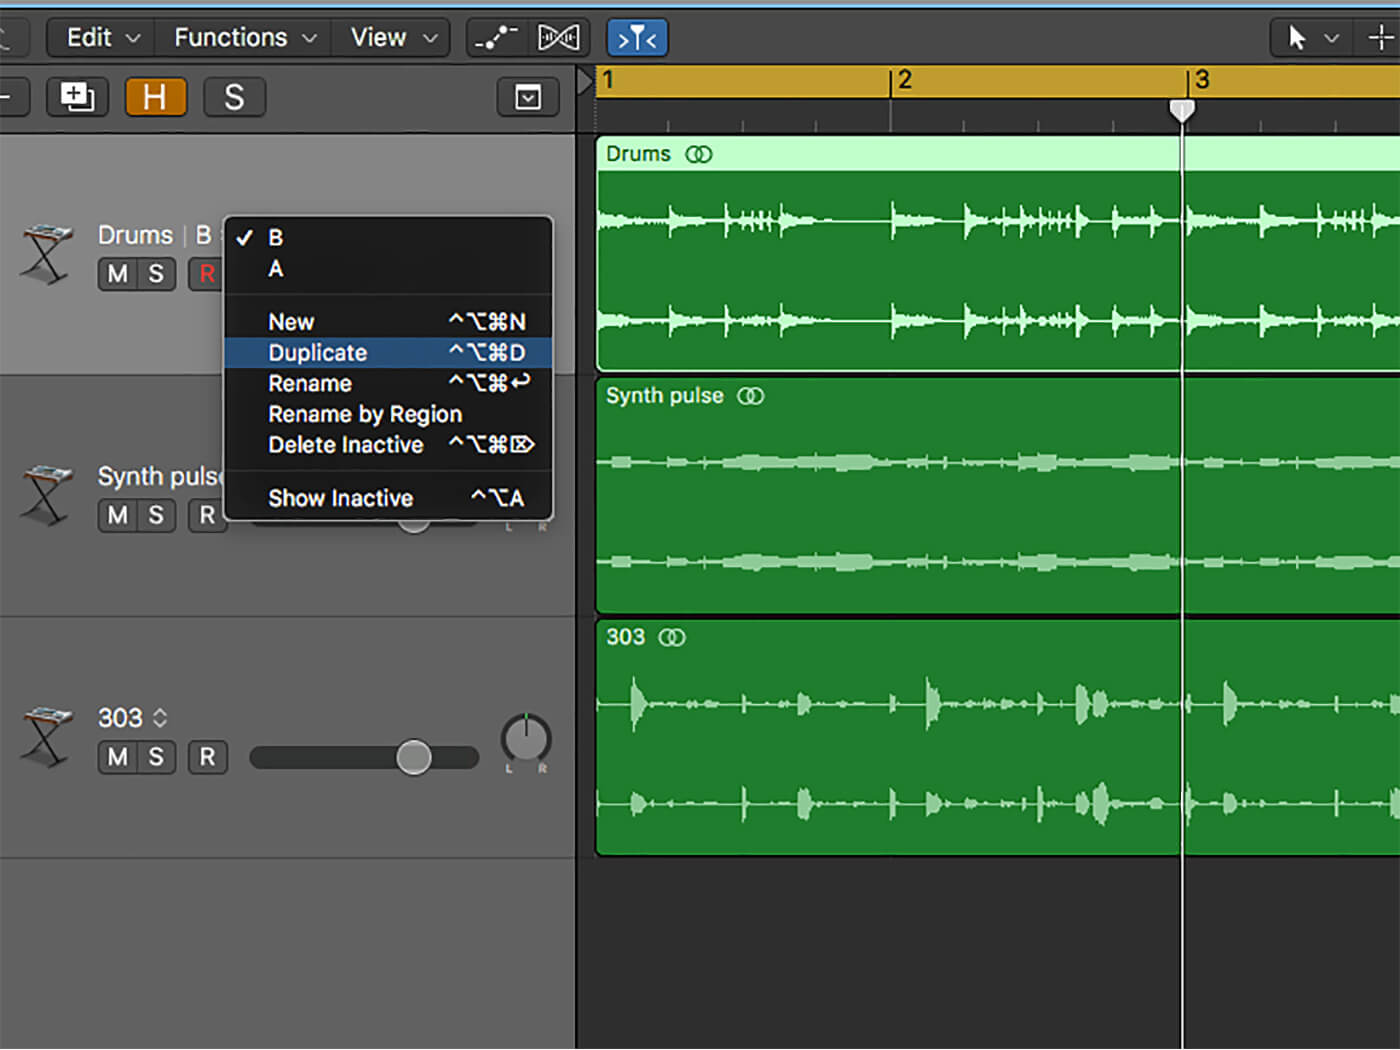
8. Track Alternatives can be selected via the drop-down menu to the side of the Track Name. Creating a Duplicate Track Alternative before you use Selection-Based Processing provides a clear point of return.

9. Press Apply to render the Selection-Based Processing onto the region. You can use the Show Inactive features from the Track Alternatives drop-down menu to see either version accordingly.

GAIN BRAIN The Gain option has some useful level correction options. Normalize can bring the file up to 0dBFS, while Loudness Compensation adjusts the printed audio level based on the perceived loudness change. This is particularly useful when you’re using the Marquee and want to avoid jumps in level from within the region itself.
10. It’s worth making the distinction between Takes and Track Alternatives. Takes are good for specific region-based processing. If you intend to modify multiple regions, the Track Alternatives solution is best.
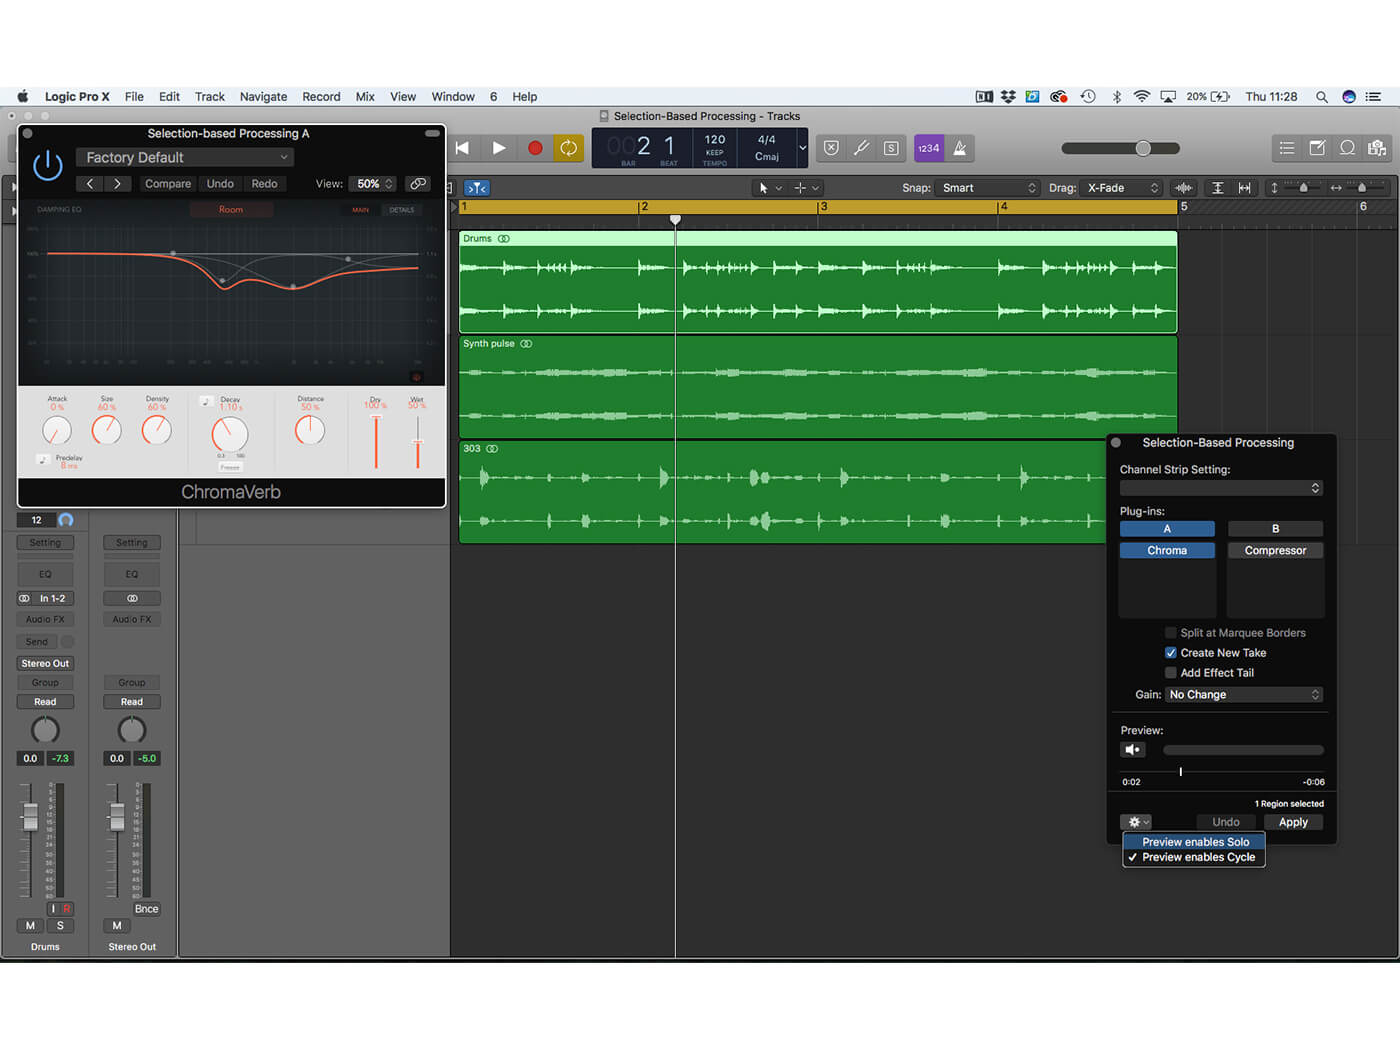
11. By default, the Preview works in Solo mode, but you might want to hear the effect in context. Under the cog menu, therefore, uncheck ‘Preview enables Solo’ to hear the region with the rest of the track.
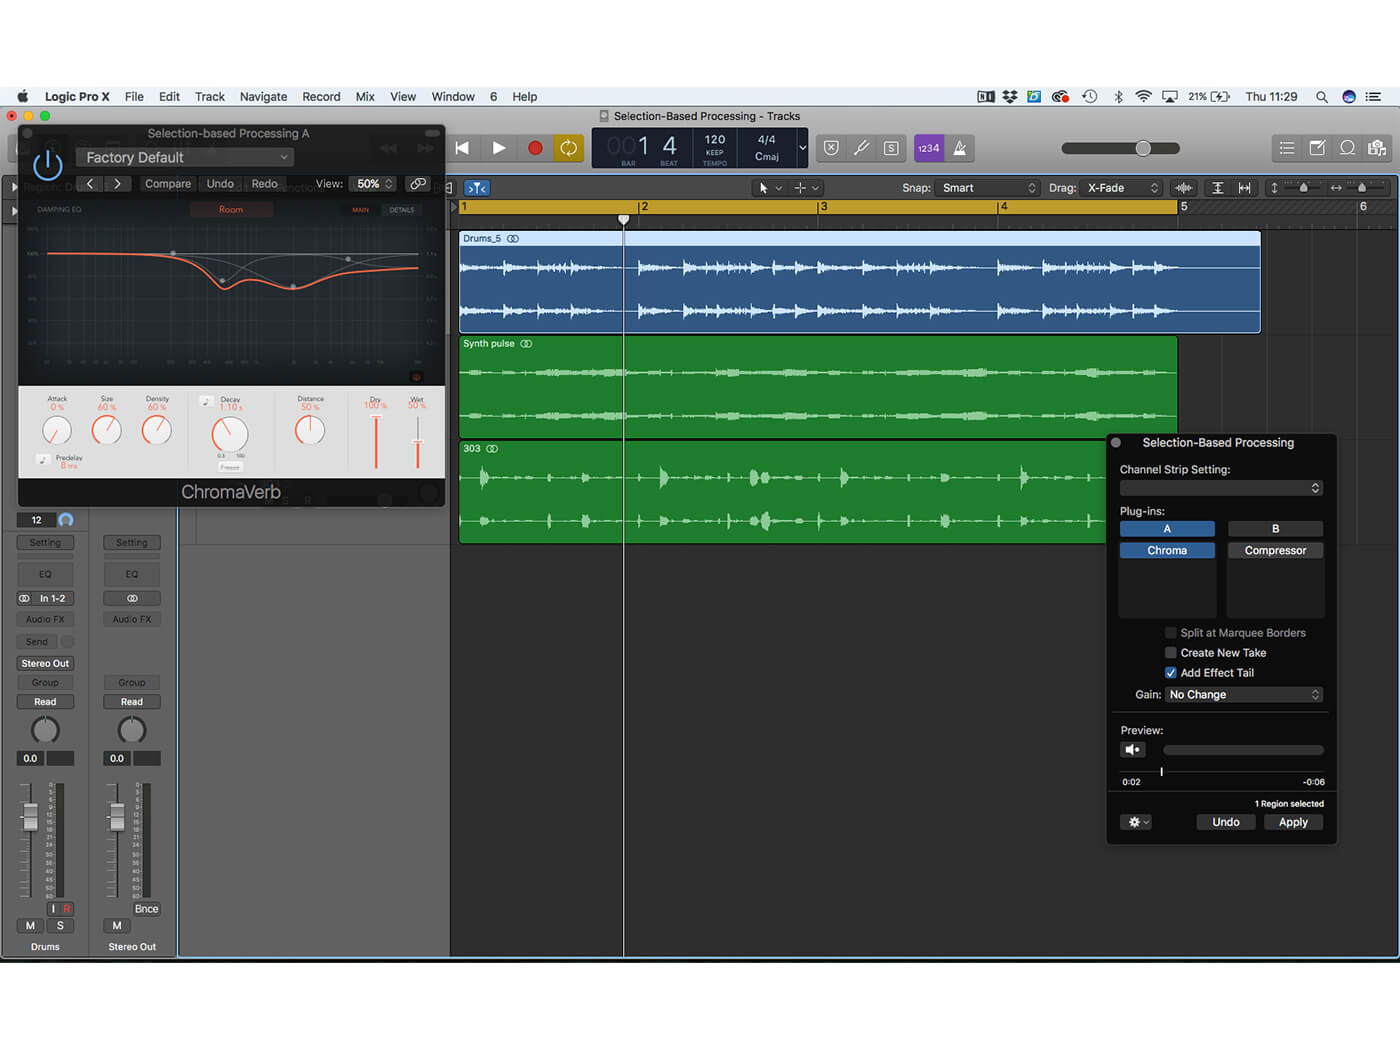
12. Consider using the Add Effect Tail option when processing with time-based effects like Reverb. This might have a knock-on effect, though, with any regions that are placed after the one you’re processing.
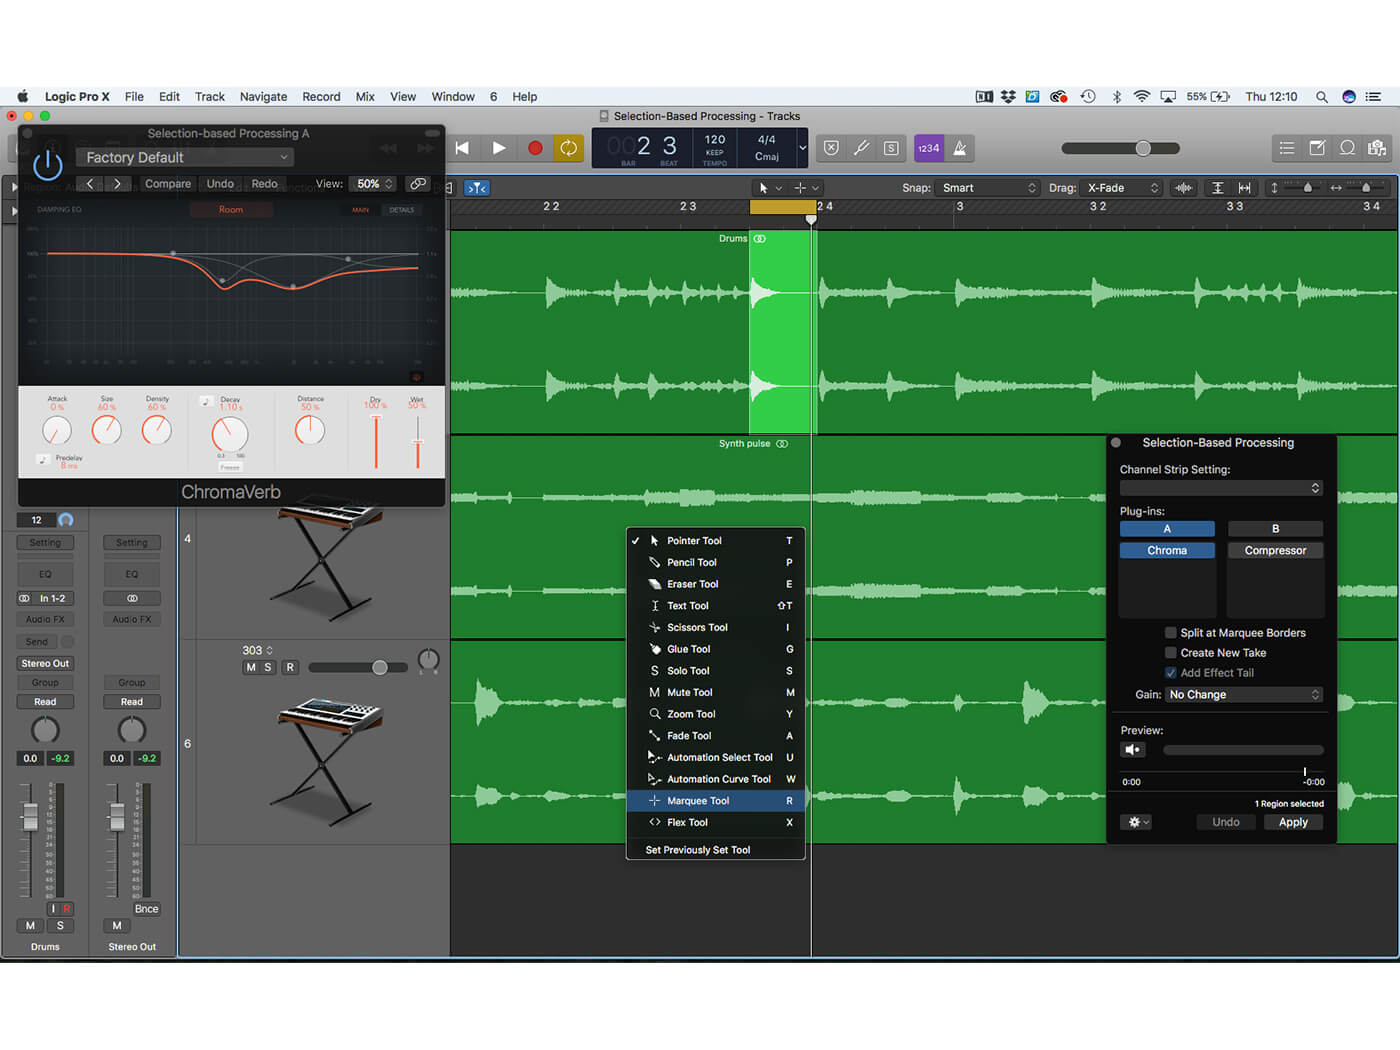
13. The Selection-Based Processing can even be selective about information within a region, assuming you use the Marquee tool. In this example, we’ve just selected a single beat (on a snare hit) from the drum loop.
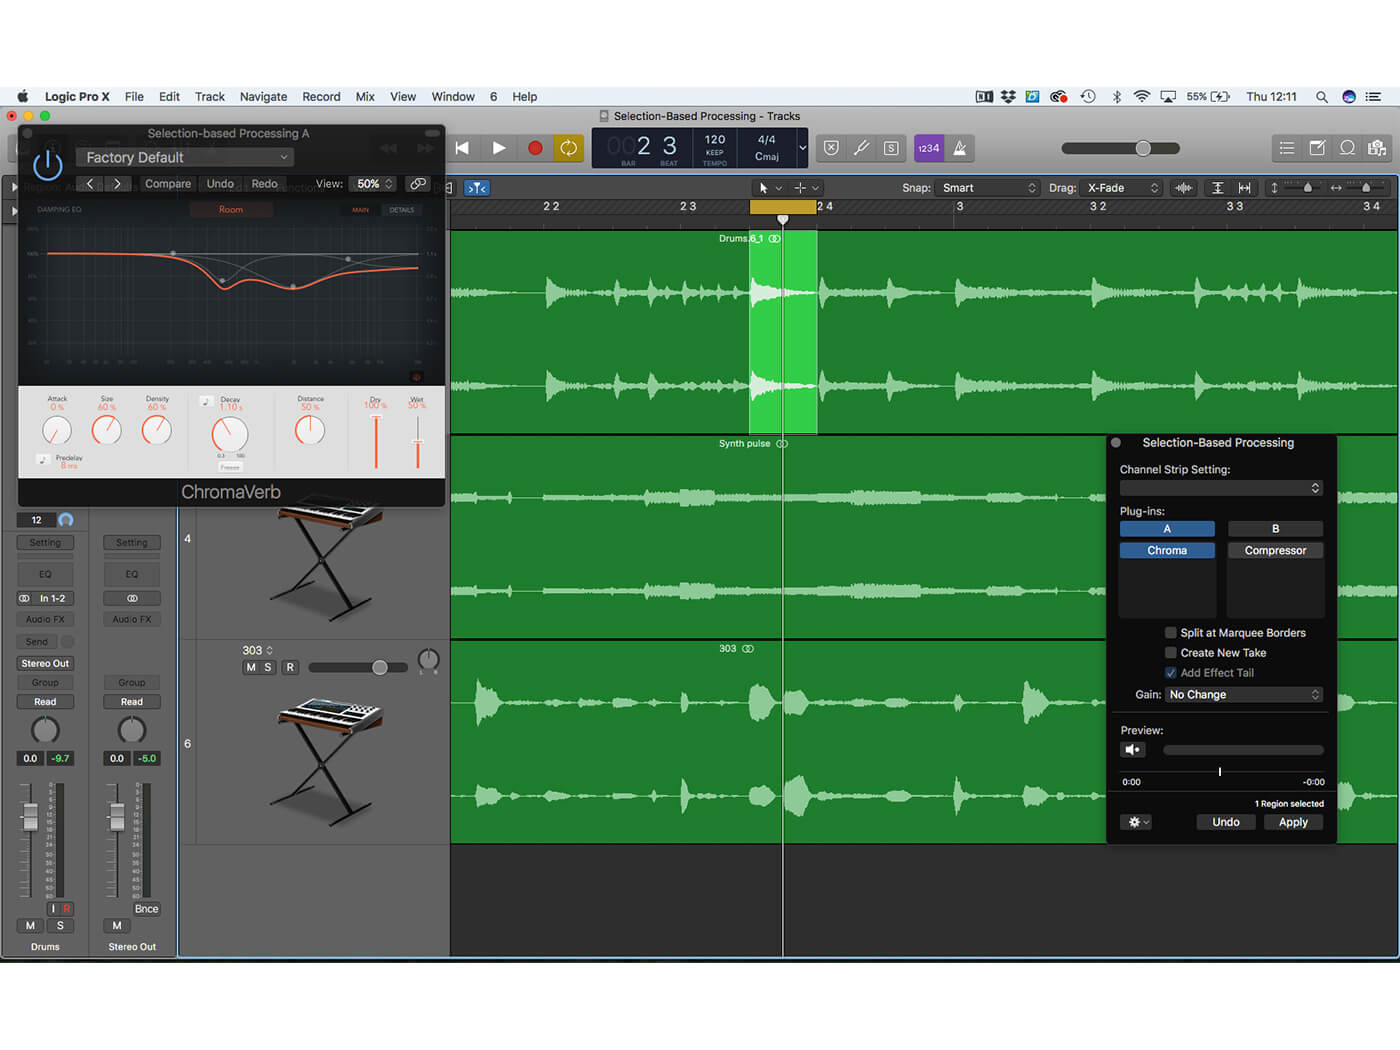
14. In this example we’re applying Reverb specific to the snare. Once applied, you’ll notice the waveform change to show the added reverb, although the tail will be attenuated immediately after the Marque selection.

15. To preserve some flexibility, consider using the Split and Marquee Borders option. This will split the region, inserting the new audio file within the original region, making it easy to recall the unprocessed version later on.
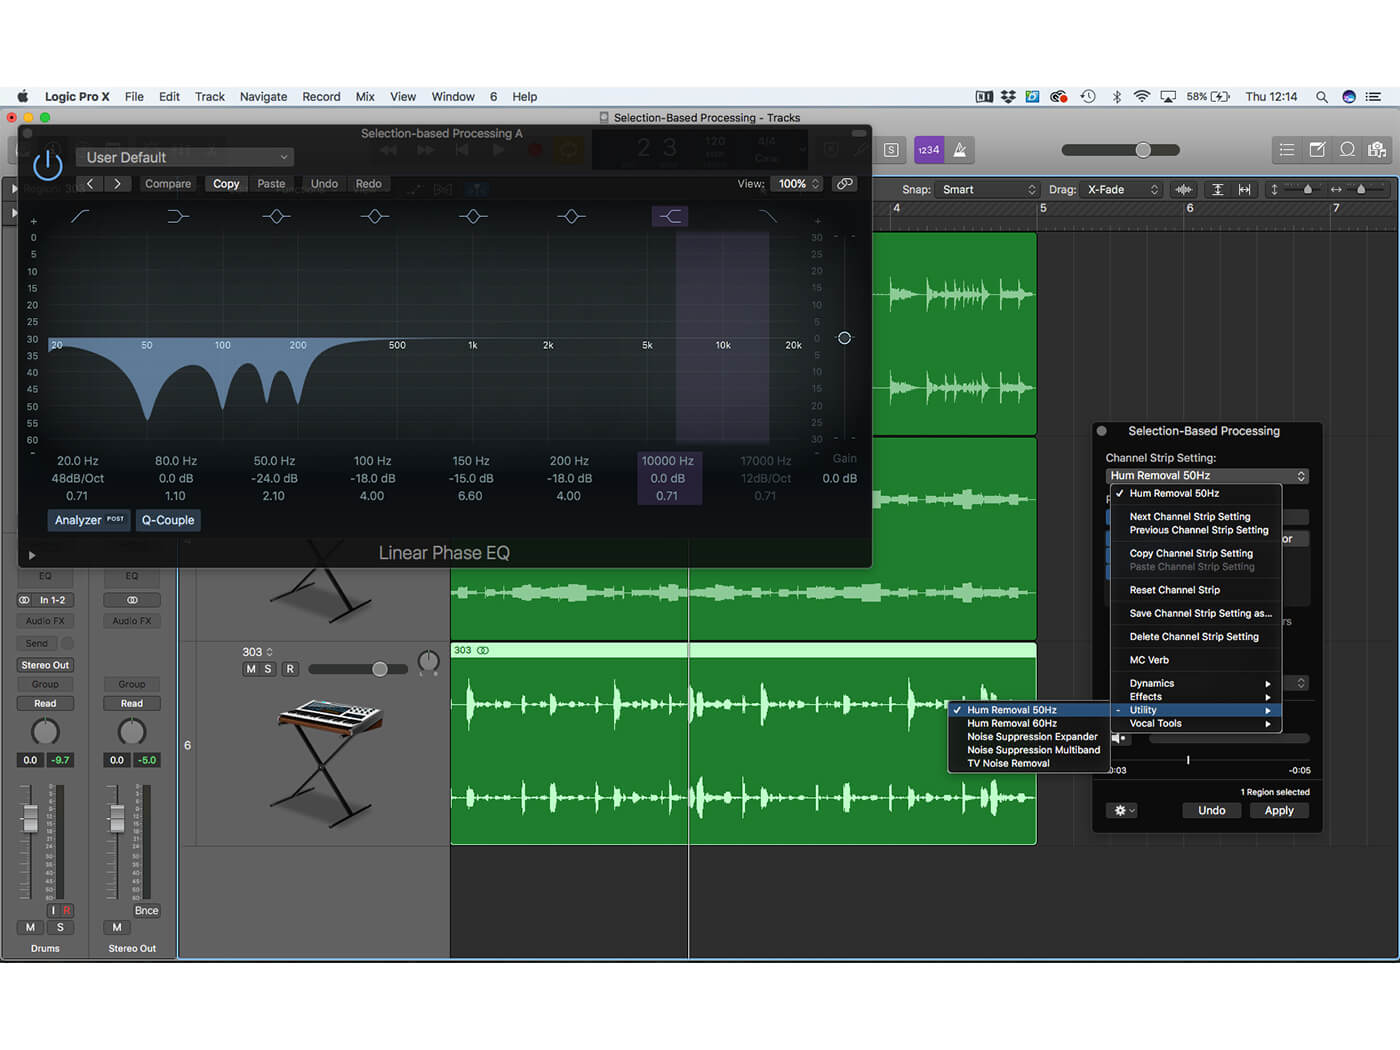
16. The Channel Strip Setting menu at the top of the dialogue box offers a number of useful Utility options, like Hum Removal and Noise Suppression. The corrective tools are often best applied selectively to the audio.
17. The settings are loaded into the respective slots – A and B – depending on what option you’ve currently selected. This makes it easy to compare between Hum Removal at two frequencies, for example.
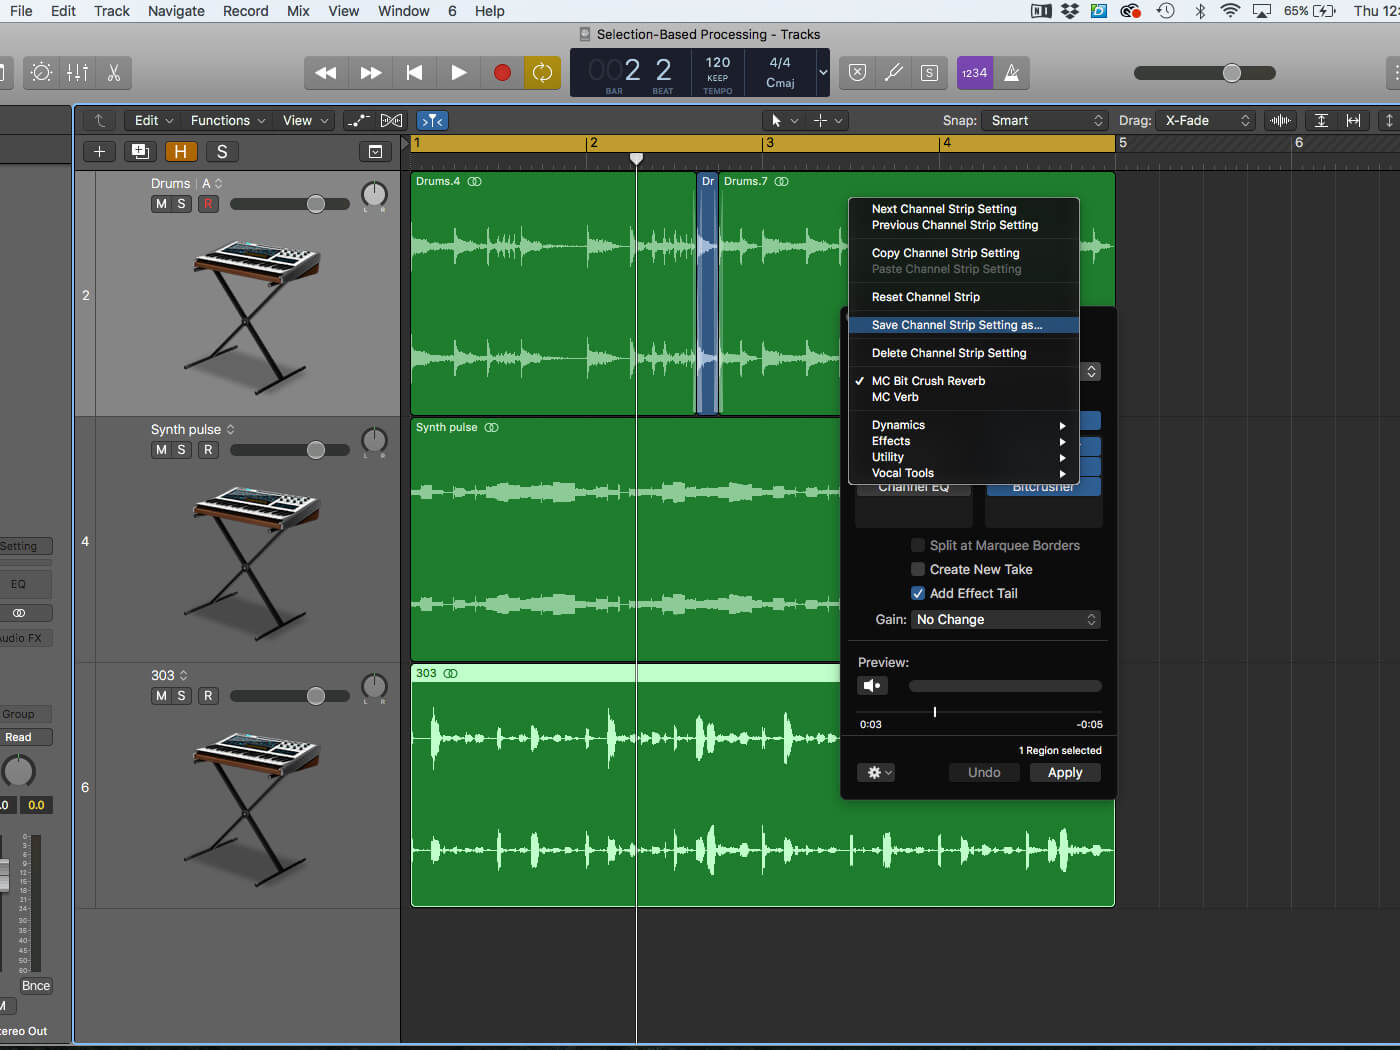
18. Settings that you use regularly can be saved as part of the Channel Strip Settings. These are separate to the Channel Strip Settings in the mixer and are unique to the Selection-Based Processing feature.
For more Logic tutorials and workshops, check here.