Logic Tutorial: Creative Synthesis In Logic Pro X
Logic Pro X comes bundled with more instruments than any other DAW. You can just use their presets, of course, but spend a little time getting to know them can reap rewards… For the money, there is no doubt that no other DAW on the market comes close to Logic Pro X in terms of […]
Logic Pro X comes bundled with more instruments than any other DAW. You can just use their presets, of course, but spend a little time getting to know them can reap rewards…
For the money, there is no doubt that no other DAW on the market comes close to Logic Pro X in terms of what you get bundled with the software. The number of instruments you get with it is simply phenomenal and you will spend an age downloading the additional sample and loop content. In short Apple wants you to have everything you need to create music in any genre (and arguably sell it to you at such a low cost that you buy into the company’s hardware – but that’s an article for another day!).
There’s a good argument to say that you could simply just get in there and start making music using the thousands of preset sounds on offer and why not? That is what they are there for after all… There are many people who have produced many tracks with Logic presets all over them and Apple loops have found their way into many an album track and single so who are we to say ‘don’t use them’? But, as ever, if there is a ‘proper way’ of doing something it is probably balancing using what’s on offer with a little (or a lot) of your own input.
And that means getting to know the instruments within Logic a little more and gaining the confidence to either produce your own sounds from scratch or tweaking the existing ones either dramatically or subtly to create something that you can quite easily call your own. And that is what we are going to do here.
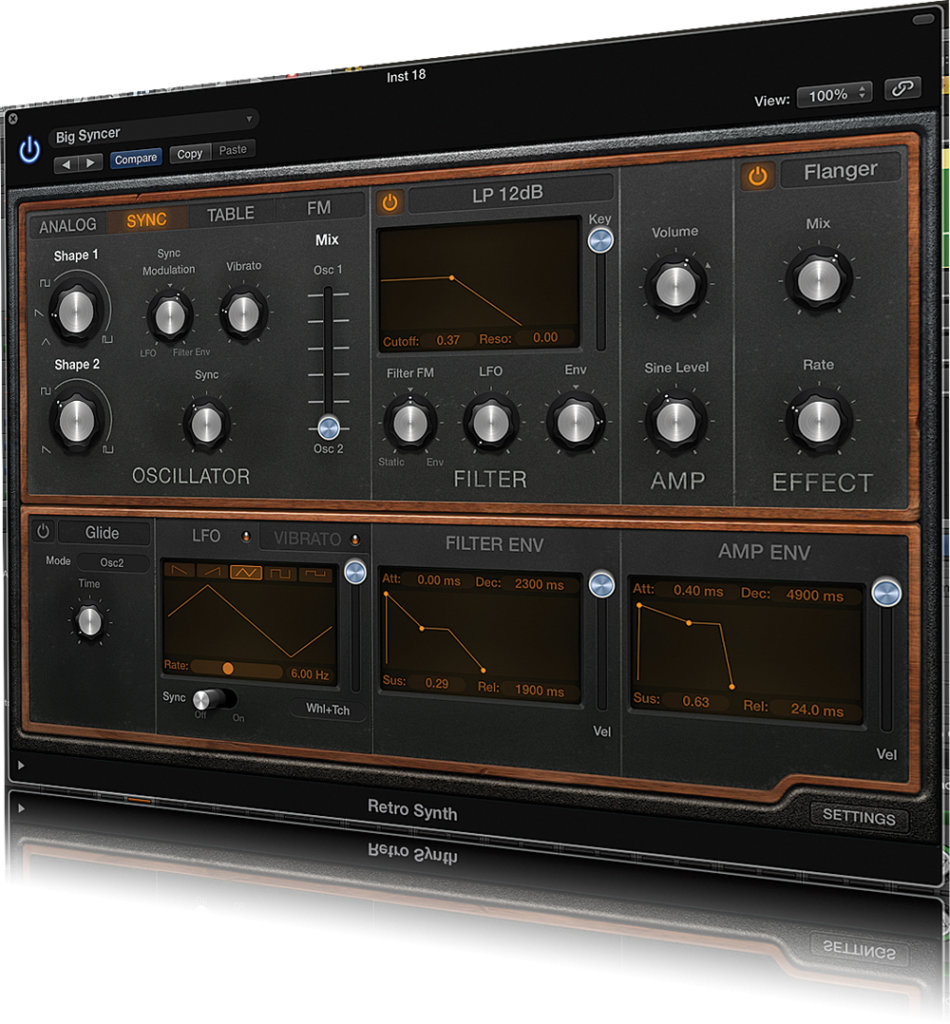
We’ll concentrate on the synth side of Logic because it is so well endowed in that department, and the bulk of the tutorials will be on Retro synth because that is the newest of the additions (see box opposite for more on the rest) although we will look at updating the sounds of one of the ES range in the final step-by-step tutorial.
Easier Than you Might Think
Before you shy away from this thinking you need a degree in synthesis to understand what is going on, don’t! Because you don’t! A simple understanding of signal flow is all you need. The building blocks of basic analogue synthesis are that you always start with a signal generated by one or more oscillators. This might be a sine, square or sawtooth waveform, usually something fairly simple. This is then filtered by frequency to give some bass or treble characteristics.
It is then modulated to give it more character with perhaps a low frequency oscillator adding movement or a sub bass oscillator adding depth and bass. An Amp envelope equates to how the sound comes in and out i.e. its volume characteristics (the attacks, decay, sustain and release parameters). And that is basically it!
Of course there are a lot of different synths that add a lot more to it than that. Some ‘analogue’ types might have seven different oscillators, for example, or allow a gazillion different modulations so you can take the output of an LFO and apply it to the resonance of the filter (basically in software synths you can do take any sonic parameter and apply it to any other).

And that is just analogue synthesis. With more digital based synths you don’t just start with analogue waveforms, you can have digital waveforms or samples that enter the signal flow for all sorts of fun. And FM synthesis is a whole new ball game which we will touch upon with Retro synth but not get in too deep for fear of drowning.
So armed with just that fairly basic knowledge you should easily be able to understand what we’re doing with each sound in each workshop. We’ll start with a punchy bass sound which will demonstrate not only the importance of the core ingredients of the sound, the oscillators, but also how important the filter is in shaping the punch and EQ of the sound (actually vital in this case). It will also demonstrate how the amplitude envelope can help add weight in terms of punch i.e. how quickly the sound comes in and how this, in turn also adds to the sound’s character.
Next we show you how to fatten up existing sounds. While Retro Synth is good it does have the odd surprisingly weak sound. In this case we’re using up one called Simple Analog Lead to show you how simple sounds can be beefed up. We use a combination of detuning (which is a common way of distinguishing oscillators from one another) and envelope shaping (which adds a surprisingly dramatic change to the sound). We’re also lucky that Retro Synth comes with built-in effects as a helping of chorus at the end fattens things up although this feels a little like cheating and we like to think that our programming has already fattened the sound up a lot by this stage!
In the third walkthrough we take a couple of the principles picked up already and take them up a notch. We use another pretty basic preset, Bright Cycle, and apply the oscillator fattening technique and also some filter envelope tweaking to show you how to get a buzzing sound without resorting to too much filter changing. But the big drama here comes with how the Amp Envelope can be used to dramatically change a sound’s character, adding its own effect, and a very useful option if your synth doesn’t come with built-in effects. Once again this shows how a little knowledge can really lift your existing presets.
In the fourth tutorial (below) we show how bringing in the LFO can add movement to a relatively low key preset. As good as Fifth Sequence is, there’s no denying that adding a bit of delay and drama will lift it and that’s what we can do by bringing the LFO in, applying it to some of the filter parameters but reigning it all in with the LFO synth and lowering its rate. This introduces some delay effect and added interest. We then increase the decay and release times and suddenly another of Retro Synth’s presets have been lifted.
By this time you’ll wonder why you can’t apply these simple principles to all synths to breathe new life into their sounds. The answer is: now you can!
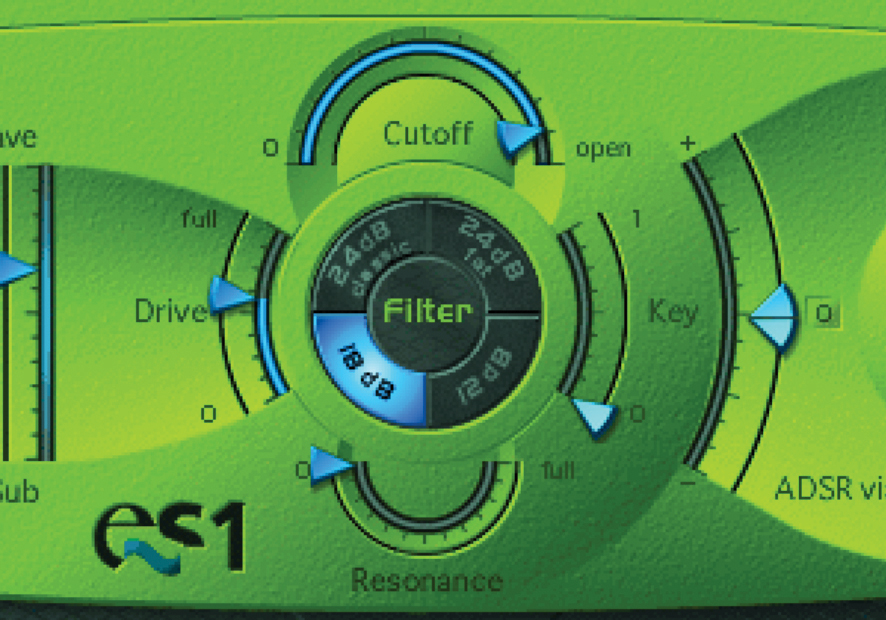
Finally we look at the classic ES1 synth. While we said we’d stick mostly to Logic Pro X’s new Retro Synth, there’s no harm in looking at one of Logic’s older synths to see if we can update its sound too. This time we’re taking a fairly tired string sound and turning it into a fatter lead.
Firstly we use ES1’s Drive and Filter cutoff parameters but then return to the Envelope shape to add punch and depth with more of a delay effect added at the end. The sound quickly moves from a fairly bland string sound to a cutting lead with the turn of just a couple of dials.
We hope that by now you realize just how easy it is to get in to your soft synths and improve the preset sounds with some basic knowledge and editing. And these principles can be applied to any synth, not just those with Logic! There’s no need to put up with tired presets as with a few parameter changes and edits you can become a synth programmer.
Focus On The New
Logic comes with many, many instruments – more so than many DAWs ��– and the ES range of synths has been with the software for years. In this tutorial, though, we’ll concentrate on the newer Retro Synth that comes with the latest version of the software.
That’s not to say that ES1 and the like should be discarded. While some of their sounds are starting to pale a little and their futuristic fascias are perhaps looking a little less futuristic, many of their sounds do cut it so don’t ignore them.
We particularly like some of the sounds with added movement but most of the step by step workshops over the following pages will focus on Retro Synth although we will look at updating ES1’s sound in the final tutorial.
Click Here to Read ‘Add Punch To Bass’
Click Here to Read ‘Fattening up a Lead Sound’
Click Here to Read ‘Using The Envelope as an Effect’
Click Here to Read ‘Adding Movement to a Preset with the LFO‘
Click Here to Read ‘Updating ES1’s Sound’
