How to get a lo-fi sound using Phat FX in Logic Pro X
Logic Pro X’s Phat FX brings together a range of lo-fi, body-enhancing treatments in one plug-in. Mark Cousins explores the grungier side of signal processing… When it comes to lo-fi treatments, there’s a collection of effects that sit well together: filtering, distortion and compression. Getting that perfect ‘gritty’ drum loop, for example, often includes a […]
Logic Pro X’s Phat FX brings together a range of lo-fi, body-enhancing treatments in one plug-in. Mark Cousins explores the grungier side of signal processing…

When it comes to lo-fi treatments, there’s a collection of effects that sit well together: filtering, distortion and compression. Getting that perfect ‘gritty’ drum loop, for example, often includes a dynamic combination of these effects, so that a drum loop is overdriven, then compressed before finally being filtered.
Logic Pro X’s new Phat FX plug-in is arguably the perfect choice for this application, combining numerous lo-fi treatments in the one plug-in. With a flexible signal path and additional modulation options, it could become a one-stop-shop for interesting and unusual signal processing treatment.
Full Phat
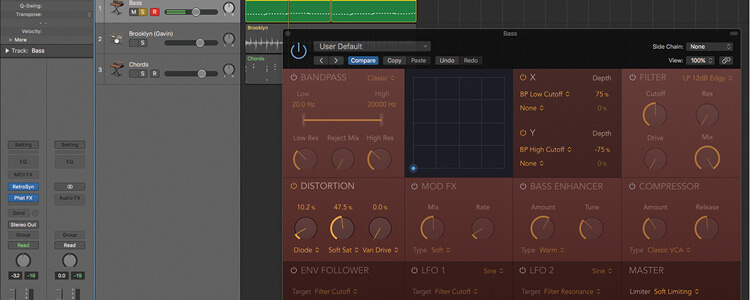
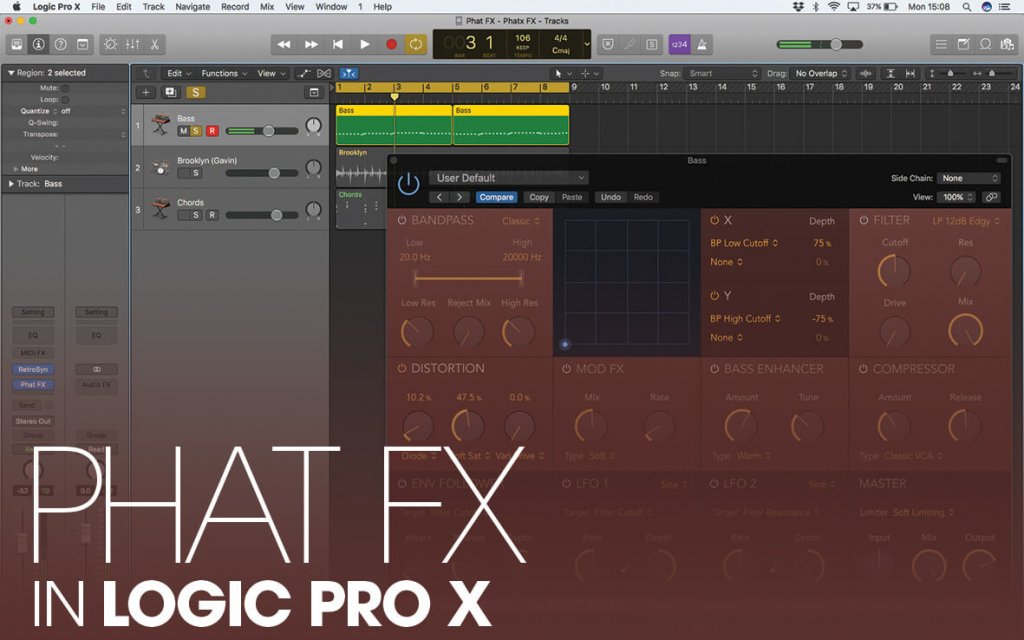
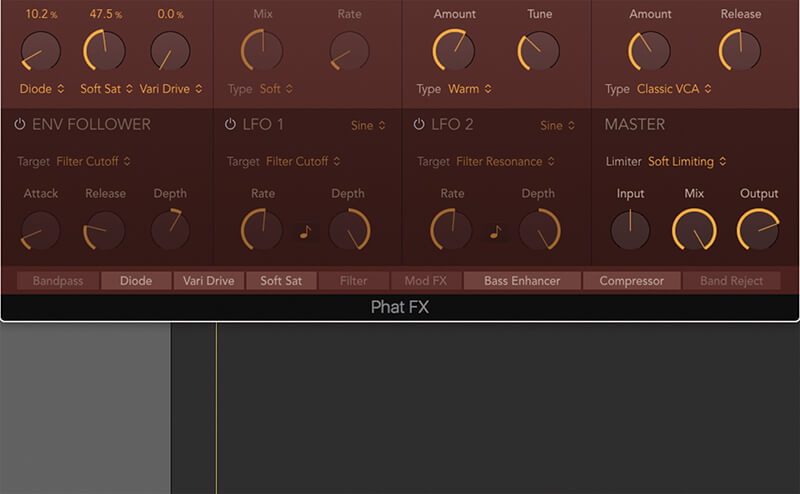
The list of signal processing options included in Phat FX should be familiar to anyone using Logic Pro X. Indeed, they arguably replicate the sound and performance of many existing singular plug-ins. At the top of the interface are two forms of timbral modification – a simple band-pass filter as well as additional multimode filter.
The band-pass effect is, of course, a quick and easy way of trimming either end of the frequency spectrum, leaving a narrow frequency, mid-range effect like a telephone line. The multi-mode filter is a more complex beast with multiple different strengths and types of filter, as well as more esoteric options like ring mod, downsampling and comb filtering.
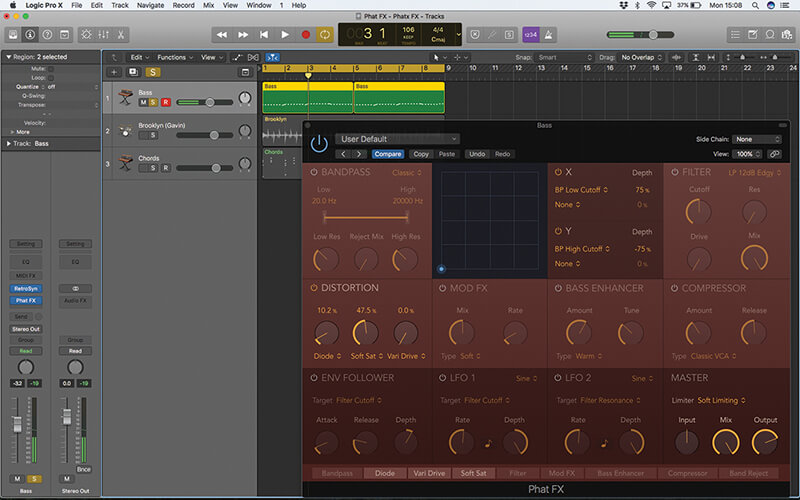
Below the filtering options you’ll find a chain of effects blocks covering distortion, mod FX (or chorus, in other words), a bass enhancer and a compressor. The key concept to grasp here – which is evident from the chain of effects block at the bottom of the interface – is that each component forms a distinct part in a long chain of effects.
Rather than being a fixed entity, you have complete control over the precise order of the effects – so that a signal could be compressed before it’s distorted or a filtered signal could have additional distortion. You’ll also notice that the distortion block appears at three separate points, making it closer to three separate effects blocks.
Special FX
The key concept of Phat FX’s use is the ordering and interaction of the effects blocks it offers. Consider the difference between band-pass placed before or after a heavy-handed distortion. With band-pass as the first effect, the distortion adds harmonics to material that already has a restricted frequency range, effectively becoming a more ‘characterful’ version of the band-pass effect.
With the band-pass after the distortion, the rich additional harmonics added by the distortion (across the full audio spectrum) are then narrowed by the band-pass, making it sound like a ‘muted’ distortion. Rather than providing lots of detailed controls, each of the effects blocks provides just a simplified control set with just the key parameters on display.
Compression, for example, is boiled down to two main controls (amount and release), with an additional type control to move between different compressor designs. The three different distortions have a selectable type (covering everything from analogue-like saturation effects to digital grunge) combined with a simple percentage amount control. Ultimately, these effects aren’t meant to be subtle, so there’s little use in having detailed controls.
Modulator madness
Towards the bottom of Phat FX’s interface you’ll find a series of modulation options that can be used to add movement to your effects. First of these is an envelope follower, which dynamically tracks the amplitude of the input and outputs a control voltage to modulate a range of effect parameters.
The obvious choice here is to use the envelope follower to modulate filter cutoff (especially good on drums), although you can also achieve interesting results modulating the amount of distortion. It’s worth noting that Phat FX’s side chain input can be used to drive the envelope follower, which opens the possibility of using other instruments and audio tracks as modulation sources.
The two LFOs are the next modulators, which can be used to provide gentle undulating movements, or precise tempo-locked pulsation. A variety of different waveshapes are provided, including Ramp Up and Down, as well as two forms of random movement that work well for sequencer-like movement. With two LFOs to play with, as well as some esoteric filter modes, there’s an argument that Phat FX trumps AutoFilter’s feature set, so is worth exploring simply as a form of filtering plug-in.
The final stage of Phat FX is its Master section, which includes a limiter alongside conventional input and output levels. Given the unpredictable signal levels that can be delivered by elements like distortion and compression, it makes sense to include a limiter, although you can always choose to push it harder as a creative effect.
Despite Phat FX ‘borrowing’ from Logic’s other plug-ins, there’s a lot to be said for the immediacy of this all-in-one solution. Given the extra functionality of the modulators, Phat FX can go above and beyond what the individual plug-ins can offer.
Phat FX: step-by-step
1. On the Bass, open the Phat FX plug-in and enable the Distortion block. Select Diode and Soft Saturation as the first two types. Use a small amount of Diode (10%), and a more extreme Soft Saturation, around 50%.
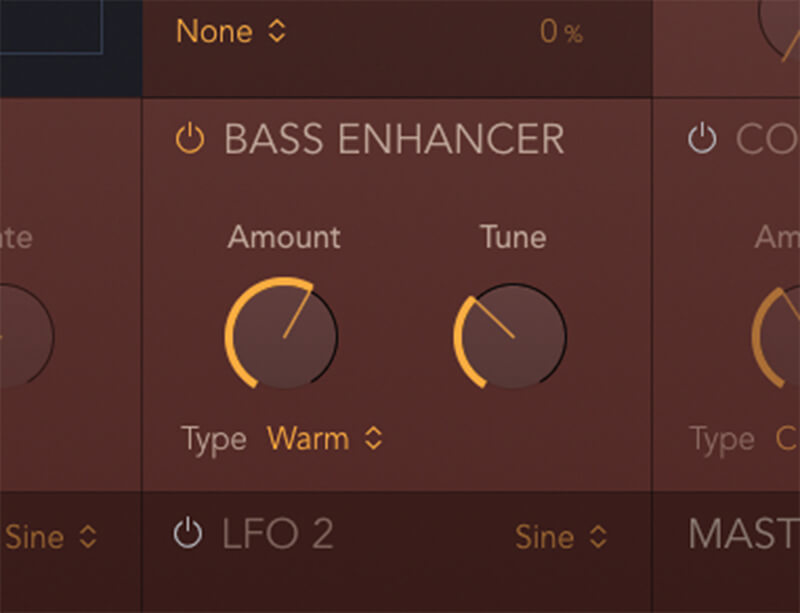
2. The Bass Enhancer is a good way of increasing the low-frequency energy. Use the Tune control to position the effect (around 72Hz, in this case) and increase the Amount to create the desired level of low-frequency enhancement.
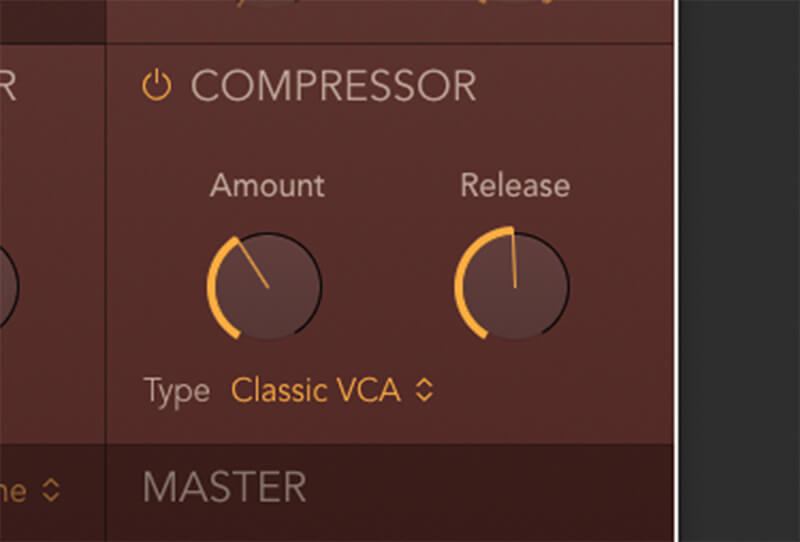
3. Now add some bass compression. The Compressor has a relatively simple control set. We’ve selected Classic VCA for the type, set the Amount to -4dB and Release to 150ms, increasing the body and sustain of the bass.

Phat FX’s X/Y Pad provides another level of gestural control. Each axis can be mapped to two parameters (by default this is set to the two extremes of the band-pass filter), each with its own depth parameter. Use Logic Pro’s automation to record and replay dynamic X/Y pad movements.
4. Try experimenting with the order of processing. For example, listen to the differing qualities of distortion with the compression placed at the begin or end of the signal path. Moved to the front, the bass has a more aggressive tone.
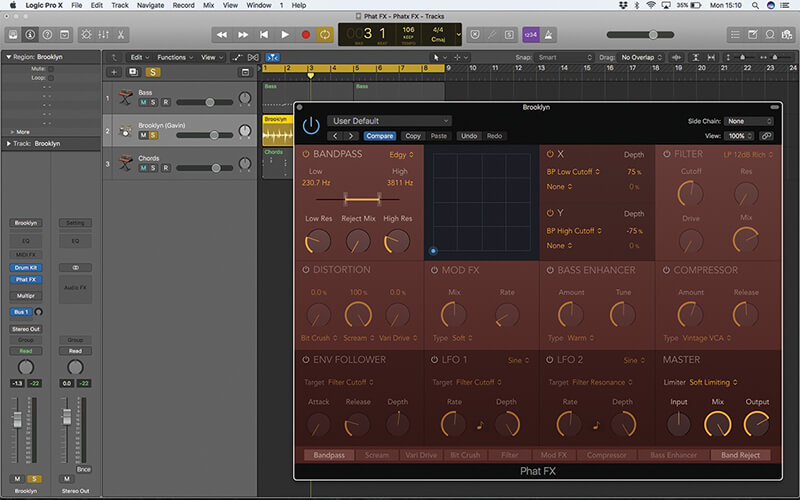
5. Now let’s turn our attention to the drums. Use the band-pass block to reduce both the top and low-end of the drum track (to around 230Hz and 3811Hz respectively), resulting in a narrow mid-range tone.
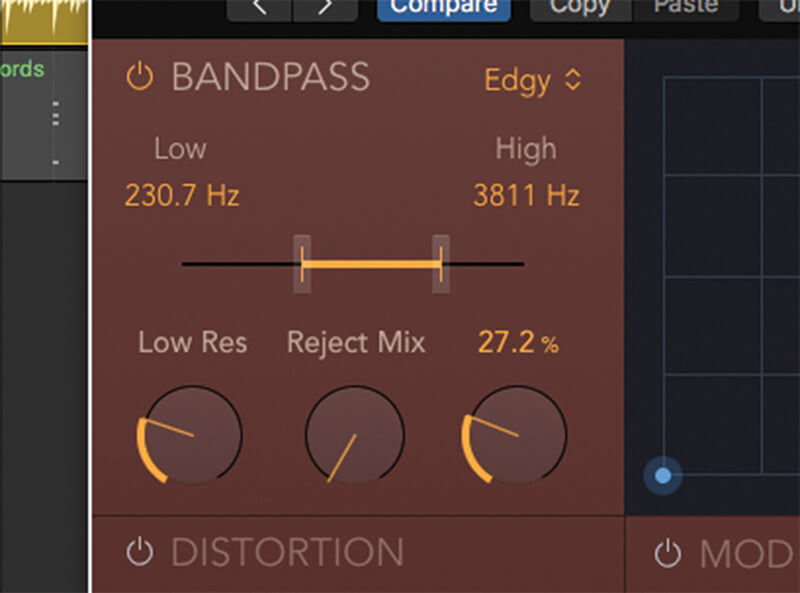
6. Try experimenting with the two resonance settings (Low Res and High Res). Settings around 25% or so tend to add character to the band-pass effect, creating a small resonant peak around the two cutoff points.
Click here for part 2 of Mark Cousins’ lo-fi antics
