Fl Studio Tutorial: Become A Power User 6 – Making Beats
FL Studio is great for making beats, and there’s more than one way to go about it, as Hollin Jones reveals… Beats are at the heart of most kinds of music, be they sparse acoustic sounds or full-on electronic assaults. FL Studio provides you with a number of great tools to program, shape and process […]
FL Studio is great for making beats, and there’s more than one way to go about it, as Hollin Jones reveals…
Beats are at the heart of most kinds of music, be they sparse acoustic sounds or full-on electronic assaults. FL Studio provides you with a number of great tools to program, shape and process your beats to make your tracks sound even better. There’s Drumaxx, SrumSynth Live and Groove Machine as well as support for any third party plug-ins you might care to add. And the multiple programming options open to you mean that whether you prefer to play your beats in using the mouse, a step sequencer or an auto generator, there’s sure to be something that works for you.
In addition to the various virtual instruments provided for making beats you can also import your own loops of course, and slice them up or time stretch them to make new variations and patterns. When you have your beats in the Playlist, you might want to quantize them and there are tools for that too. Straight quantization will give you a more mechanical feel, which you might want for certain types of electronic music like house or techno. For a more “human” feel, say perhaps for hop hop, dubstep or even rock you can add groove quantization and swing so that the music doesn’t necessarily sound like it’s been generated by a machine.
It’s rare that you would want to just use a single beat, so FL Studio also makes it easy to layer up patterns, create variations and add things like percussion and other, non-drum sounds to your beats to keep things interesting. The bundled plug-ins allow for drum synthesis as well as sample-based beat creation and it’s here that things can get really interesting. When you have a kit built from synth modules you can really get to the heart of the sound, detuning and morphing each element of the kit in ways that aren’t possible with samples, in order to get a really unique sound. So however you approach beat making in FL Studio, there’s sure to be something on offer that will get you the best results possible.
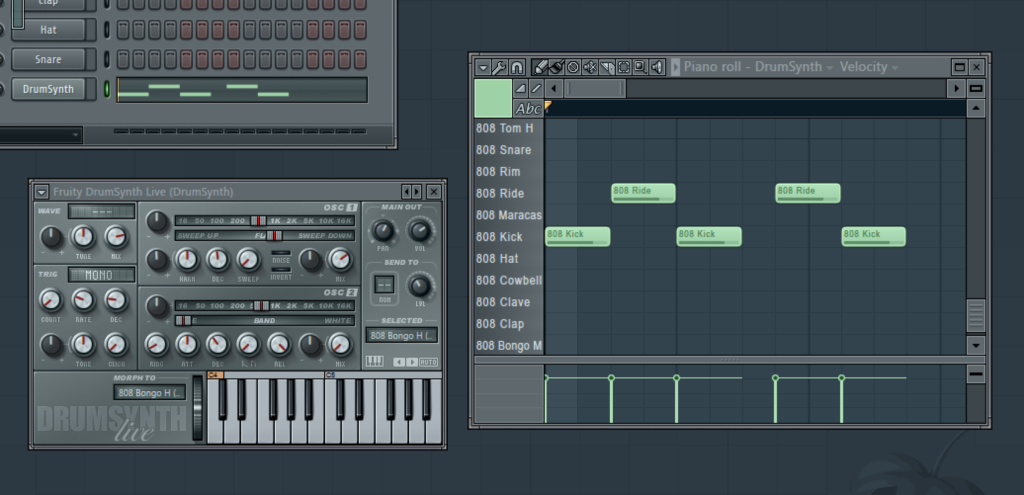
1: Start by setting your project tempo and calling up an instance of one of FL Studio’s bundled drum plug-ins. Here we have chosen Fruity DrumSynth Live, which is a nice simple drum synthesizer for making electronic beats. Open the Piano Roll editor and use the Pen tool to draw in some beats. They will default to one measure in length.
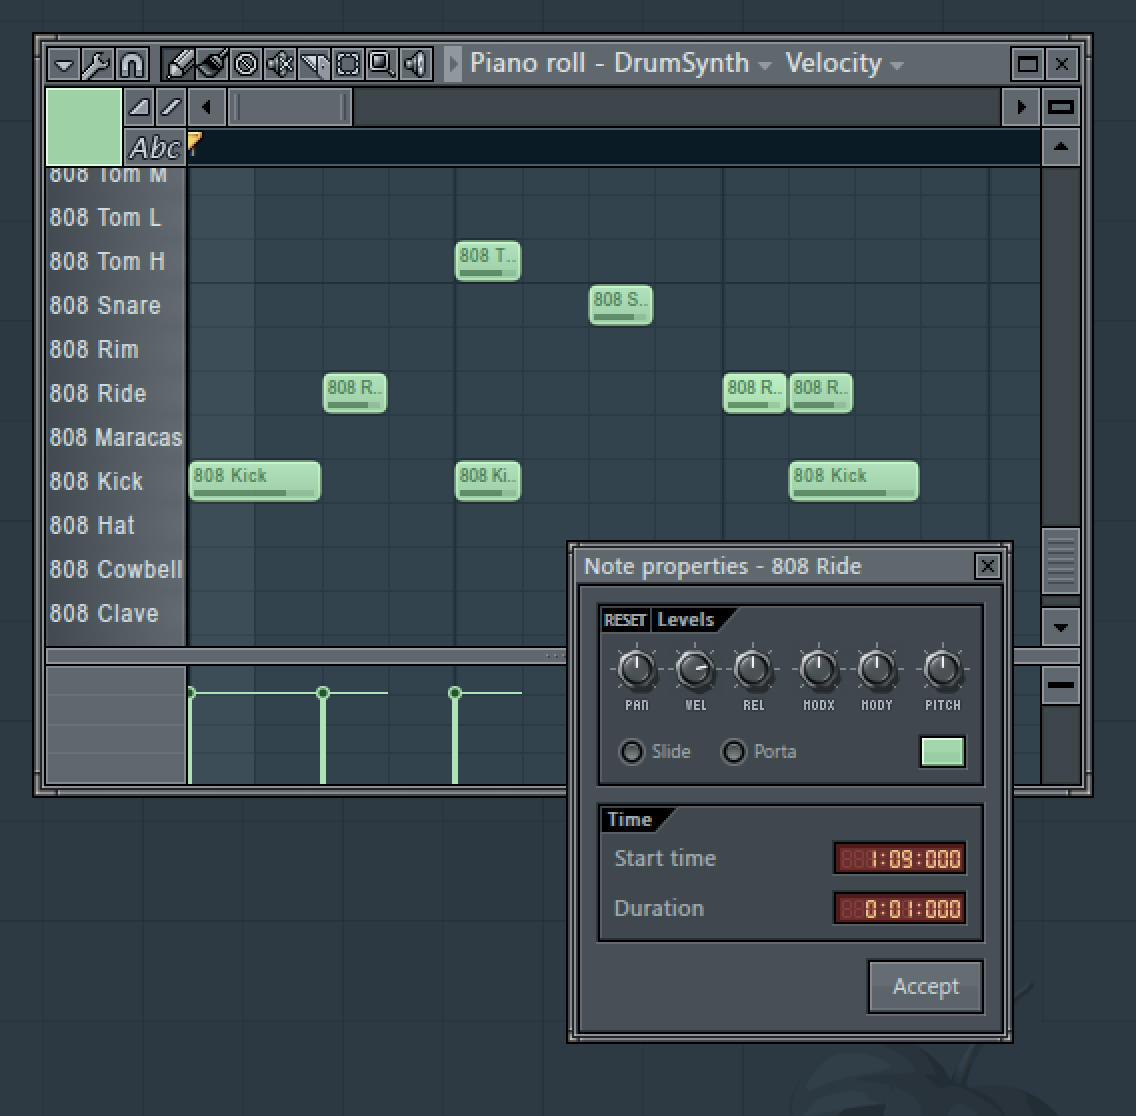
2: Drag the boundary of any note to change its duration, or drag the note from its centre to change its position in time or move it to another drum channel. If you double click on any note you can open the note properties window where you can set various parameters including velocity and release on a note-by-note basis.

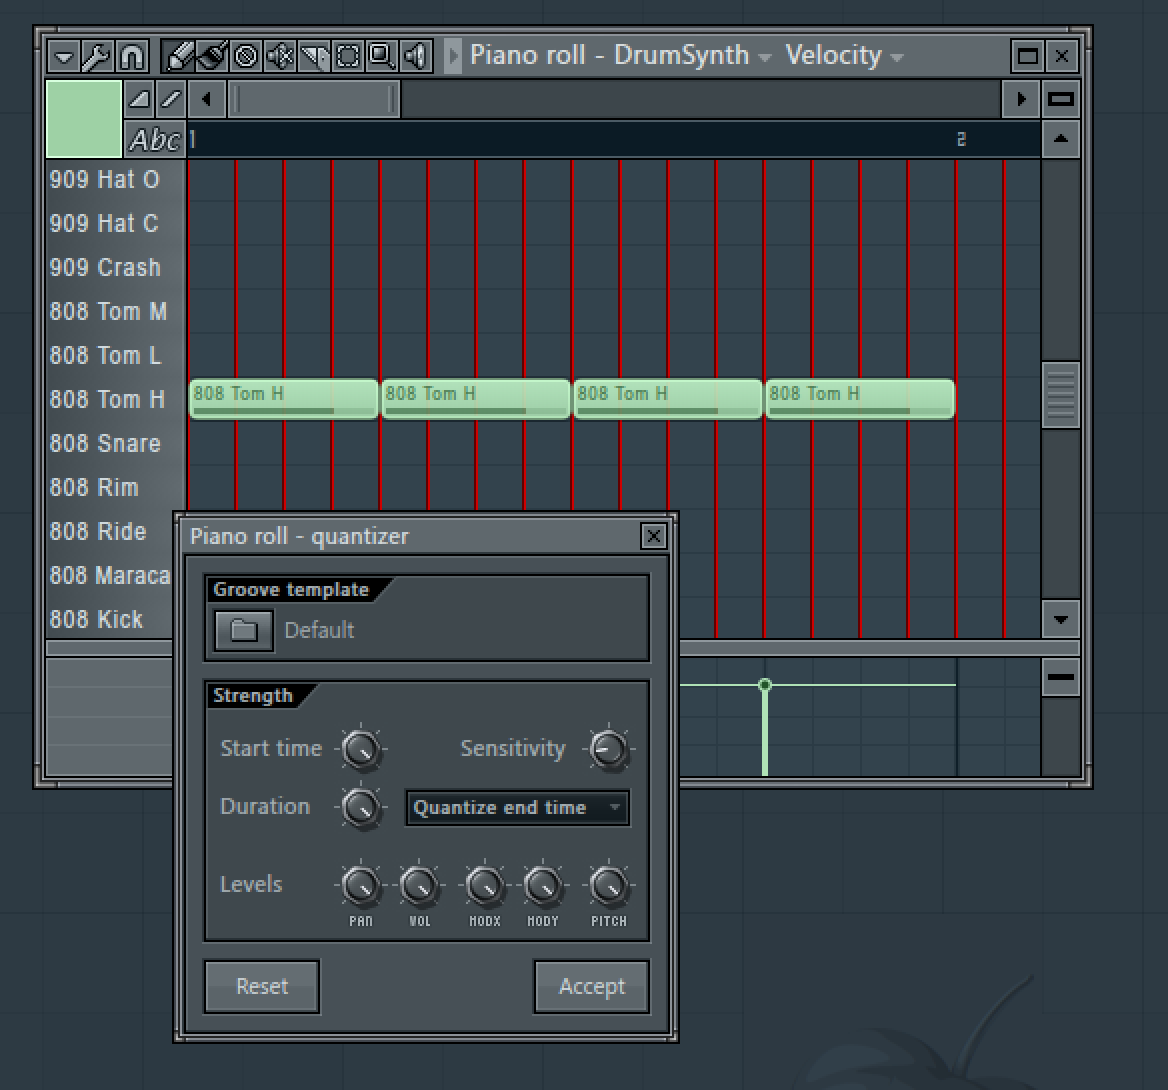
3: The Piano Roll and step sequencer tend to give you very rigid results which is good for some types of music but not others. To get a more human feel for your beat, go to the Piano Roll’s Tools menu and choose Quantize, which opens the Quantize window. In the lower part of the window you can adjust quantize strength, which may be enough for some purposes.

4:For a better groove, click on the Groove template file load icon and you will see a number of preset groove templates. These will affect not only the timing of the beats but also the velocity, and alter what kind of emphasis is placed on the different beats. Try a hip hop groove for a nice swing, for example.
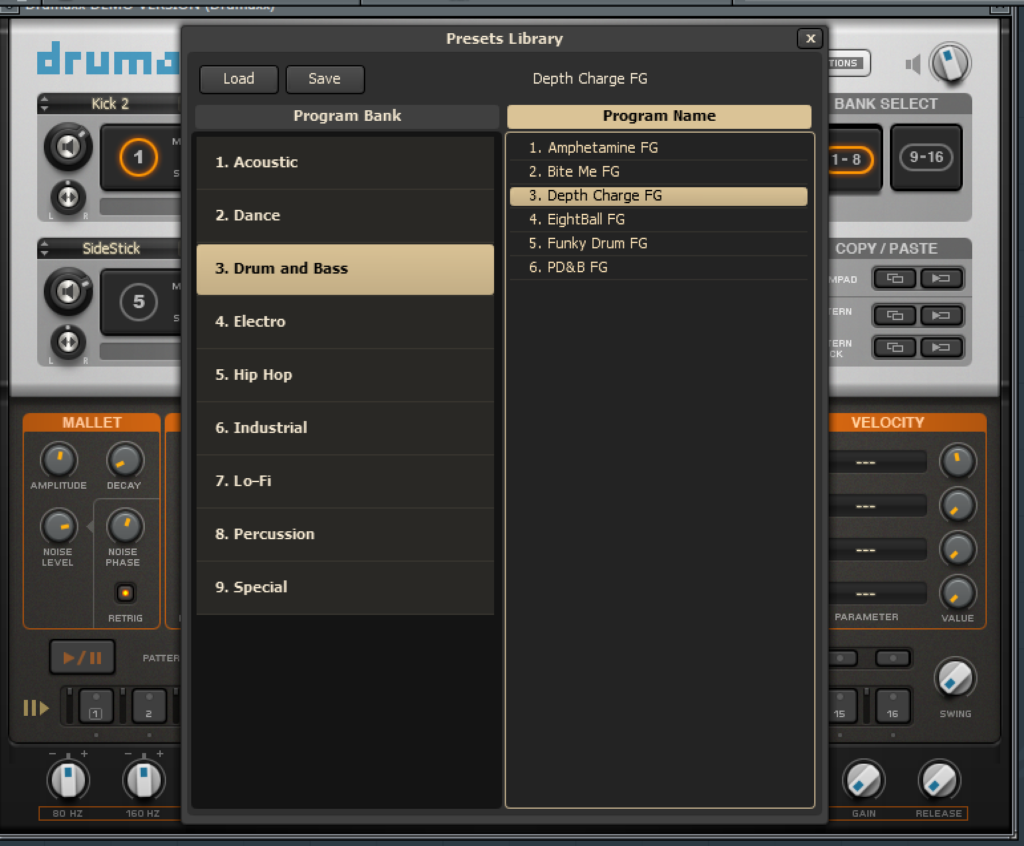
5: Next try loading an instance of the Drumaxx drum synthesizer. Go to the kit selection menu and choose from the bundled kits. Here we have chosen a drum and bass kit. Program a pattern in using whatever your preferred method is and then you can start working with the modules that are generating the sound to customise the kit.
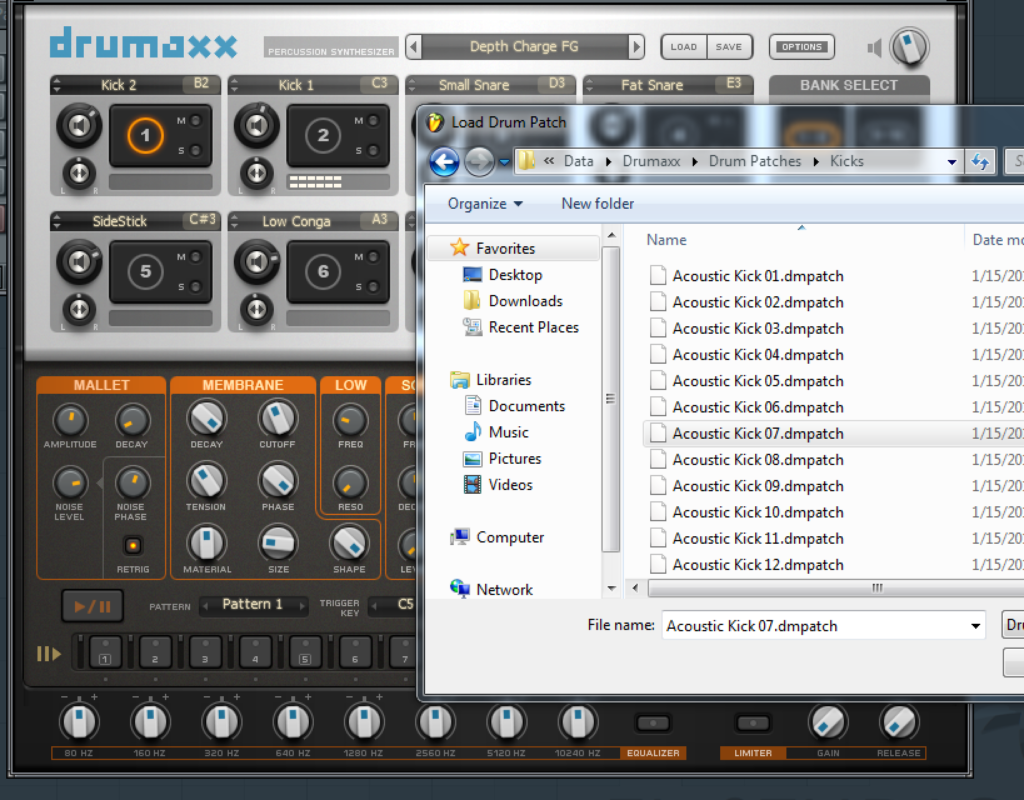
6: To swap out a drum for a different sound, click on the arrows by the name of the drum module to reveal a file browser. This should point you at the Drumaxx patches folder and you can try some different sounds. Repeat for any drums you want to swap until you have a kit that’s working for you
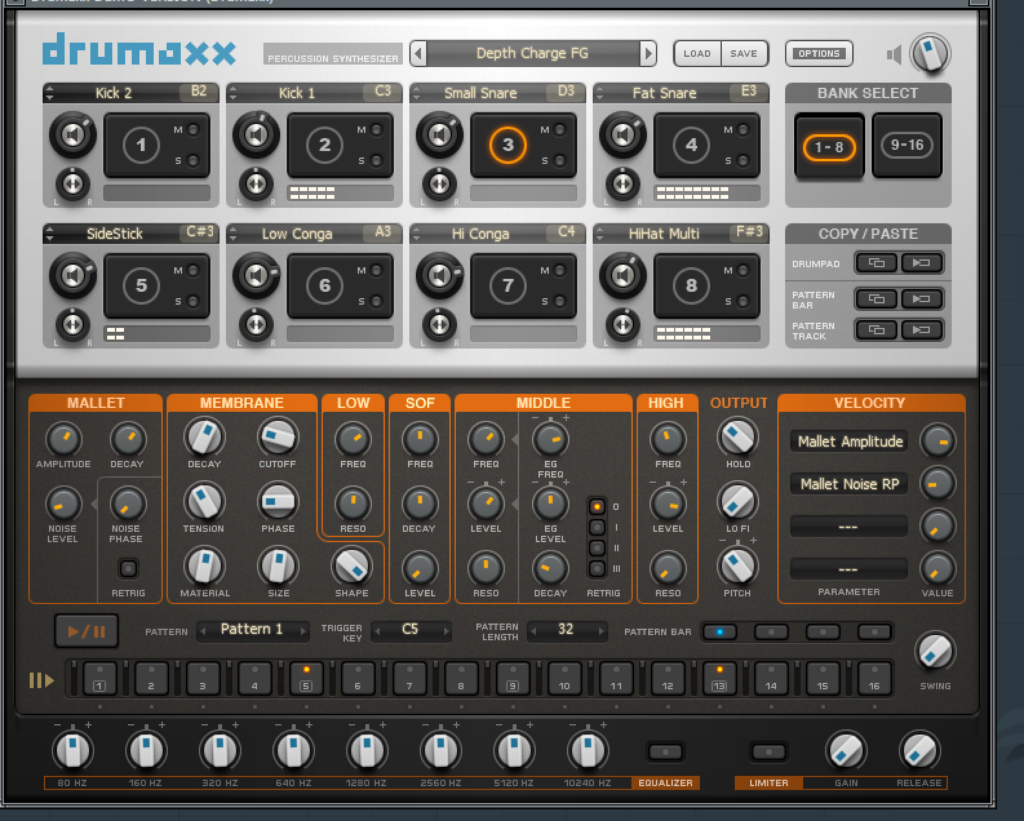
7: As well as programming beats using FL Studio’s regular techniques you can use the built-in sequencer in Drumaxx, which is a more old school way of putting a pattern together. Select a drum module by clicking on it and then in the 16 step sequencer bar at the bottom, click to add notes for every hit you want to add. Repeat for each drum module you want to include.

8:You can make patterns up to 64 steps in length and also add equalization using the multiple dials along the bottom, and limiting using the section next to EQ to beef up the sound of the beats. Also use the multiple controls in the centre of the instrument to tweak the sound of each individual drum hit.
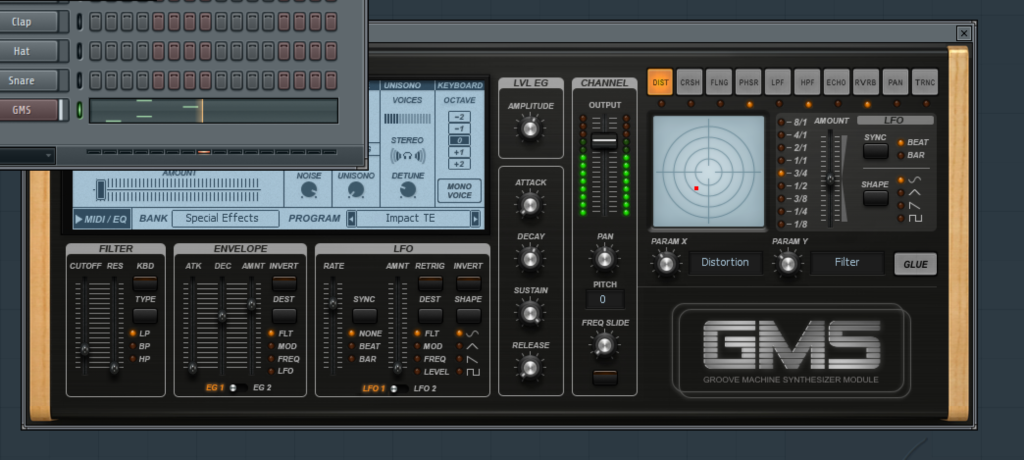
9: Try adding some special fx or percussion to your drum parts. Add an instance of GMS Groove machine and go to the Special FX folder where you’ll find some synthesized hits and other sounds that are good to incorporate into rhythm patterns. Add some hits to complement the beats you already have running and repeat the process to start layering things up.
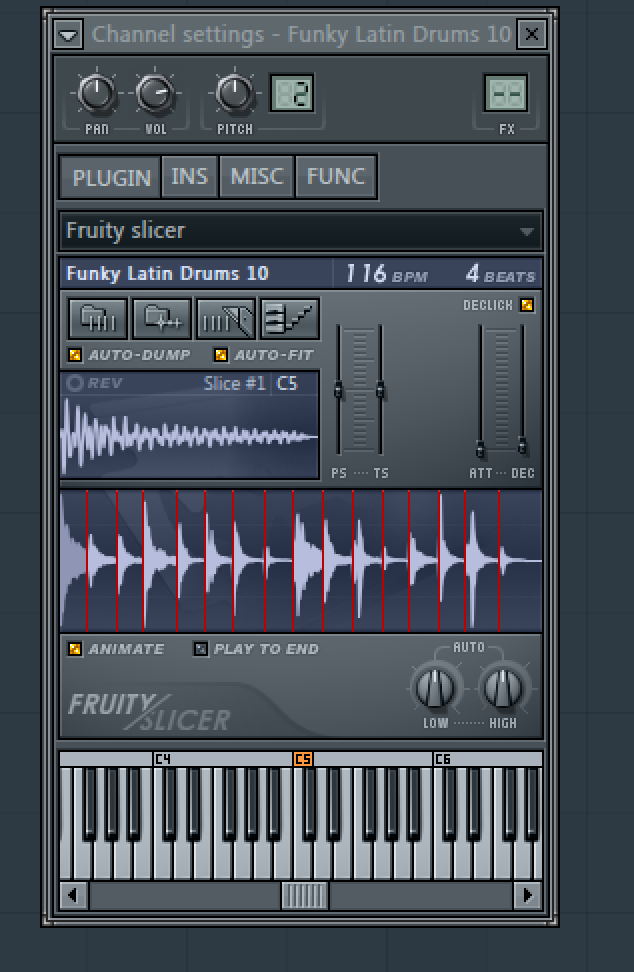
10: You can use audio file drum loops too. Go to the File menu and choose Import > Beat to Slice and navigate to a drum loop stored on your hard drive. Choose how to import the beat : we have chosen Slicer channels as it gives more freedom to play. This opens the file in Fruity Slicer and chops it up for us.
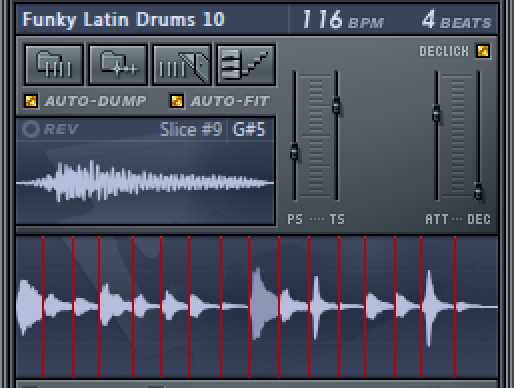
11: With the sliced up beat now automatically mapped across your MIDI keyboard you can play it in any sequence you like. This effectively lets you turn any sampled beat or other loop into an instrument. You can use the pitch shift and slice fade tools inside the Fruity Slicer to alter the behaviour of the slices.
12: Double click to open the pattern in the Piano Roll editor and all the usual tools like quantization are available to you here too, so you can re-quantize the new loop with a fresh groove. You can also re-order the MIDI notes inside the pattern to change the slice playback order, which makes it easy to quickly create new grooves.