Buss Compression Tutorial
When you’ve struggled for hours to get a mix to sit together, you can see why the cohesion that a buss compressor can deliver is such a desirable entity. Applied in the correct way, buss compression can ‘glue’ the disparate elements of a mix as one, gelling instruments into a cohesive and musically effective whole, […]
When you’ve struggled for hours to get a mix to sit together, you can see why the cohesion that a buss compressor can deliver is such a desirable entity. Applied in the correct way, buss compression can ‘glue’ the disparate elements of a mix as one, gelling instruments into a cohesive and musically effective whole, as well as adding punch and energy to the overall performance.
However, while a liberal dose of buss compression has the potential to lift a track, it can also ruin an otherwise good performance if applied in a sloppy and incoherent way, or without access to the correct type of hardware or software compressors.
In this feature we’re going to explore the powerful sonic effects of buss compression, understanding what is meant by terms like ‘glue’ but also exploring the practical ways in which you can implement buss compression as part of your studio setup. More than just being a gimmick, though, we’ll see how buss compression can have a profound effect on your mixing process, transforming your approach to balancing and processing a track as well giving your mixes that elusive professional sheen.

On The Busses
For the uninitiated, buss compression refers the process of inserting a compressor across your main stereo outputs or across a grouped section of instruments routed to a buss fader. Arguably, the technique of buss compression was conceived when mix engineers started to explore the unique effects that a compressor could deliver when it was patched across the outputs of the console rather than inserted across individual channels in the mix. As the process became more popular, companies such as SSL even started embedding a dedicated buss compressor into the console’s signal path, with SSL’s G-Series compressor arguably becoming the de facto standard buss compressor.
What’s interesting to note about buss compression is the variety of opinion regarding its validity, and, more importantly, the number of ways in which it can be applied. As we’ve already hinted at, the application of buss compression tends to fall into two distinct camps: either using a single compressor patched across the main stereo outputs, or a series of two-channel compressors applied across groups of instruments (a drum submix, for example, or a collection of backing vocals). Each method brings its own distinct set of pros and cons, as well as transforming the methodology and workflow of the mixing process.
Although each engineer will express a different opinion, I’d argue that master buss compression should be approached with a large degree of caution, while buss compression applied across groups of instruments should be positively embraced. The issue with master buss compression is that it somewhat duplicates the use of a two-channel broadband compressor as part of the mastering process, although by having been applied at the mix, it limits what can be achieved in mastering. Put simply, once the buss compression has been overcooked during the mix (easy to do as your ears soon become fatigued) it’s next to impossible to restore the original dynamics later on in the production process.
By compressing groups of instrument, though, we can assimilate many of the positive attributes of buss compression without killing the overall dynamics of the track. Importantly, we gain control of where and how buss compression is applied – instruments that need to be ‘glued’ together, for example, can be compressed accordingly, while other instruments might pass unaffected through to the main stereo buss. We can also be more creative about the types of compression used for each instrument group, maybe contrasting a fast-acting FET compressor on a drum kit, for example, with gentle variable-mu compression across a strings submix.

Sticky Stuff
Before diving into the specifics of buss compression it’s worth taking time to consider what we’re trying to achieve by applying compression in this way. First and foremost, the application of compression is largely driven by the need to shape the dynamics of a track, arguably understanding that even though individual instruments might be controlled, their combined input might vary at points throughout the song. As we’ll see later, it’s often about discerning and controlling the differences between your mix on a micro level – with individual instruments – and on a macro level, where instrument groups combine to create a complete arrangement.
Beyond dynamic control, another major role of buss compression is this elusive term of ‘sonic glue’. A mix that lacks glue is something that all of us has encountered at some point, whereby a mix sounds like a combination of disparate elements rather than an entity that works as a whole. Given that most songs are recorded as a series of separate overdubs and that we are initially driven by the process of separation in a mix (usually by EQ’ing instruments separately to avoid overlapping frequencies) you can see why the end result might lack cohesion. Contrast that approach with the ‘Wall of Sound’ recordings Phil Spector made in the early 60s – which often comprised large ensembles of players all recording at once – and you can see why a modern mix might struggle to be ‘greater than the sum of its parts’.
In effect, therefore, the glue that we associate with buss compression is arguably formed by the instruments sharing the same amount of gain reduction – in short, the more gain reduction you apply, the more glue you add to the mix. Having created the separation, the application of buss compression sticks the mix back together, but (unlike the Phil Spector approach) in a controlled way. In short, we can decide which instruments are stuck together, which instruments float free, and how much adhesive we want to apply.
Beyond the ability to control dynamics or glue instruments together, the final piece of the buss compression puzzle is its ability to add a degree of mojo into your mix. Rather than just being a vague term, mojo arguably encapsulate all the positive and interesting sonic attributes compression can deliver. Applied in the right way, compression can add energy and punch to a piece of music, and in some cases even appear to make the track ‘breathe’ in a musically effective way (French-style compression is a good example of this).

Group Mentality
Having understood some of the reasoning behind the application of buss compression, let’s look at practical ways in which we can apply it. First, we need to consider at what point in the mixing process it’s best to apply buss compression – should it be running from the start of the mix, for example, or is it the final ‘icing on the cake’ once the mix is reaching perfection? In truth, the answer lies somewhat between these two points. Starting clear of buss compression will enable you to assess the dynamics of your instrumentation and how the instruments naturally sit together. Once you’ve achieved this initial understanding, though, it’s worth adding the buss compression into the equation so that you’re effectively mixing ‘through’ the compression.
Given that we’re opting for groups of instruments rather than the master buss, the next stage is to start to think about how you want to organise your instruments and the various compressors at your disposal. The solution, of course, can be as complicated or as simple as you see fit. You could, for example, just use the buss compression on a single instrument group (usually the drums) to add a selective amount of glue. A more involved solution, however, might use multiple groups, each with a different choice of compressor and differing amounts of gain reduction. Equally, I’ve achieved some great results using two distinct buss compressors – bussing one half of the mix to one compressor and the other half to another compressor, seeing how the two interplay with one another.
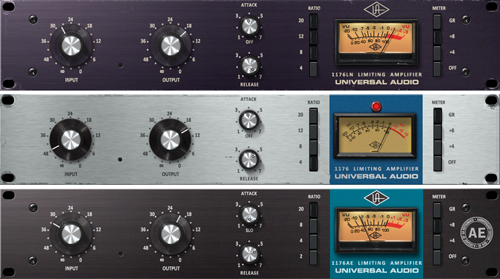
Given the choice of compressors now available, it’s also worth making some distinction between the type of compressor used for the respective groups of instruments. Optical or variable-mu designs, for example, favour a more gentle application of gain reduction, especially in situations when you want to preserve transient details such as guitar picking. A FET compressor like the ubiquitous Urei 1176 tends to work best when you want plenty of character and movement to the compression, especially if you’re working with drums. A VCA compressor, on the other hand, offers detailed control and transparency, which is ideal in situations where you want the compressor’s fingerprint to be discrete.
With so much choice available in hardware and software, it’s a shame not to explore the veritable Aladdin’s cave of compression styles on offer. Be wary, though, of compressors that might be adequate or even characterful on individual instruments but don’t quite cut the mustard when it comes to groups of instruments. The integral compressors included with most DAWs are good examples of this, often lacking the subtlety and musicality that the more prestigious compressors can deliver. While it isn’t essential to use a dedicated buss compressor (like the aforementioned SSL G-Series Compressor) it’s worth opting for a compressor that is designed to work with complicated and varied programme material.

Soft Drinks
Having grouped your instruments and chosen a particular compressor, we now need to start thinking about the settings we use. To best illustrate the methodology behind buss compression, we’re going to start by exploring two contrasting techniques – one using a soft, ‘over-easy’ style of compression, and another style of gain reduction that aggressively clamps down on transient energy. Each style has its place, of course, and between the two approaches there are plenty of other solutions to explore.
With either approach, though, the key component of any form of buss compression is subtlety – to put it another way, that small amounts of gain reduction can go a long way. Whatever ratio or threshold setting you use, therefore, aim for small amounts of gain reduction – from around 0 to -3dB – rather than any hard ‘gain pumping’. As a point of reference, it’s worth noting that many of the US-based mix engineers using this approach often have their compressors barely tickling their gain reduction meters, often using the compressor more like a colouring device.
For the softer style of compression, look at using a combination of both a low threshold and a low ratio – no more than about 2:1. In this respect it’s interesting to look at the SSL Buss Compressor and its unique behaviour in the 2:1 ratio. In this lowest ratio setting, you’ll find small amounts of gain reduction being applied even at relatively high threshold settings. The reason for this behaviour is that the 2:1 ratio has an extremely wide knee, so that small amounts of gain reduction (using 1.25:1 ratio, for example) are applied beneath the threshold, with the full 2:1 ratio achieved only as the signal rises above the threshold. In short, the compressor spends plenty of time ‘compressing’, but only ever applying small amounts of gain reduction.
When it comes to defining the attack and release of the compressor, the approach should be equally moderate so that the buss is massaged into place rather than being aggressively squashed. Keeping the attack around 10ms preserves transient detail, while an auto release setting adapts the compressor’s release characteristics so that it’s empathetic to the complex dynamics inherent in a collection of instruments. Put simply, it keeps the compression transparent, allowing you to glue the instruments without the compression becoming too noticeable.
Peak Slicing
To illustrate a completely different approach, we could look towards the buss compression controlling some of the transient energy routed to a given buss. As you can see, we immediately make some distinction between the different qualities present at each subgroup – a percussion buss, for example, will have lots of transient energy, while a strings buss will have much more sustain and body. Matching the compression to the type of instrumentation enables you to be more discerning and refined in respect to how you control dynamics, rather than the ‘one-size-fits-all’ solution of a single stereo buss compressor.
For the fast-acting transient compression, we’d pick a high ratio and threshold so that the compression occurs more sporadically than in the low ratio/low threshold model previously described. The attack and release settings should also be suitably fast so that the compressor works only with the transients rather than modifying the body of the sound. In this respect, a VCA or FET compressor should be the preferred option given that both of these types are known for their fast response times.
Between these two extremes there’s plenty of ground worth exploring – particularly if you want the compression to leave more of a sonic footprint (or, to put it another way, mojo). Compression ratios of 3:1–8:1 can inject punch into the compression, but in this area you’ll find that the fine-tuning of the attack and release times becomes far more important, especially if you start to work the compressor harder. Watch out for the attack being too fast, reducing too much of a buss’ transient energy. As for the release, move away from the relative transparency of the auto setting and start to experiment with the release times (from around 100–400ms) so that the compressor audibly ‘breathes’ or ‘pumps’ in time with the music.
 Mixing Through Compression
Beyond the settings of each compressor, what’s really interesting is the effect of mixing ‘through’ the buss compression. In effect, any dynamic change that you apply ahead of the busses has a knock-on effect on its accompanying buss compressor. For example, push a lead guitar routed to a guitar buss up by 6dB and you raise both its level and, of course, the amount of compression. The final level that you achieve, therefore, becomes more about the interaction between the individual channel fader and the compression strapped across the buss rather than the level on the fader itself. As you can imagine, it’s a complex interwoven relationship, but it’s also one with huge musical and sonic potential.
With a little bit of practice, you’ll soon start looking at your mix in a different way, understanding the difference between a signal’s absolute amplitude
(leaving the buss, in other words) and the given intensity of sound (defined by how hard the buss is driven). Familiar tools such as automation take on a new light, so that channel faders can be used to drive a compressor harder, for example, while automation on the busses can yield some interesting results by raising or lowering the absolute signal level. In short, amplitude becomes a far more multifaceted beast, with significantly different results based on where the gain change is applied.
Another important change that buss compression delivers is that you’ll start to think far more about the micro/macro structure of your mix. Groups of instruments now gain far more importance, with the final mix often being as much about how the groups balance against each other (and the amount of compression applied, of course) as well as the level on an individual fader. As such, you arguably start to work in a way that’s closer to how the listener perceives your music (in other words, the relative balance between rhythm, melody and chords) rather than the channel-by-channel balance you’re painfully aware of as a mix engineer.
As you reach the end of your mix, it’s interesting to bypass the buss compression to see exactly what it is delivering to the overall sound and feel of a track. Not surprisingly, many mixes will fall apart once the compression is bypassed – not because they’re fundamentally deficient in any way, but because the buss compression, though subtle, has become an integral part of the musical balance. It also explains why buss compression tacked on at the end of mixing also doesn’t work, because it has to be an integral part of the balancing process.

Musical Control
Buss compression is arguably one of the most powerful tools a mix engineer has at their disposal – and it’s not a practice that’s restricted to only high-end studios with expensive outboard. However, despite the abundance of tools now readily available, it’s still an easy process to get wrong. The professionals that make such great use of buss compression all seem to use it in a subtle, musically intuitive way, responding to the emotional drive of the music rather than feeling the need to squash every last decibel from the performance. Ultimately, therefore, buss compression isn’t a ‘one-stop solution’ to a great-sounding mix, but an important part of a palette of tools that an engineer uses
This great video expands upon this area in detail: