Beginner’s guide: Everything you need to know about compression in music production
Compression is one of the most important weapons in the sound engineering arsenal. Learning to wield it effectively is a vital skill for all producers.

Image: skynesher / Getty Images
In music production, compression reduces the amplitude (volume) of the loudest parts of a signal. Think of a compressor as an automatic channel fader that is turned down when the signal gets too loud and is returned to its previous position when the signal becomes quieter again. By doing this, a compressor reduces the dynamic range of an audio signal or recording, reducing the difference between silence and the signal’s loudest peaks.
By reducing the peak amplitude of a signal, compressors allow us to make a mix or instrument sound fuller and louder overall. This is because the loudest peaks in a signal restrict how much gain can be applied to an instrument before clipping occurs but the average signal level gives the impression of loudness. By reducing those peaks, then, we are able to increase the average signal level and therefore perceive the sound as louder.
When to compress
Compression can be applied at various points in the recording chain. In general, though, we want to process an entire signal with it. So, here, we use it as an insert effect, but there are some specialised compression techniques that use different patching and routing configurations (such as parallel compression and multiband compression).
When recording live sources, it can be useful to compress the input signal. This keeps loud peaks under control, allowing us to add more preamp gain to achieve a richer recorded signal. Be careful not to over-compress at this stage, though. Doing so will limit your options during the mixdown, and there is no way to remove bad or over-done compression.
This input conditioning is beneficial in analogue and digital recording but, in the latter case, the compression has to be applied before the signal is converted to digital. Standalone analogue compressors can do this and many mic preamps have built-in compressors too. There are even a few audio interfaces with such capabilities.
Come mixdown, compressors can still serve the function of levelling the dynamics of the elements in the mix, while also playing a secondary role in adding solidity, prominence and punch to parts that need it. Typically, the entire mix will also be treated to a dose of compression, whether during mixdown, mastering or both. The aim of full-mix compression is to create loudness and dynamic consistency within the mix.
Compression concepts
Despite their various operational and technical differences, all compressors work within the same core concepts and parameters. Keep in mind that while some compressors offer direct control over all these parameters, some only sport a few and others offer completely different settings altogether.
Remember: the concepts below apply generally to all compressors, even when the specifics of some implementations appear to be quite different.
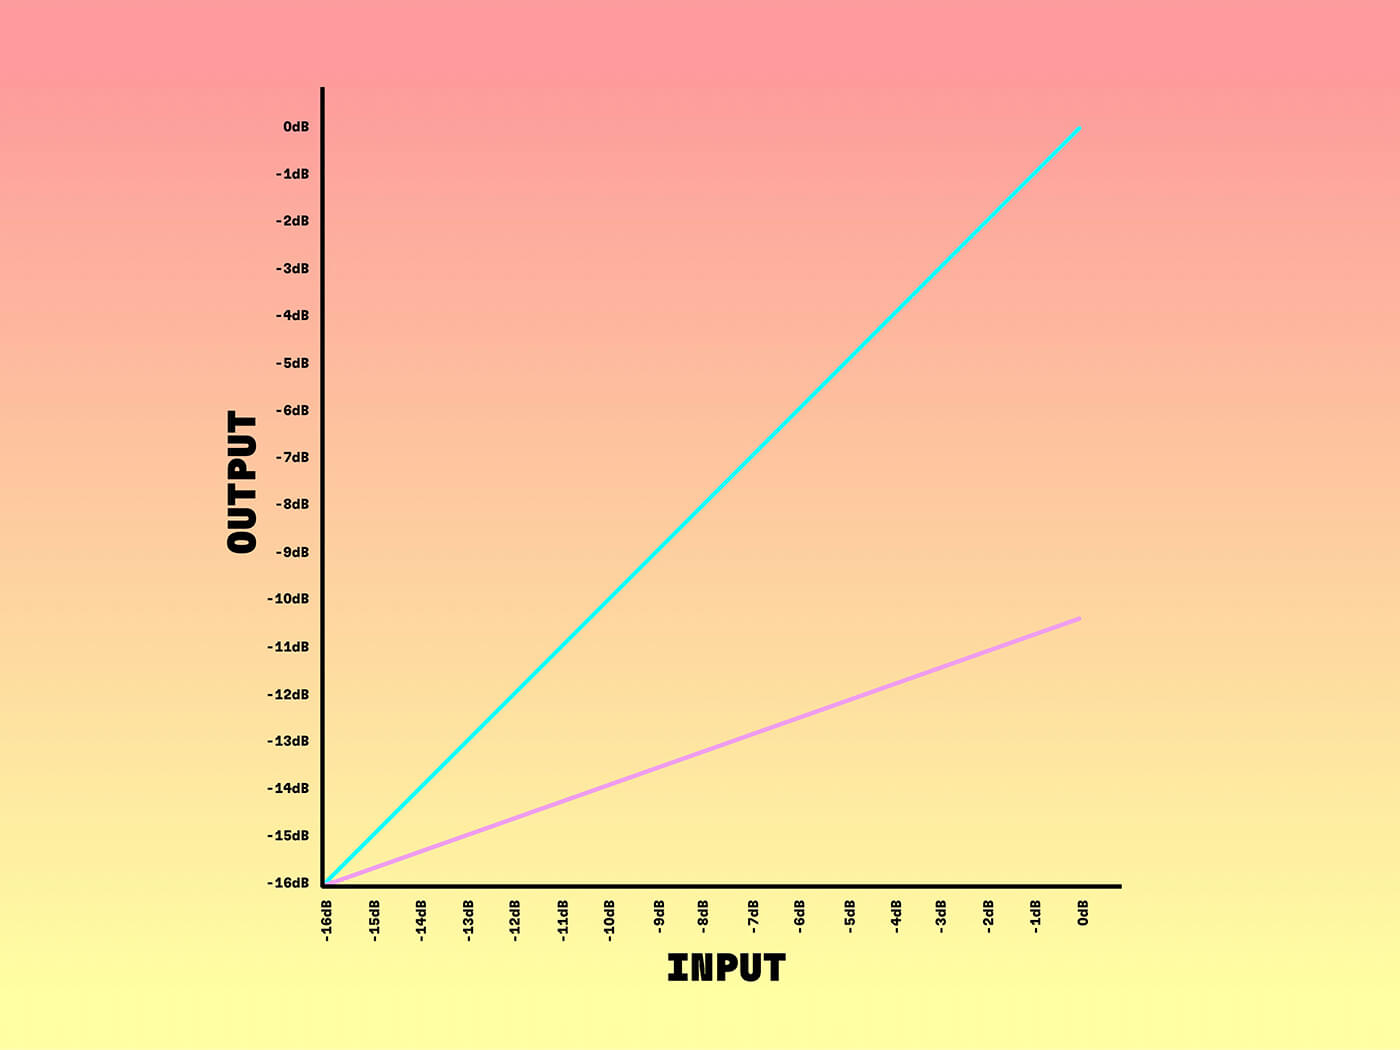
Compression is essentially a process that modifies the relationship between the input signal’s amplitude and the output signal’s amplitude. This is expressed as a ratio. For example, a ratio of 3:1 would mean that for each increase of 3dB in the input signal’s amplitude, the output signal’s amplitude will only be raised by 1dB.
Compression ratios are often represented on a graph, known as a compression curve, which shows the increase in input amplitude mapped against the resulting increase in output amplitude – see Fig.1.
In most circumstances, we configure a compressor so that it only impacts louder passages of sound. The crossover point between no compression and compression is referred to as the threshold. When the signal amplitude is below the threshold, no compression will be applied; when the signal exceeds the threshold, the compressor will reduce the output amplitude in line with the ratio. You can see this illustrated in Fig.2.

The threshold creates a kink in the compression curve that makes it look like a bent leg, which is why the point where the bend occurs is referred to as the compressor’s knee (no, really, it is!). Fig.2 shows a ‘hard knee’, where the changeover from zero compression to full-ratio compression is instantaneous.
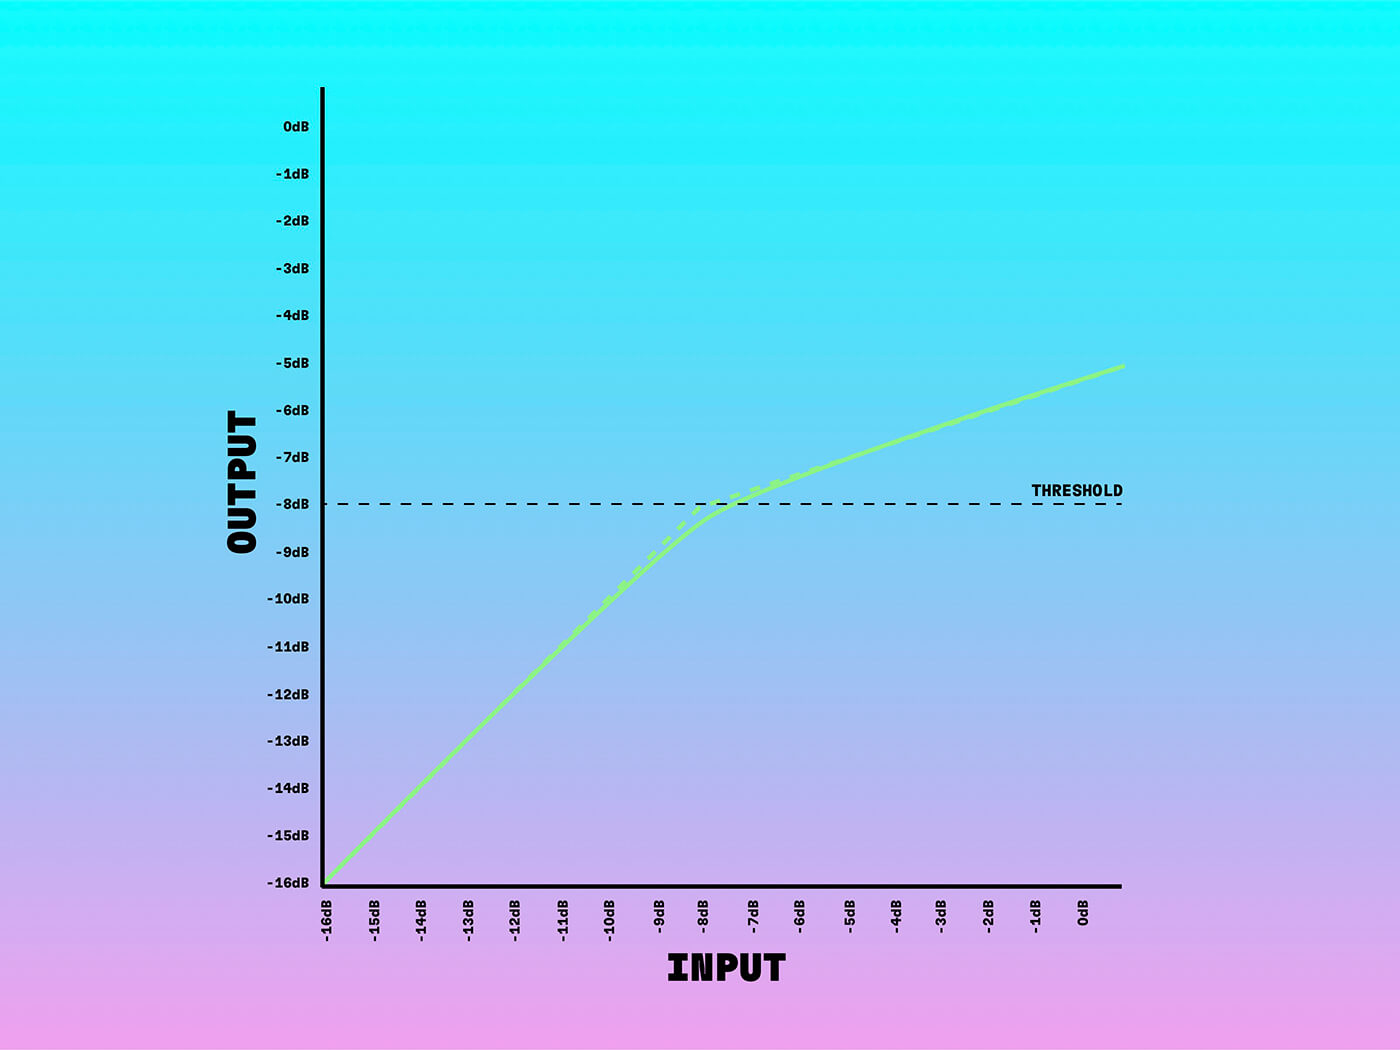
In practice, many compressors will start to increase the compression ratio when the signal amplitude is a little way below the threshold, and don’t reach full-ratio compression until the amplitude is some way above the threshold. This creates a curve around the threshold in the compression, and is referred to as a ‘soft knee’ – the smoother the curve, the softer the knee (see Fig.3). Softer knees tend to give more natural results, while harder knees are better suited to signals that contain many loud or aggressive transients.
Some compressors have a variable knee, allowing you to select what works best depending on the situation. But it’s more common for the knee characteristics to be baked into the compressor.
Attack and release times provide an additional layer of sculpting and control over the onset and fall-off of full-ratio compression. The attack time is how long it takes for full-ratio compression to be achieved once the threshold has been exceeded. Similarly, the release time is how long it takes for the compressor to return to 1:1 once the input amplitude falls below the threshold.
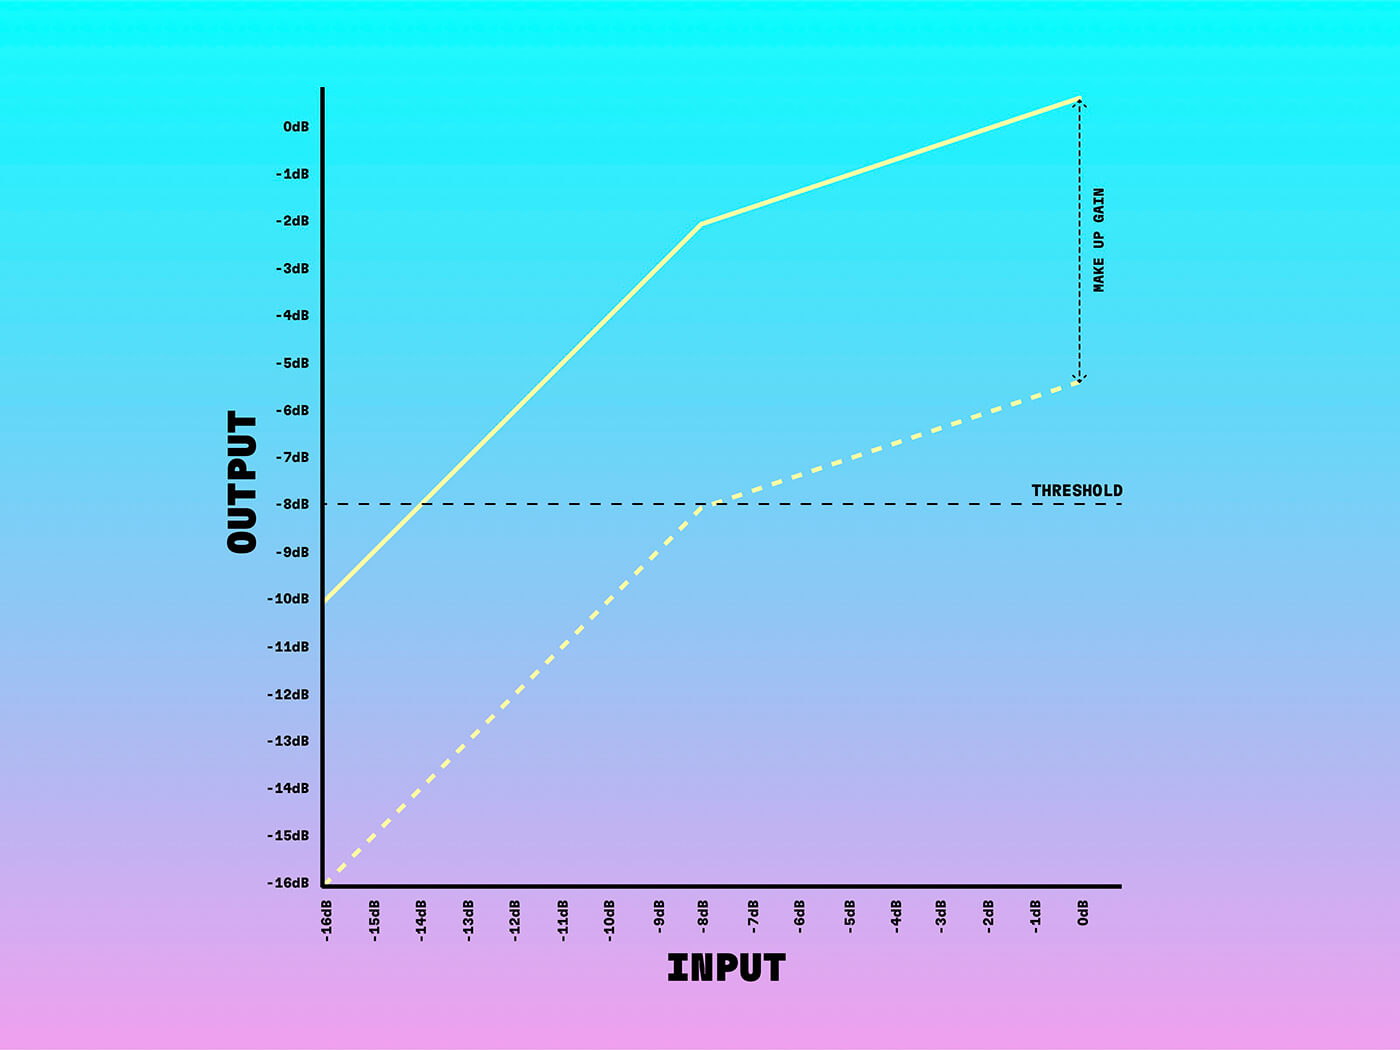
Many compressors have a control called ‘make-up gain’, which we use to compensate for the gain lost due to the compression process; it’s not uncommon to see an automatic make-up gain option too. Any half-decent compressor should have an output level control that, in the absence of a separate make-up gain knob, can serve the same purpose.
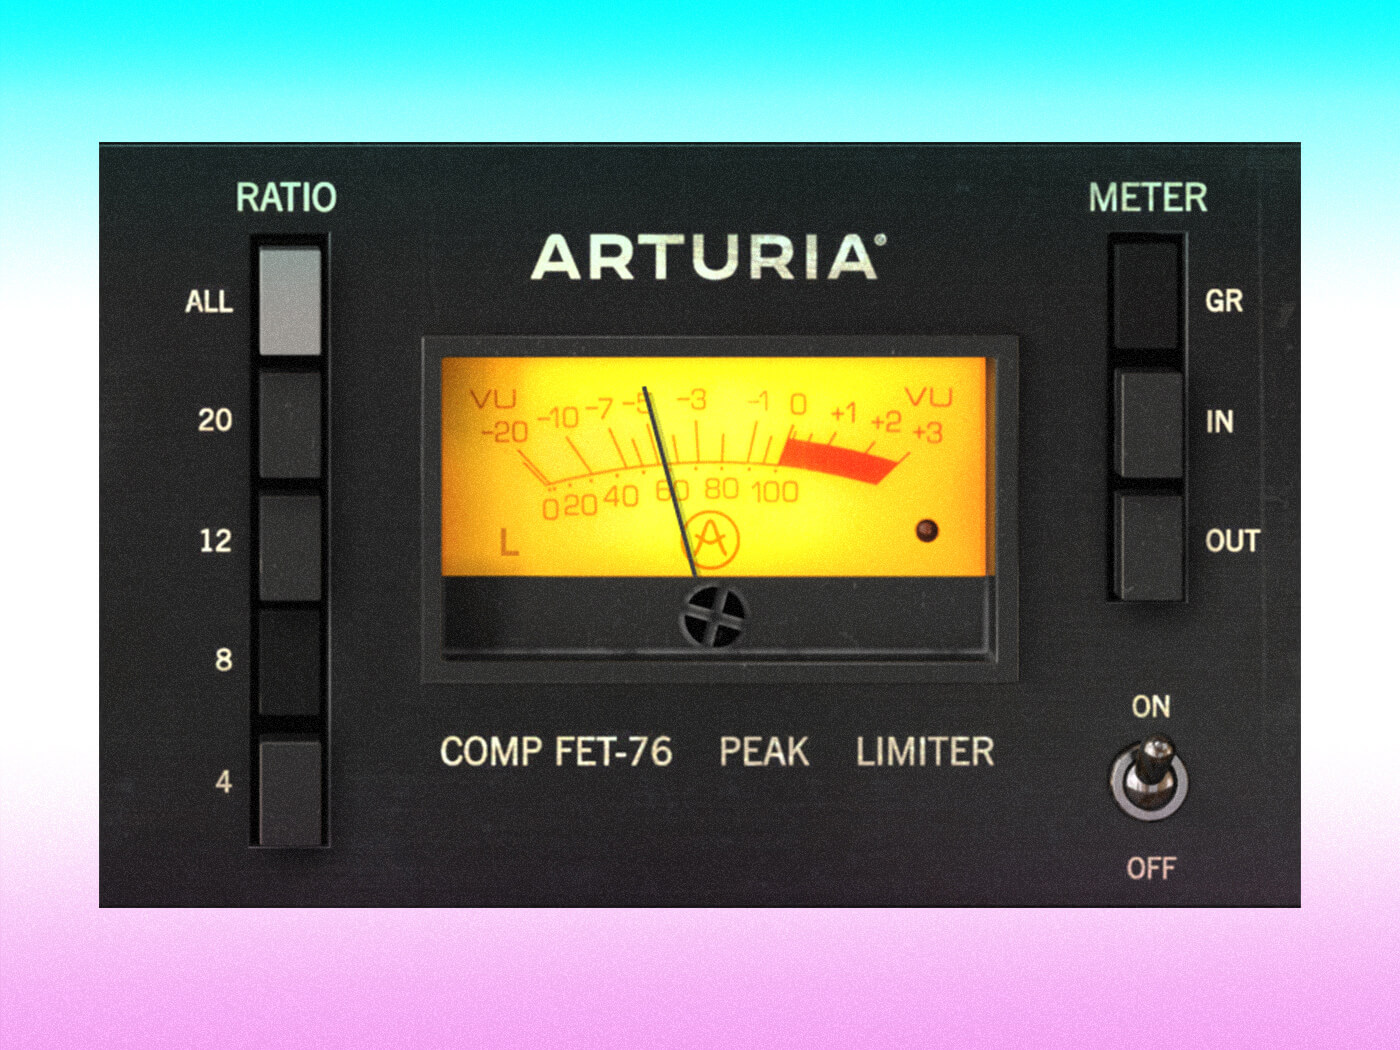
Compression isn’t always obvious to the ear, especially as ears become more tired over the course of a recording or mixing session. So it’s important to get familiar with the gain-reduction (or GR) meters offered by most compressors. These come in various forms – bar graph and needle are the most common – and tend to work in the opposite direction to a level meter (that is, top-down/right-to-left rather than bottom-up/left-to-right). Producers often say “trust your ears” but, when it comes to compression, you often have to trust your GR meters just as much.
Types of compressors
There are four main types of analogue compressor, and practically every digital compressor, whether plug-in or hardware, is based on one of these types. The differences in how these compressors work has a big impact on their sonic and dynamic character, and this gives each type its particular strengths and weaknesses.
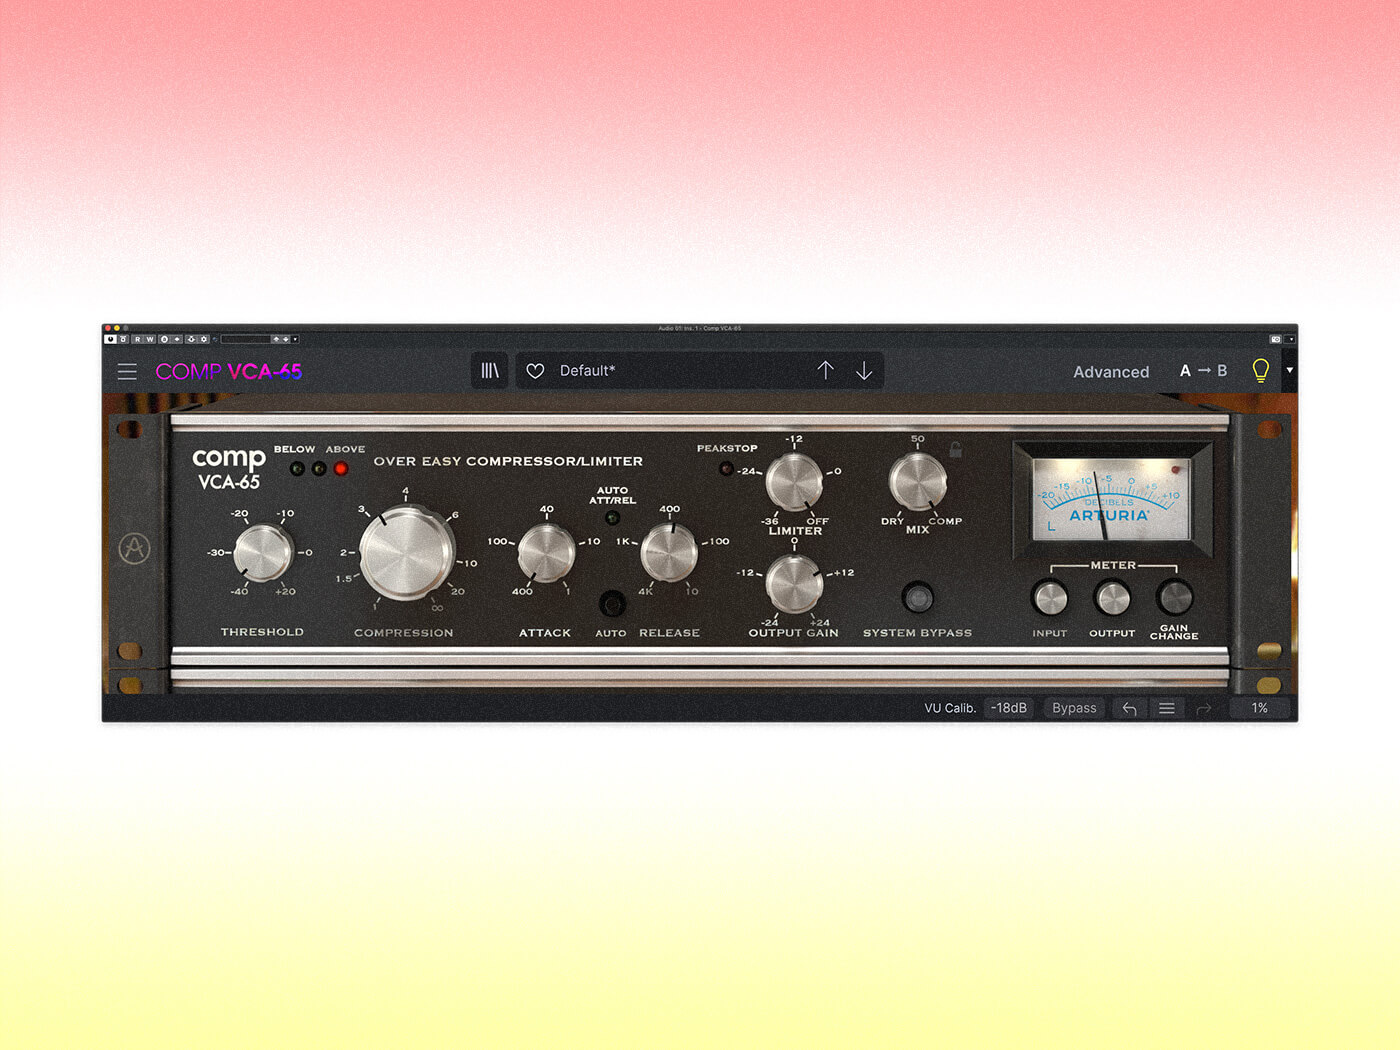
The most common compressor type is the VCA compressor, so-called because the output level is governed by a voltage-controlled amplifier. These tend to give the most fine-grained control over the compression process, exposing direct control over most or all of the parameters mentioned above, and so they tend to be the most flexible. VCA compressors are very responsive, making them ideal for sounds that feature many loud transients, such as snares, clean and acoustic guitars, and so on. They also excel at fattening basses and kicks.
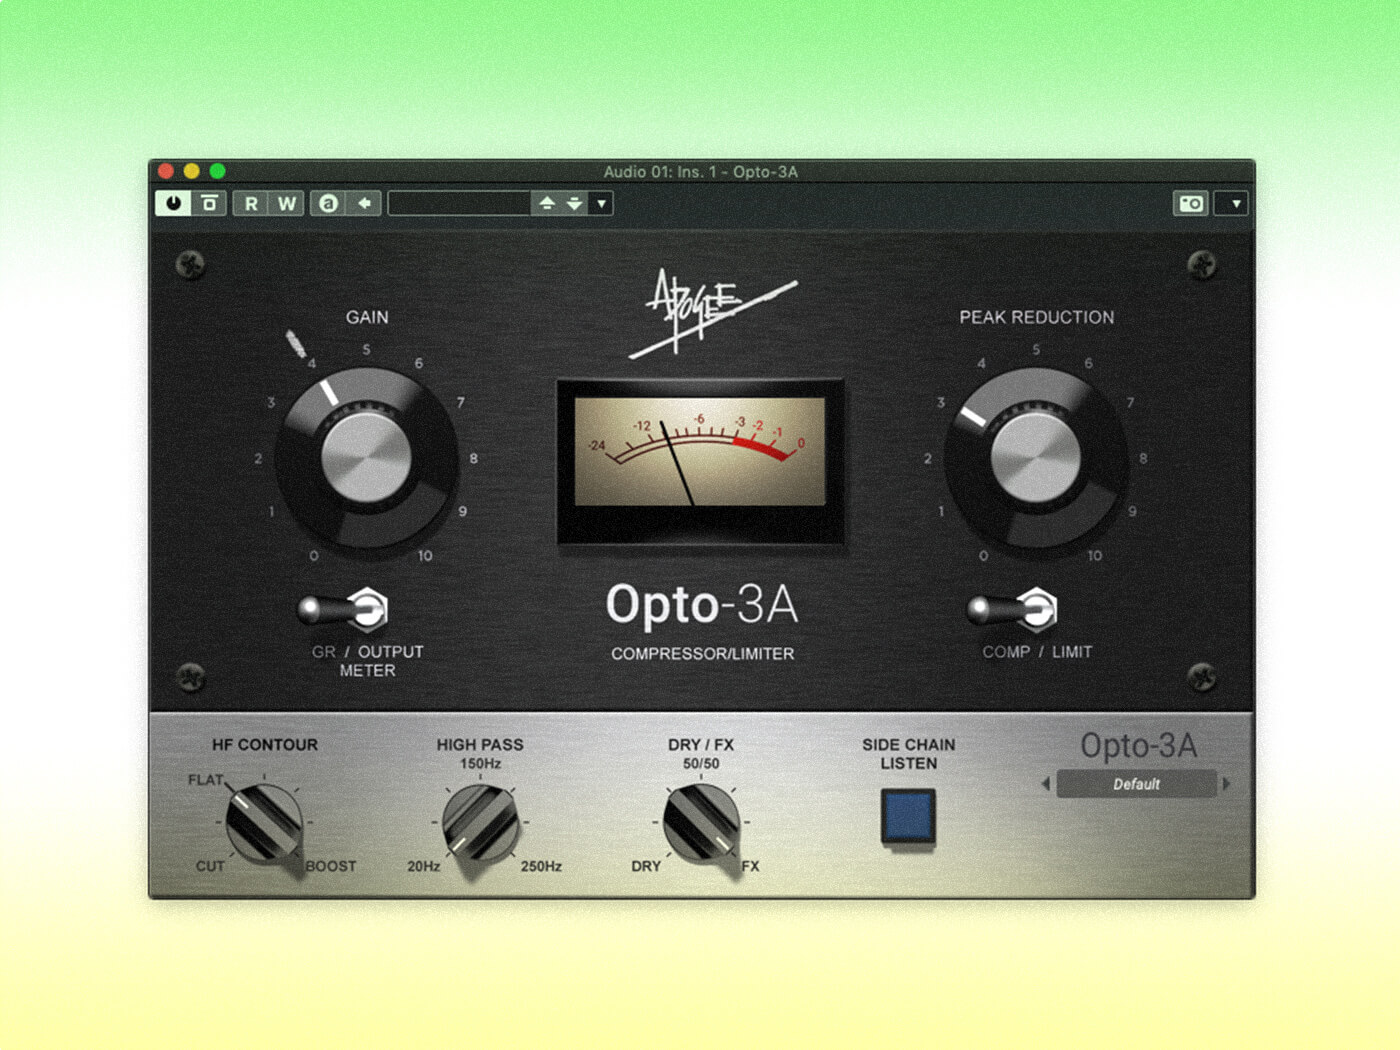
Inside an optical compressor, you will find an opto-coupler – essentially an LED and a light-dependant resistor encased within a little box. The amplitude of the input signal controls the brightness of the LED, which in turn varies the resistance of the LDR. This variable resistance is used to control the compressor’s output level.
Optical compressors can deliver a natural, smooth compression, even when driven hard, making them useful for full-mix processing and mastering. They also serve well when used for input conditioning.
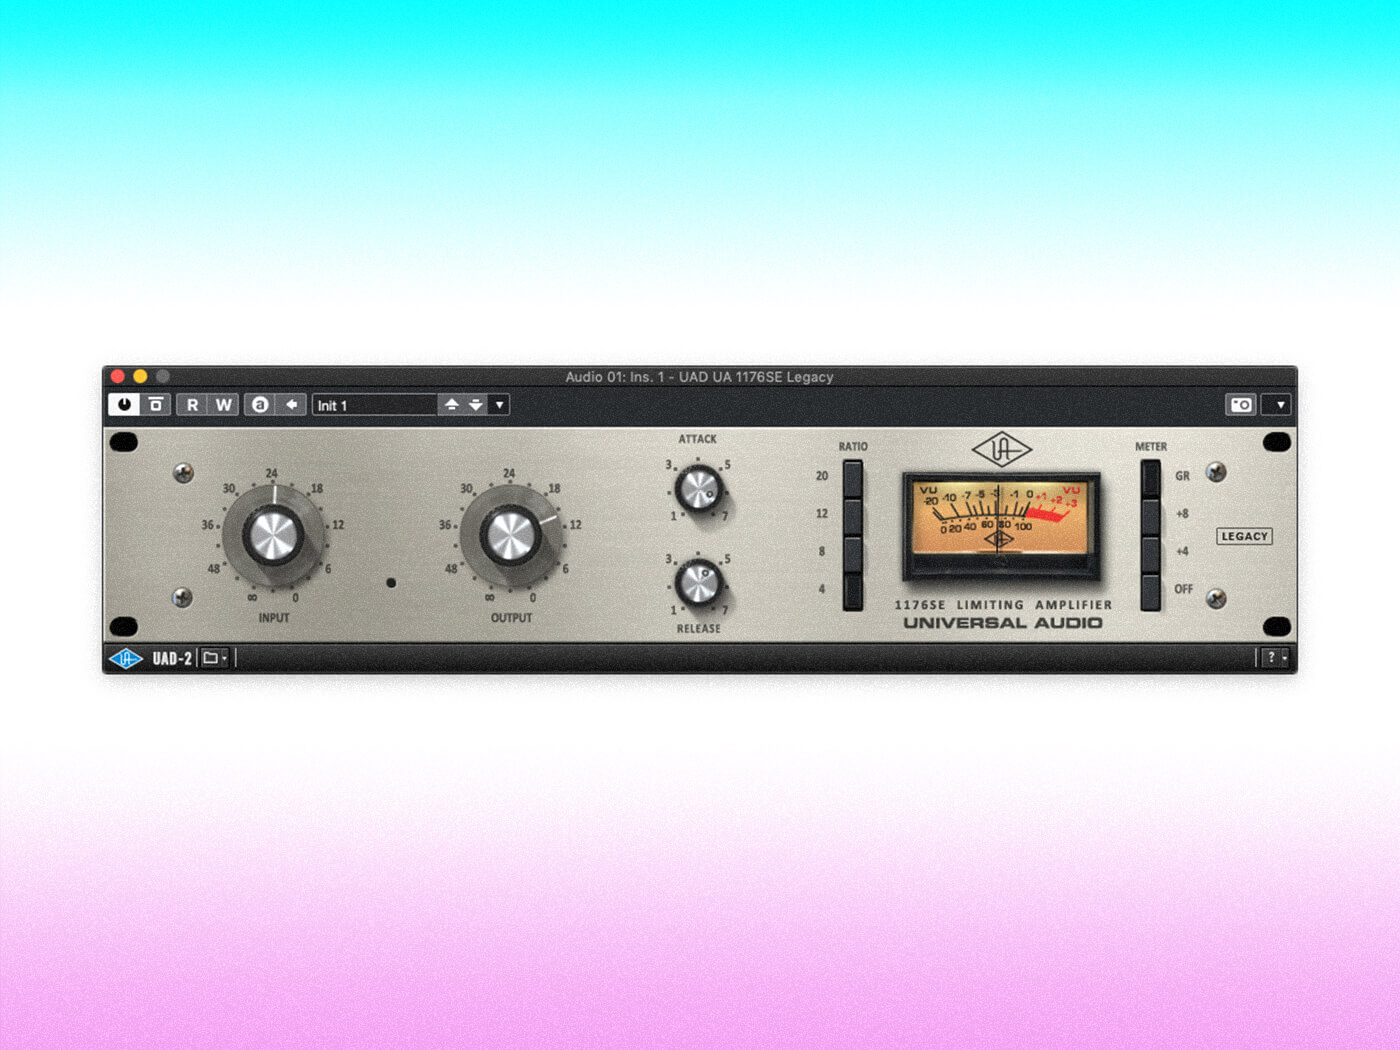
FET compressors use a field-effect transistor in their compression circuitry, which makes them exceptionally responsive to the aggressive transients found in drums, overdriven guitars and percussive instruments. They’re also brilliant at smoothing the dynamics in sources that have a large dynamic range, such as vocals (both singing and spoken), pianos and synths.
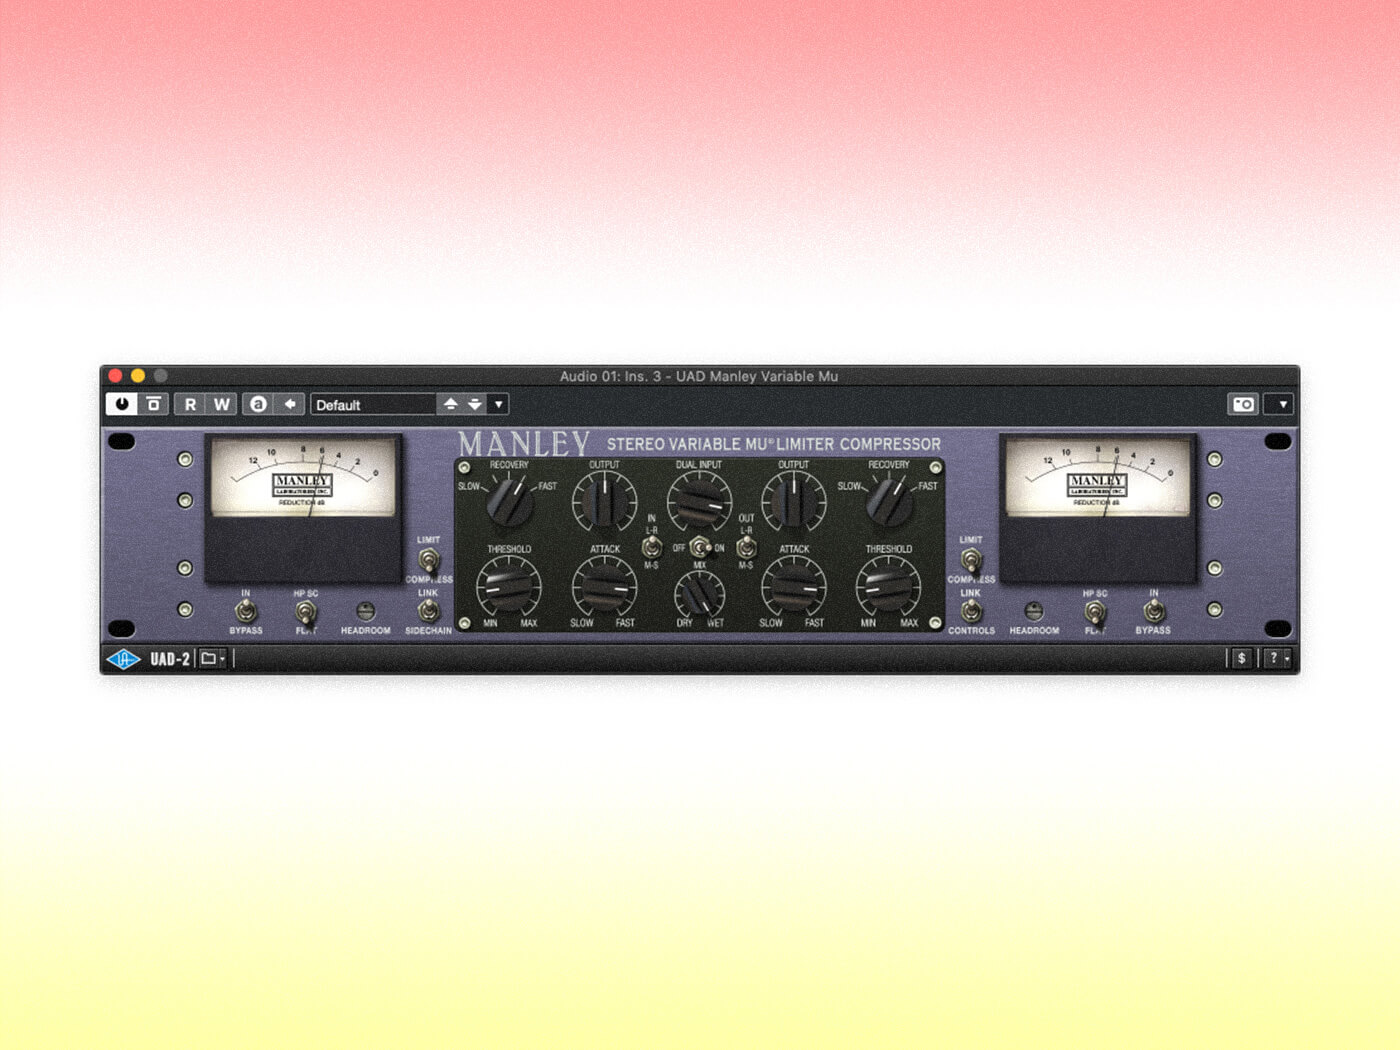
The exotically named and rather uncommon Variable Mu Compressor uses a vacuum tube to control the output signal, imparting a hit of classic tube warming and colouration on the resulting sound. These compressors tend to offer a similar degree of control to a VCA compressor but have a much smoother and more transparent sound. This makes them perfect for full-mix processing and mastering.
Get compressing
The best way to get to grips with compression is through practice. You will make mistakes along the way but you’ll learn more from those mistakes than you will from getting things right, so embrace the screw-ups! Just keep plugging away and, in time, using compression will become as instinctive and intuitive as adjusting a fader or dialling in some reverb.
For more guides, click here.