Technique of the Week: Manually Removing Microphone Pop
Manually removing microphone pop sounds like a bit of an ordeal, but Adam Crute is here to show us otherwise… When recording vocals, even if using a top-notch pop shield, there are times when the puff of wind caused by plosive sounds – “p”, “b” etc. – hits the microphone, creating a nasty ‘pop’ noise […]

Manually removing microphone pop sounds like a bit of an ordeal, but Adam Crute is here to show us otherwise…
When recording vocals, even if using a top-notch pop shield, there are times when the puff of wind caused by plosive sounds – “p”, “b” etc. – hits the microphone, creating a nasty ‘pop’ noise in your recording. There’s an easy way to fix these…:
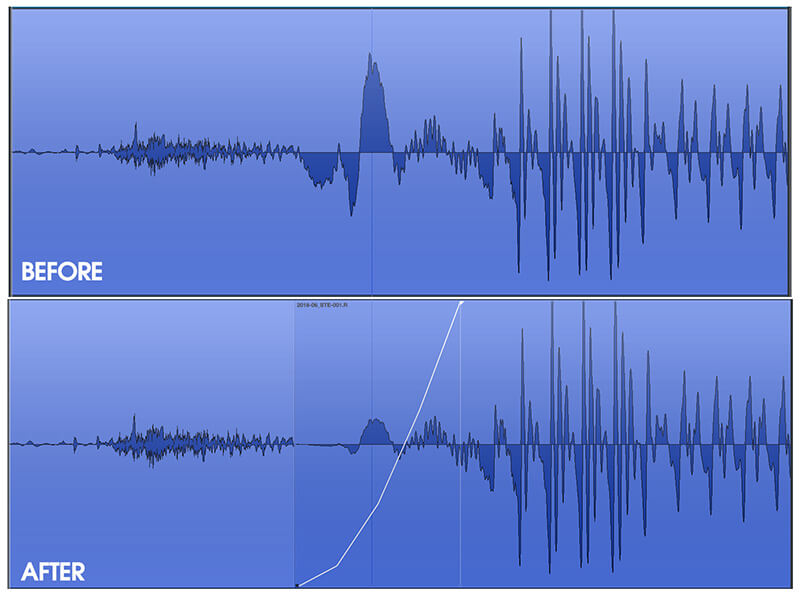
Locate the ‘pop’ sound in the recording and zoom in so that you can see it in detail. Become familiar with the shape – a sudden, loud, low-frequency oscillation that rapidly dissipates. Create a cut in the audio part just before the start of the ‘pop’, and then use a fade tool to create a short convex fade-up that covers the length of the pop sound.
Take a listen to the results. If the ‘pop’ is still audible then lengthen the fade slightly, and perhaps adjust the position of the cut; or, if you can hear the volume dip caused by the cut-and-fade-up, shorten the fade.
You wouldn’t want to have to fix a whole lot of pops in a take using this technique so it’s no replacement for a good pop shield, but it’s ideal for those odd pops that manage to sneak through, and that risk ruining an otherwise good take.