How To – Create Lively 808 Snare Rolls in Logic Pro X
808 snare drum rolls are a staple feature in dance music, but not all of us have a vintage Roland drum machine at our fingertips. We’re going to take a look at how you can build interesting sounding snare rolls that go beyond the original, using just a single sampled hit. 1. Start by loading […]
808 snare drum rolls are a staple feature in dance music, but not all of us have a vintage Roland drum machine at our fingertips. We’re going to take a look at how you can build interesting sounding snare rolls that go beyond the original, using just a single sampled hit.
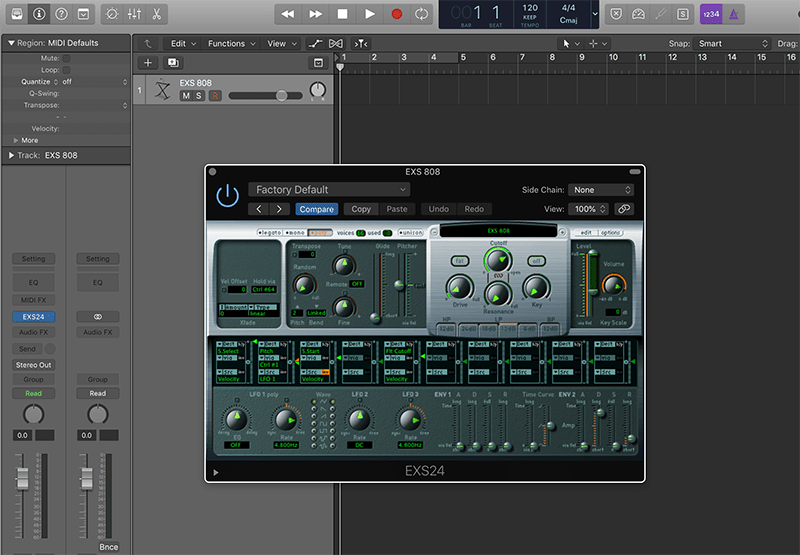
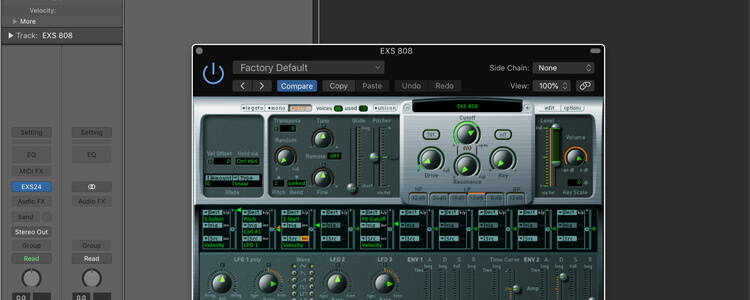
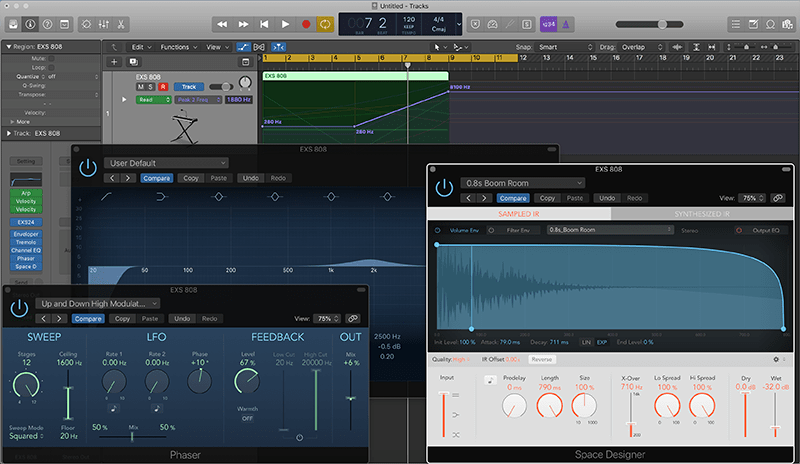
1. Start by loading an 808 kit in your sampler of choice. We’re going to use the EXS24 808 kit that comes with Logic, although if you have some more interesting, processed 808 libraries on your HD, then even better.
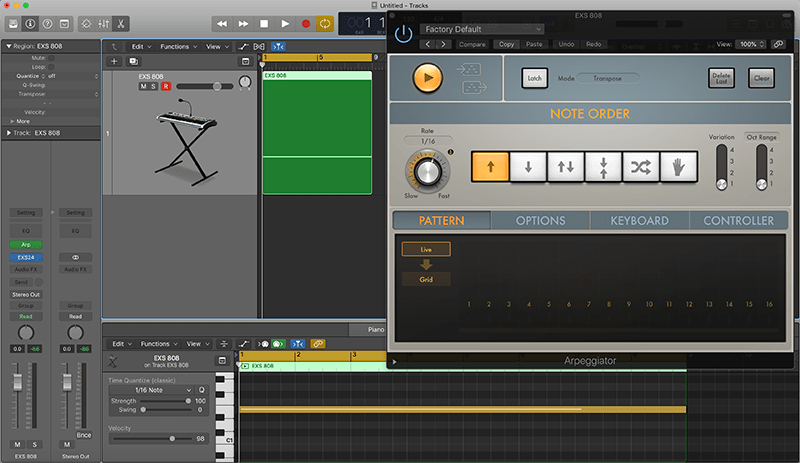
2. Next we’ll load up an Arpeggiator MIDI effect with the default preset, which is set to 16th notes, and draw in a single note to trigger the snare sound. We’ve gone for 8 bars, but you can adjust based on how long you need the fill to be.
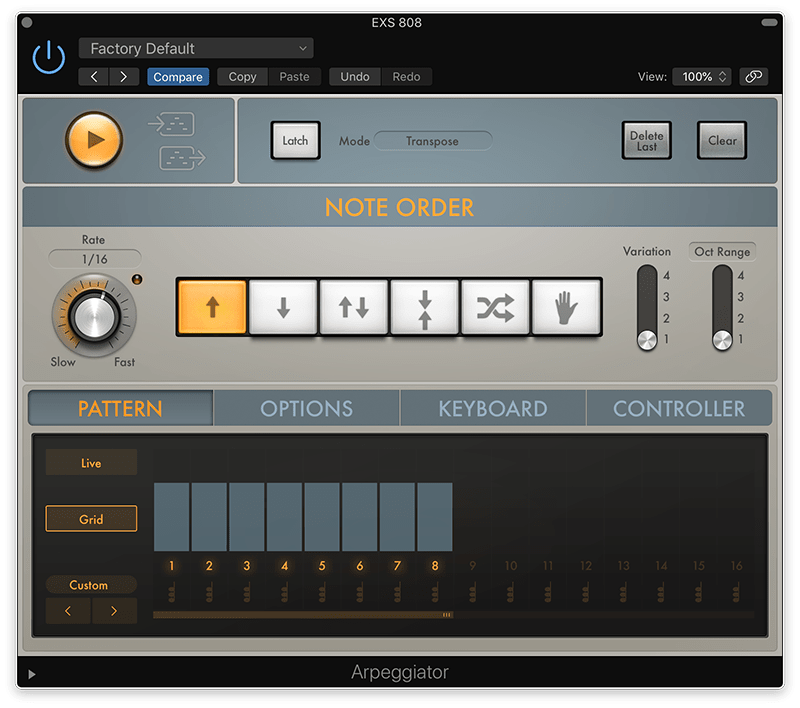
3. We’ll now change the Arpeggiator to Grid mode, and set the length to 8 steps. In theory, we could use 6 steps or a different subdivision that would create a more interesting polyrhythm loop, but for this fill we’ll stick to keeping it simple.
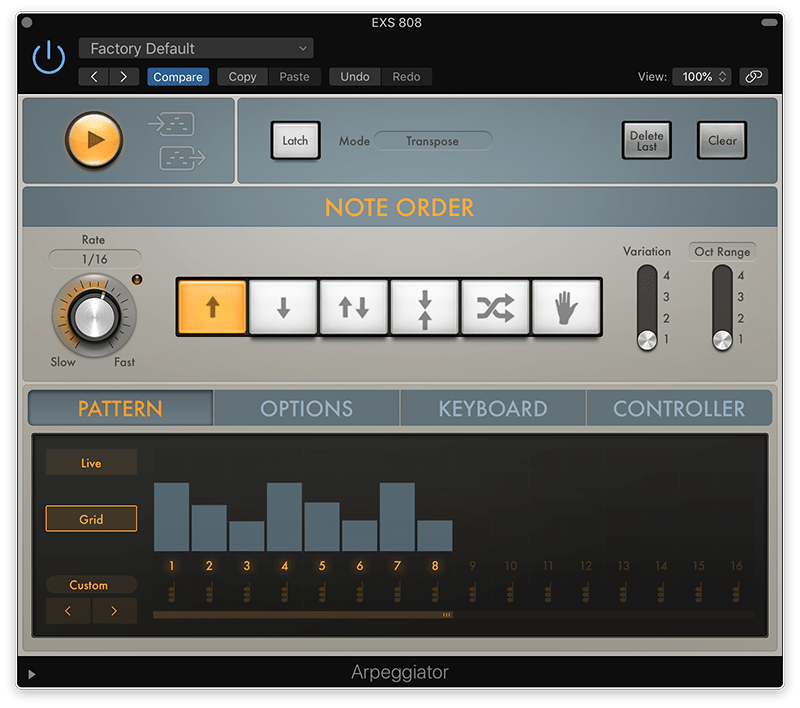
4. Let’s add some interest by changing the velocities to create more of a groove akin to a real drummer playing a roll. The more variation the better, but try and keep a degree of consistency so that it still has a driving feel.
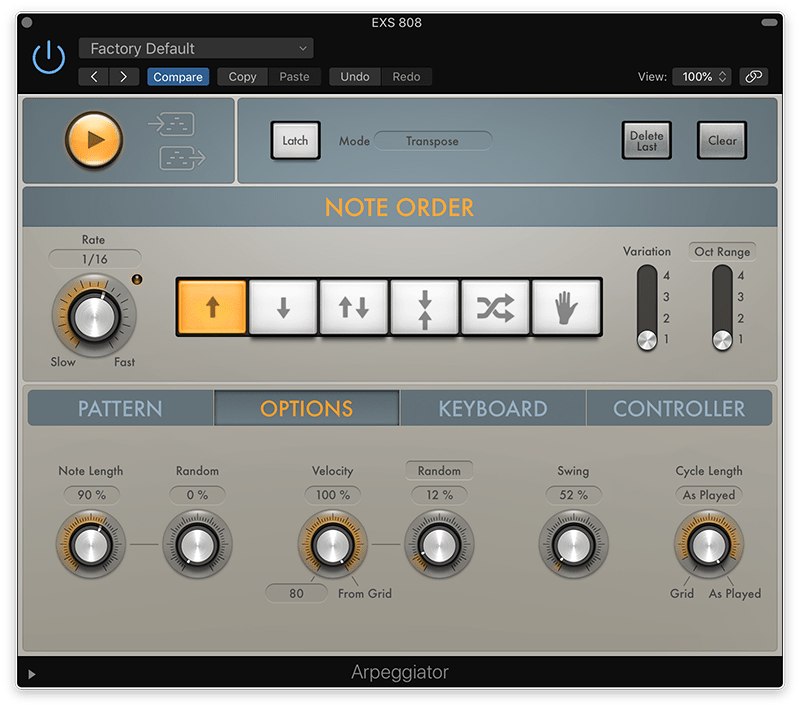
5. We can add some subtle extra velocity variations by increasing the Random dial, and maybe dial in a tiny bit of swing. Bear in mind though, even when working alongside a jackin’ swung house beat, straighter rolls generally work best.
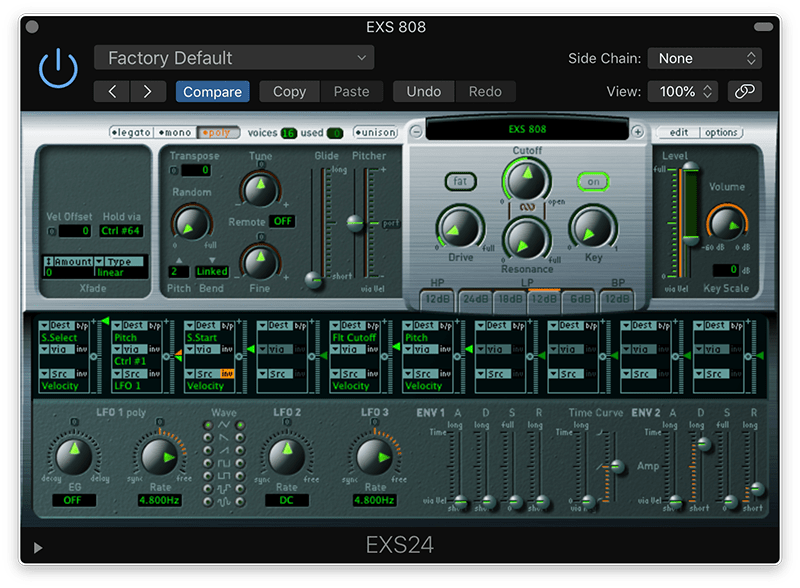
6. If we now switch on the Filter in EXS24, the Cutoff on this preset is already setup to be subtly modulated by the Velocity amount. We could also try very gently affecting the Pitch via Velocity as well to help slightly emphasise the harder notes.
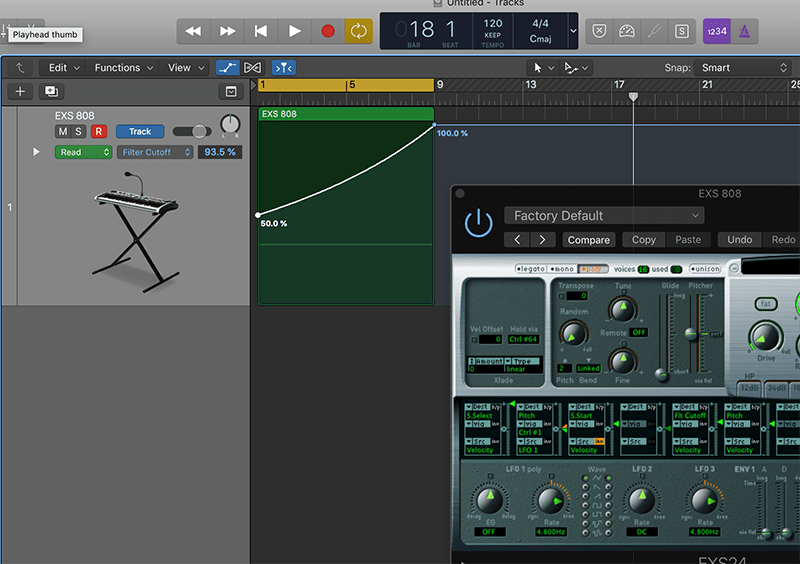
7. Now let’s start giving it some movement. The first port of call could be to automate the Cutoff to gently open from halfway to full over the length of the 8 bar roll. You might want to record this by hand or add a curve to give it more shape.
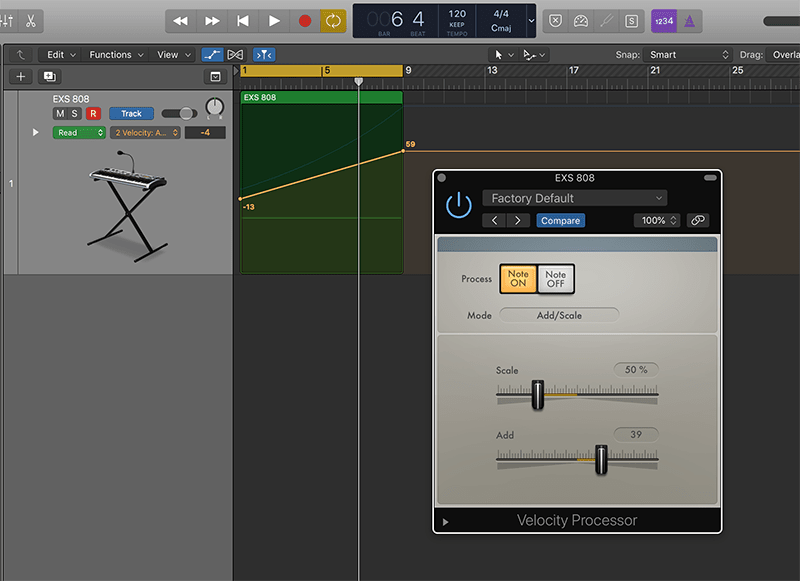
8. The next step is often to reach for volume automation, but let’s use a MIDI effect instead. Add a Velocity Processor after the Arp, and set it to Add/Scale mode. Then draw in some automation of the Add parameter, taking care of where you set the start and end values.
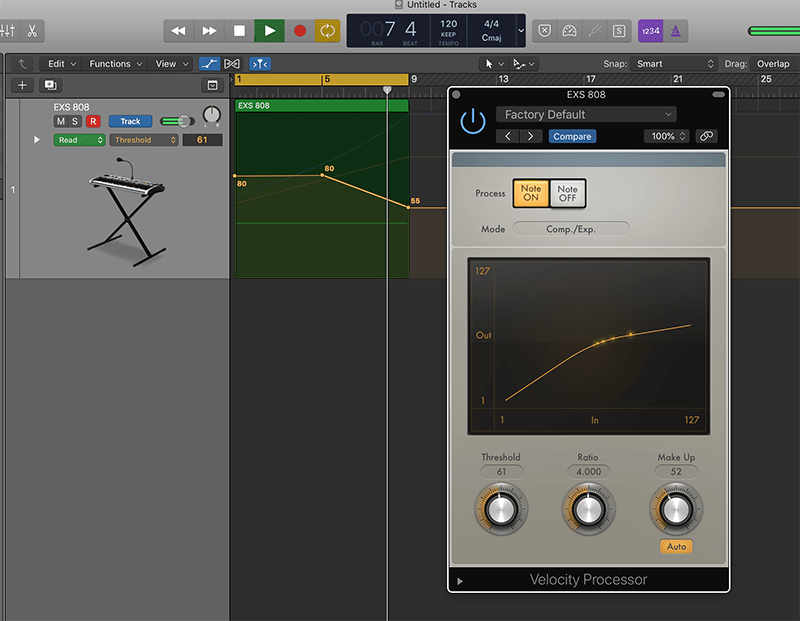
9. For one final MIDI trick, add another Velocity Processor, but this time set to Comp./Exp. Set the Ratio to around 4, turn on the Auto Make Up gain, and slowly automate the Threshold down. This will flatten out the louder velocity hits towards the end, which helps build intensity.
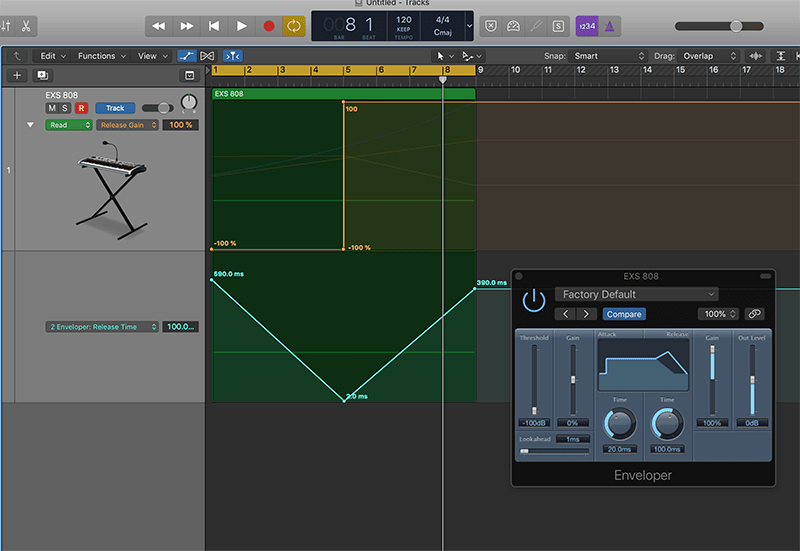
10. Let’s push it further using a transient designer effect such as Logic’s Enveloper. We’re going to automate the tail of the hit so that it starts tight, then increases up to it’s normal tail length, and finally is pushed to emphasise the decay.
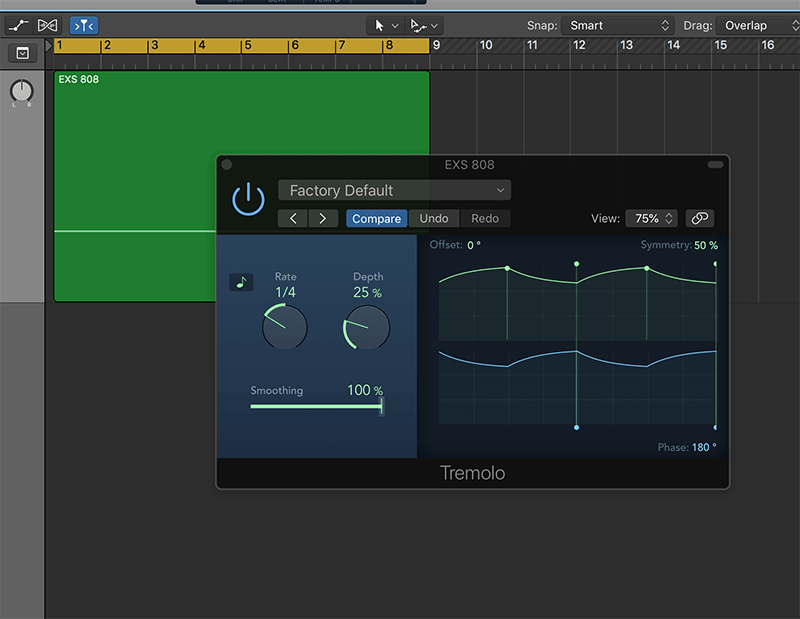
11. Our roll now has plenty of movement, but it’s in mono. To add some subtle stereo interest, try adding a Tremolo or other panning effect and set it to be fairly fast and narrow. Be aware that too much width will make the roll loose focus.
12. As a final touch, think about adding some other FX. Automating flangers and phasers can be good, as can adding in a reverb swell or sweeping up a subtle EQ peak. Just make sure it works in the context of the rest of the track.