Ableton Live Tutorial: Follow Actions – Step-by-Step
In this step-by-step tutorial Martin Delaney further explores the usage of follow actions in Ableton Live… 7: For bonus coolness, consolidate clips in the Arrangement View with Cmd>J, creating a new clip you can paste back into Session View. Follow Actions and Consolidate work with MIDI and audio clips. 8: More? Let’s use the clips […]
In this step-by-step tutorial Martin Delaney further explores the usage of follow actions in Ableton Live…
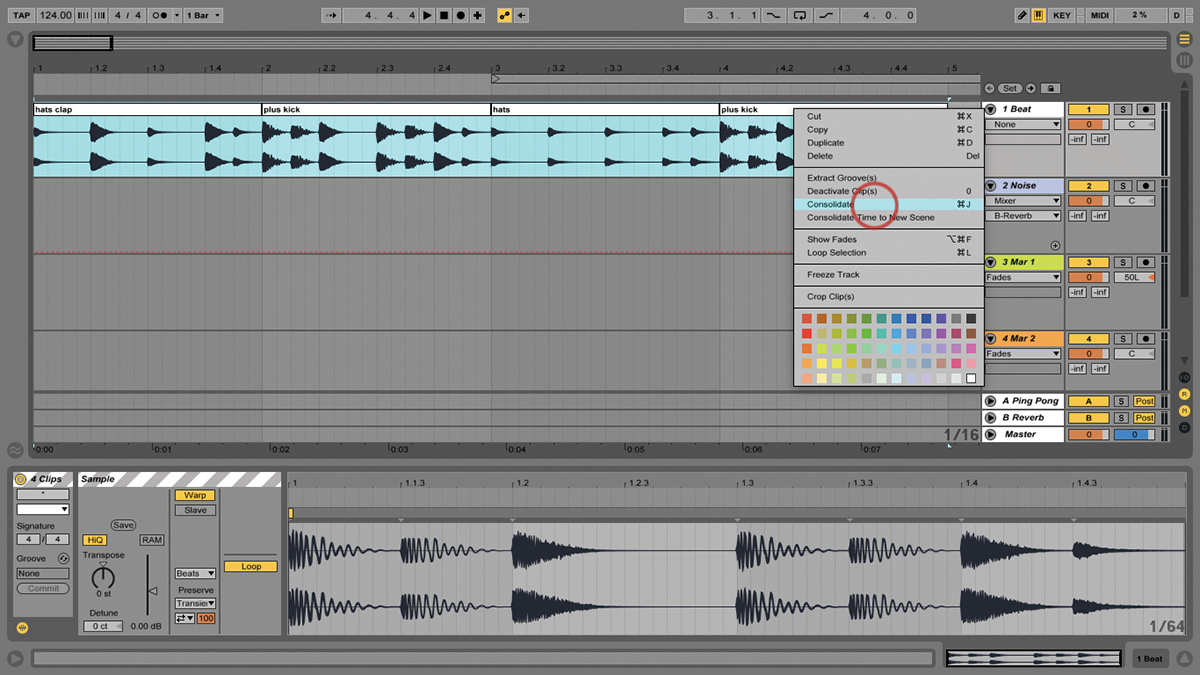
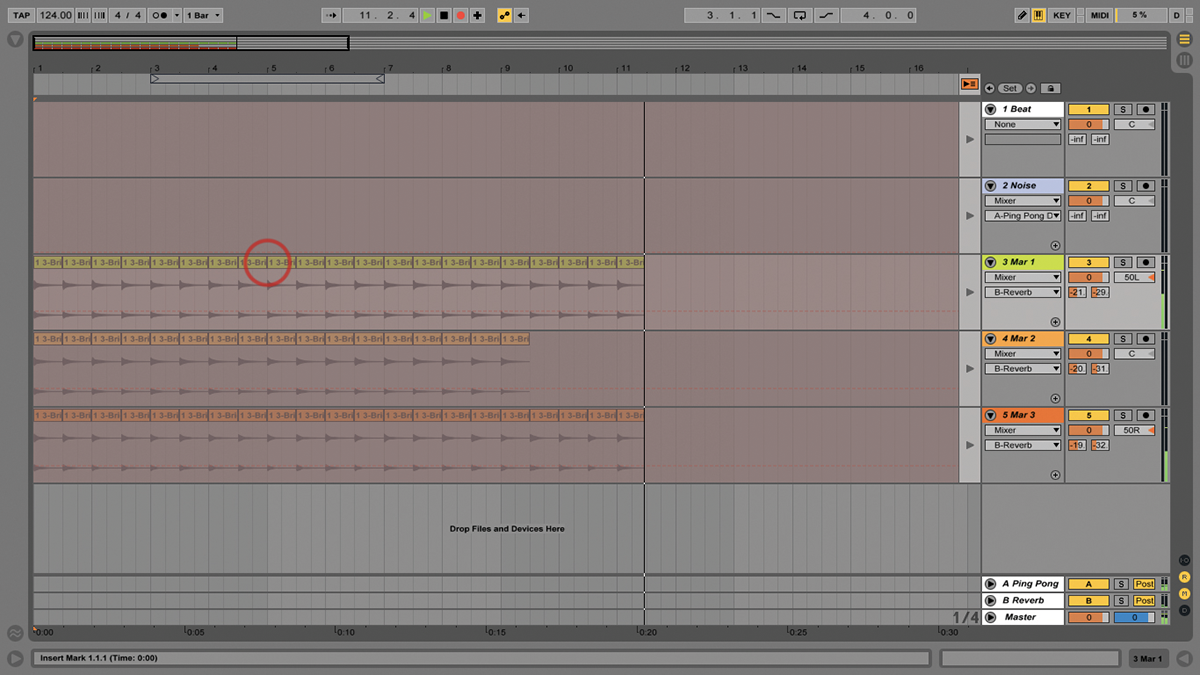
7: For bonus coolness, consolidate clips in the Arrangement View with Cmd>J, creating a new clip you can paste back into Session View. Follow Actions and Consolidate work with MIDI and audio clips.
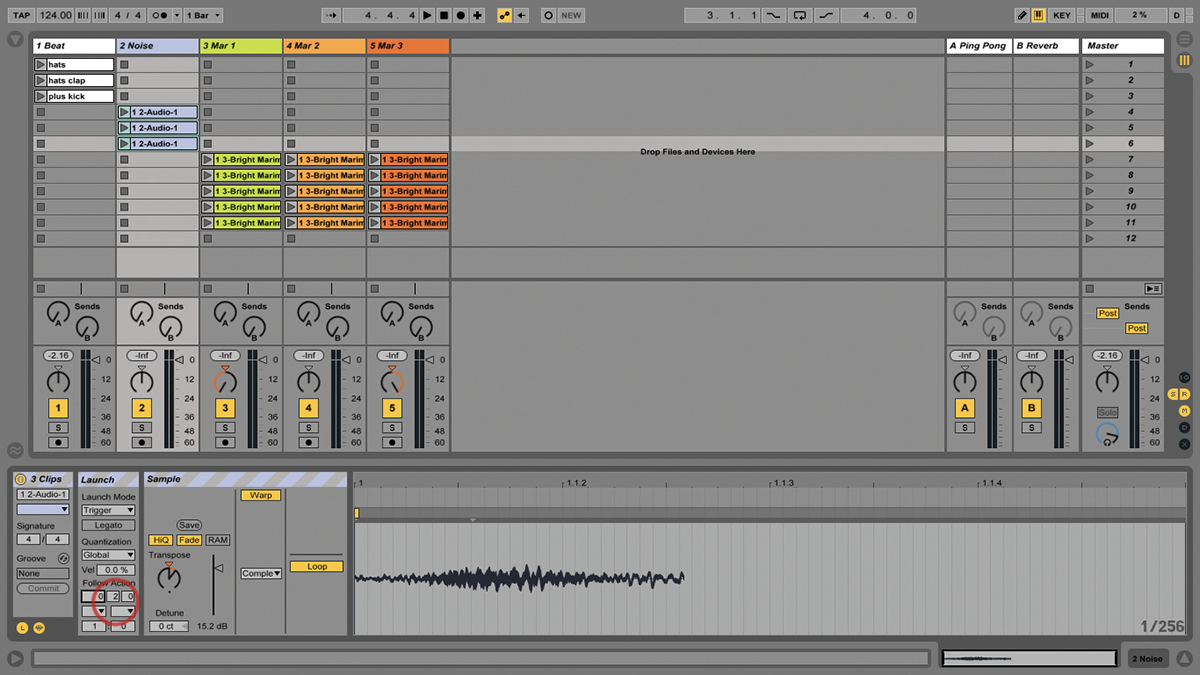
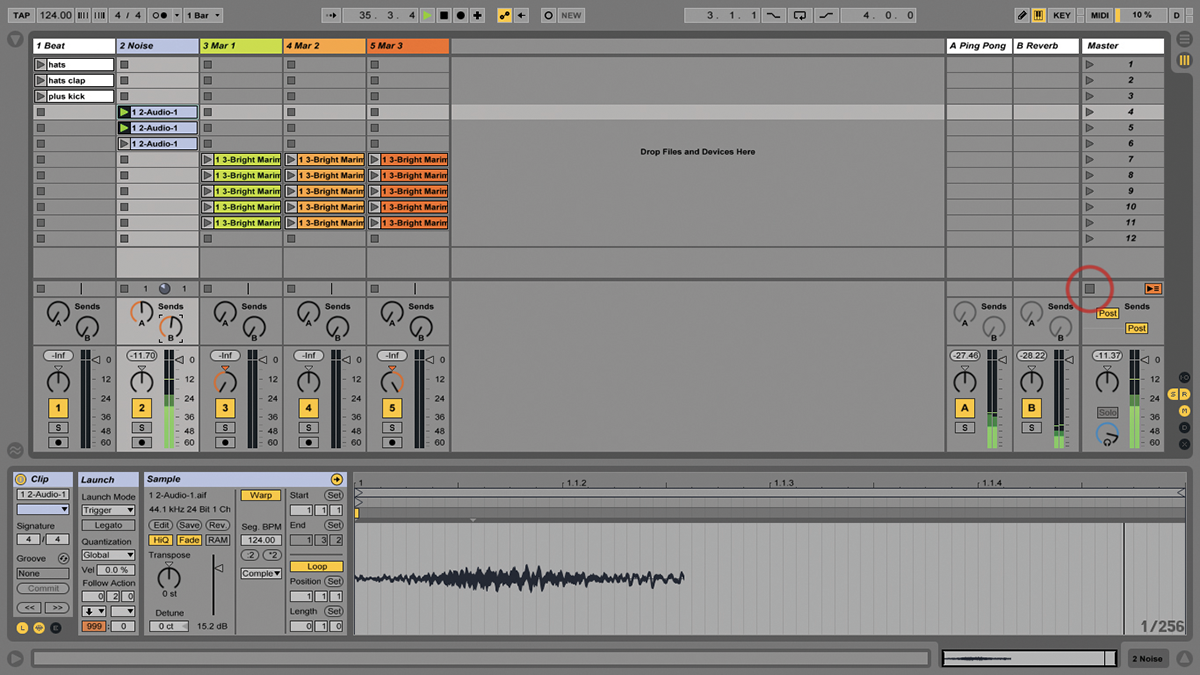
8: More? Let’s use the clips in track 2. Make sure all clips in track 1 are off. Select all the clips again, as we did before, and this time choose a time value of 0/2/0.
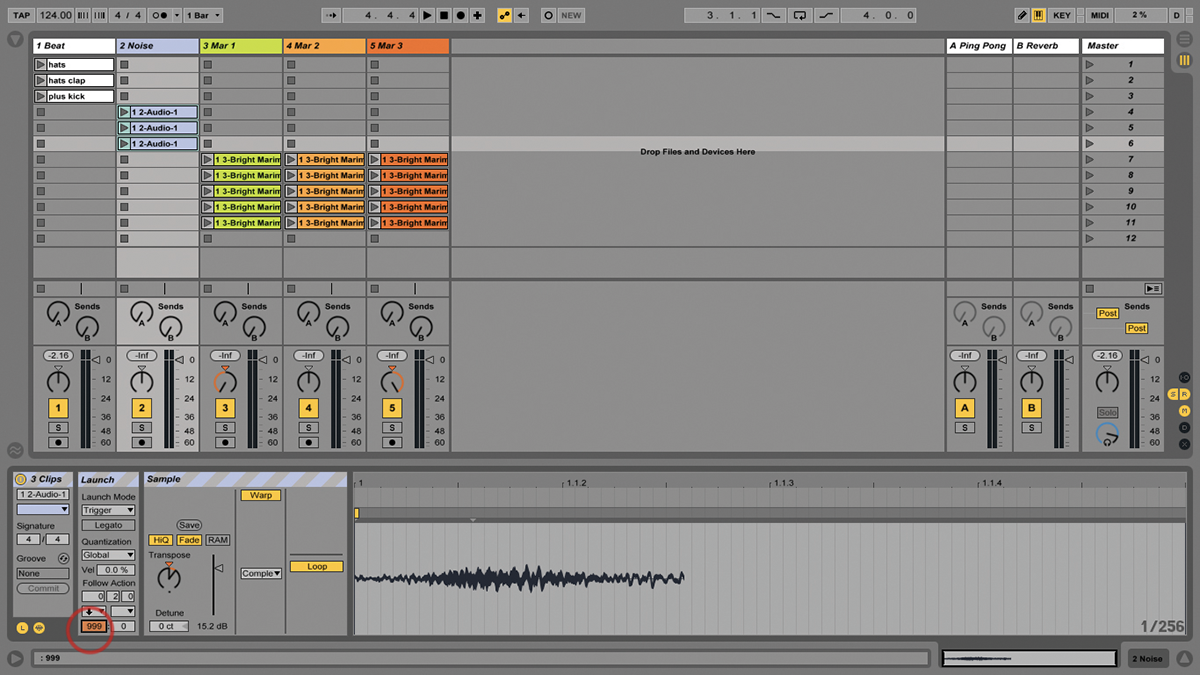
9: Choose the Next action, and set the Chance to 999. Select the last clip alone, and choose the Stop action. Launch the top clip, and they’ll play in sequence, until they reach the last one and stop.
10: To make things sound more interesting, send Sends A and B to the 12 o’clock position – those are going to Delay and Reverb. I love adding Ping Pong Delay, especially, to these kinds of sounds.
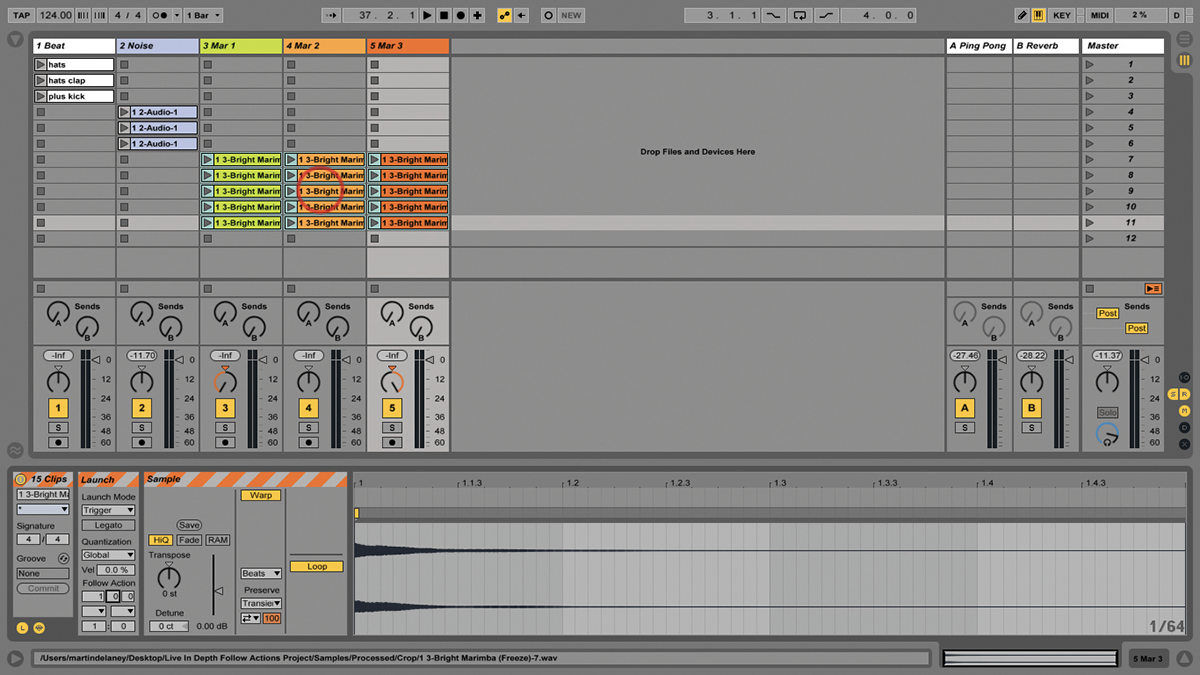
11: Stop all those clips. In fact, you can use the Stop All Clips button under the master track. Now go to tracks 3, 4, and 5. Select all of those clips and go to the Launch Box.
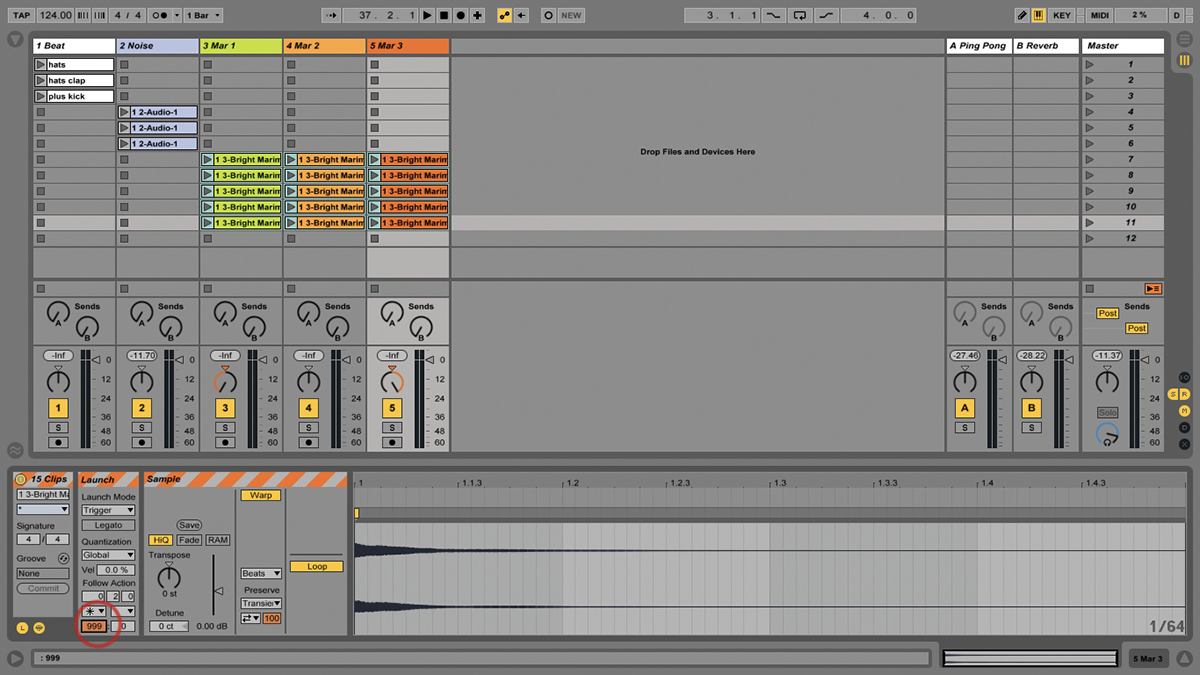
12: Set the timing value to 0/2/0. You’ll see this affects clips across all three tracks. Choose the Any action in the left-hand box, and set Chance to 999 again.
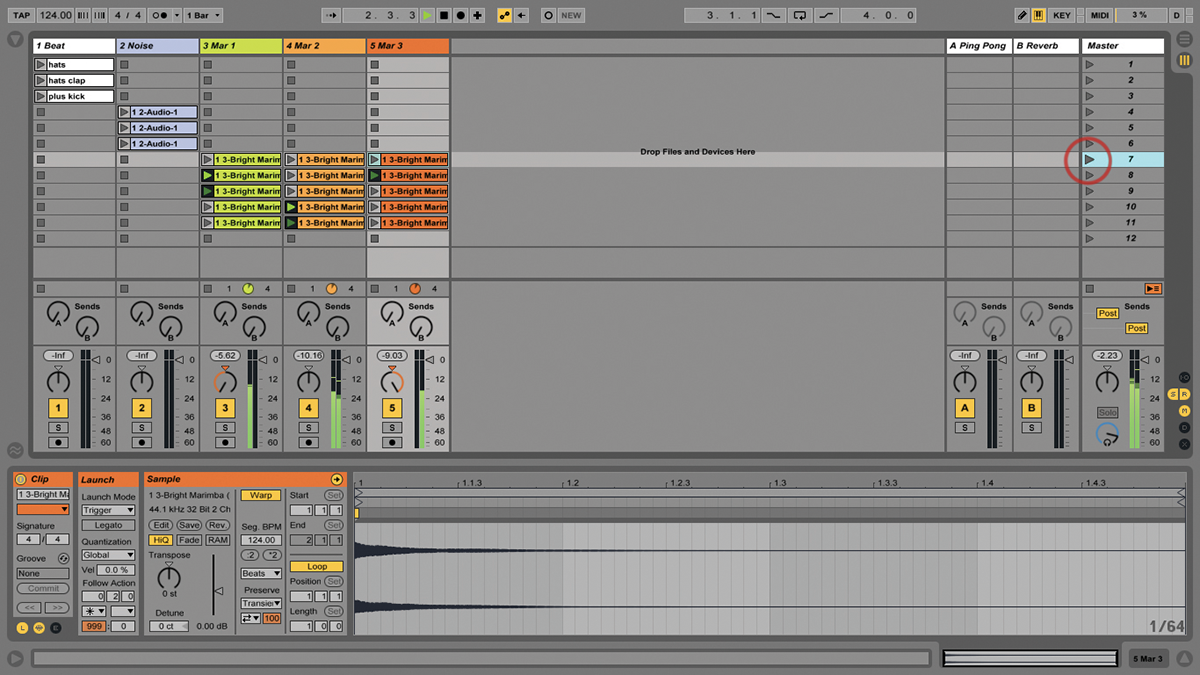
13: Instead of launching each track individually, use a scene from the Master track to fire the top clip in each track. Clip playback diverges, building a more interesting and unpredictable sequence.
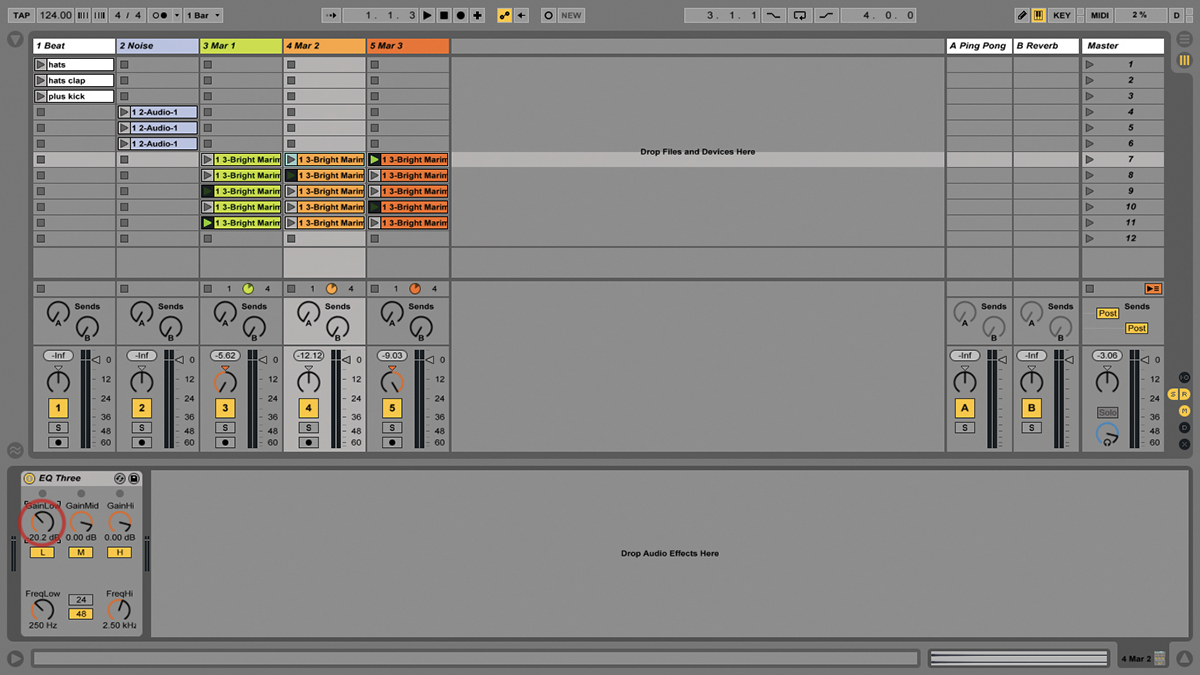
14: Sounds good, but track 4 is clashing with the others in the low end. So add an EQ Three to track 4 and roll off the low end a bit. That thins it out some more.
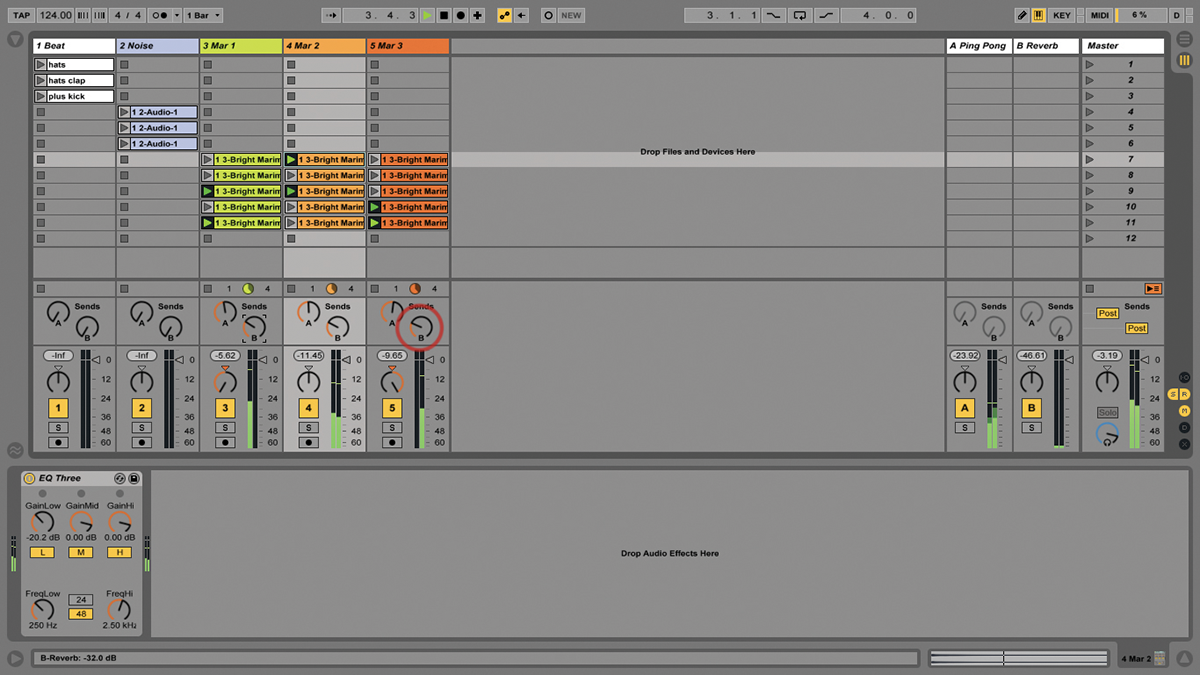
15: Having fixed that EQ issue, now you once again add delay and reverb Sends to give more depth and even more rhythmic variety to the parts. Experiment with different project tempos as well.
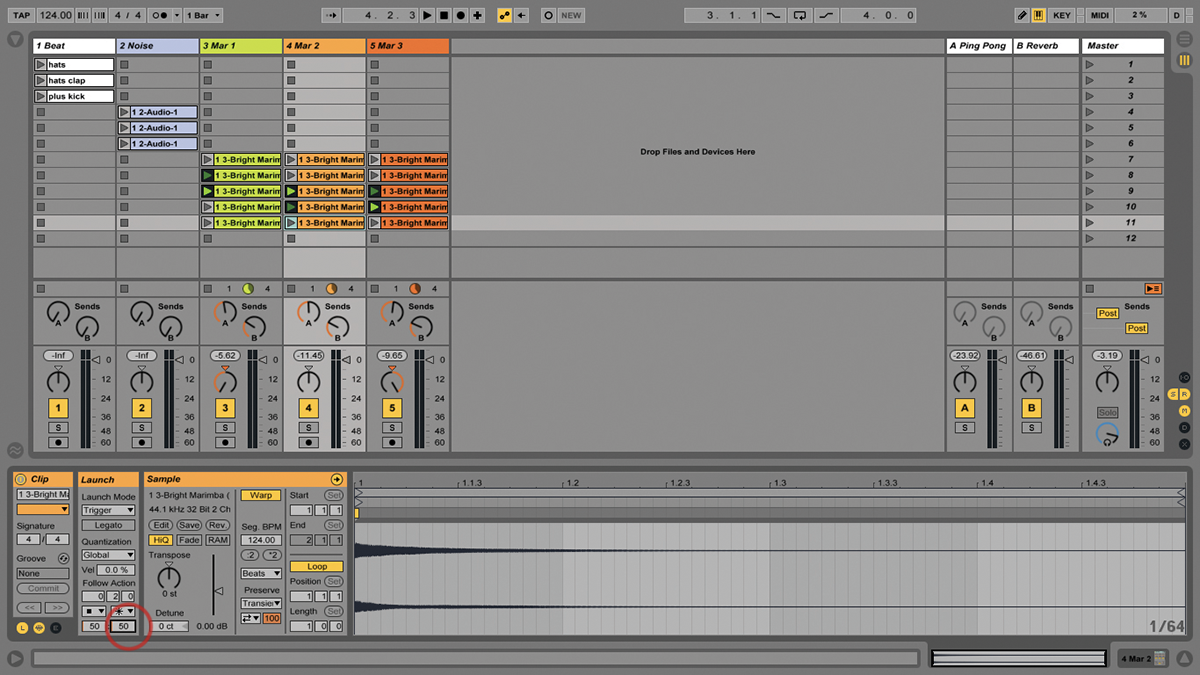
16: Go to the bottom clip in track 4 and set one Follow Action to Stop, the other to Any and their Chances to 50 each. Now, when the Follow Action reaches that one, the track 4 clips sometimes stop.
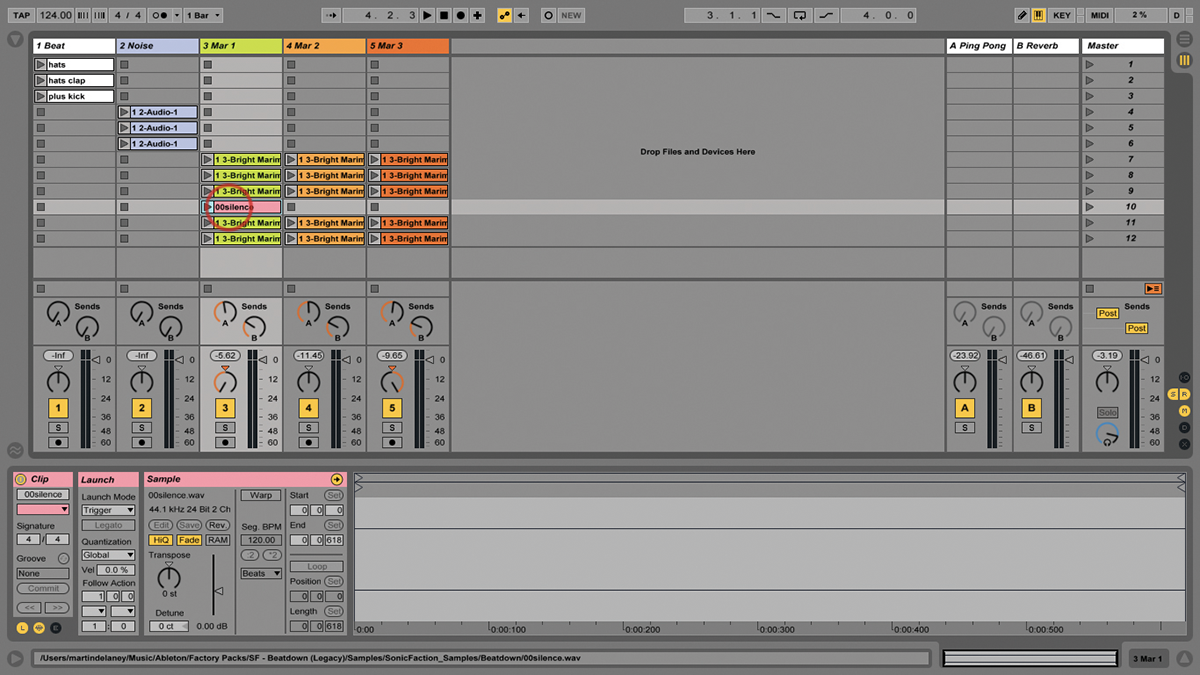
17: Follow Actions only apply to blocks of adjoining clips in the same track. They stop when then arrive at an empty clip slot. If you need a silence section, add a silent audio or MIDI clip!
18: As we’ve already seen, Follow Actions are recorded just like everything else that happens in Live, so it’s easy to use them as a way of semi-randomly generating new parts and even mixes.
