The Lazy Guide to Ableton Live: Part 5 – Clip Automation
It’s time for our final part of our lazy guide to Ableton Live and this time we’re looking at getting the most out of clip automation. Check out the rest of our guide, part 1, part 2, part 3 and part 4. So to our final way of easily getting variation from your clips, and […]

It’s time for our final part of our lazy guide to Ableton Live and this time we’re looking at getting the most out of clip automation. Check out the rest of our guide, part 1, part 2, part 3 and part 4.
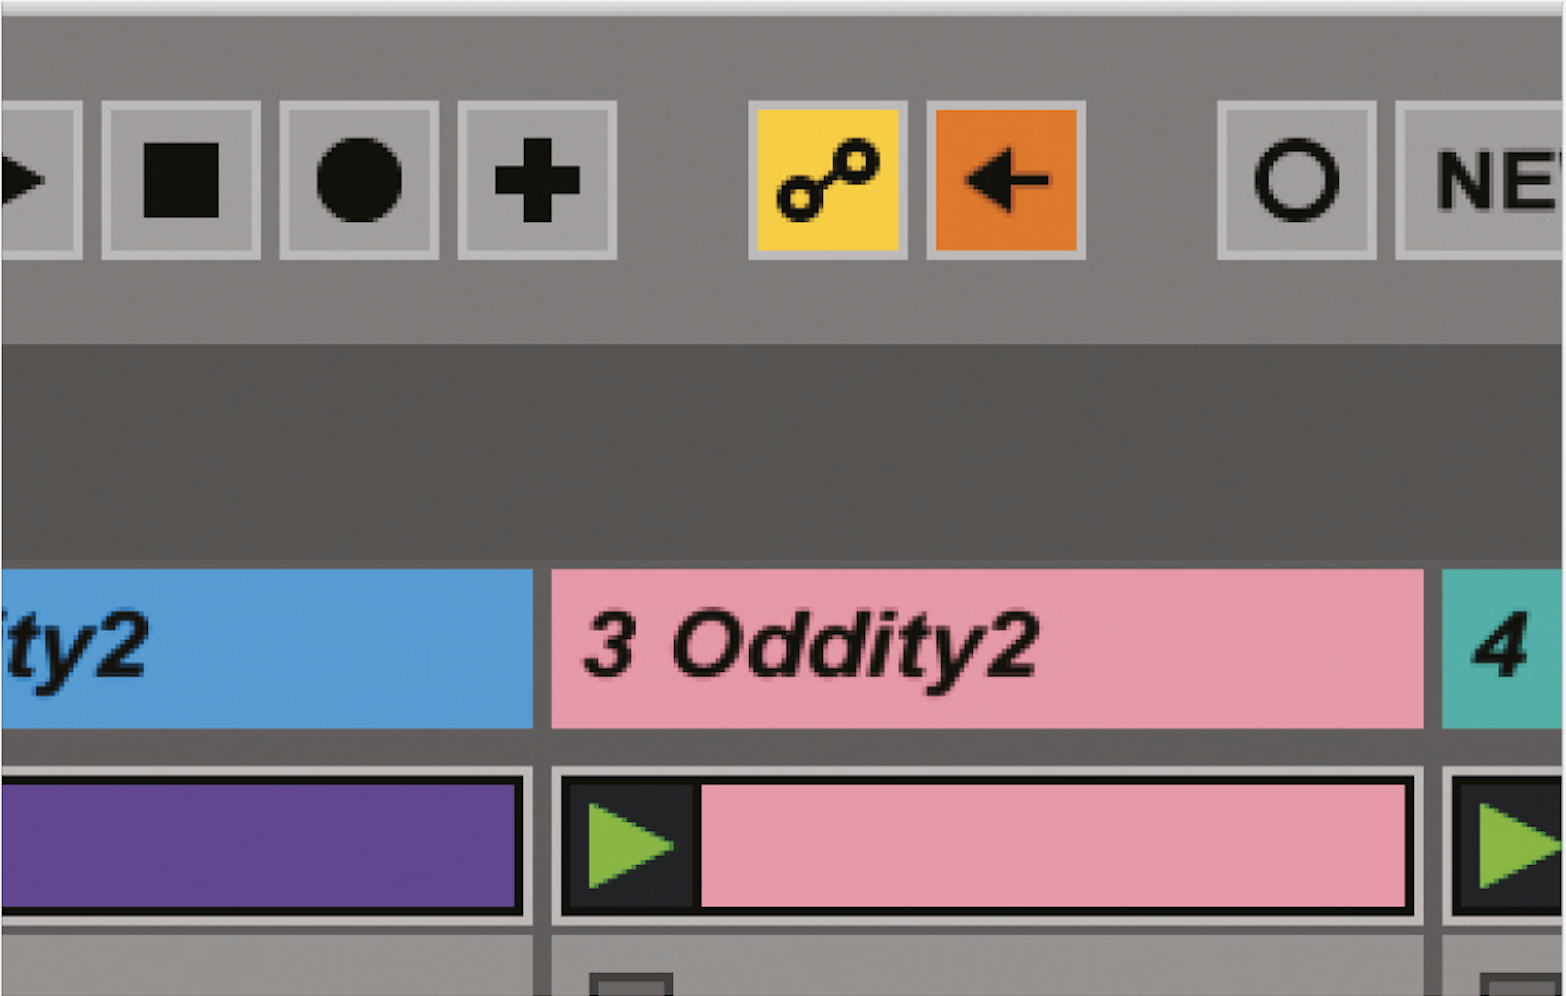
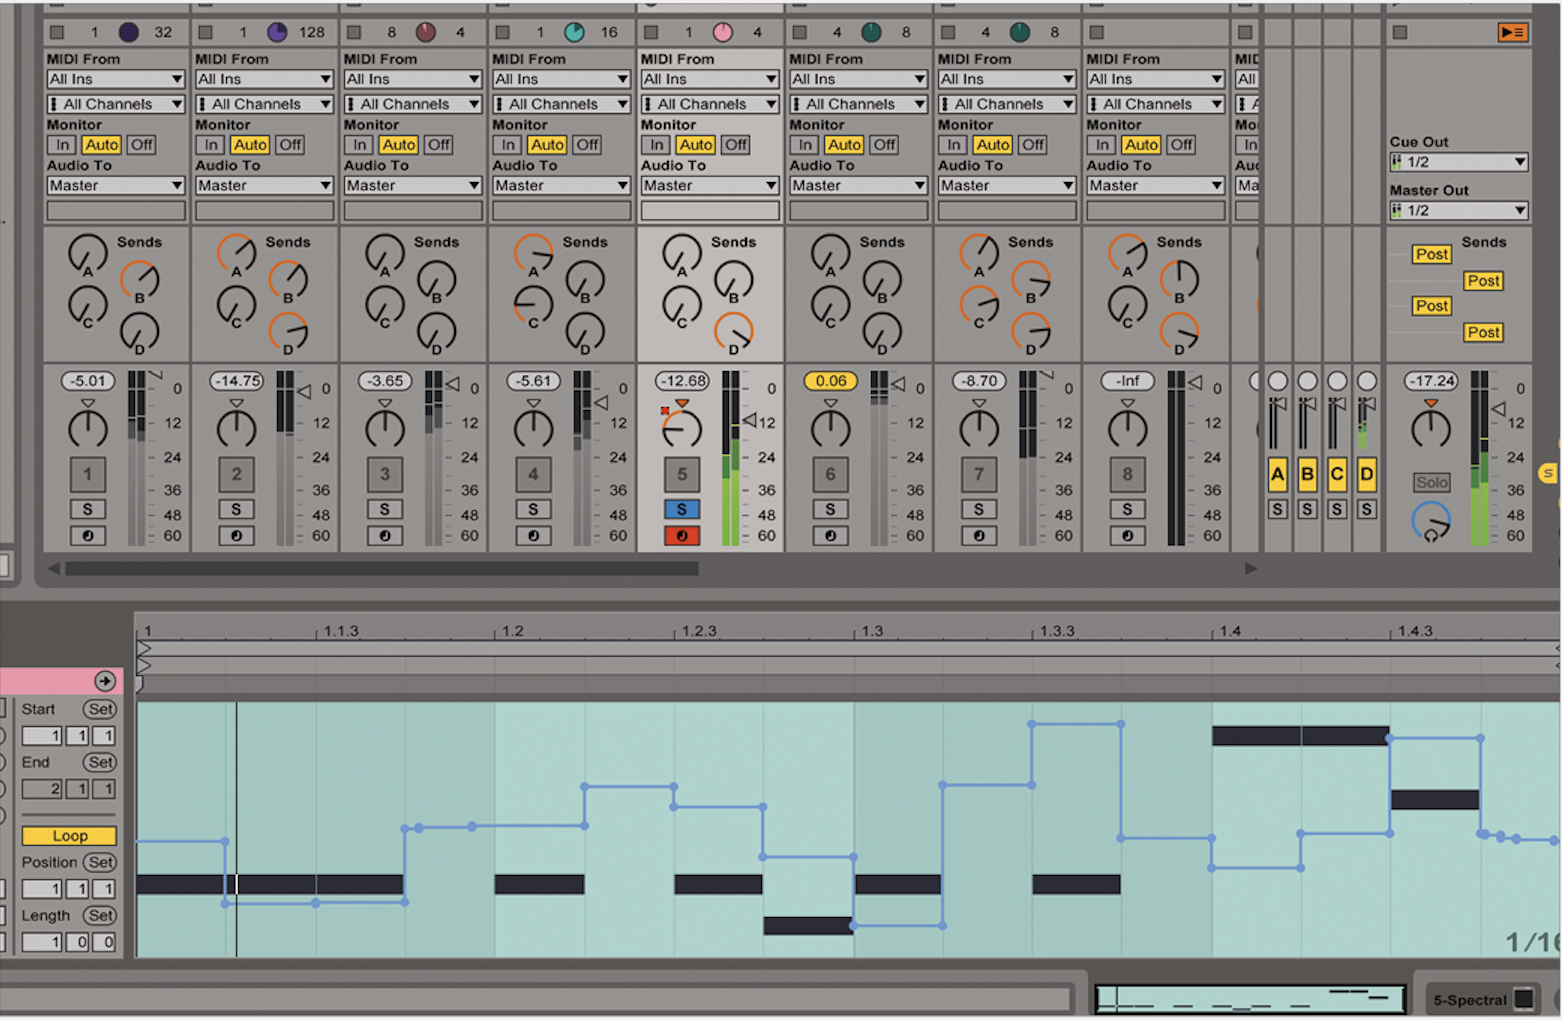
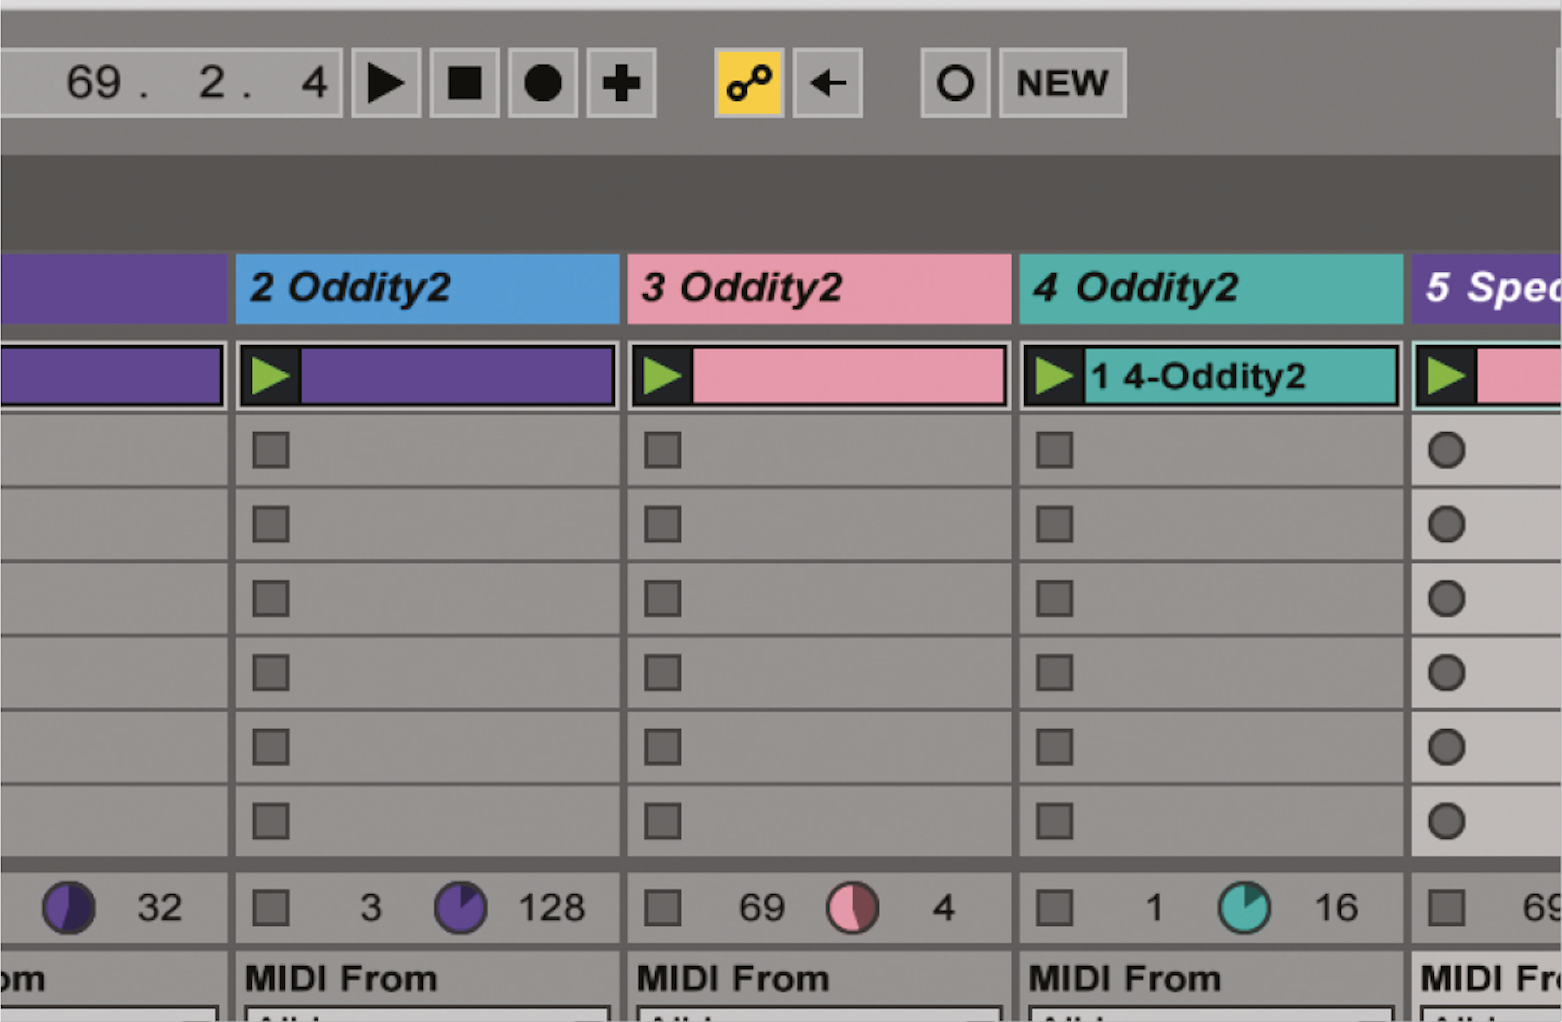
So to our final way of easily getting variation from your clips, and it’s time for some automation. Again, this is a subject that we could go into some depth with, but as this is ‘The lazy person’s guide’, let’s not go too deep. All you need to do to get things moving is to hit a couple of keys and record some movement and everything you record will be kept within your clip in Session View. Edit it later to make it perfect!
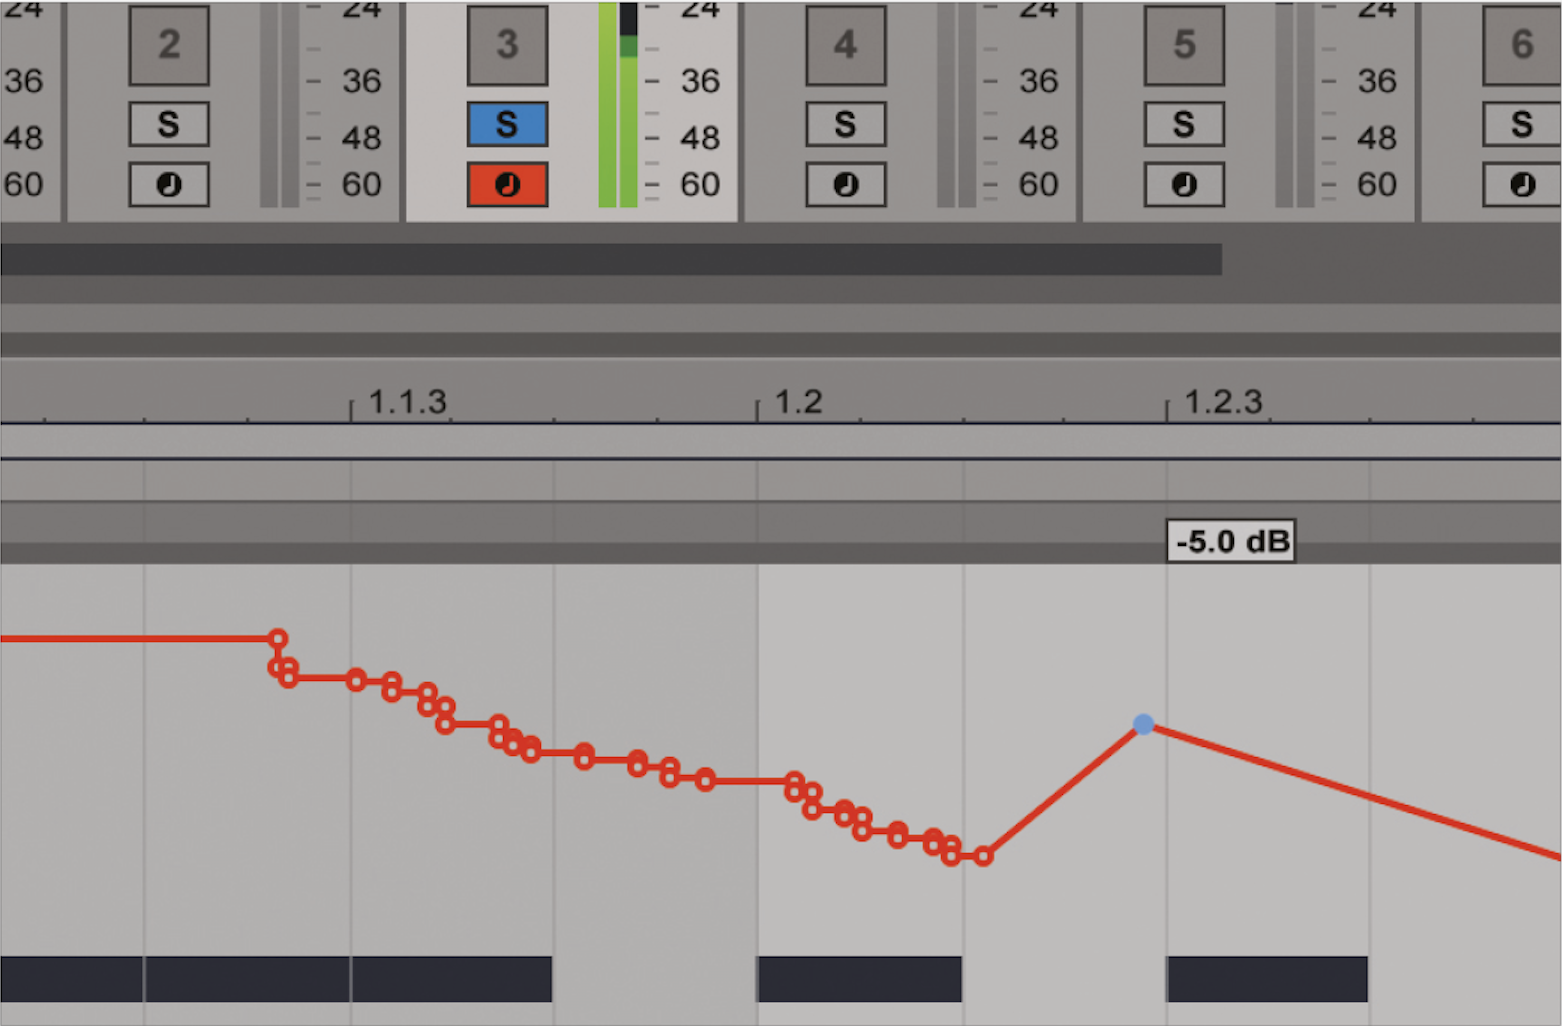
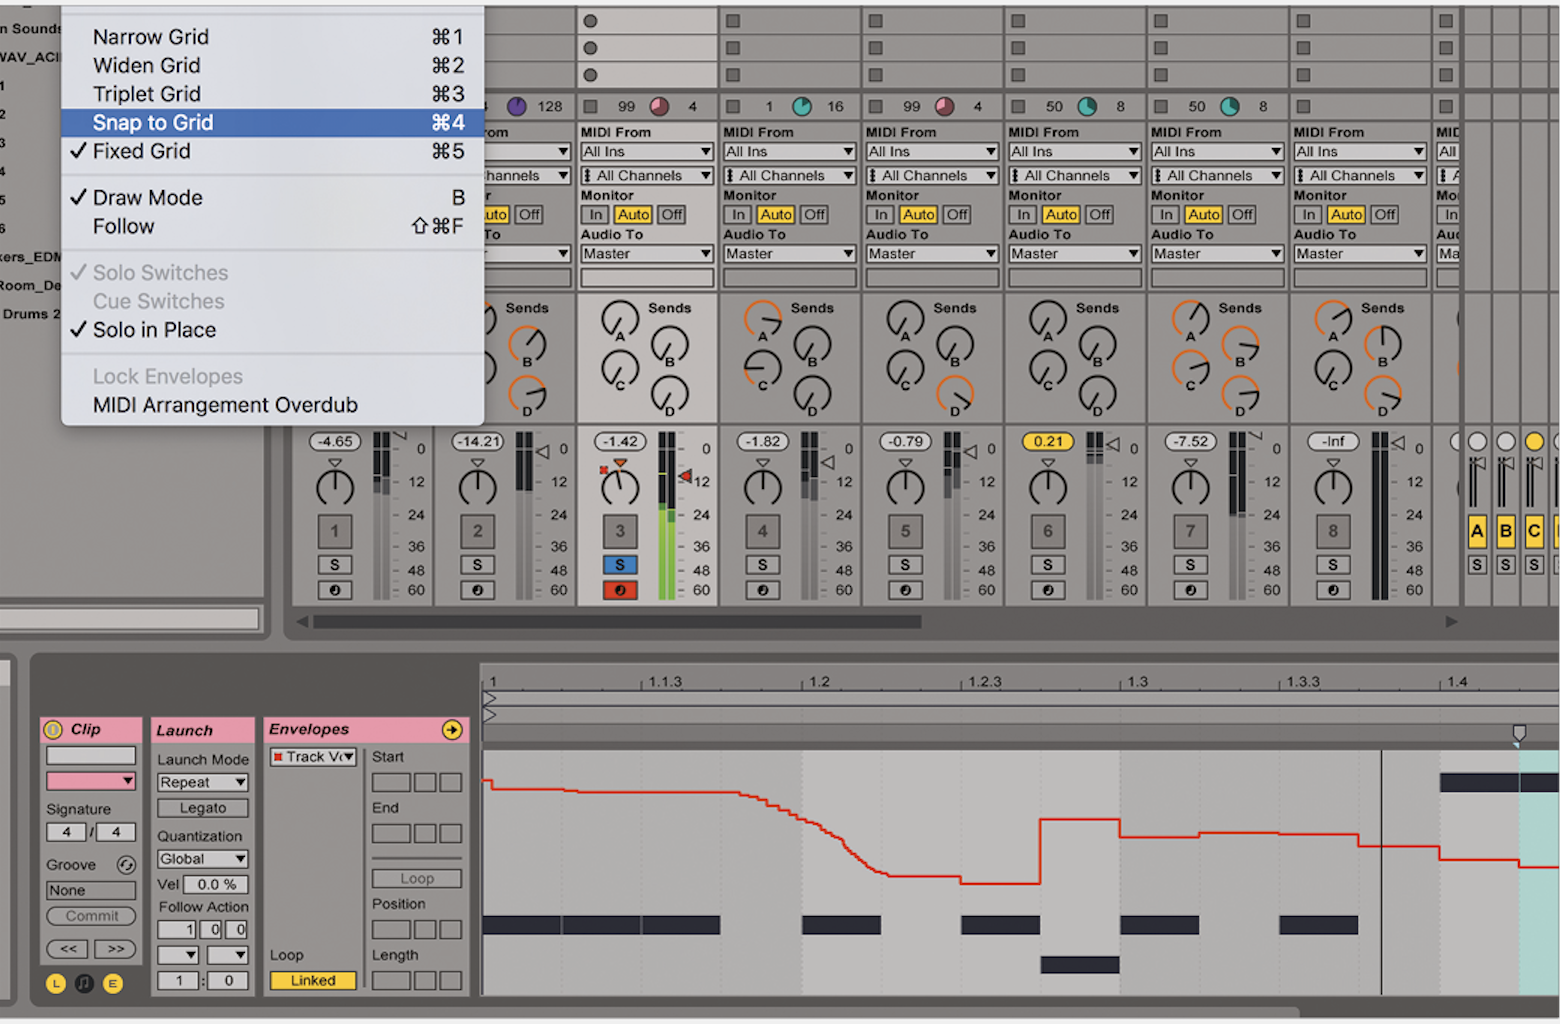
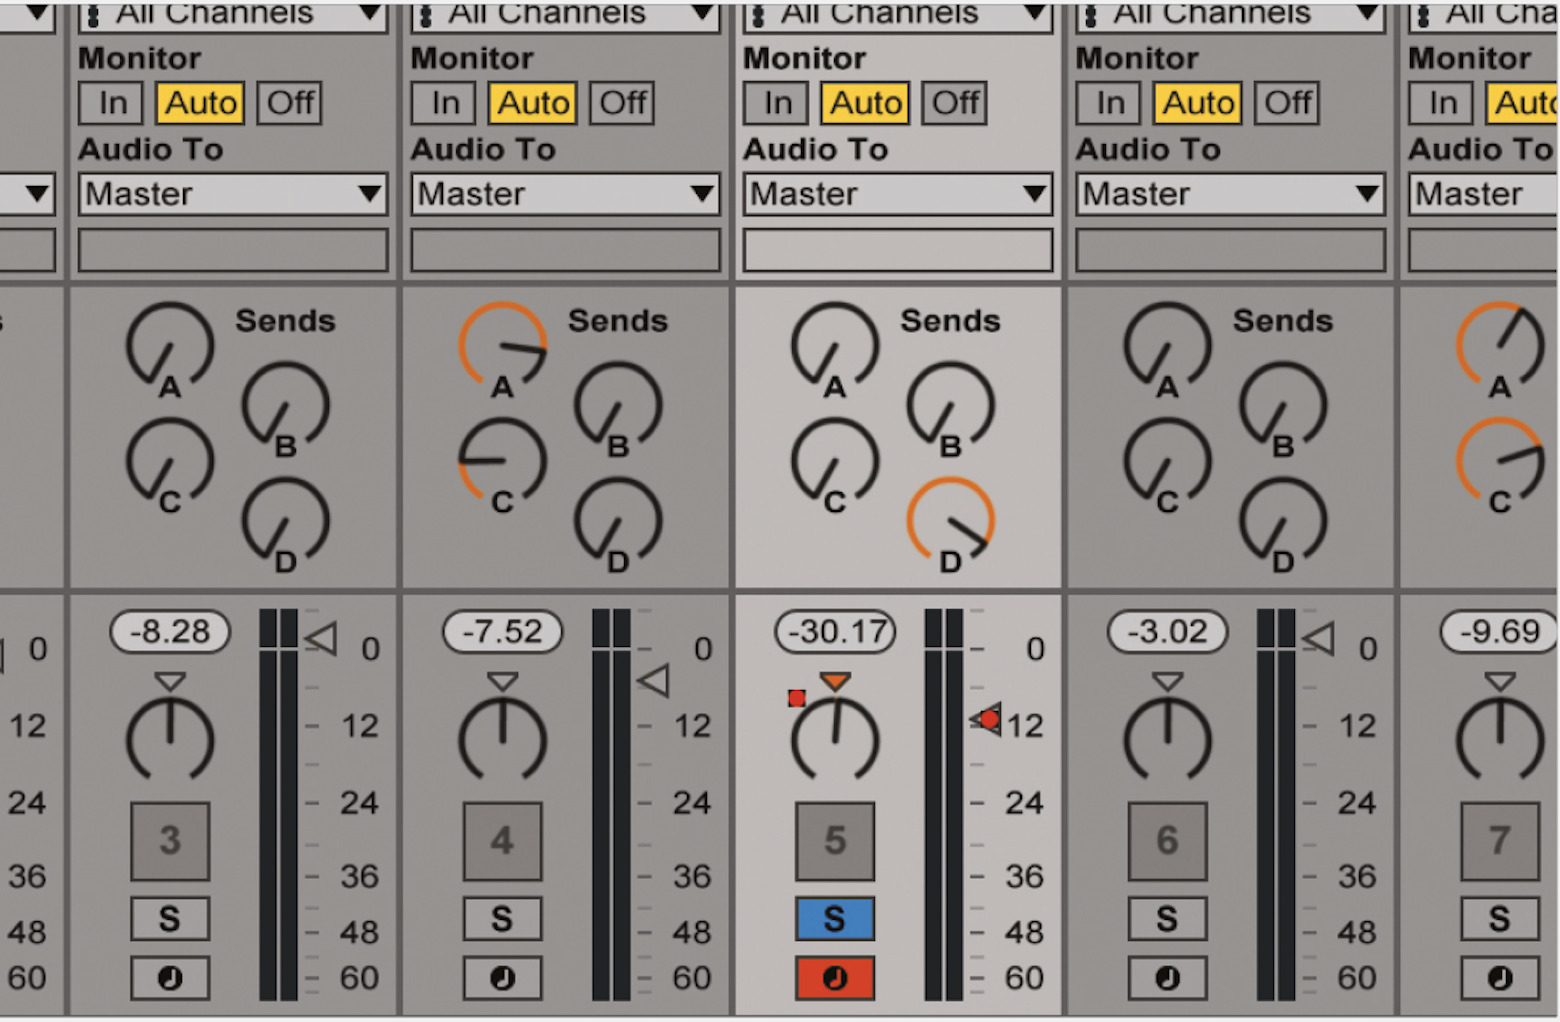
Simply arm the track and enable the automation. We start by showing you how simple panning and volume changes can be recorded per clip. Then we detail how you can edit the results or draw in completely new versions of the automation.
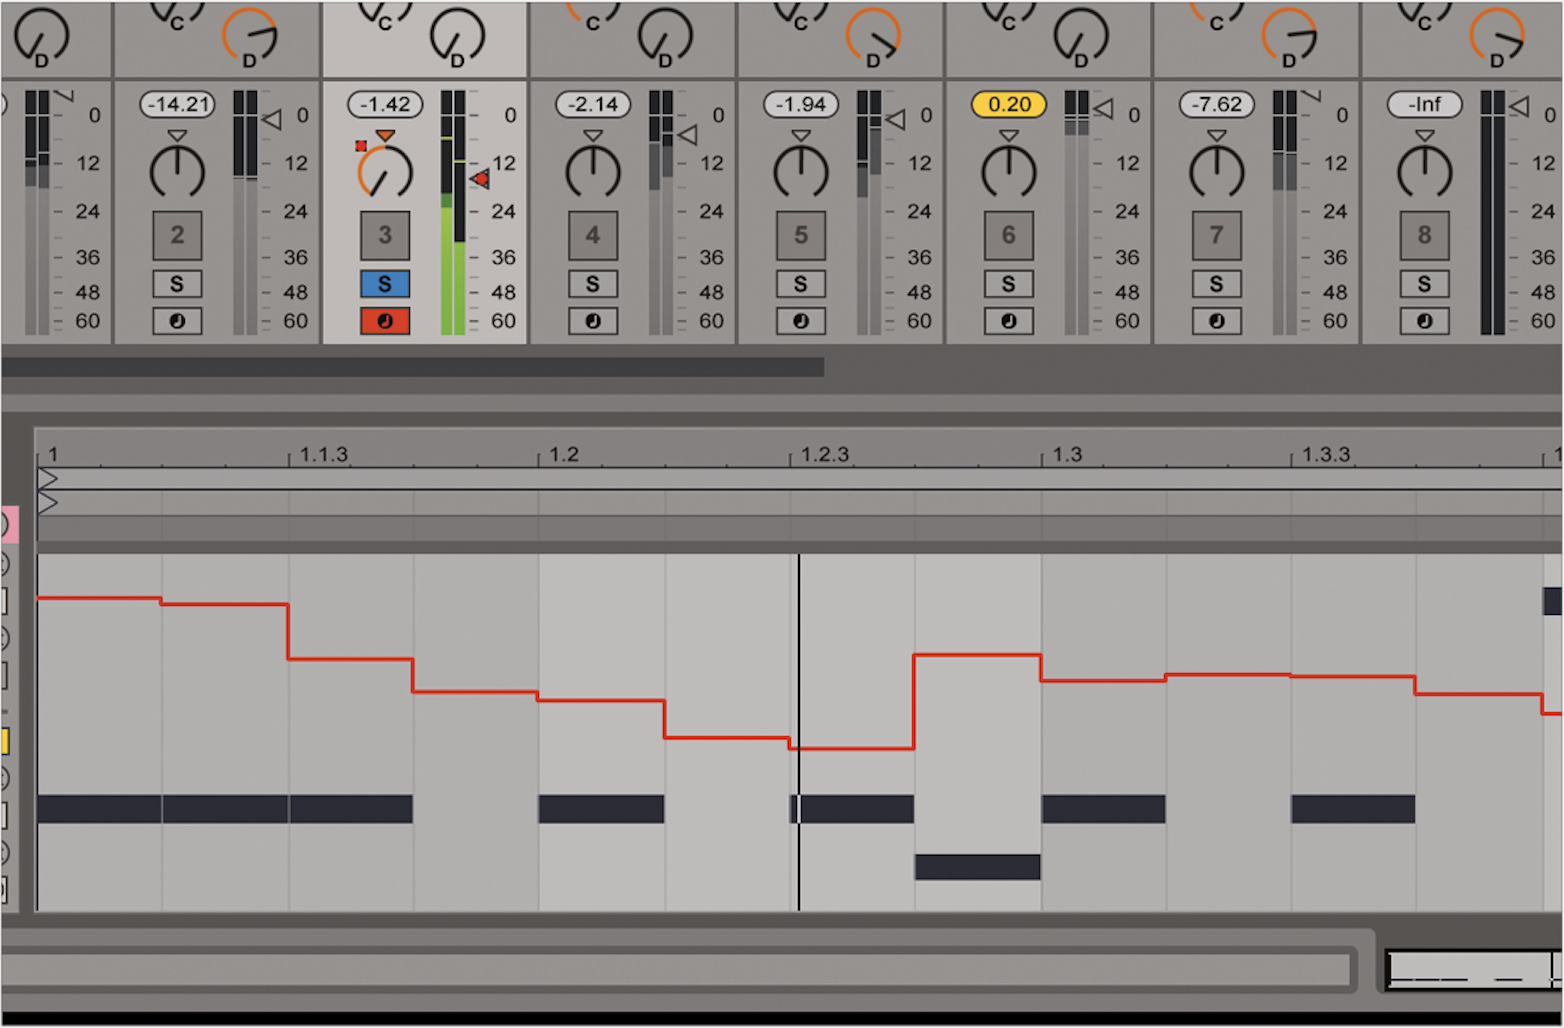
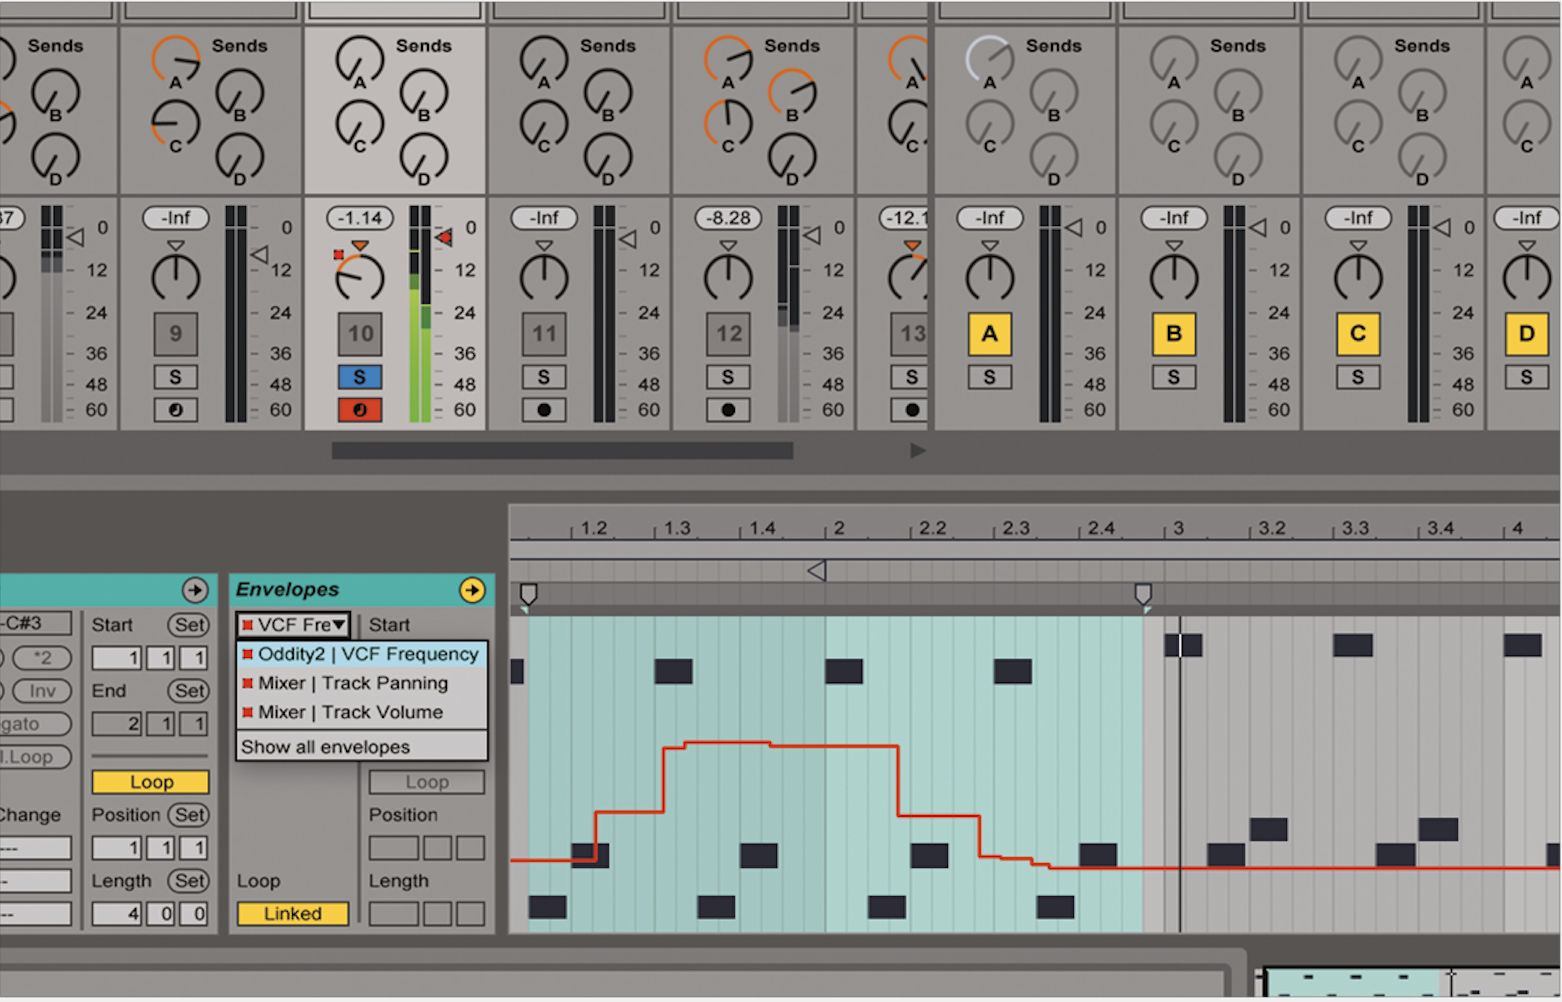
Finally, you can even record the changes you make to MIDI instruments on the track in question – we show you how to record a synth frequency fader being opened and then how to select that recorded automation (from a drop down menu) to then edit it. Automation is a key feature in any DAW and Live’s clip automation takes it well beyond what is possible in many of the other DAWS, to turn it into a completely creative and immersive experience.
So we hope that this tutorial has enabled you to get more creative with your clips in Live and, importantly, to do that without spending too much time or effort getting there. Using technology to make music should make it easier after all! Happy creative clipping!
Clip Automation Step-By-Step
for example, your movements will be recorded into the clip.
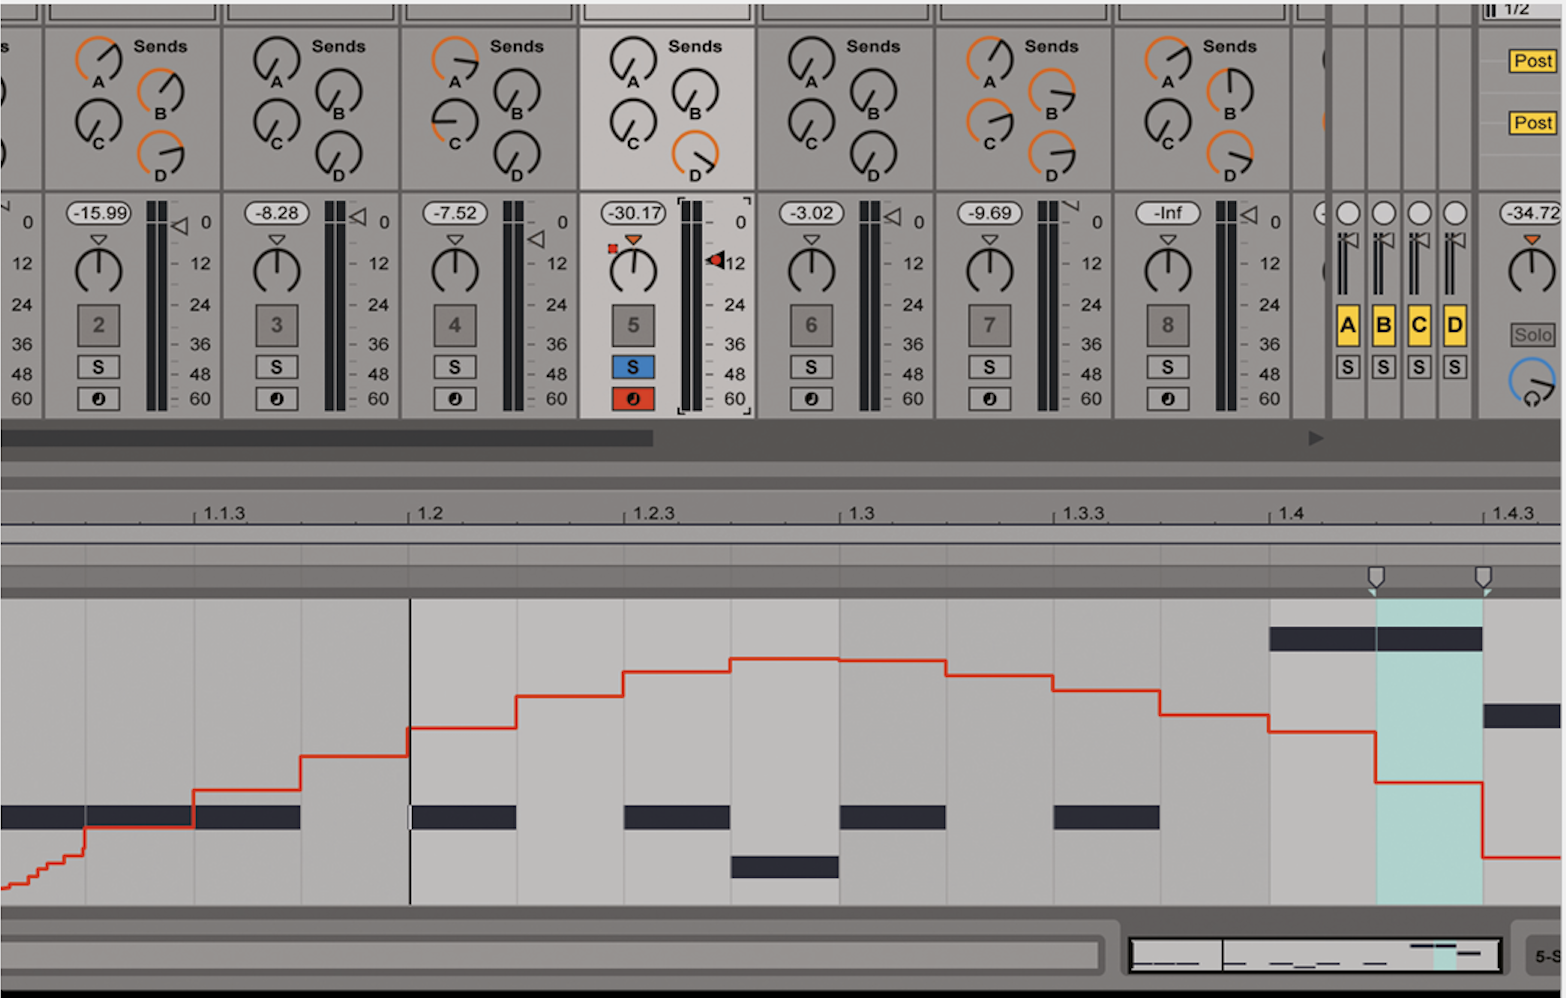
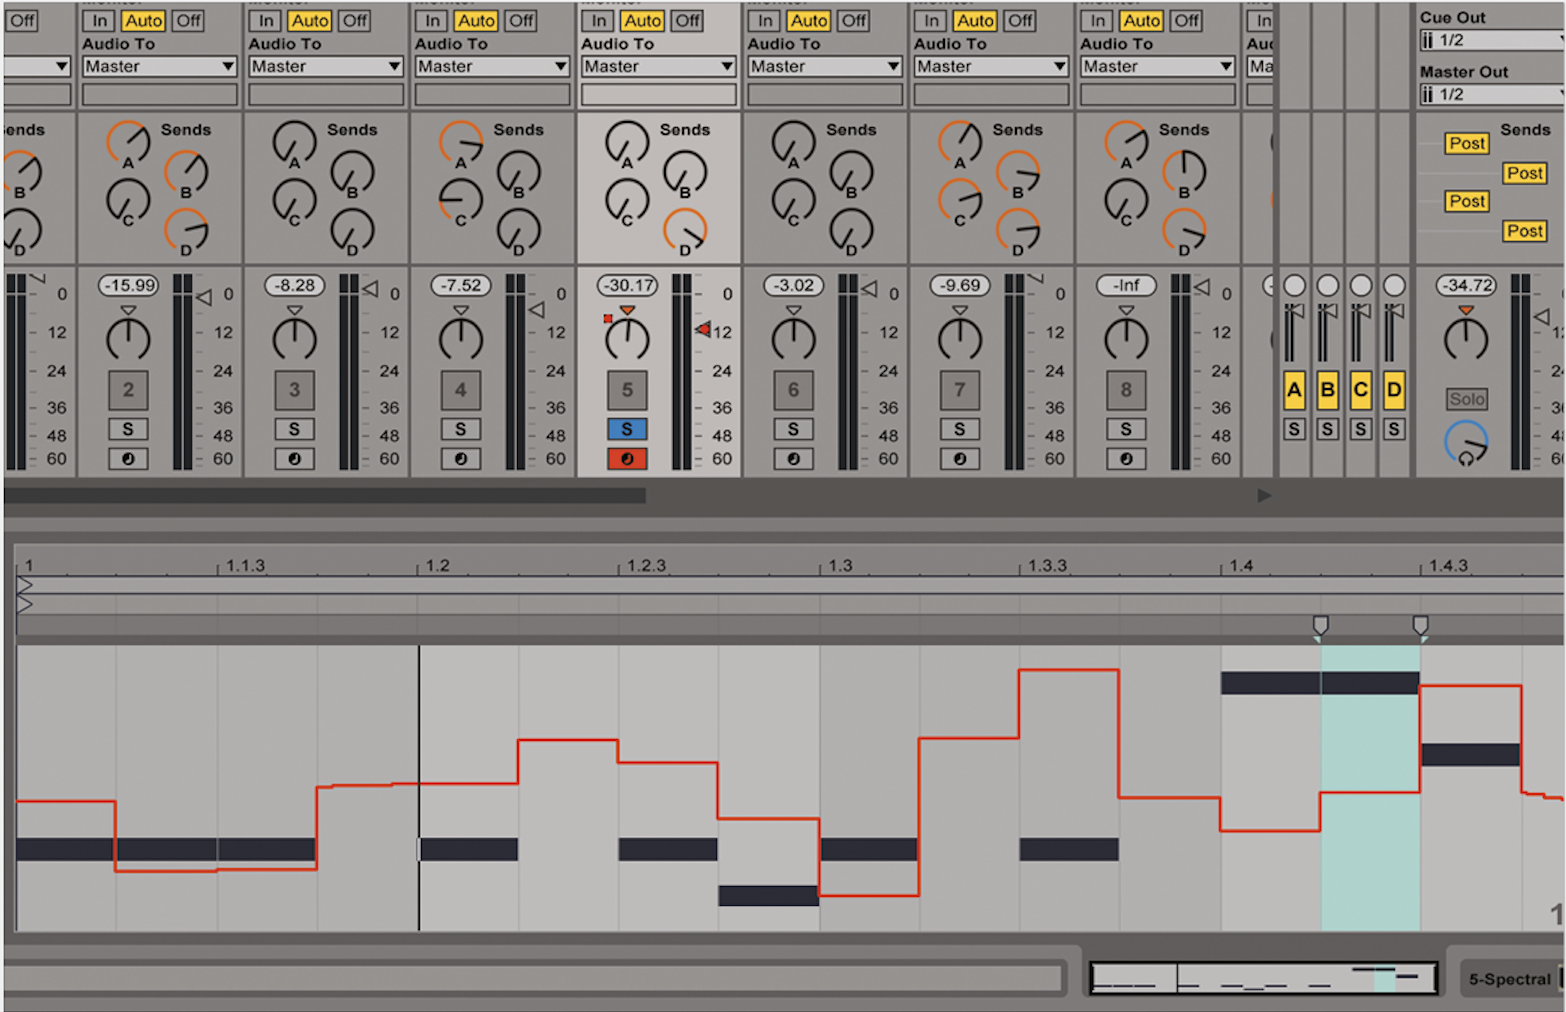
If you want to go back to the panning, simply click the pan control. Here’s our volume coming in and going out over a clip.