Weekend Workshop: Make your first sounds with Surge, the open-source supersynth
Program some righteous Reeses with the most potent freeware synth around.
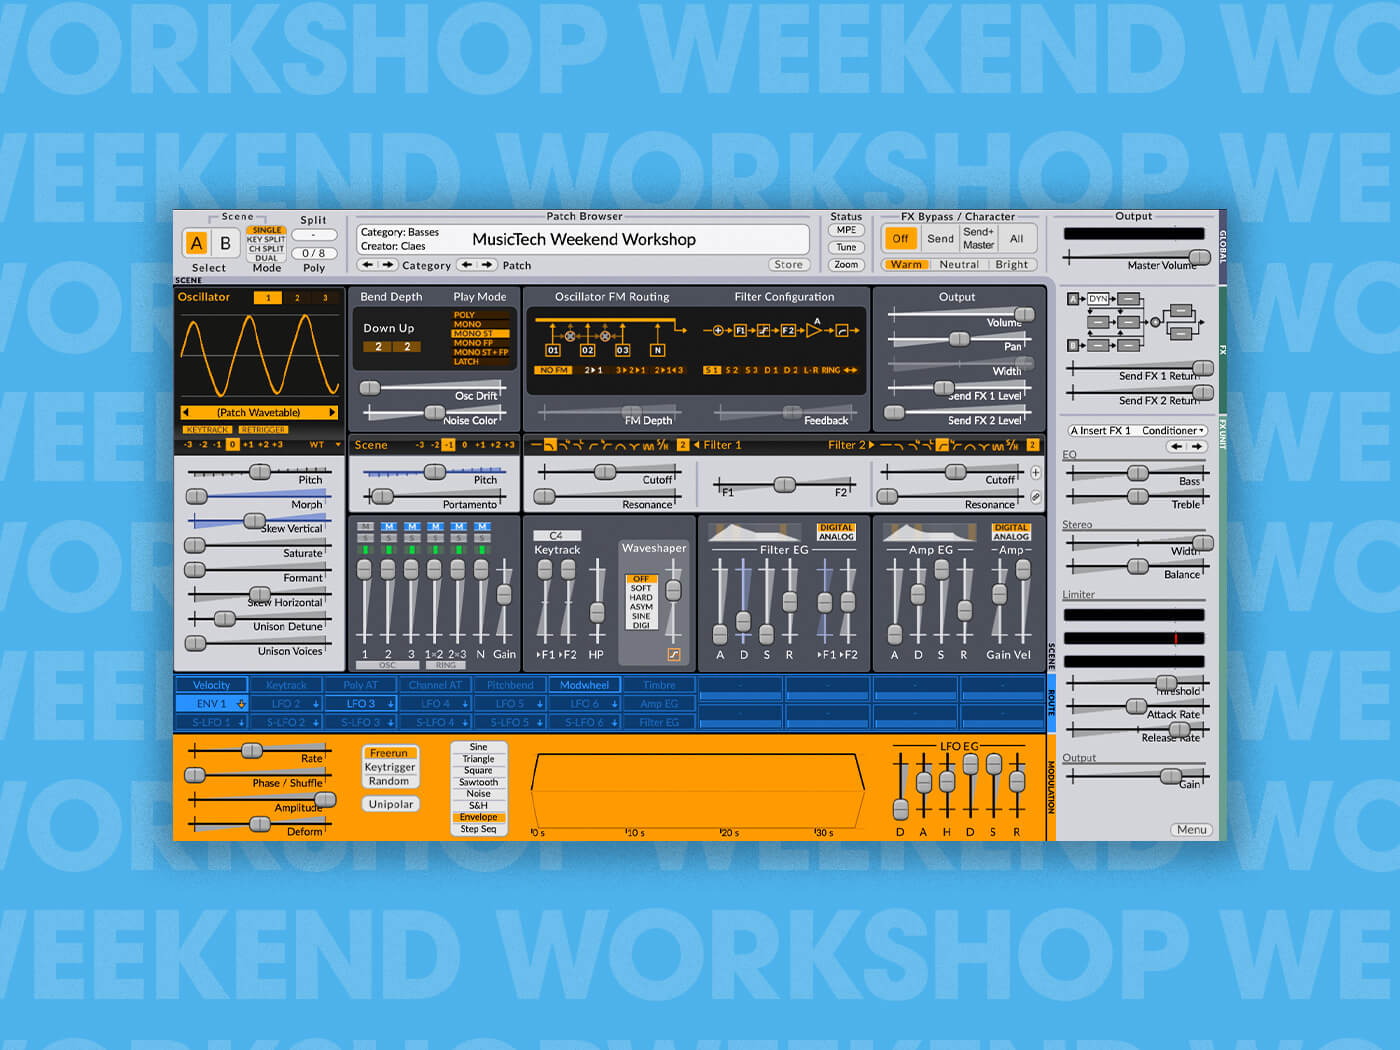
Surge Synth Weekend Workshop
Originally developed by Bitwig founder Claes Johanson solely for Windows back in 2006, Surge became open source in late 2019 and is now available for Windows, Mac and Linux in AU and VST3 formats thanks to the efforts of the Surge Synth Team.
A rival to Native Instruments Massive back in the day, Surge is a powerful instrument capable of virtual analogue, wavetable and frequency modulation (FM) synthesis, and it still holds its own against contemporary commercial synths.
In this beginner’s guide to Surge, we’ll show you how to make some big, bad bass sounds as we introduce you to the synth’s basic features. We’ve got the urge to Surge, so let’s go!
What you’ll need:
- A DAW
- Surge, which you can download for free, here.
1. Setting up Surge’s oscillators
Start by loading Surge up on a MIDI, or Instrument track. The first thing you’ll likely notice is that Surge’s interface starts out a little on the small side. You can resize it by dragging any of the interface window’s edges or corners, or by clicking the Zoom button in the Status panel at the top of the interface and selecting a new Zoom level.
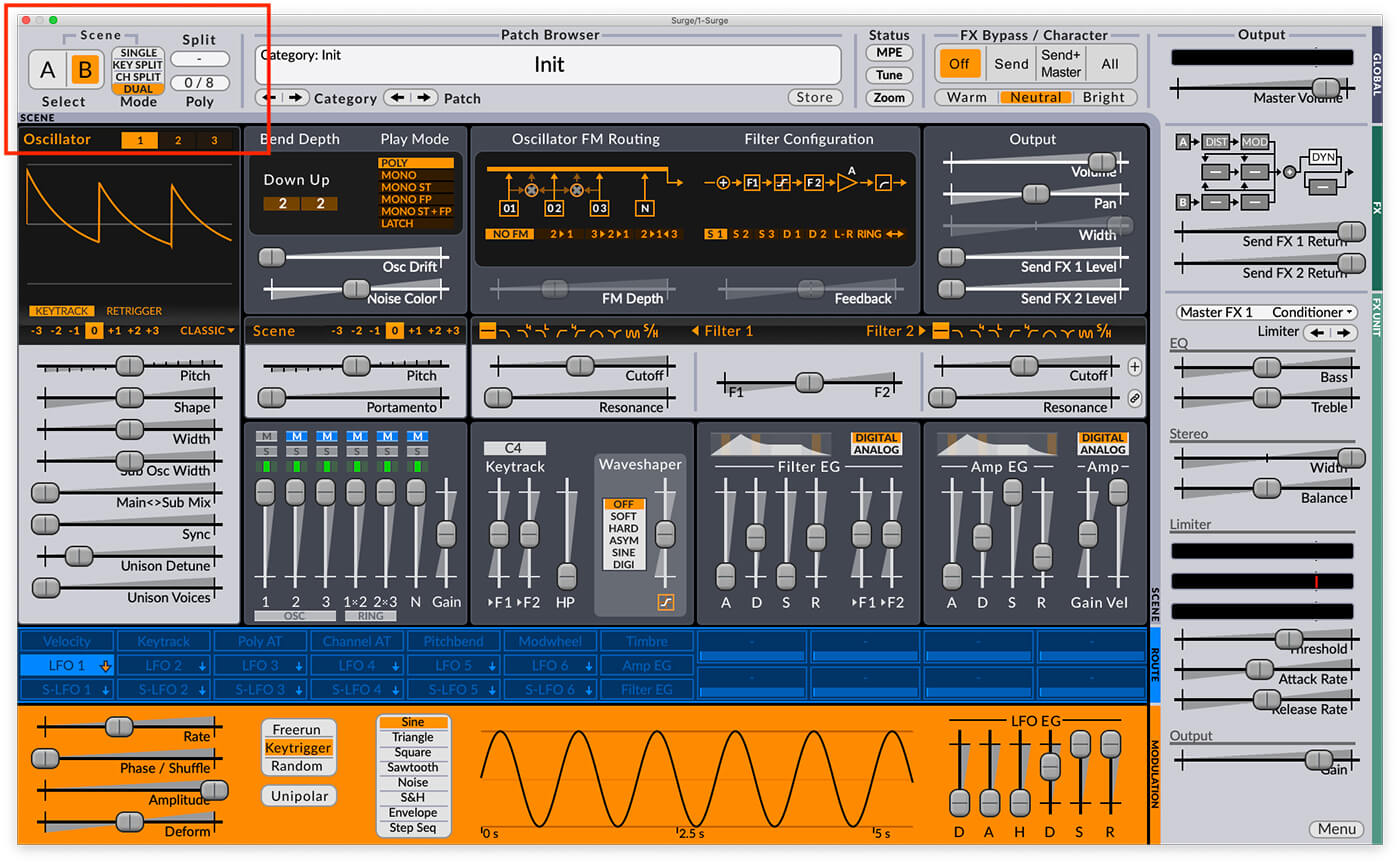
The initial patch is a single sawtooth oscillator. Surge has three oscillators, and the parameters for these can be found on the left-hand side of the interface.

Currently, only oscillator 1 is active, and we can see this by looking at Surge’s mixer, which is located directly to the right of the oscillator panel.
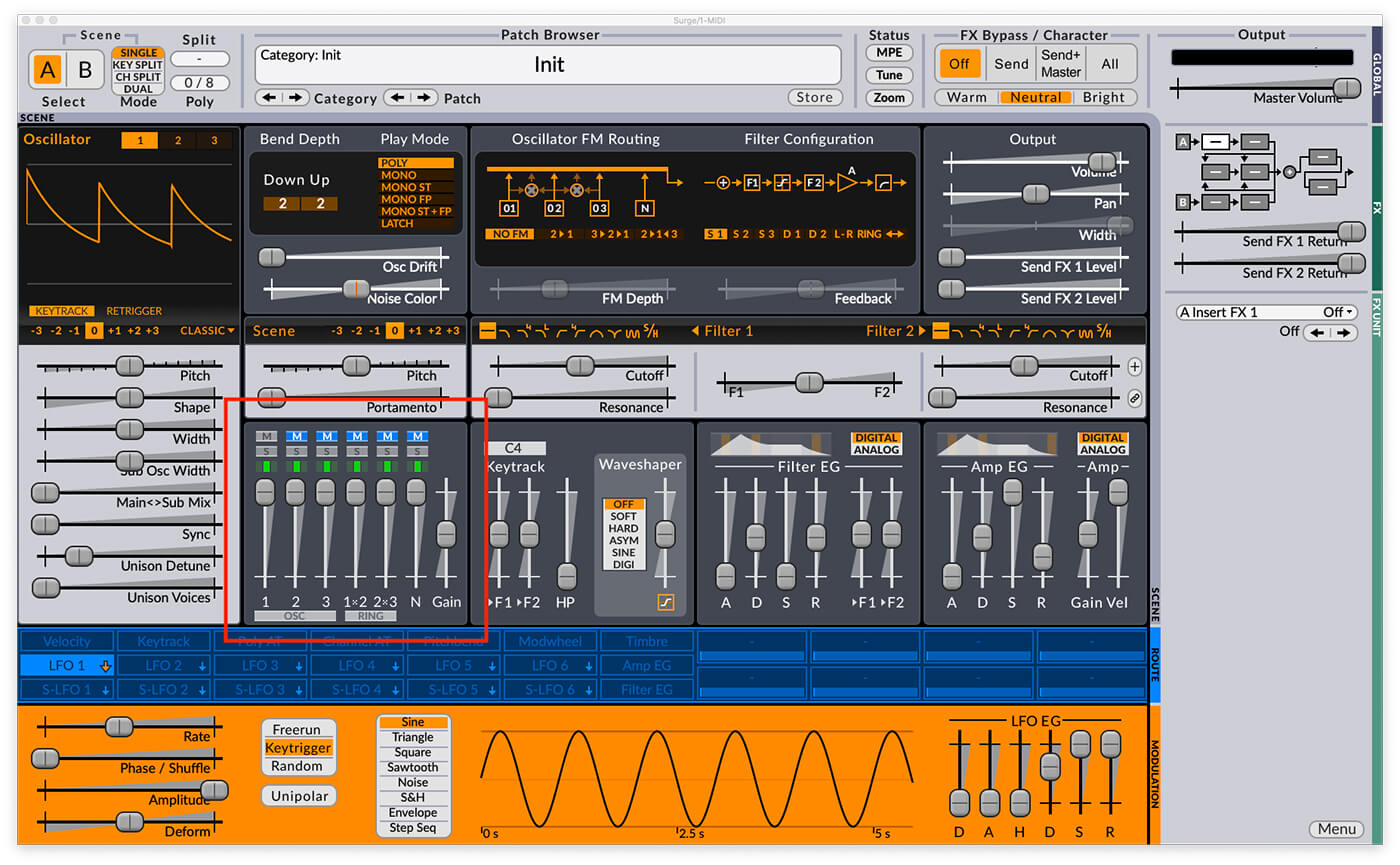
The mixer panel displays the level of the three main oscillators, plus a noise oscillator (N) and levels for the ring-modulated outputs of oscillators 1×2 and 2×3.
Click the mute (M) button above Osc 2 in the mixer to deactivate it. Let’s detune the oscillators. Turn up the horizontal Pitch fader to 0.15 semitones to set oscillator 1 to +0.15 semitone detune, then click the 2 button at the top of the panel to see oscillator 2’s parameters. Set the Pitch here to -0.15 semitones.

Detuning the oscillators in this manner causes them to ‘beat’ against each other, giving us the most basic of old skool DnB ‘Reese’ basses. Nothing too exciting on its own, but we can spruce it up with some tweaking to get a much more engaging sound.
2. Monophonic glide
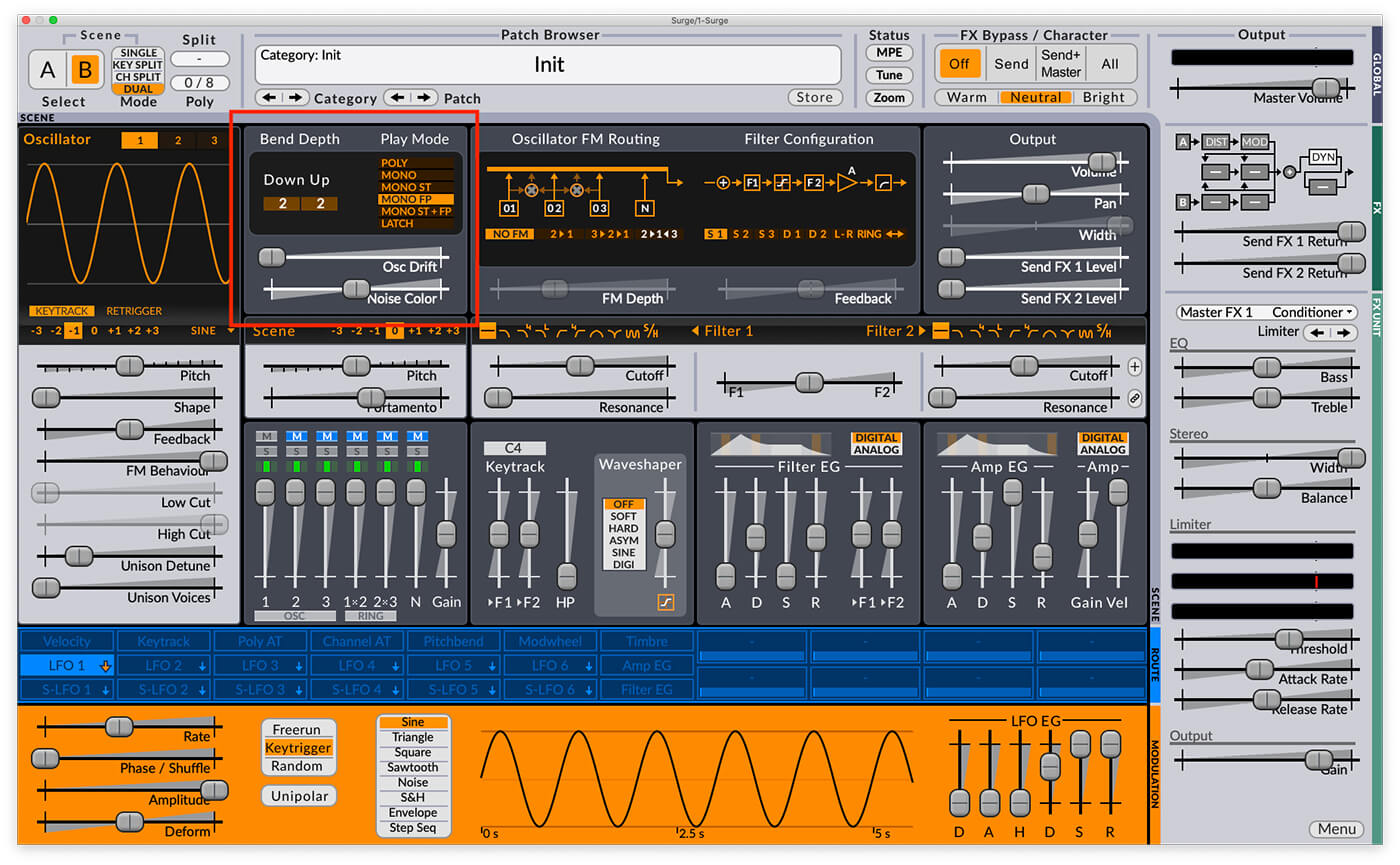
Let’s add some snaking portamento to our Reese. First, we’ll set the Play Mode to Mono FP in the panel above the mixer. This sets the synth to Monophonic Fingered Portamento mode, meaning we can only play one note at once, and if we play overlapping notes the pitch of the first will glide smoothly to the pitch of the second without restarting the synth’s envelopes. The amount of time the pitch glide takes is controlled with the horizontal Portamento fader. Set it to 0.230 seconds.

Now when you play legato notes, you’ll hear Surge glide smoothly between them, with the Portamento fader controlling the amount of time the pitch movement takes.
3. Waveshaping and filters
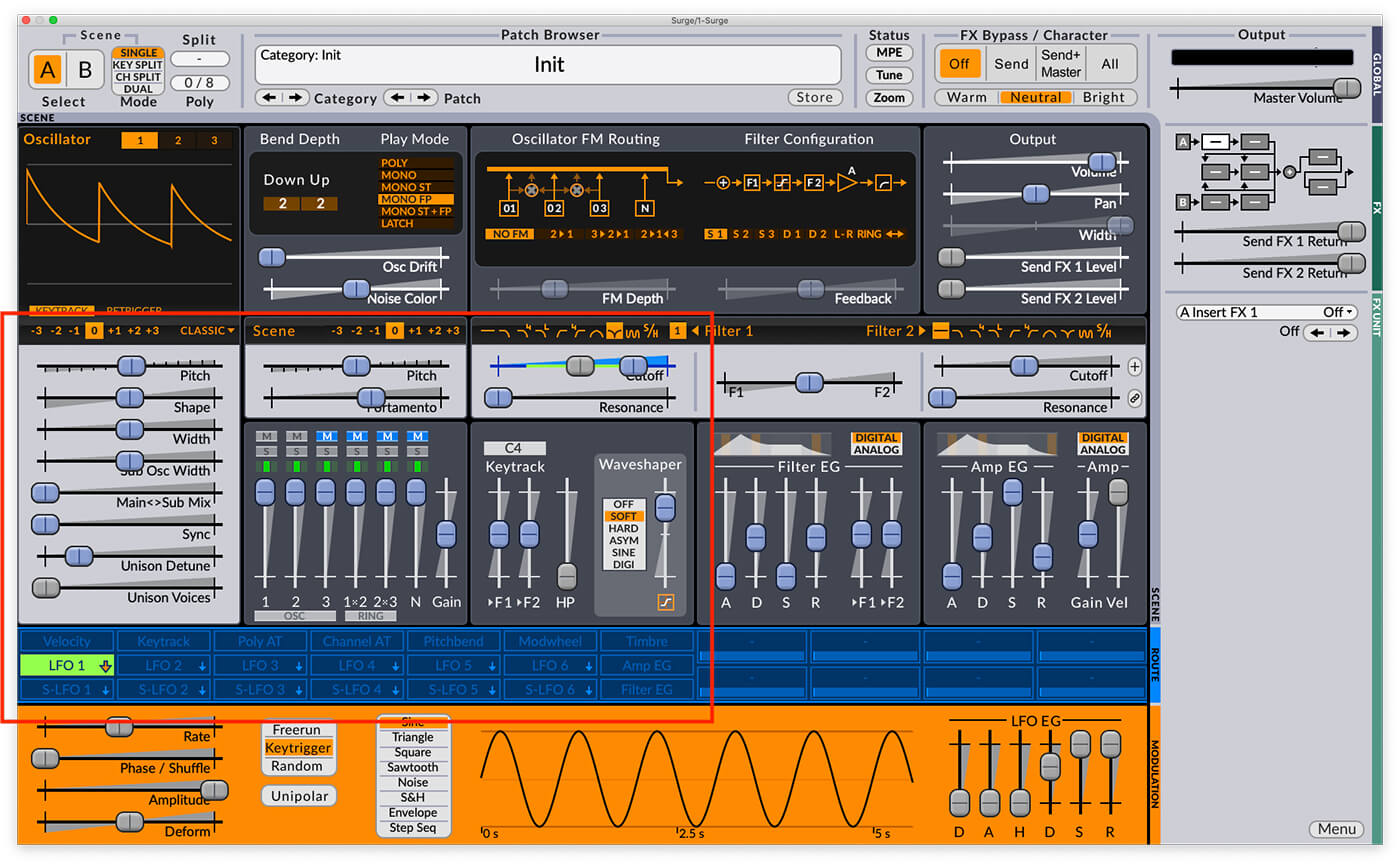
Now we’ve set up the patch’s voicing, let’s beef up the sound using Surge’s waveshaper. This lives on the right of the mixer panel. Set the waveshaper mode to Soft, and turn the Gain to +15dB or so. This increases the perceived volume of the signal and adds some harmonic enhancement that helps the patch sound full and analogue-like.

We can add more movement to the sound using Surge’s notch filter mode. Activate this by clicking the notch icon in the Filter 1 section above the waveshaper.

This thins out the sound a fair bit, but if you try sweeping the horizontal Cutoff fader as you play a note you’ll hear it introduces an enticing movement to the patch. Let’s use an LFO to automate this movement. Surge’s modulation programming is quite straightforward. We’re going to use LFO 1 as our modulation source, and you’ll see that this is already selected in the blue modulation panel by default as it’s highlighted in light blue.

If we click the LFO 1 button again, it will become green, which means we can now assign the modulation source to Surge’s parameters. Drag up on the Cutoff fader, and you’ll see a second, green fader is added that shows the modulation amount.
Once you’ve set the modulation amount, click the LFO 1 button again to exit modulation assignment. Currently, our LFO to cutoff modulation is quite fast, so let’s turn LFO 1’s Rate horizontal fader down to around 0.6Hz or so.

4. Insert Effects
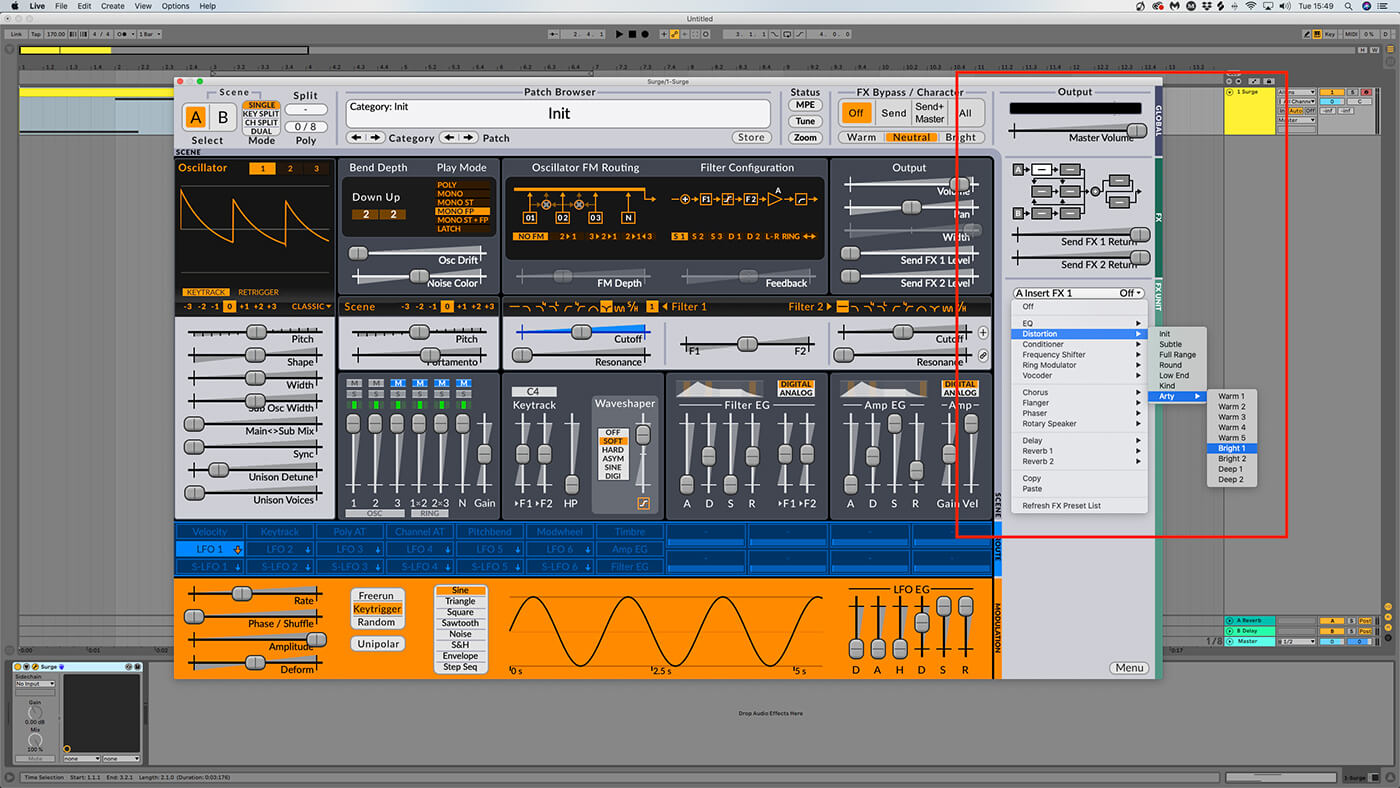
Surge has a ton of built-in effects, so let’s use a couple of them to spice up our sound. At the top right-hand corner of the interface, you’ll see an effect routing schematic for the FX slots, including A and B inputs.

Don’t worry about the B input for the moment – this has to do with Surge’s ‘Scenes’ capability that can be used to create layered and split patches, and we’ll come back to it later.
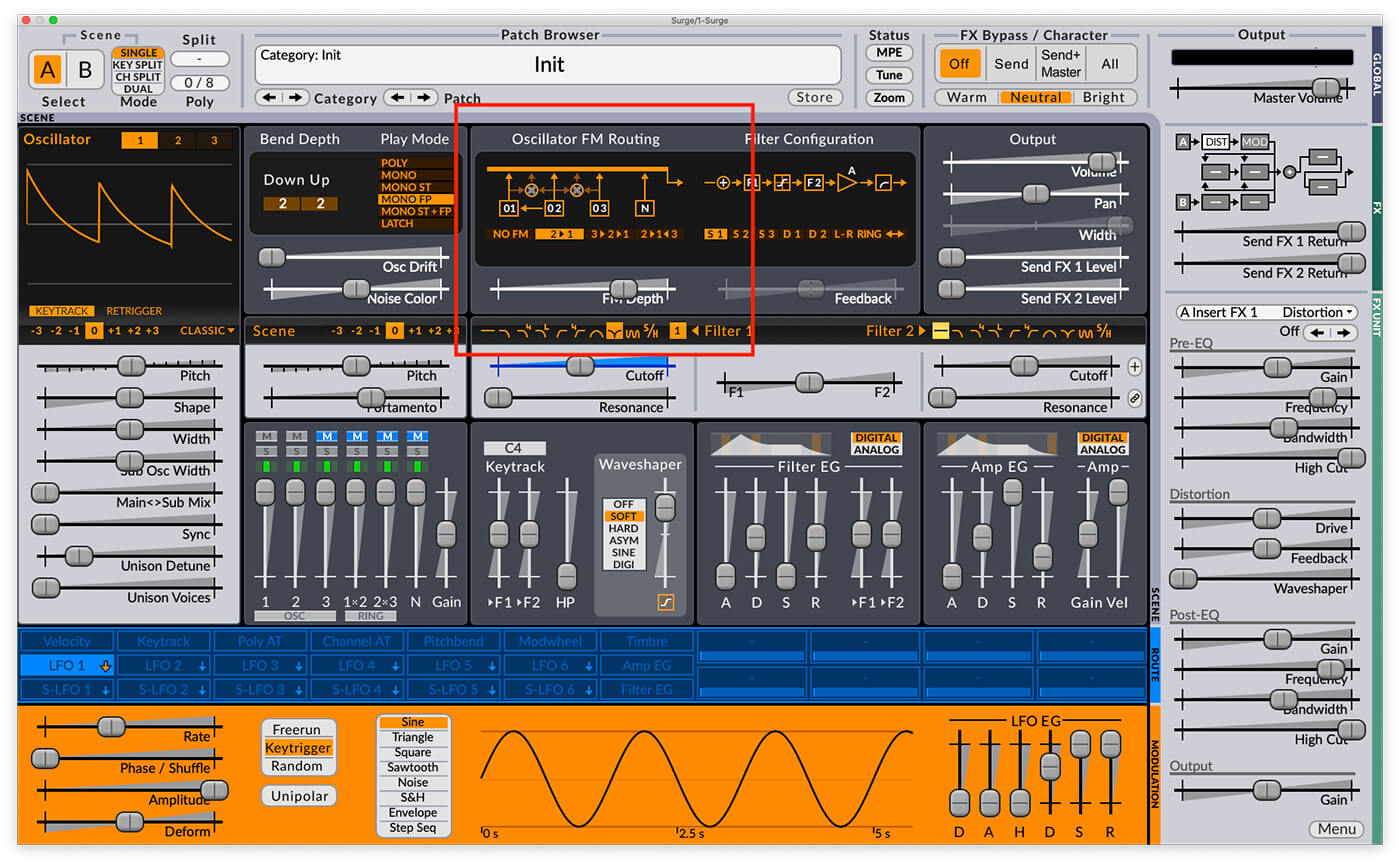
Right now, the first insert FX slot after input A is selected in the schematic, and we can assign an effect to this slot using the drop-down menu below. Let’s set it to Distortion > Arty > Bright 1.
Activating this effect will cause Surge to clip the master when you play a note, so turn the Master Volume fader in the top right-hand corner of the interface down to around -6dB.

At the moment, our Reese sound has two types of movement: the beating of the detuned oscillators, and the sweeping of the notch filter cutoff frequency. Let’s add a third type of movement with another insert effect. Click the FX slot to the right of the slot that now says ‘Dist’, and use the drop-down menu below to select Phaser > Stereo Phaser. Turn down the Base Frequency to -100% and set the Feedback to 0%.
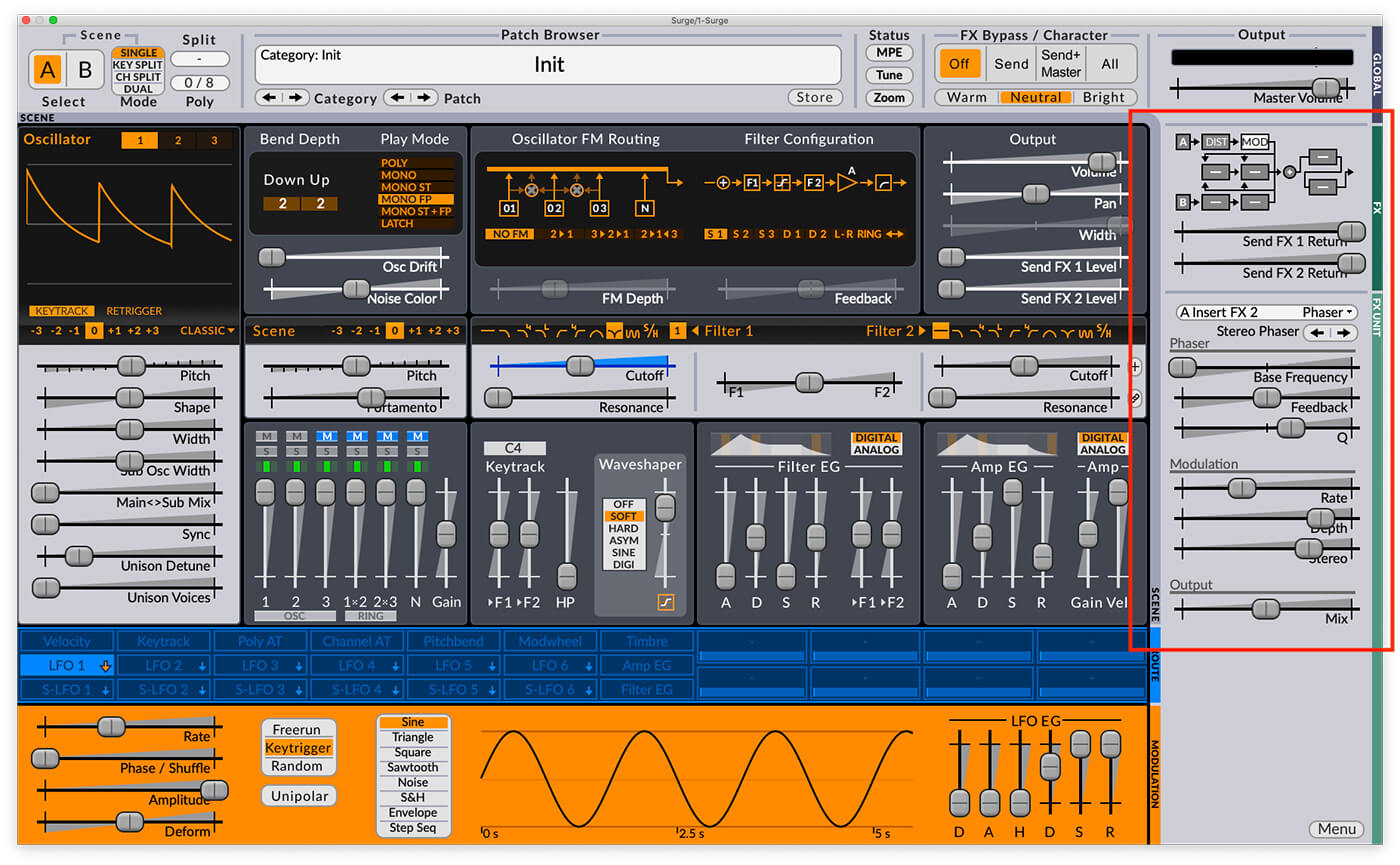
As its name suggests, this effect makes our patch stereo. Currently the Mix fader in the Output section at the bottom of the FX Unit panel is set to 50%, which gives us an equal mix of the mono ‘dry’ signal and the phased stereo ‘wet’ signal.
You can hear the difference between the mono dry signal and the stereo wet signal by first listening to the sound at 0% Mix, and 100% Mix.
The synth patch gets wider as the Mix fader is increased, and you can use it to control the stereo width of the sound in your mix. Let’s return it to 50% now.
5. Applying FM and filter ring modulation
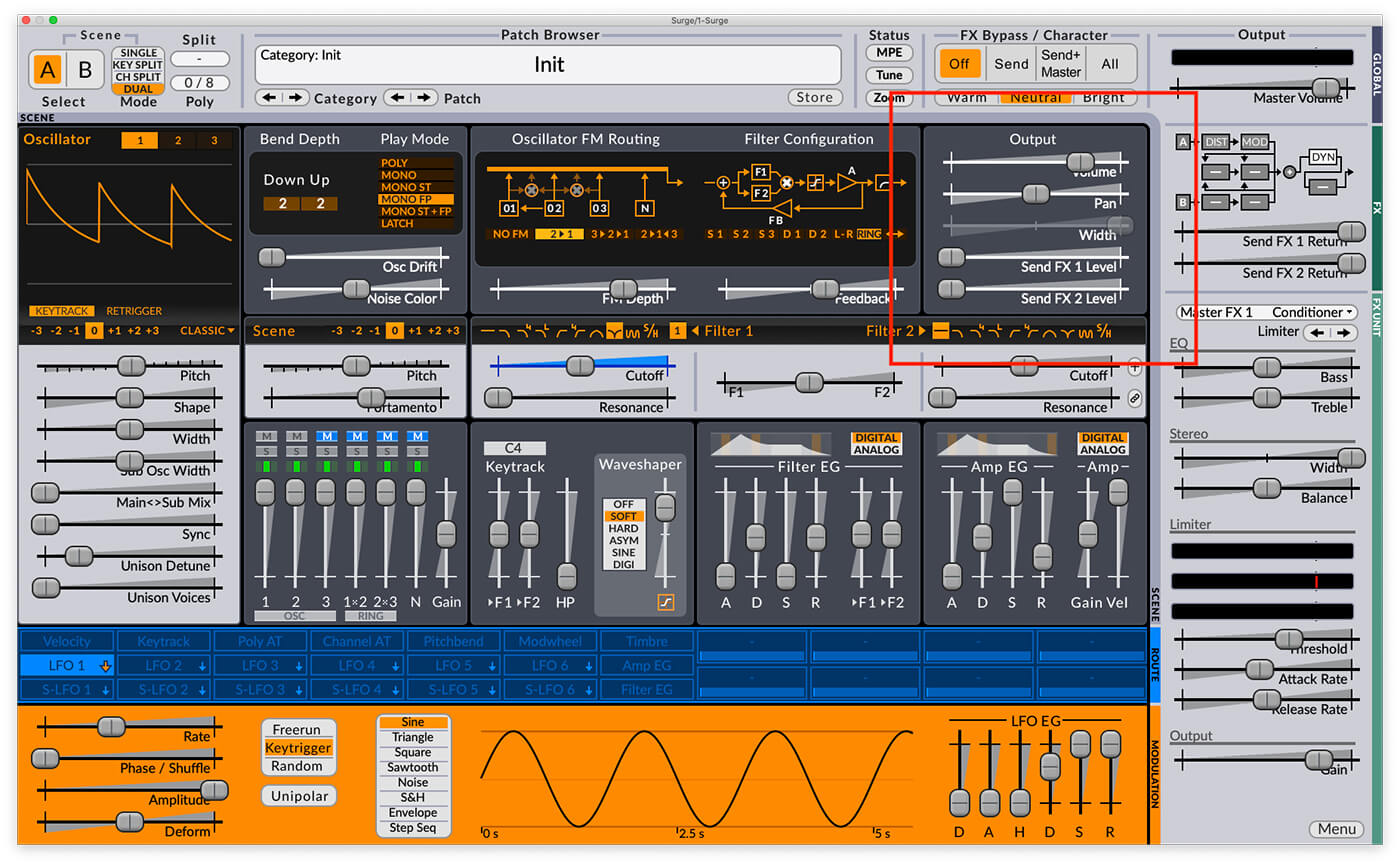
Let’s try using a little FM to spice our sound up further. In the Oscillator FM Routing section, change the routing mode from No FM to 2 > 1. This causes oscillator 2 to modulate oscillator 1, but this won’t be apparent until we turn up the horizontal FM Depth fader. Give this a sweep to hear how it sounds, and when you’re done set it to 5.4dB or so.
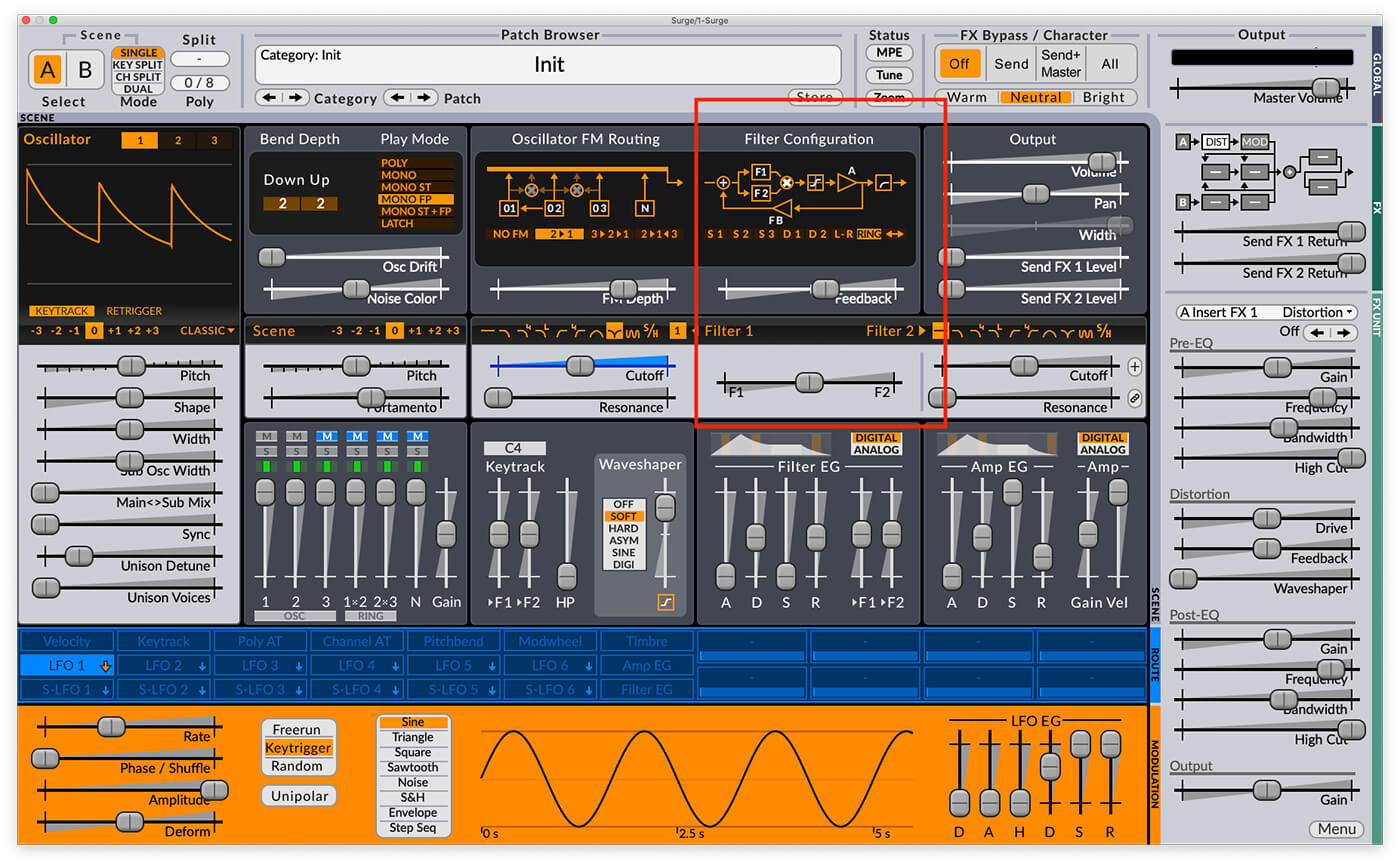
This gives the sound more crunchy movement, and we can add yet more character to the patch with the Filter Configuration section. Set the filter mod to Ring, and turn up the Feedback to 17.35%.
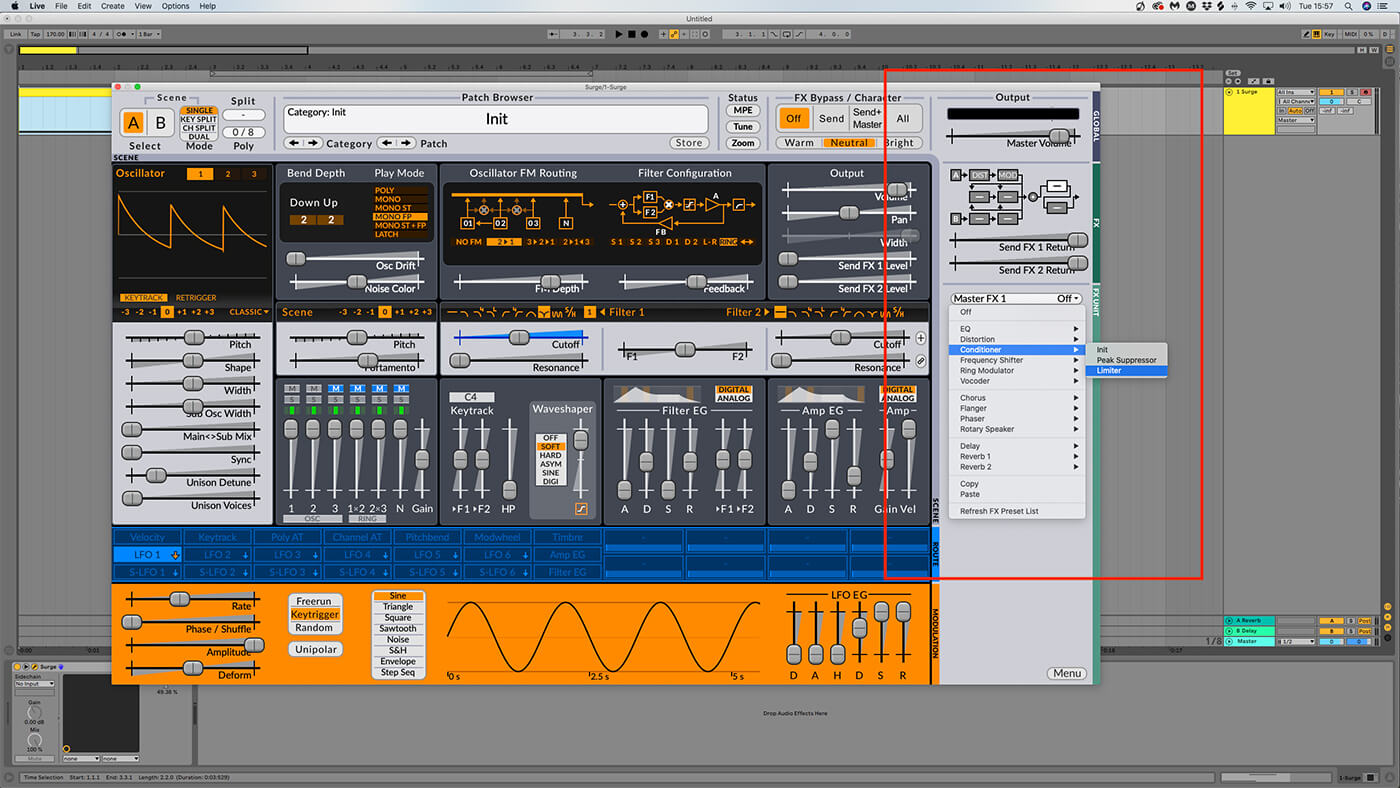
Our sound’s volume level is quite variable, so let’s select the first master FX slot in the routing schematic, and set it to Conditioner > Limiter.
All this processing has taken the weight out of the patch’s low-end, so let’s reintroduce some now. Set the Scene Mode to Dual in the top left-hand corner of the interface, and change the scene to B with the toggle to the left.
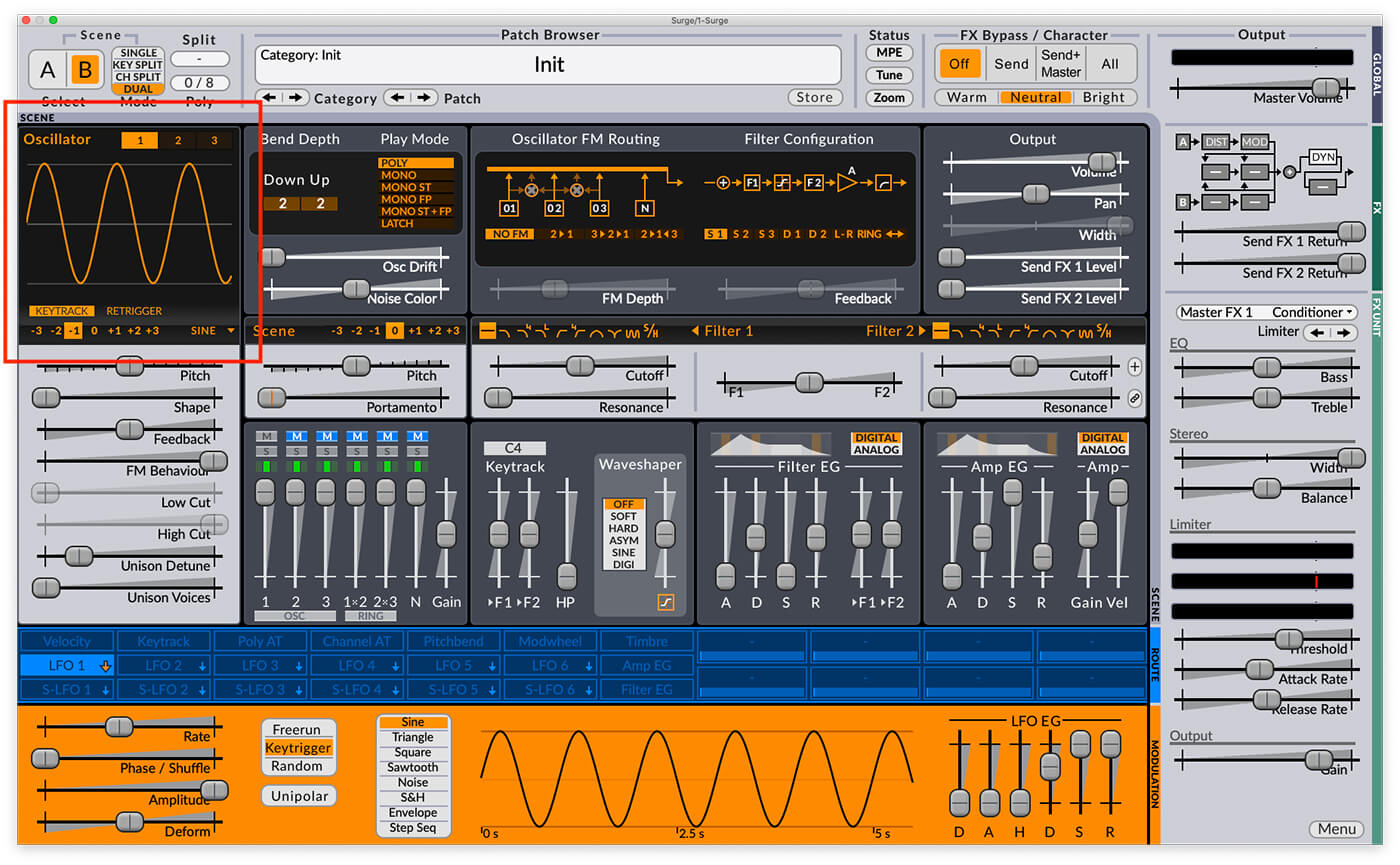
Scene B gives us another synth to play with that doesn’t use the same processing as Scene A, so we can use it to make a weighty sub. To do this, set the mode of oscillator 1 to Sine using the menu to the bottom right of the waveform display, and use the octave control to the left of that to tune the oscillator down 1 octave.
So that this oscillator matches the glide of the first scene, set the Play Mode to Mono FP and turn the portamento fader up to 0.230 seconds.
You can set the balance of the mids from Scene A and the sub from Scene B using each Scene’s Volume faders in the Output section. Here we’ve turned down Scene A’s Volume to around -7dB so that it’s quieter relative to the sub.
And there you have it, your very own D’n’B friendly Reese bass. Naturally, this is just a starting point, but Surge is a massively powerful synth so the sky’s the limit, and it doesn’t cost anything.
Happy sound designing!
We’d love to know how you found this workshop – share your synth sounds and patches with the MusicTech Creator Community Group on Facebook.
Check out more Weekend Workshops here.