Using Maximus as your all-in-one dynamic processor in FL Studio
Since the multiband dynamics plug-in Maximus has been included in the mid-range Producer Edition of FL Studio, it’s time to take an in-depth look at dynamics processors in general and why FL’s Maximus is an outstanding one for general use. Leo Konig goes into the most common types of dynamics processors and how Maximus can […]
Since the multiband dynamics plug-in Maximus has been included in the mid-range Producer Edition of FL Studio, it’s time to take an in-depth look at dynamics processors in general and why FL’s Maximus is an outstanding one for general use. Leo Konig goes into the most common types of dynamics processors and how Maximus can be all of those in one…
1. Gates
A gate, like the name implies, opens and closes . As soon as the audio level goes over the threshold, the gate opens based on the attack time. If the level drops below the threshold, the gate closes based on the release time. When the gate is closed, audio is attenuated or completely muted. When the gate is open, the audio is unaffected. This type of processor is often used to remove background noise and unwanted long reverb. Here is a schematic drawing of a gate’s transfer curve.
Now, to achieve this behaviour with Maximus, you can simply draw the transfer curve in the lower left quadrant. Right click to add straight lines to the graph. Move the tension handle to adjust the knee between two points.
2. Compressors
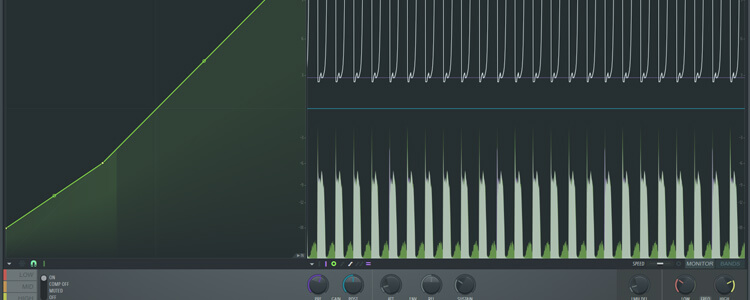
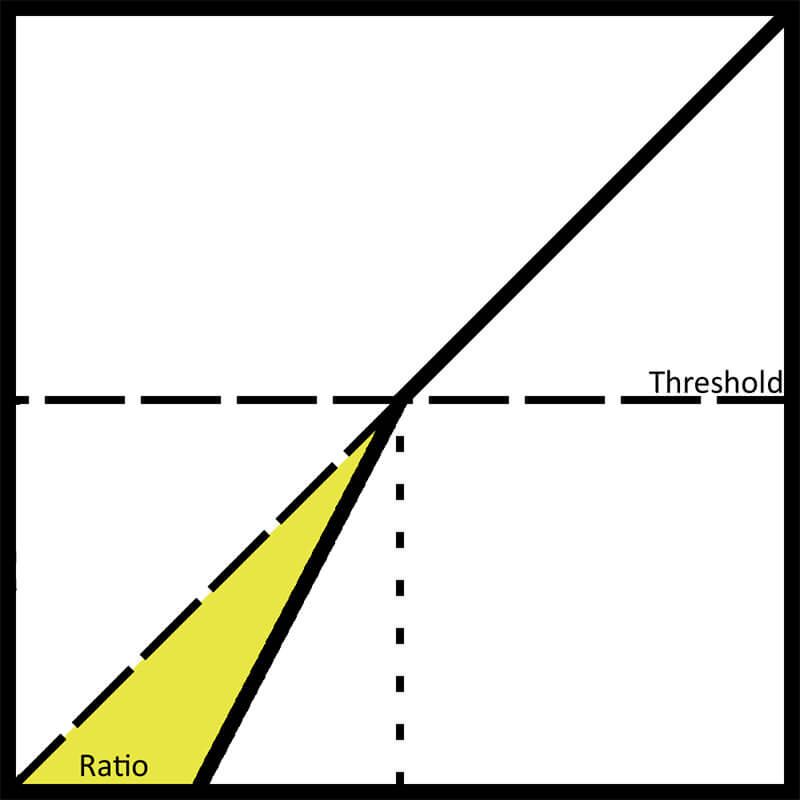
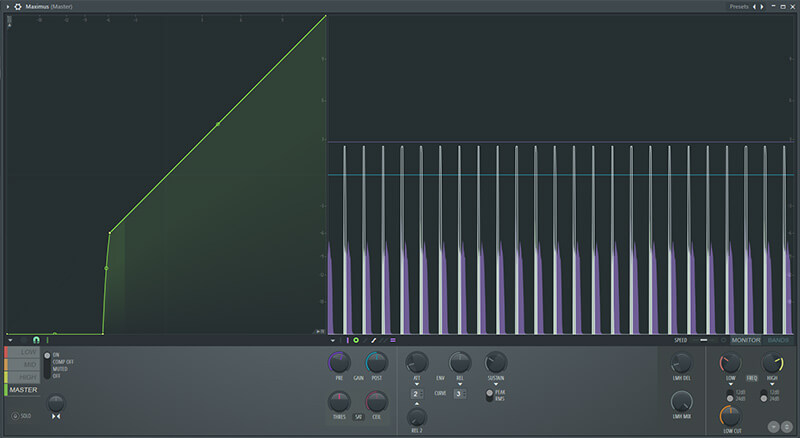
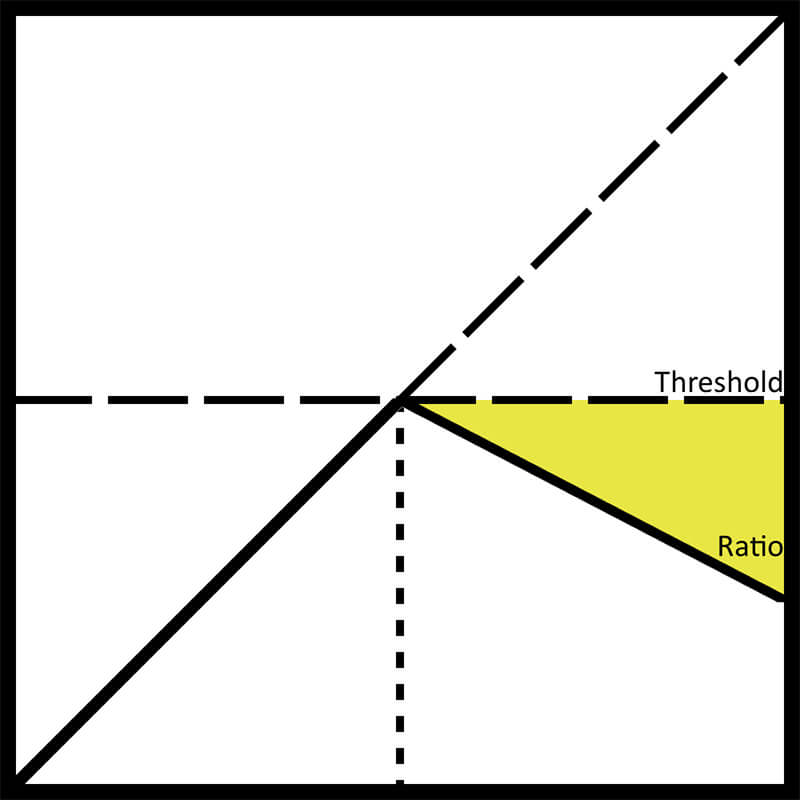
A compressor attenuates audio that goes over the threshold. According to attack time, the gain reduction ramps up as soon as the threshold is passed and releases as soon as the signal dips below the threshold again. This process is a standard procedure to level out inconsistent signals and can also increase transient dynamic range if the attack time is left long enough. I’ve drawn a transfer curve for this as well
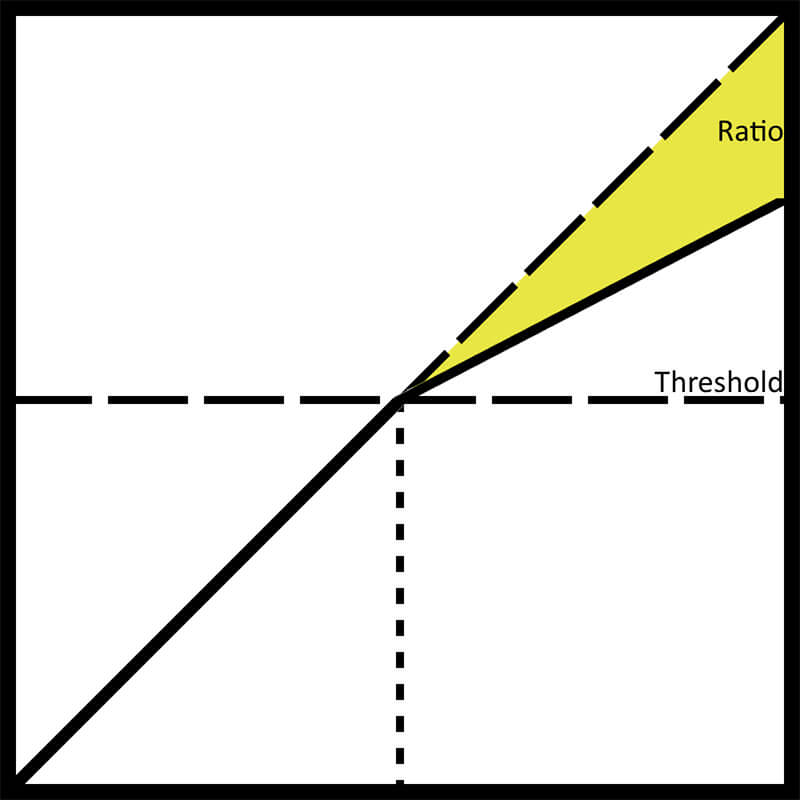
To turn Maximus into a compressor is very easy. Just drag the middle point until you have the right threshold/ratio setting.
3. Expanders
An expander is a dynamic processor that extends dynamic range. Once the signal passes the threshold, according to attack time, it is amplified and the amplification releases once the input signal drops below the threshold again. This is especially helpful on very dense signals that lack impact. Transient shapers, another popular type of dynamic processor, are based on this concept. This is what an expander’s transfer curve looks like.
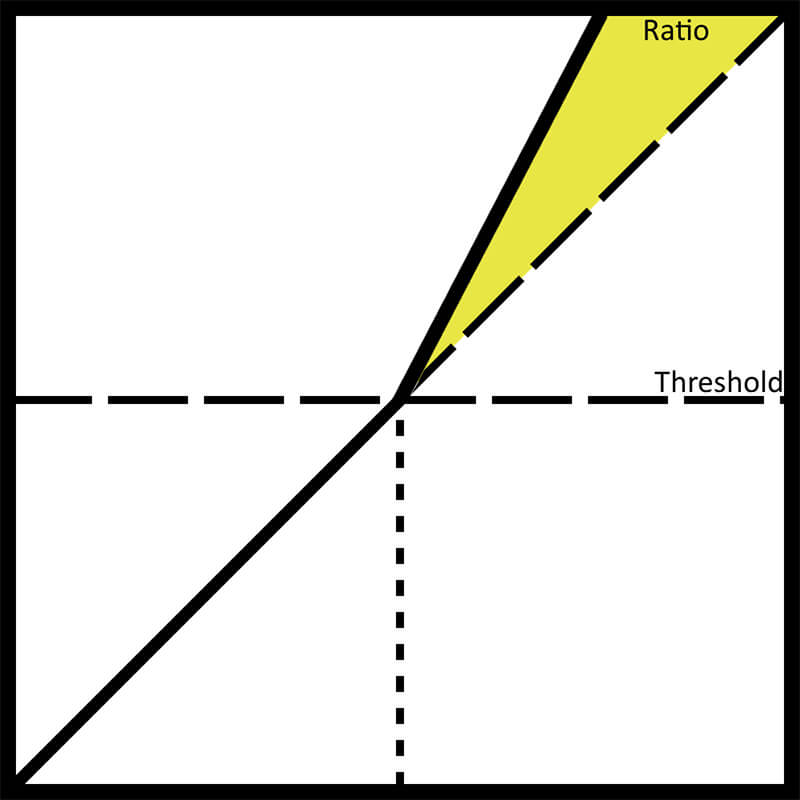
To turn Maximus into an expander, you will need to have 4 points in your graph, then drag the right-most one to the top right corner, and the one left of it to the top of the graph. The second one from the left will be your threshold.
4. Duckers
To understand a ducker’s most useful purpose, imagine a live recording situation with a drummer who has a talkback mic and while they’re talking the mic level is fine. As soon as they start playing however, your live mics from the kit are completely overshadowed by the extreme levels coming out of the talkback mic.
A ducker is a dynamics processor which is basically a compressor turned to way past 11- instead of attenuating to make audio stay below the threshold, it will actually turn audio down past the point of the threshold.
The higher the input level, the more it will attenuate, to the point of turning audio to -inf dB or to below the noise floor. It’s like having a maximum input level, and anything that has a higher input level than the maximum will come out quieter than the maximum level.
So with a ducker in between, the talkback mic has OK levels when just talking, and when the drummer starts playing the ducker will turn the mic down so much it’s quieter than the talking was. A Ducker’s transfer curve looks like this.
To make one in Maximus, simply drag the left-most point down to lower than the threshold point.
5. Upwards Compressors
Upwards compressors work like regular compressors, but the signal below the threshold is affected rather than the signal above it. The most common use cases are pads, ambiences and mix buses. What they do is: as soon as there is signal at all, the compressor will try to make it loud enough stay above the threshold. So while you’re still reducing overall dynamic range, you’re now setting how quiet you want to allow the signal to become. In Maximus, upwards compression is created by dragging the left-most point up.
6. De-essers
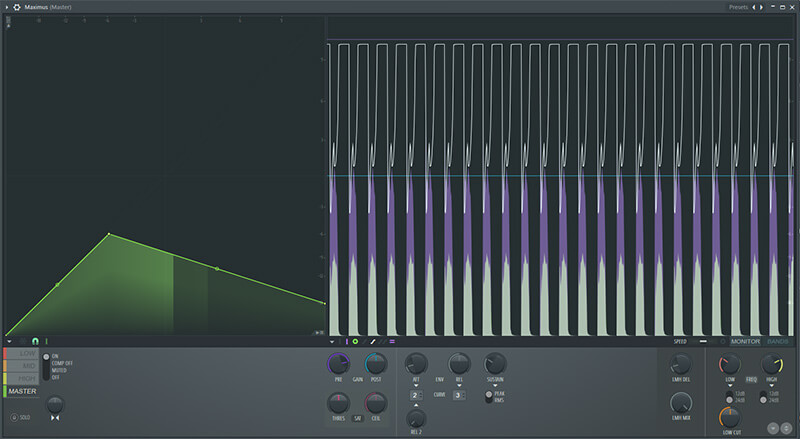
A de-esser is a dynamic processor which is designed to affect high frequencies only, originally to reduce sibilant sounds in a vocal performance, but also very helpful in general mixing. It’s a broad strokes solution to reduce harsh high mids and high frequency content, overall soothing the signal. A traditional de-esser consists of a frequency split compressor for the high frequencies. For Maximus to do this, you will need two bands. First, go to the high band and turn it off. Now the mid band is your high band. Set the mid band to an appropriate range. To set the crossover frequency, check the GUI’s lower right corner. “Low” is the crossover between low and mid band. Set it to somewhere over 2 kHz for de-essing. “High” is the crossover between the mid and high band. Since the high band is turned off, this doesn’t matter in that case. Now draw your compression curve in the mid band.
7. Combining the processes
Since the amount of points you can have in a Maximus graph is unlimited, you can combine any of these concepts with each other and have them in one in-line solution.
Tried and true combinations are gating + compression, expansion + upwards compression and gating + ducking. Since Maximus is a multiband processor by design, each band of frequencies can have a different transfer curve according to the band’s dynamic profile.
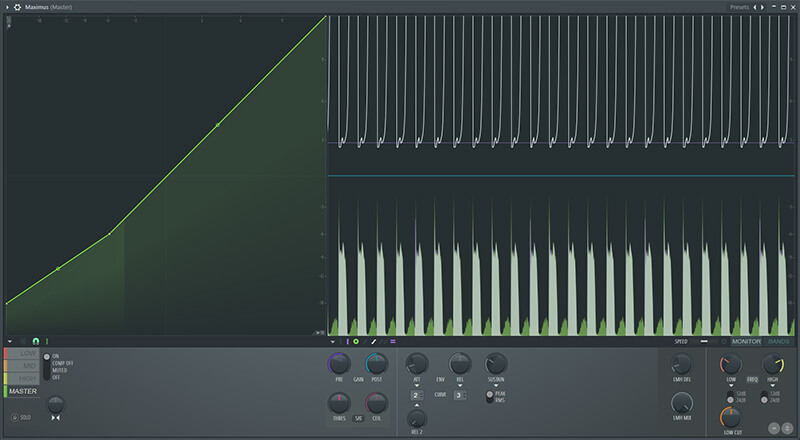
You could also have a more fine-tuneable transparent de-esser if you don’t turn the high band off entirely, instead just turn the compressor off. You can now use the high crossover to define a high frequency area that is untouched by compression, perhaps to preserve a vocal’s natural brilliance. Each band also has a saturation ceiling that can be used to create a hard limit for the amplitude. Be aware that this is not as transparent as using the transfer curve to do this, since it will create harmonics in both modes, but it is a handy tool to have if you have a complex transfer curve and still need to control transients.
All in all, Maximus is a highly versatile dynamics tool that might seem daunting when you’re starting out. With a little insight though, it can become a really useful tool and will take your mixing chops to the next level.