Using automation to create sidechain-style pumping on BandLab
Add movement to your tracks without any routing, just a bit of simple volume automation.
In partnership with BandLab
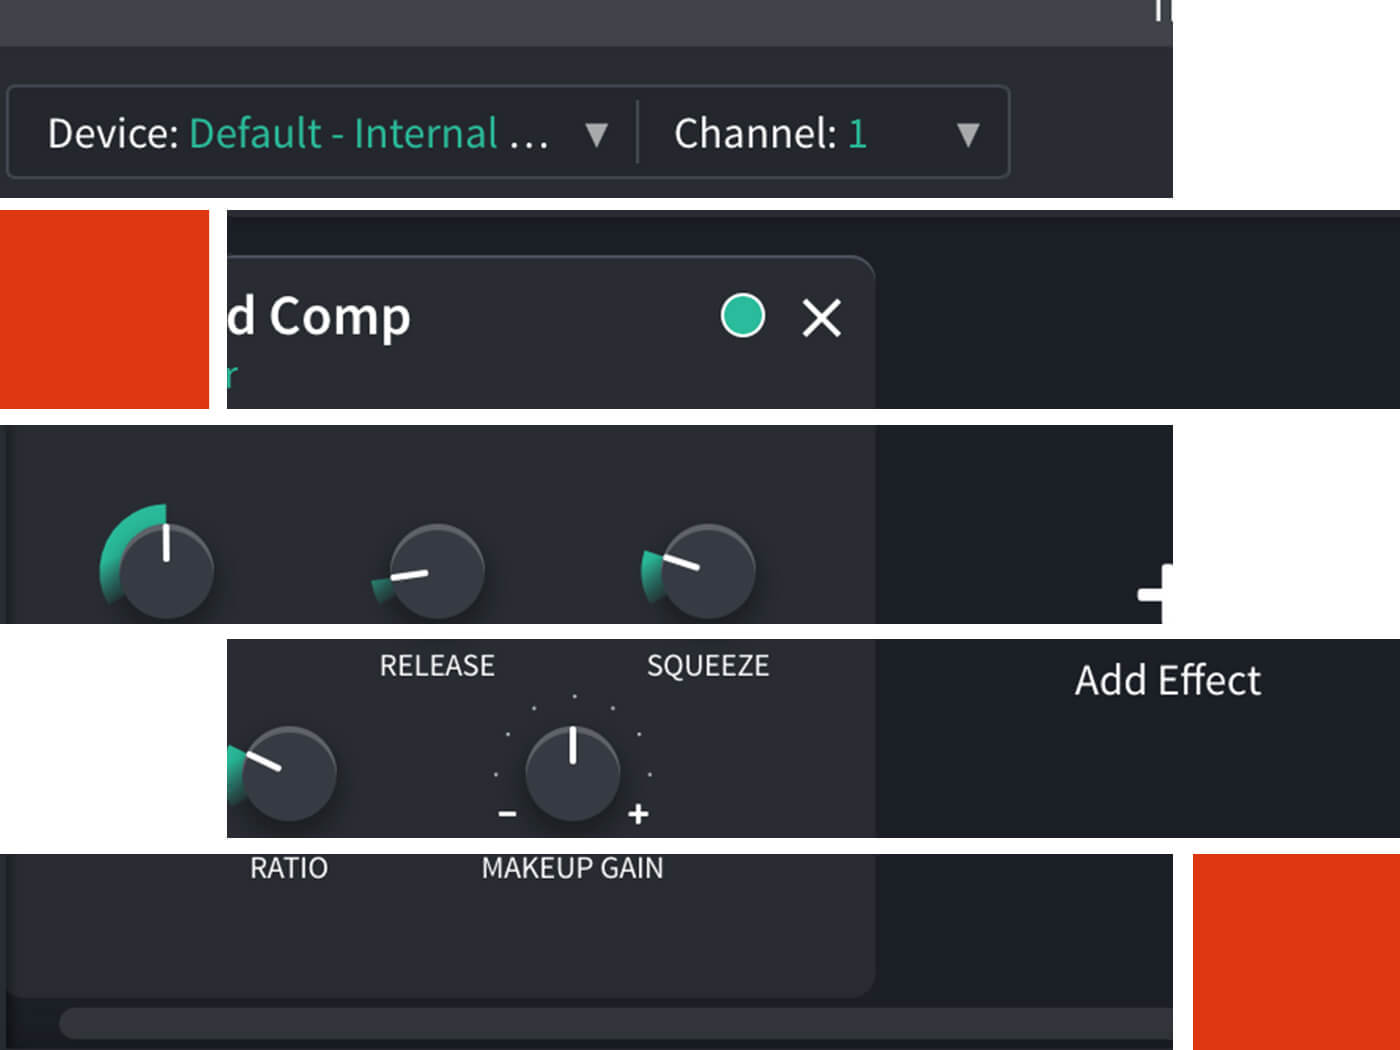
For decades now, dance tracks have heavily featured a technique called sidechain compression. This helps kick drums cut through the mix and enables producers to push up the volume of their tracks while, at the same time, squashing the dynamics. This results in a pumping effect, whereby the rest of the track seems to shape itself in time to the kick.
Despite the baffling name, the essence of this technique is rather simple. It involves reducing the volume of elements of the music when the kick drum plays. Usually it’s the bassline that gets this amplitude-reduction treatment but some producers place the effect on synths, on pads and even on the entirety of the track.
The most famous example of this is probably Eric Prdyz’ Call On Me, on which you can hear the rolling bassline and synth chords dropping in volume on each beat. However, there are many more obvious examples out there, on which you can hear all of the instrumentation momentarily disappear every time the kick hits.
In this tutorial, we’ll show you how to use BandLab’s volume automation to quickly emulate the pumping technique without the need for complex sidechain routing.
Choosing your pads
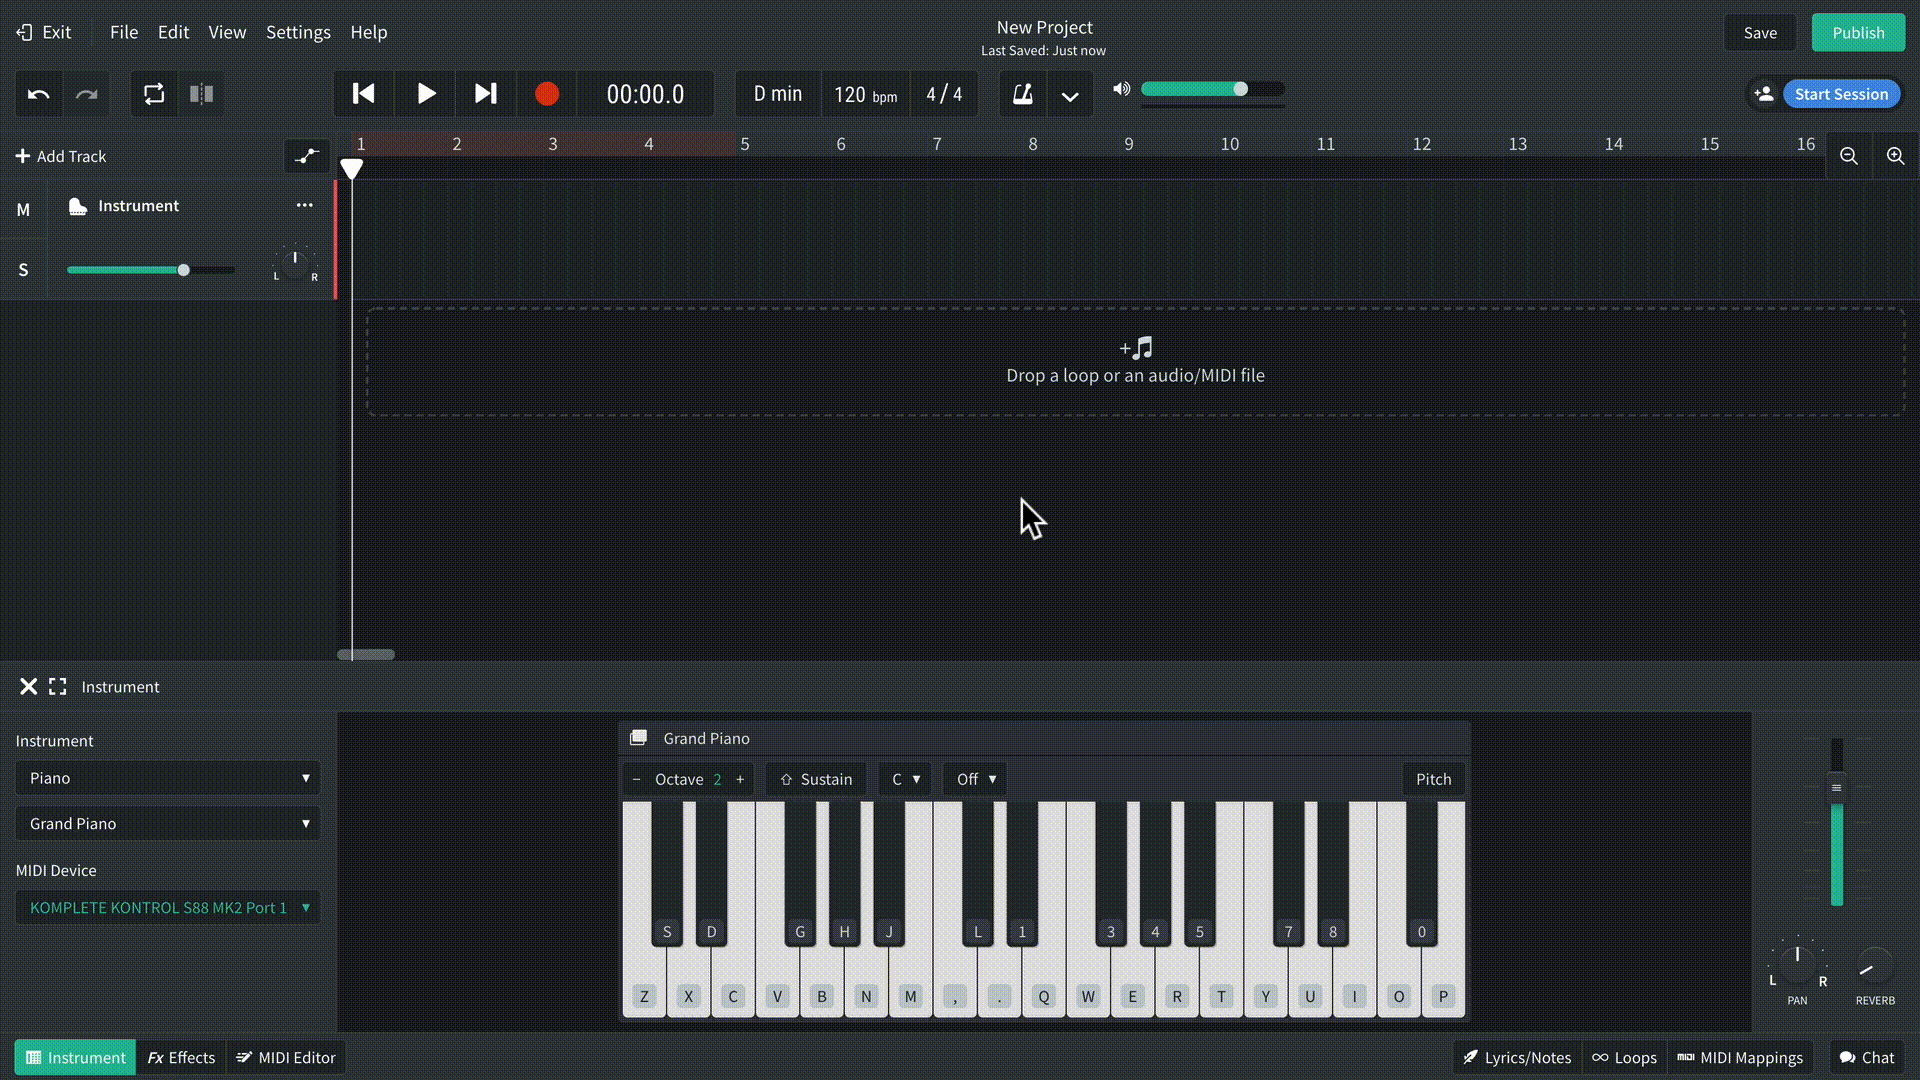
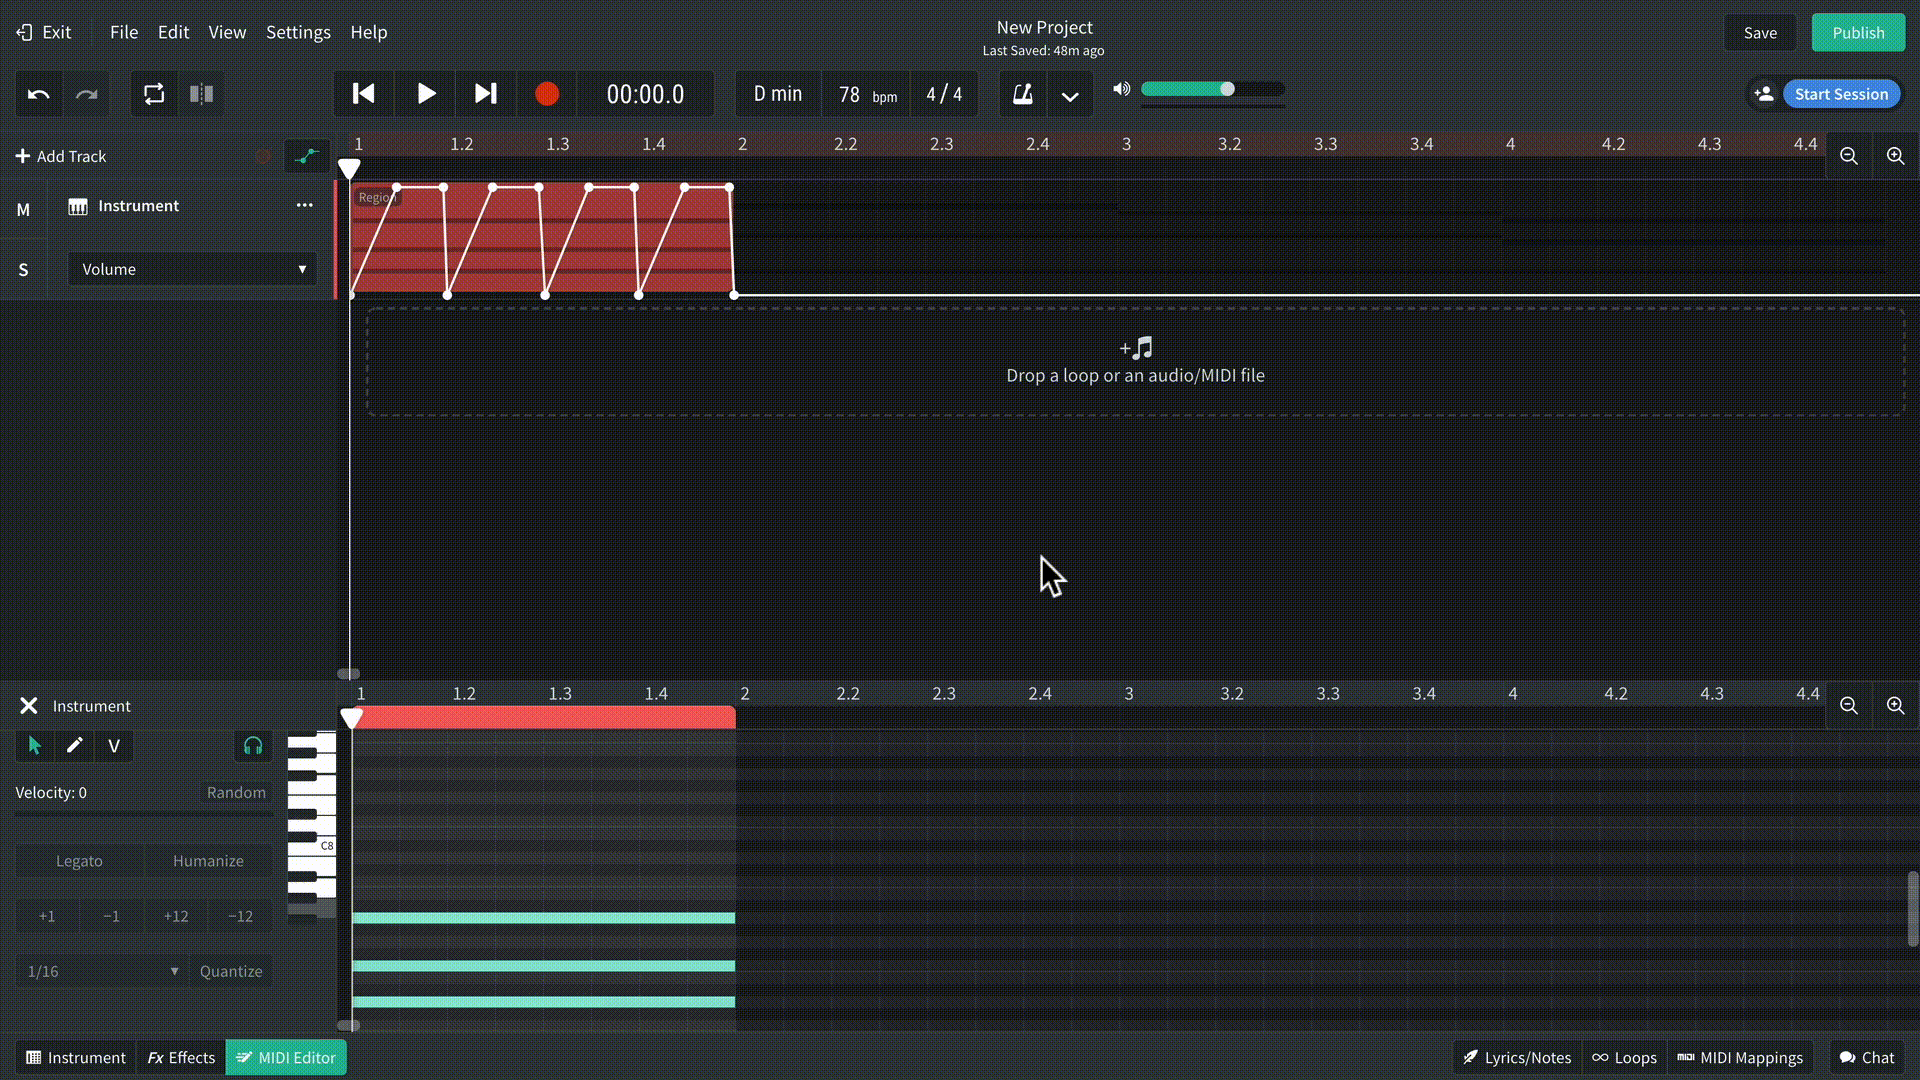
Firstly, you need to program a long, sustained sound so that you can hear the effect clearly. Head to the selection of Synth Pads and choose String Pad. Start with a simple D minor chord, one bar long.
Drawing automation
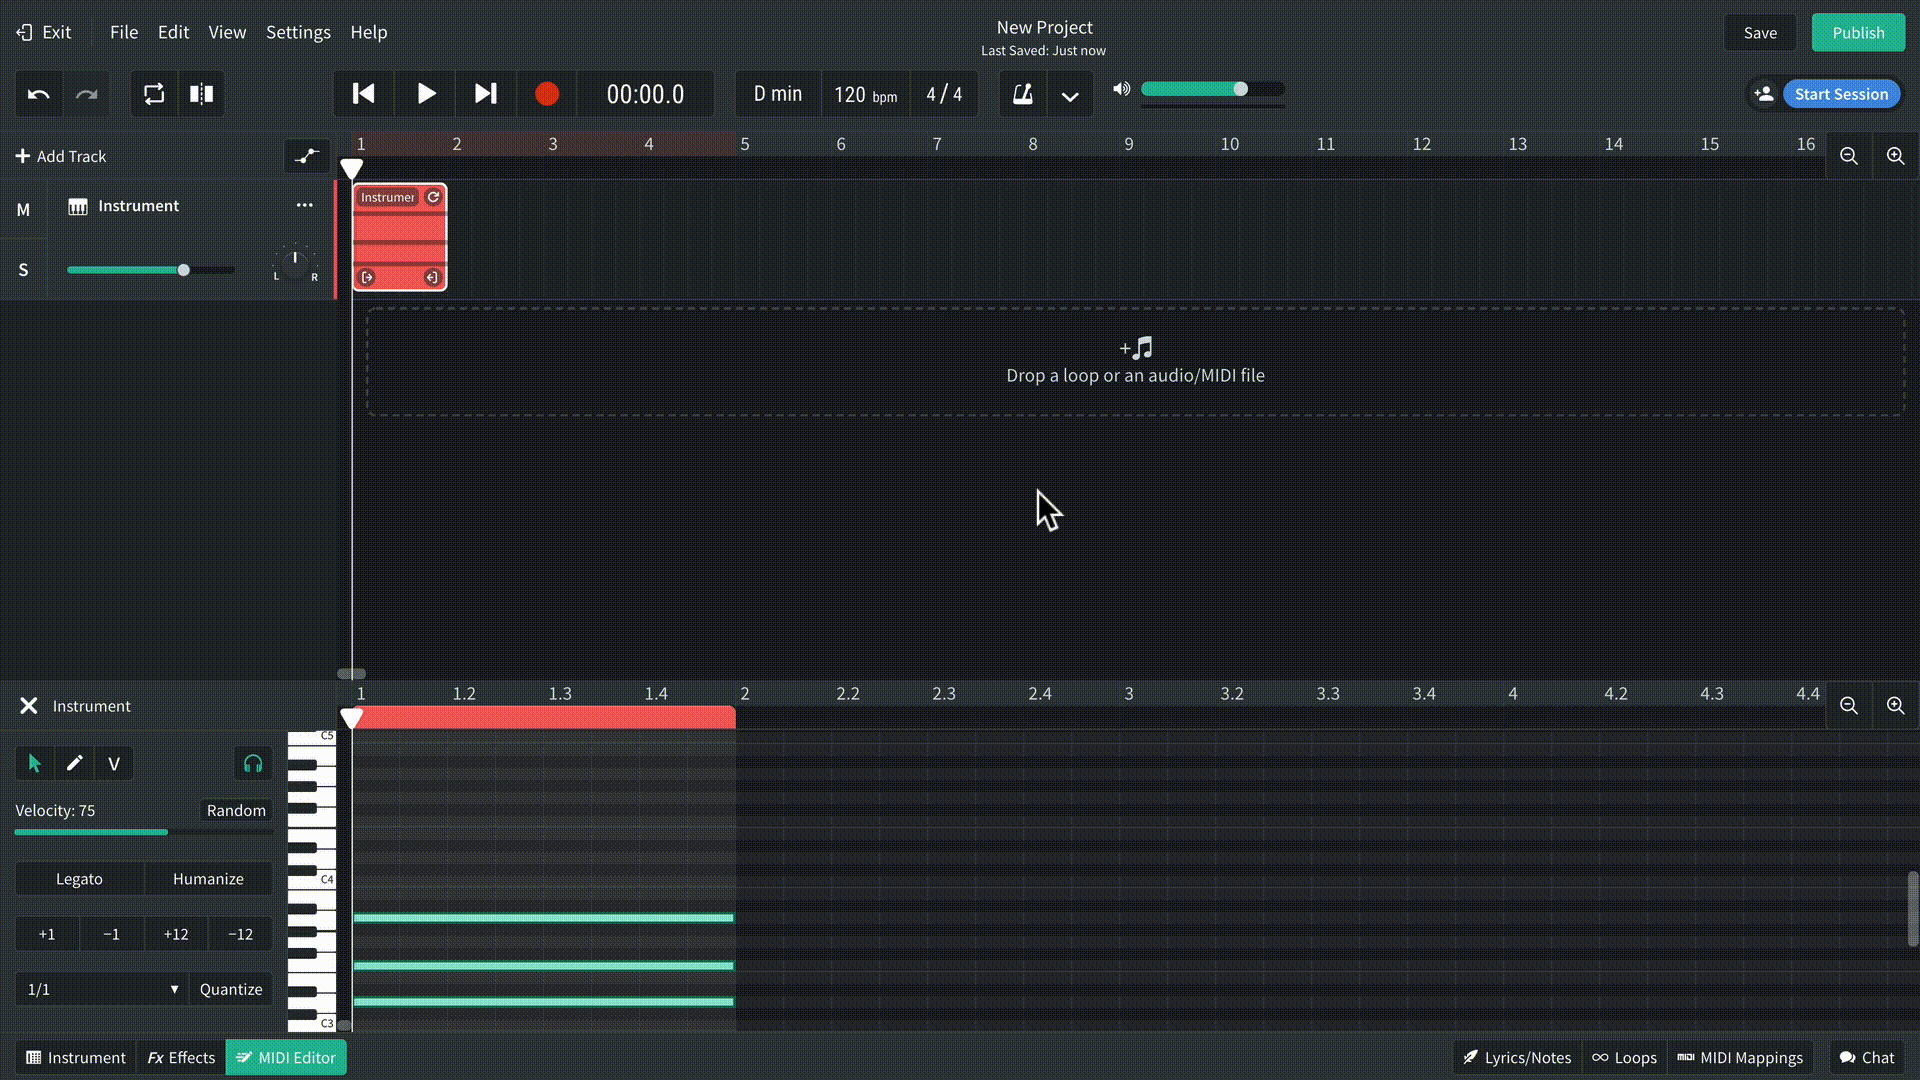
Zoom into the region so that it’s easier to see what you’re doing. You want the volume to be at 0 for each beat of the track and to rise to maximum volume just beforehand. Click to add automation nodes at positions 1, 1.2, 1.3 and 1.4 to create a lopsided sawtooth shape.
Changing the pumping effect
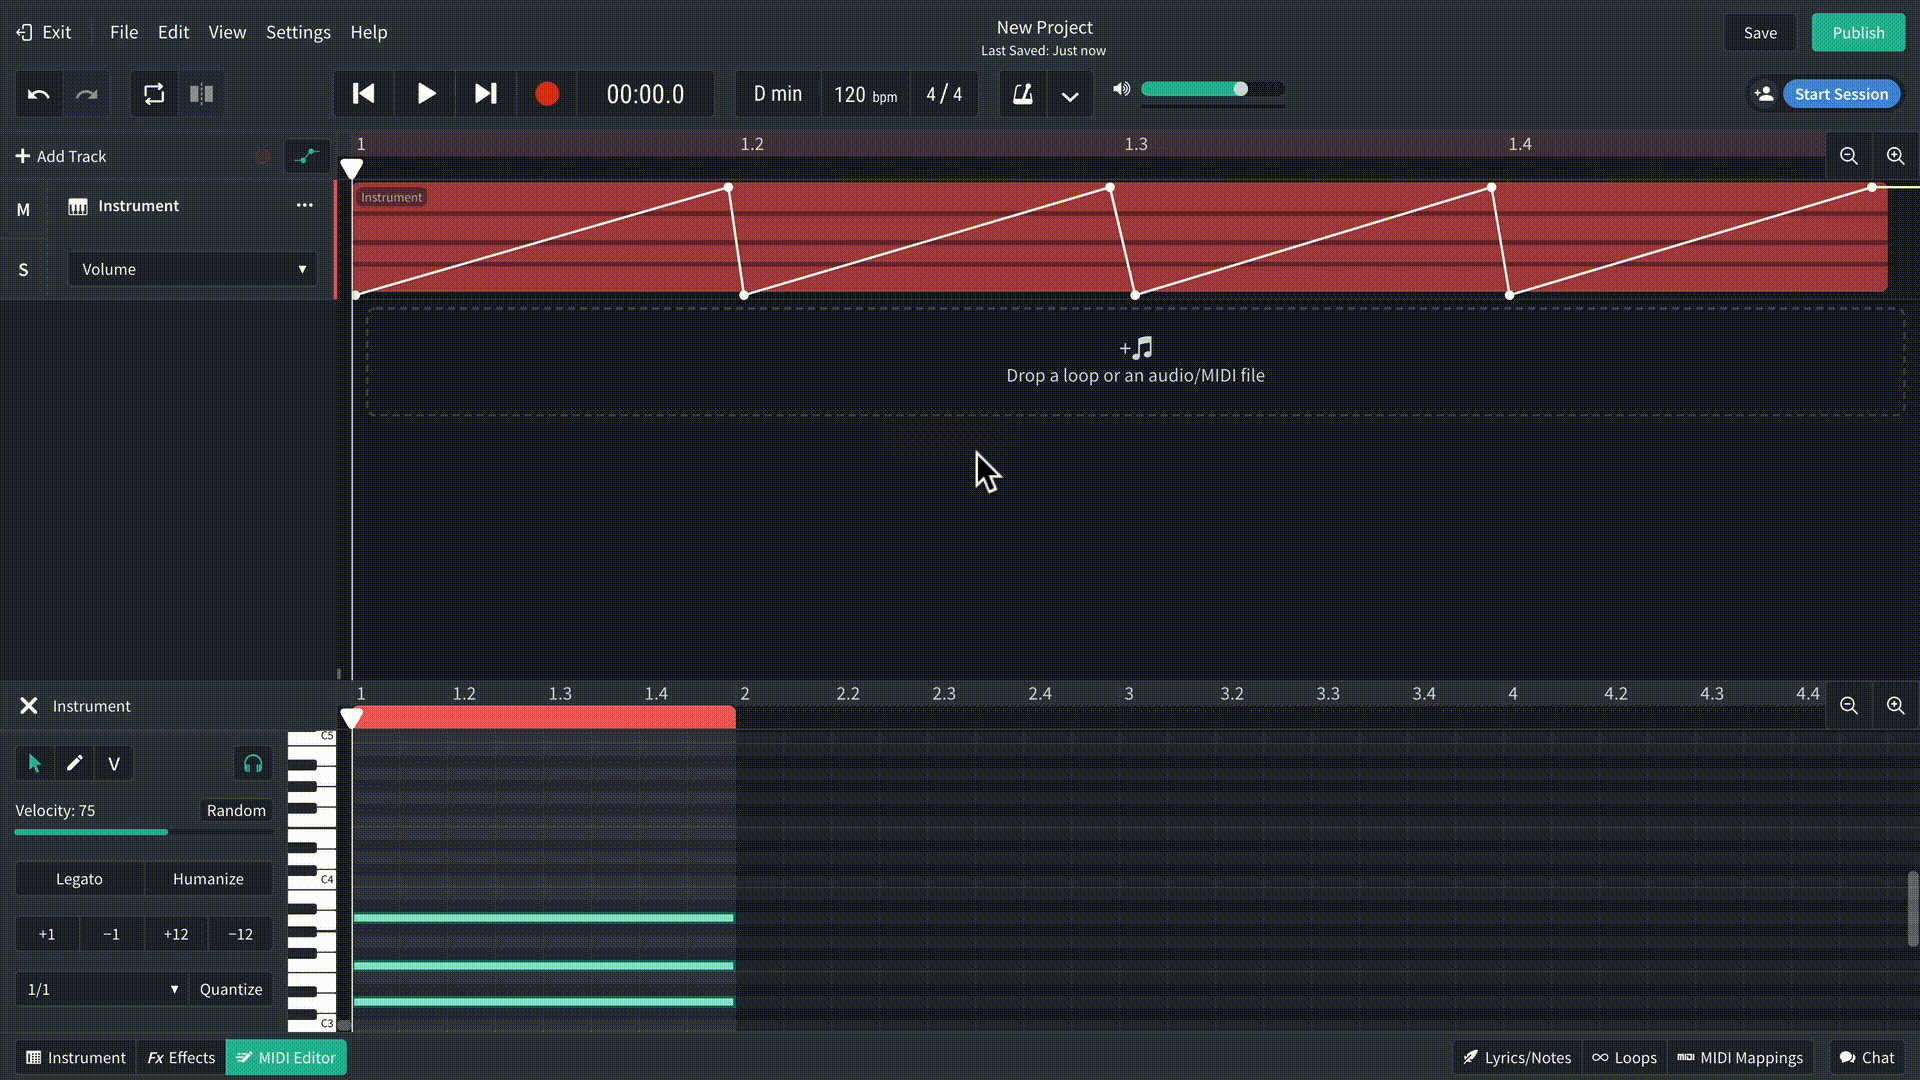
You don’t have to stick with this automation shape when writing your own tracks, as there are lots of volume-curve variations that work just as well. For less of a pumping feel, add more automation nodes to raise the volume level to maximum for half a beat.
Copy and paste to save time
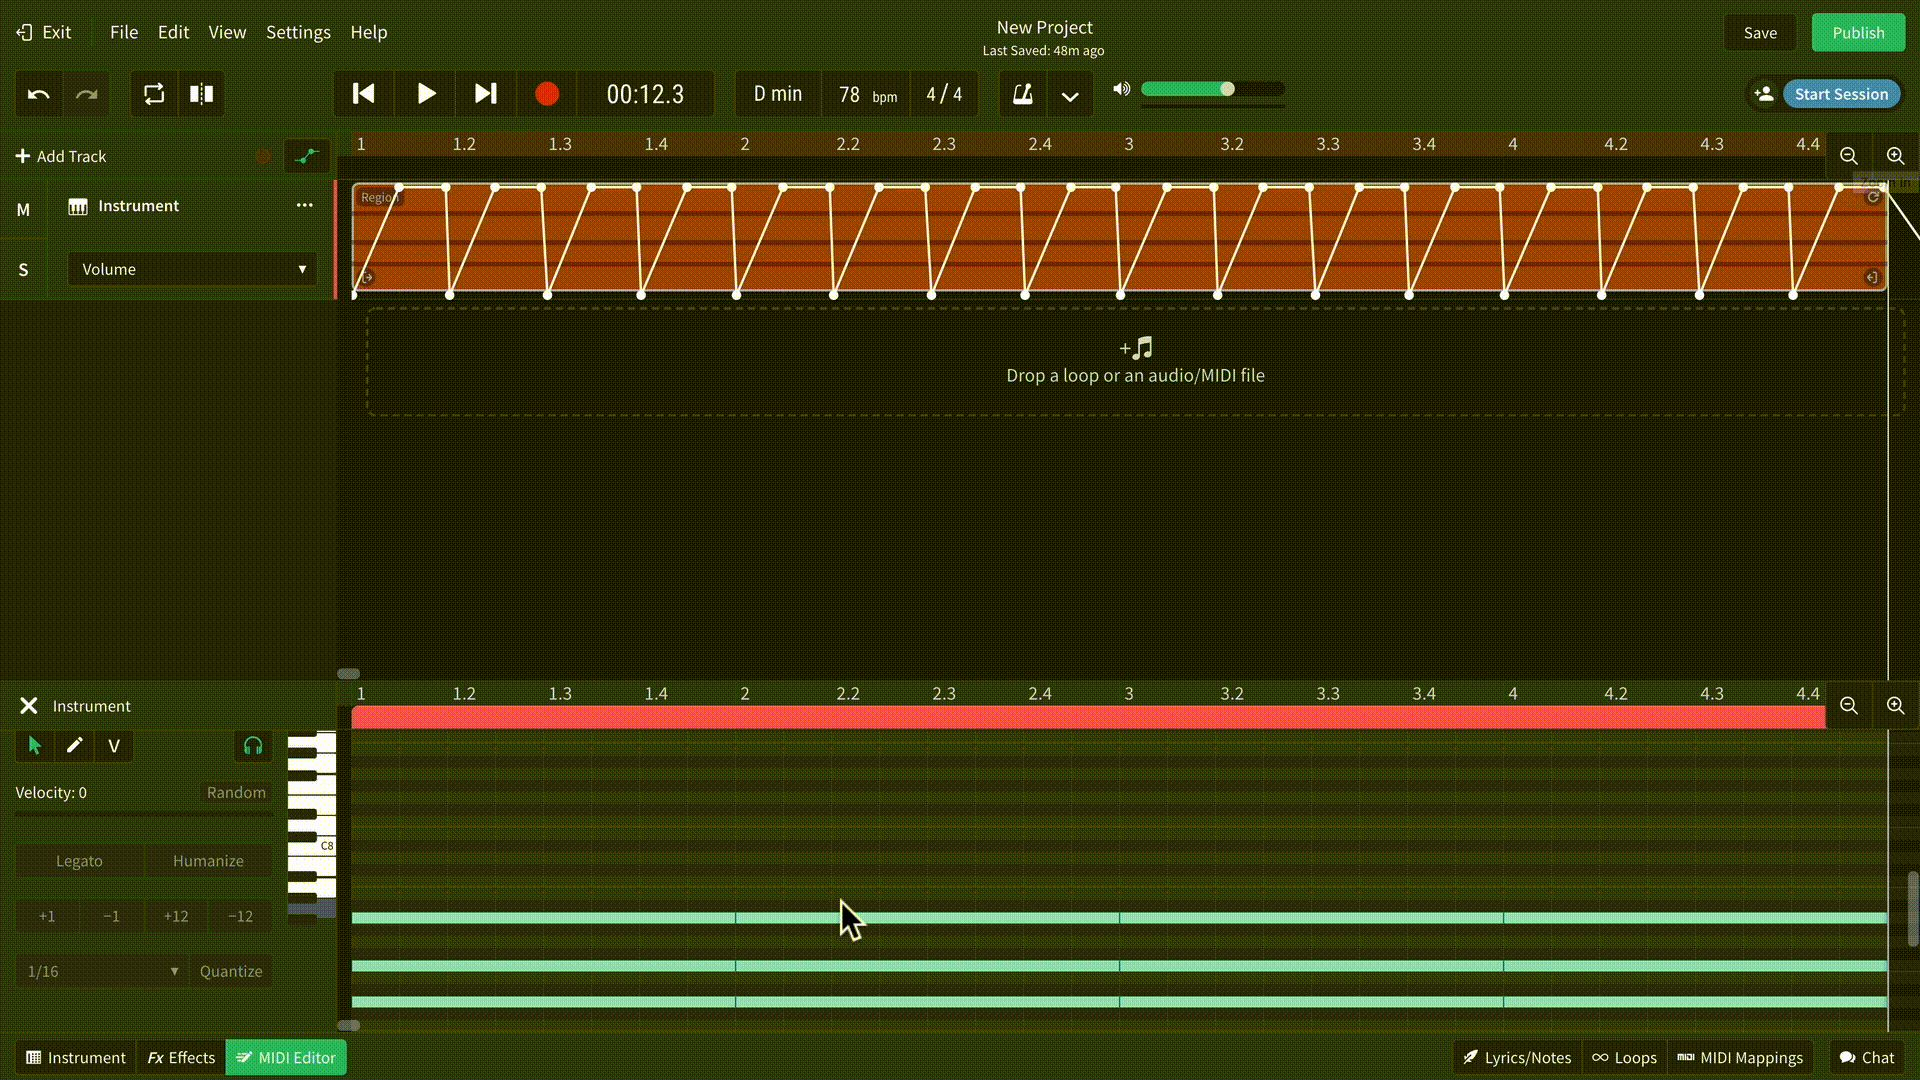
The reason you only programmed a single bar of automation in step one is that it’s easier to draw a few nodes and copy and paste them than it is to draw in multiple bars of automation. Copy your region three more times, pasting the automation with each new region.
Creating new chords
Change up your chords to create more interest while retaining your automation. Moving the individual notes of existing chords by a couple of semitones is a simple way to transform basic repeating chords into something fresh.
Listening to the pads and kick
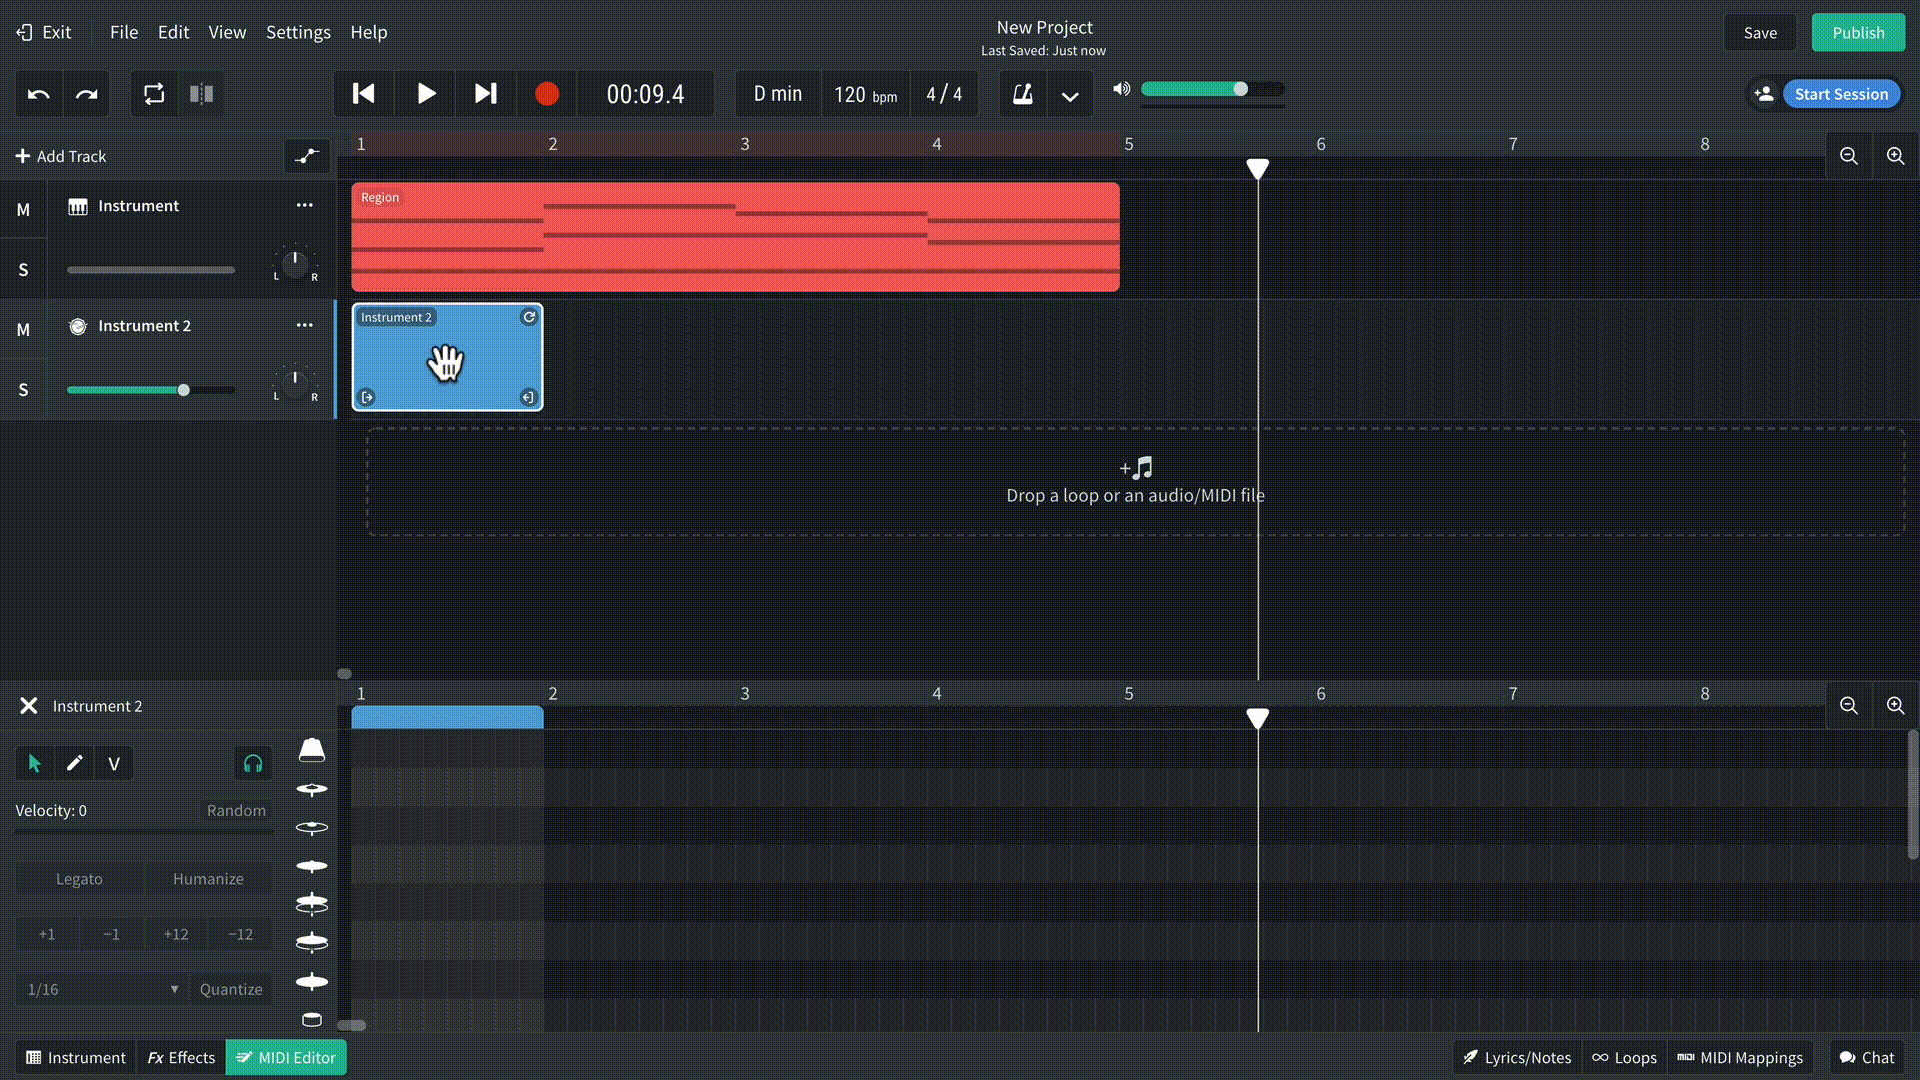
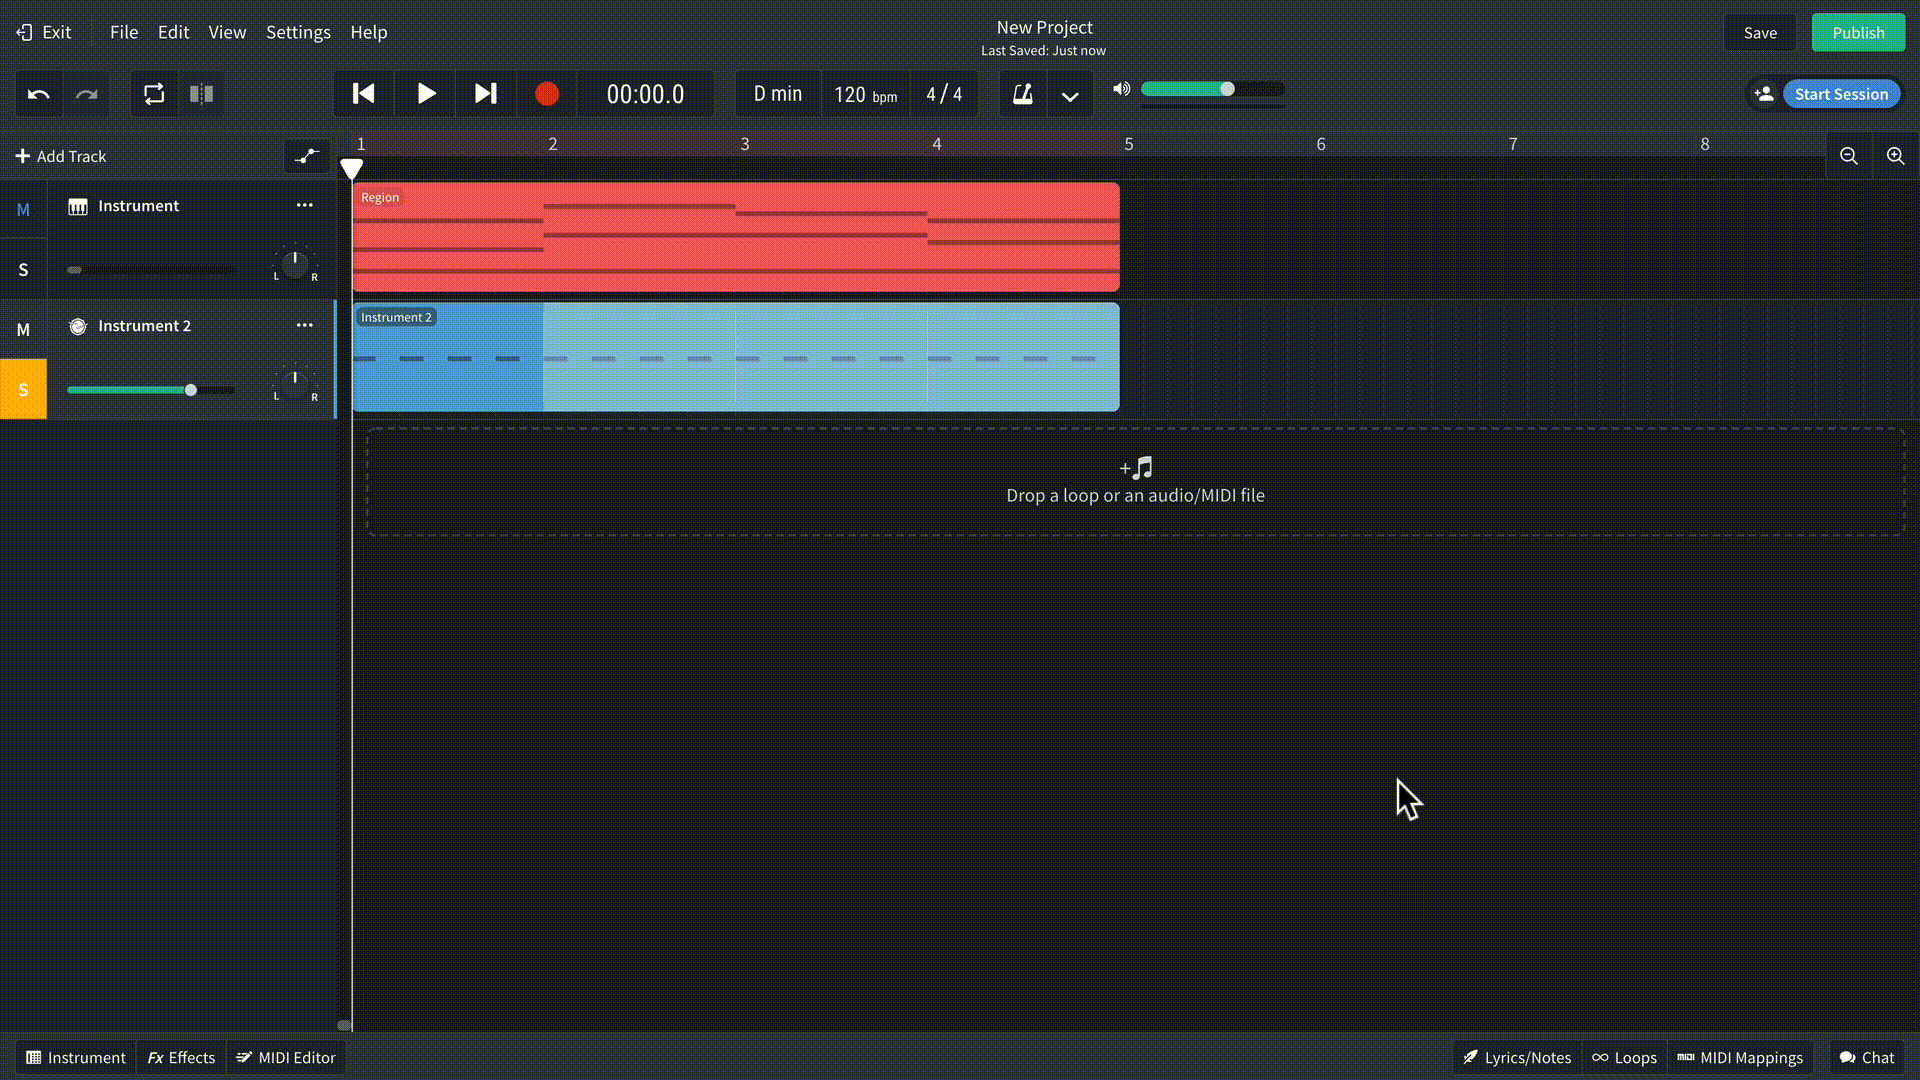
The reason the pads are being automated is to make way for the kick, so add the kick on a new track. Select the Chill Wave kit from the Drum Kits menu and program a regular 4/4 beat using just the kick. When you play the two tracks together, you’ll hear that, each time the kick plays, the pads chords are ducked out of the way.
Taking things further
There are many other transformative techniques you can perform using automation lanes, including stutter and fill effects. With judicious editing of BandLab’s volume and pan lanes, you can transform any sustained sound into a more compelling rhythmic texture. Check out what we’ve done here with a loop named Vocal Cluster.
About BandLab
![]()
BandLab is the flagship digital product in BandLab Technologies’ portfolio of music brands, and a leading social music creation platform with a global reach of over 37 million users. Through its best-in-class digital audio workstation (DAW) and audio hardware division, BandLab empowers creators to make music and share their creative process with musicians and fans on an unprecedented level.
The BandLab product family also includes BandLab for Education, an award-winning music creation platform with classroom management tools, and Cakewalk by BandLab, a professional-level digital recording studio for career musicians and producers.