How to master a track with Wavelab 10
Get to grips with a dedicated mastering suite in the form of WaveLab 10 in this step-by-step tutorial to the process.
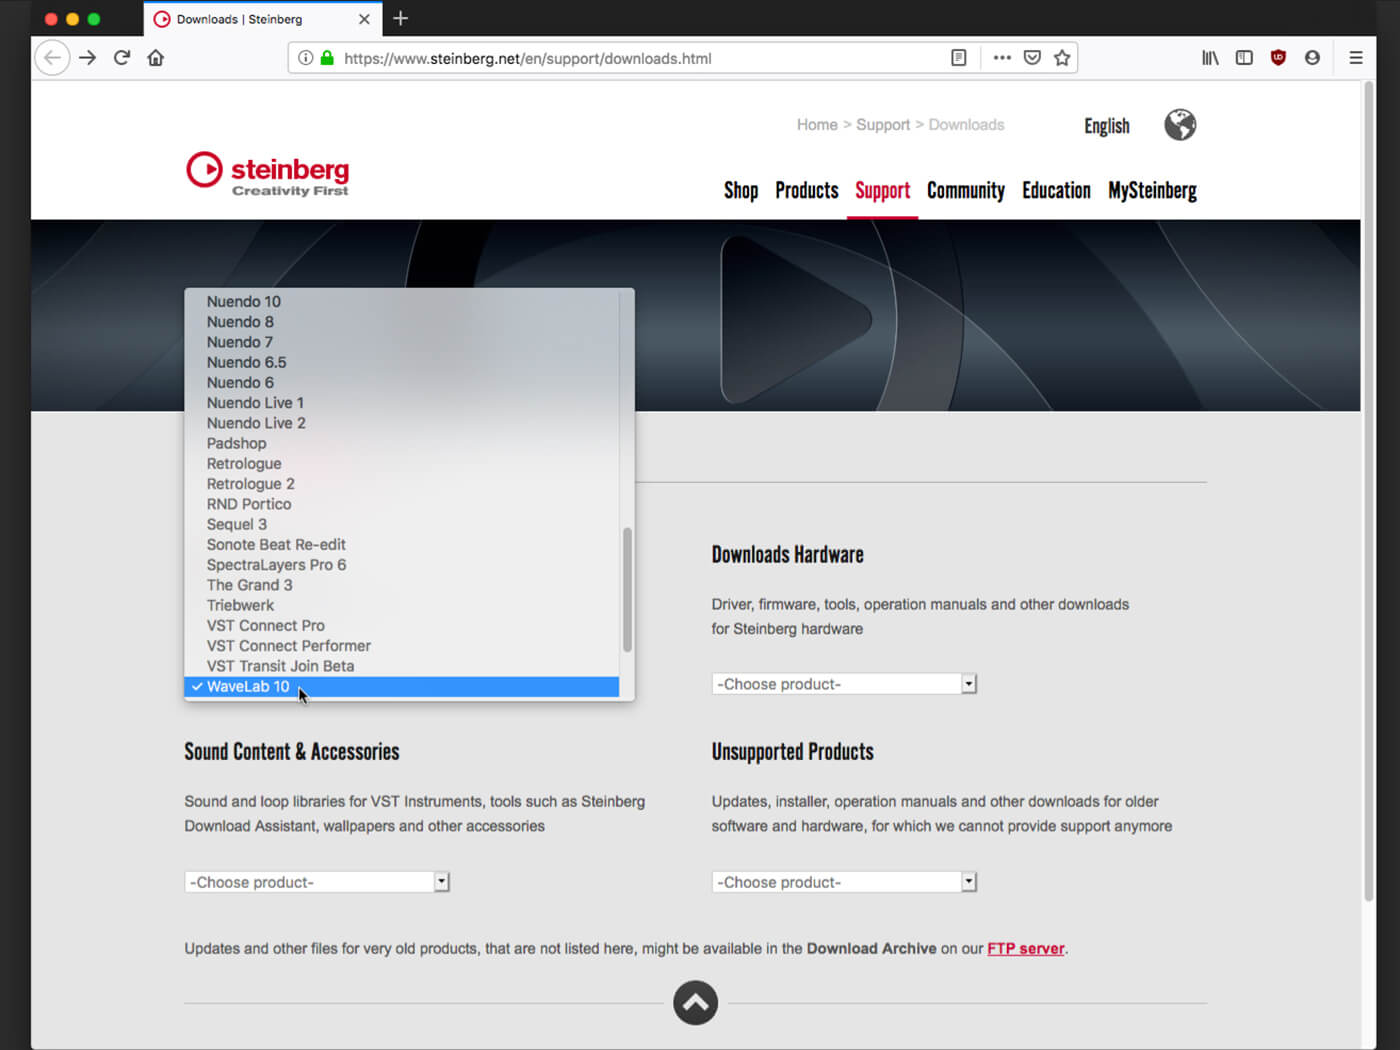
1. Go to www.steinberg.net, browse to the Support page and scroll down to locate the link to the downloads section – click the link. On the following page choose to download WaveLab 10. If you don’t have a Steinberg eLicenser dongle grab WaveLab 10 Elements instead.
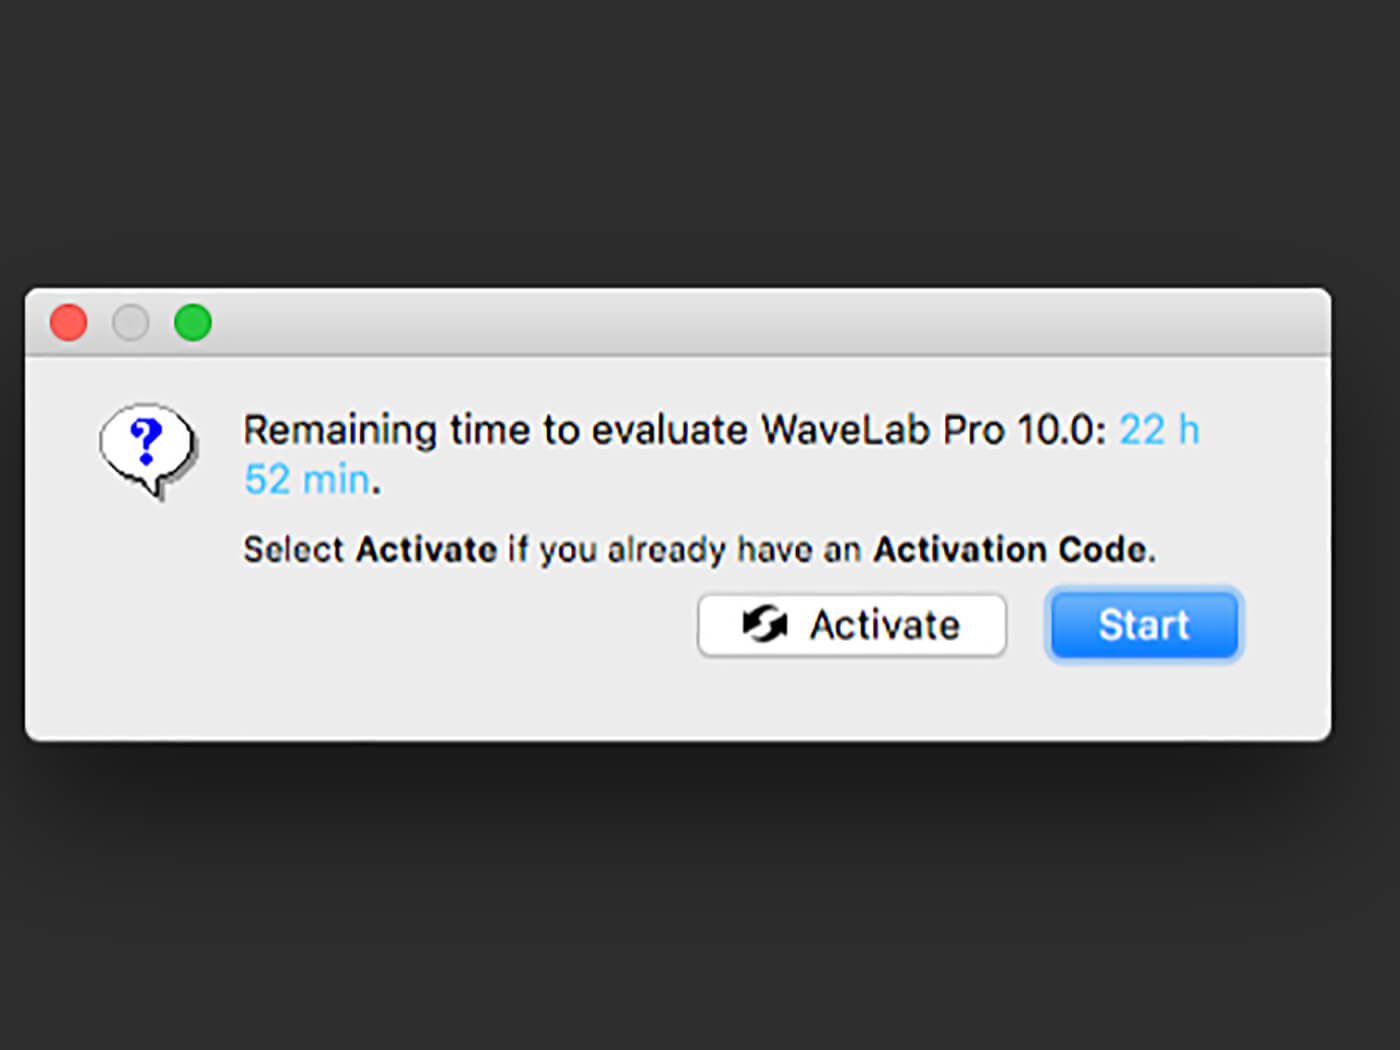
2. Follow Steinberg’s instructions for installing WaveLab, which are contained in the download. When you then launch the program you’ll be asked to activate the software – if you don’t have a license click on the Start button to launch WaveLab in a time-limited demo mode.
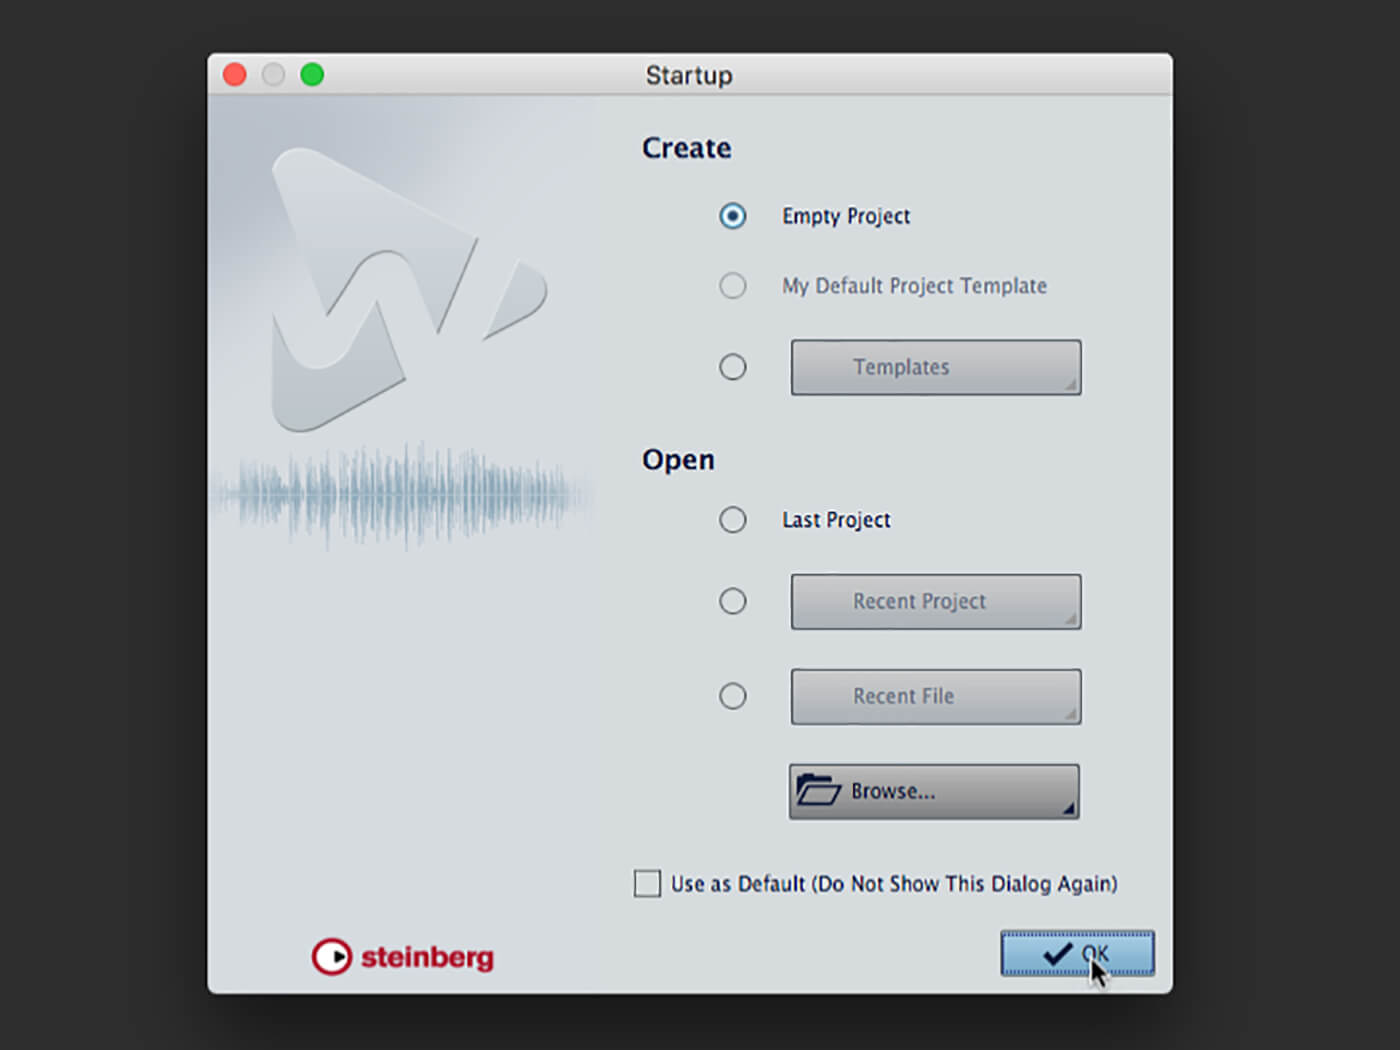
3. In Wavelab’s launcher window, select Empty Project then click OK. Take a moment to familiarise yourself with the window layout. Note that the top and right borders of the window show various tool palettes that wrap around the main work area.
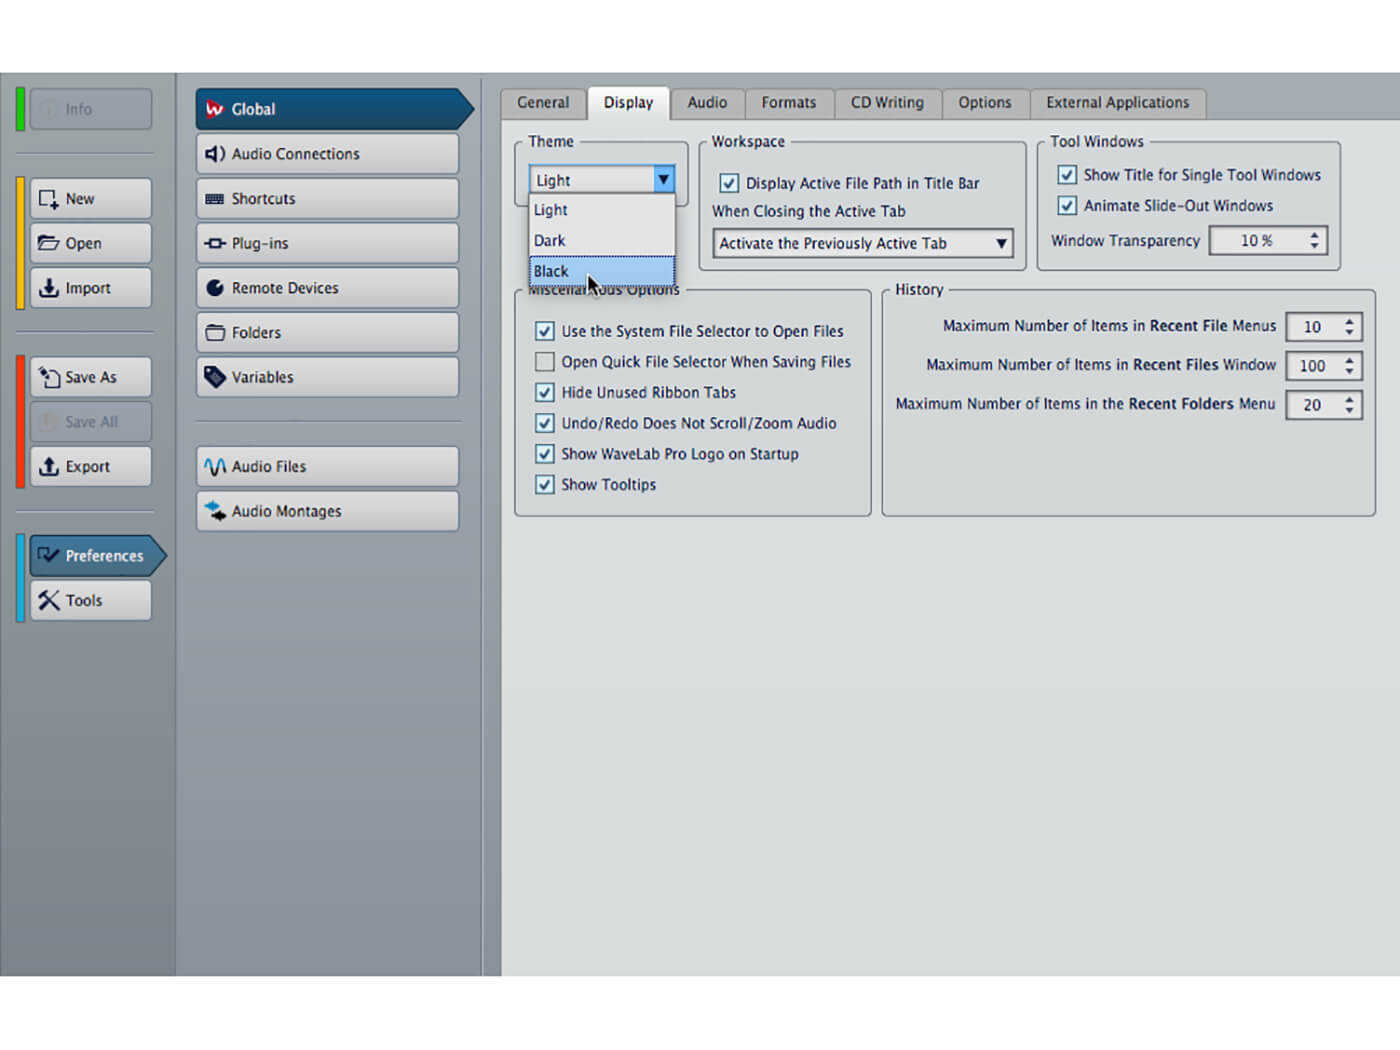
4. The default colours are a bit intense. The panel showing in the main area provides various top level options – click the Preferences button then choose the Display tab and change ‘Theme’ to ‘Black’. That’s much nicer!
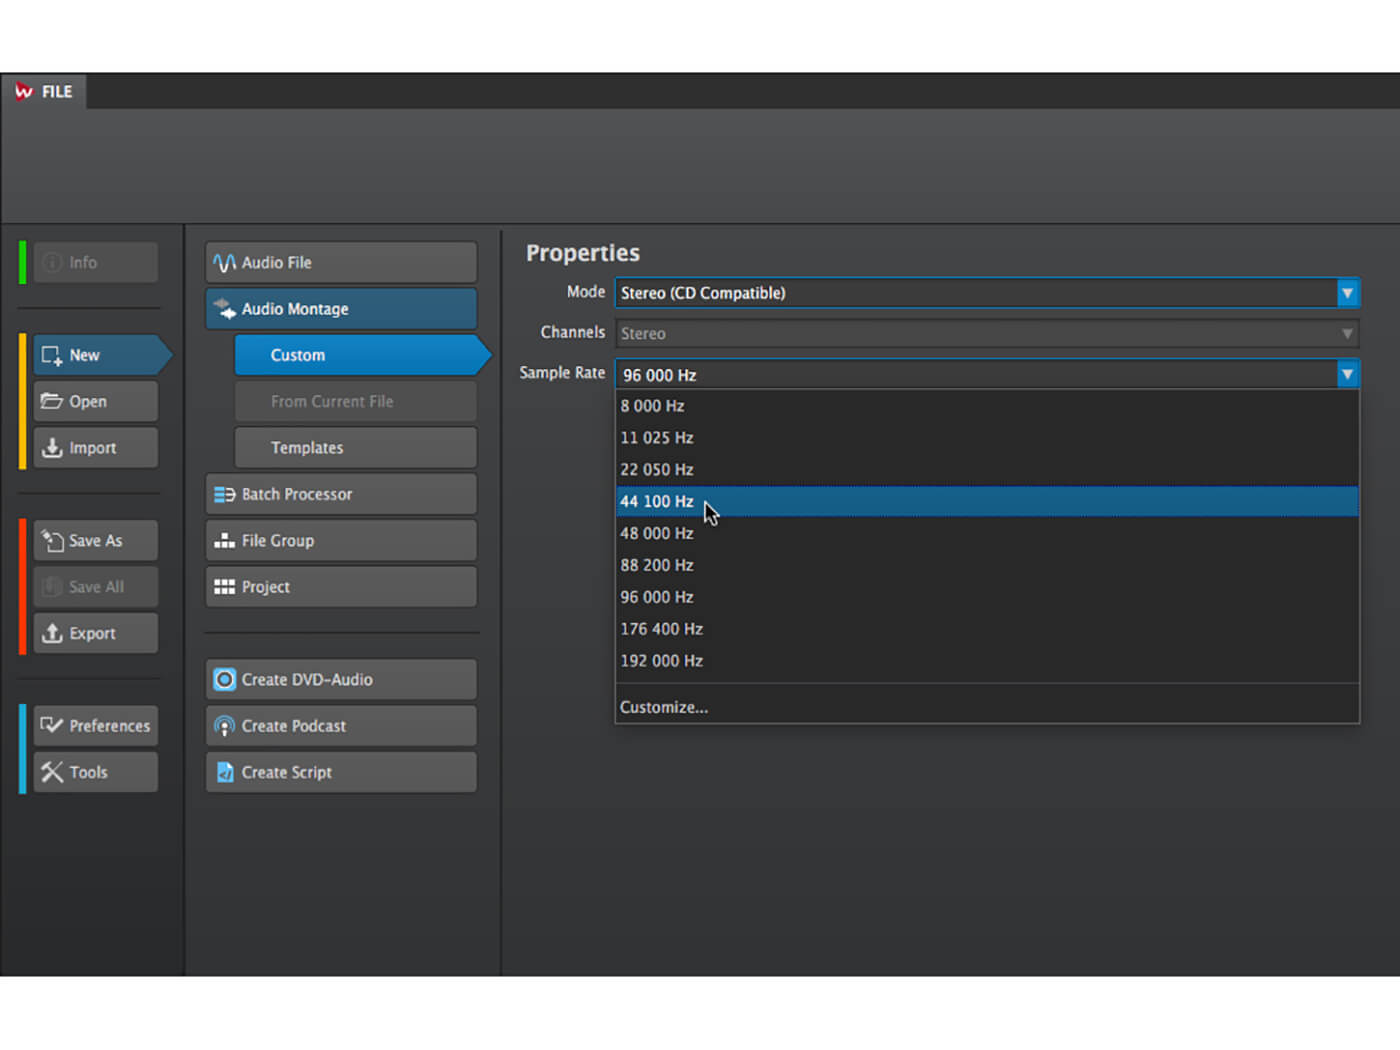
5. Click the New button at the side of the main area. Select the Audio Montage option, then set Mode to match your target format, and Sample Rate to match the material you’re working on. Click Create when done.
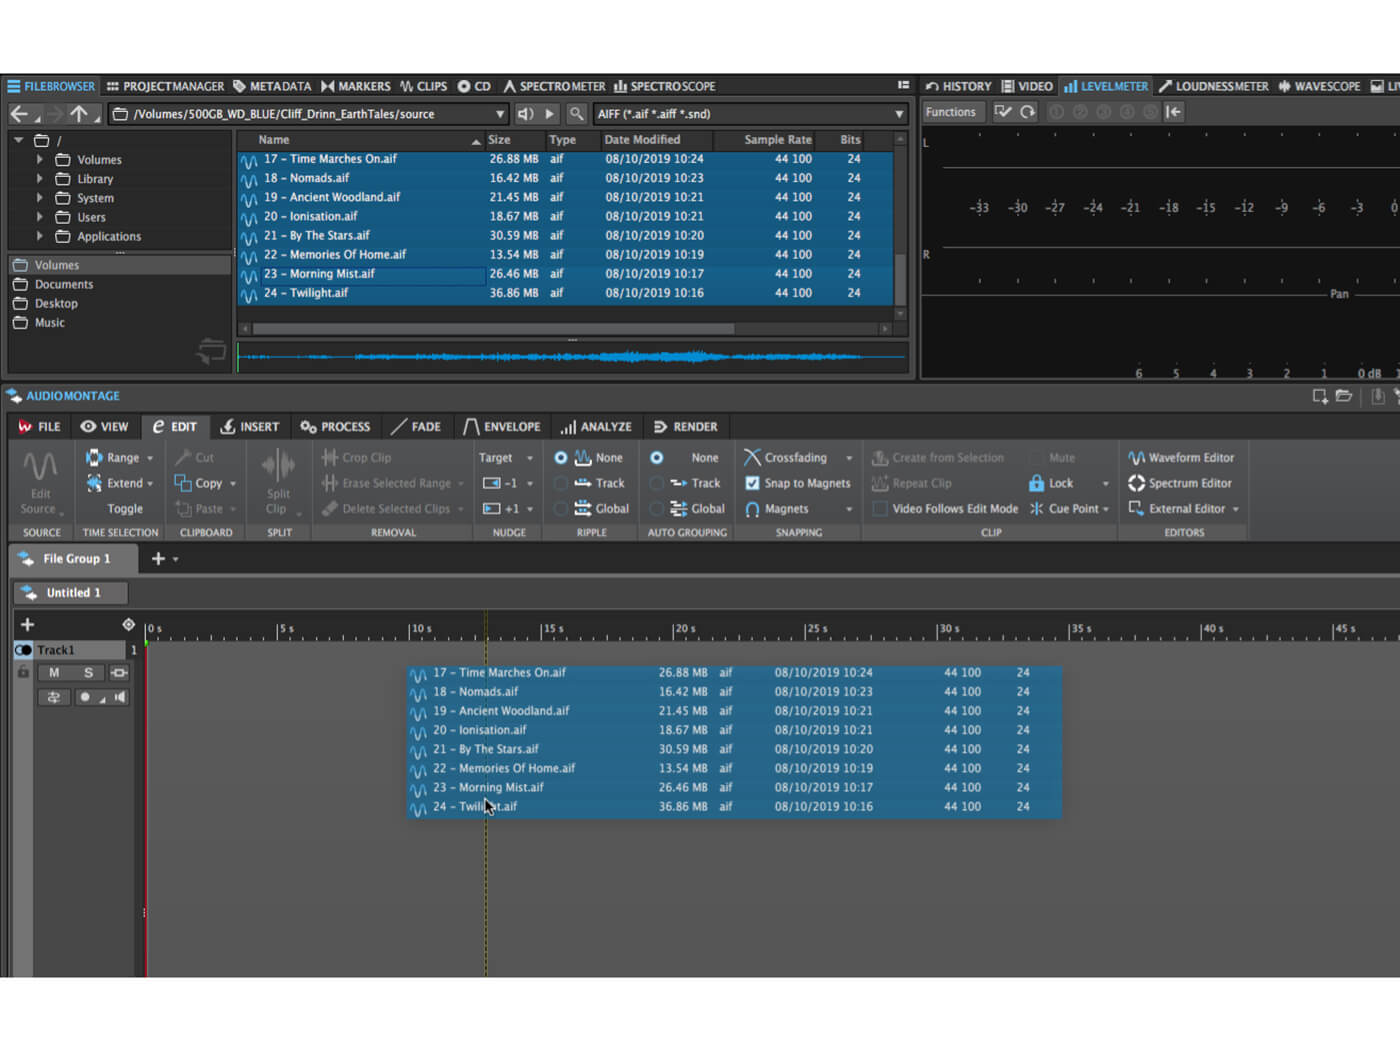
6. Select the File Browser tab in the upper-left tool palette and use it to browse to the files you want to master. Select (highlight) the files that will be part of the montage and drag them down to the montage window.
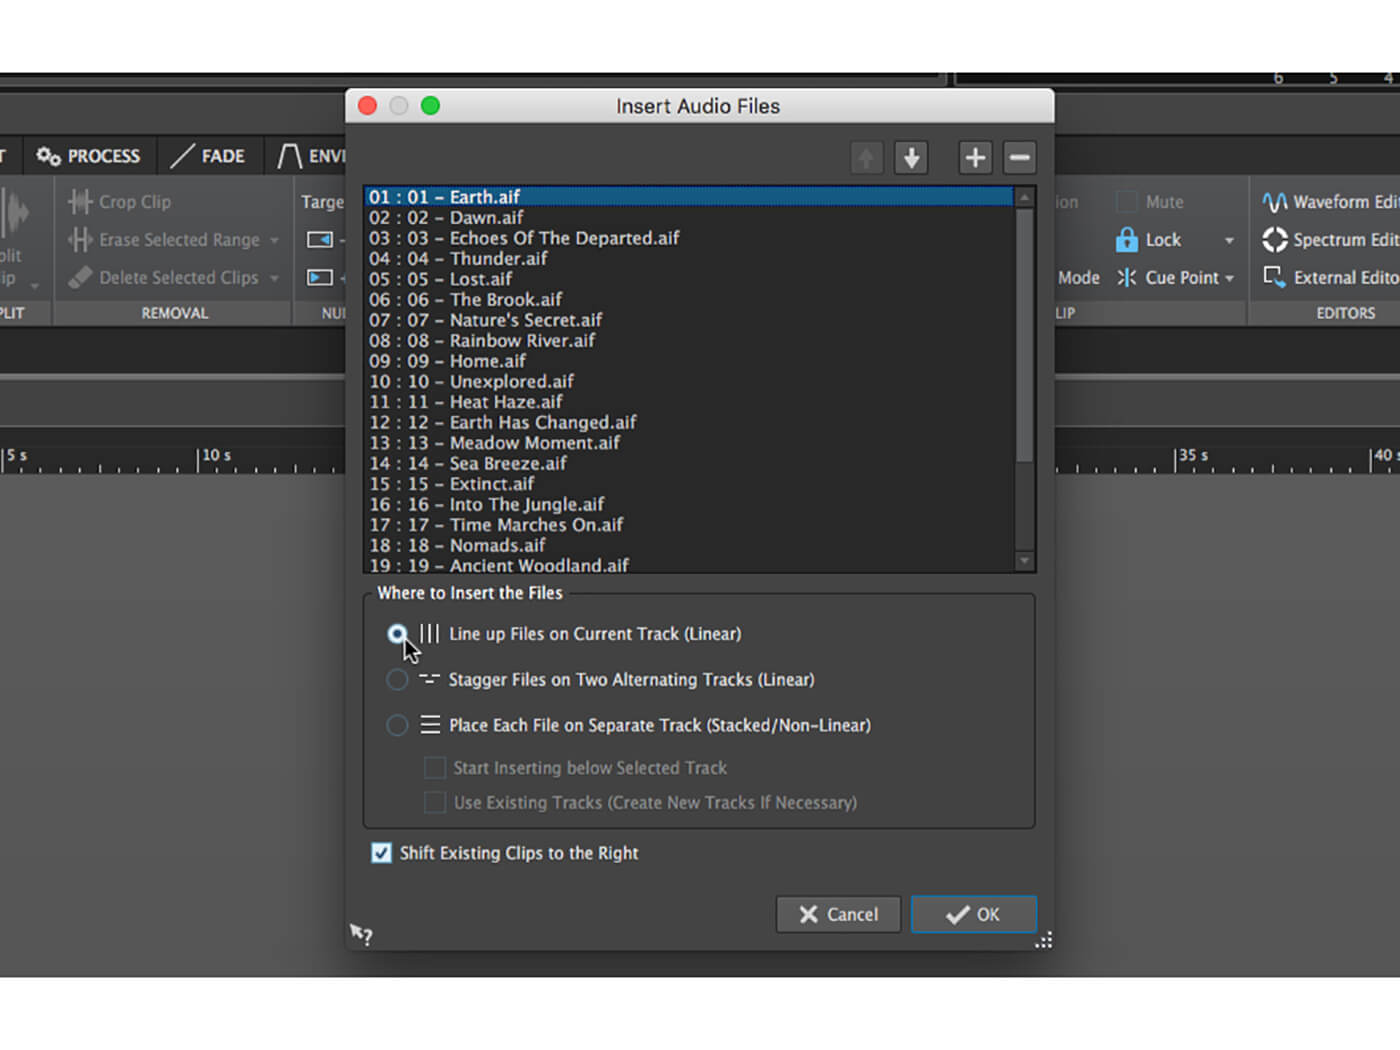
7. Dragging multiple files to a montage in this way opens the Insert Audio Files popup. Use this to arrange the songs into the desired order (you can adjust this later) and select the Line up Files on Current Track option. Click OK when done.
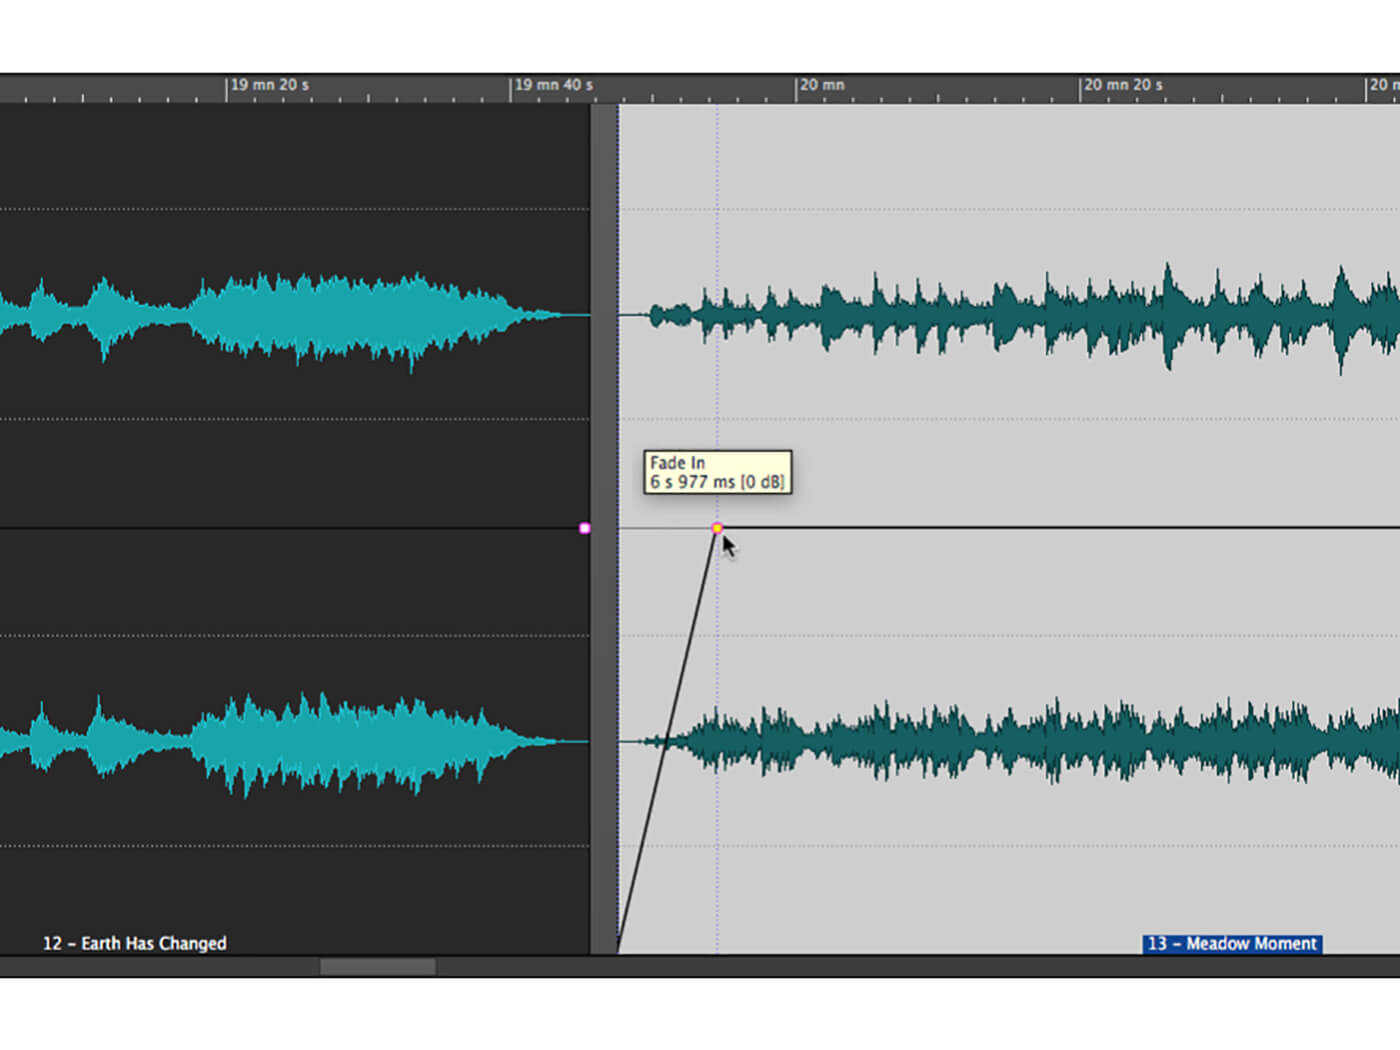
8. Rearrange the clips on the montage timeline by clicking-and-dragging in their lower halves. Holding the mouse next to a clip edge allows you to trim it, while fades can be created by clicking-and-dragging on the dots displayed on each clip.

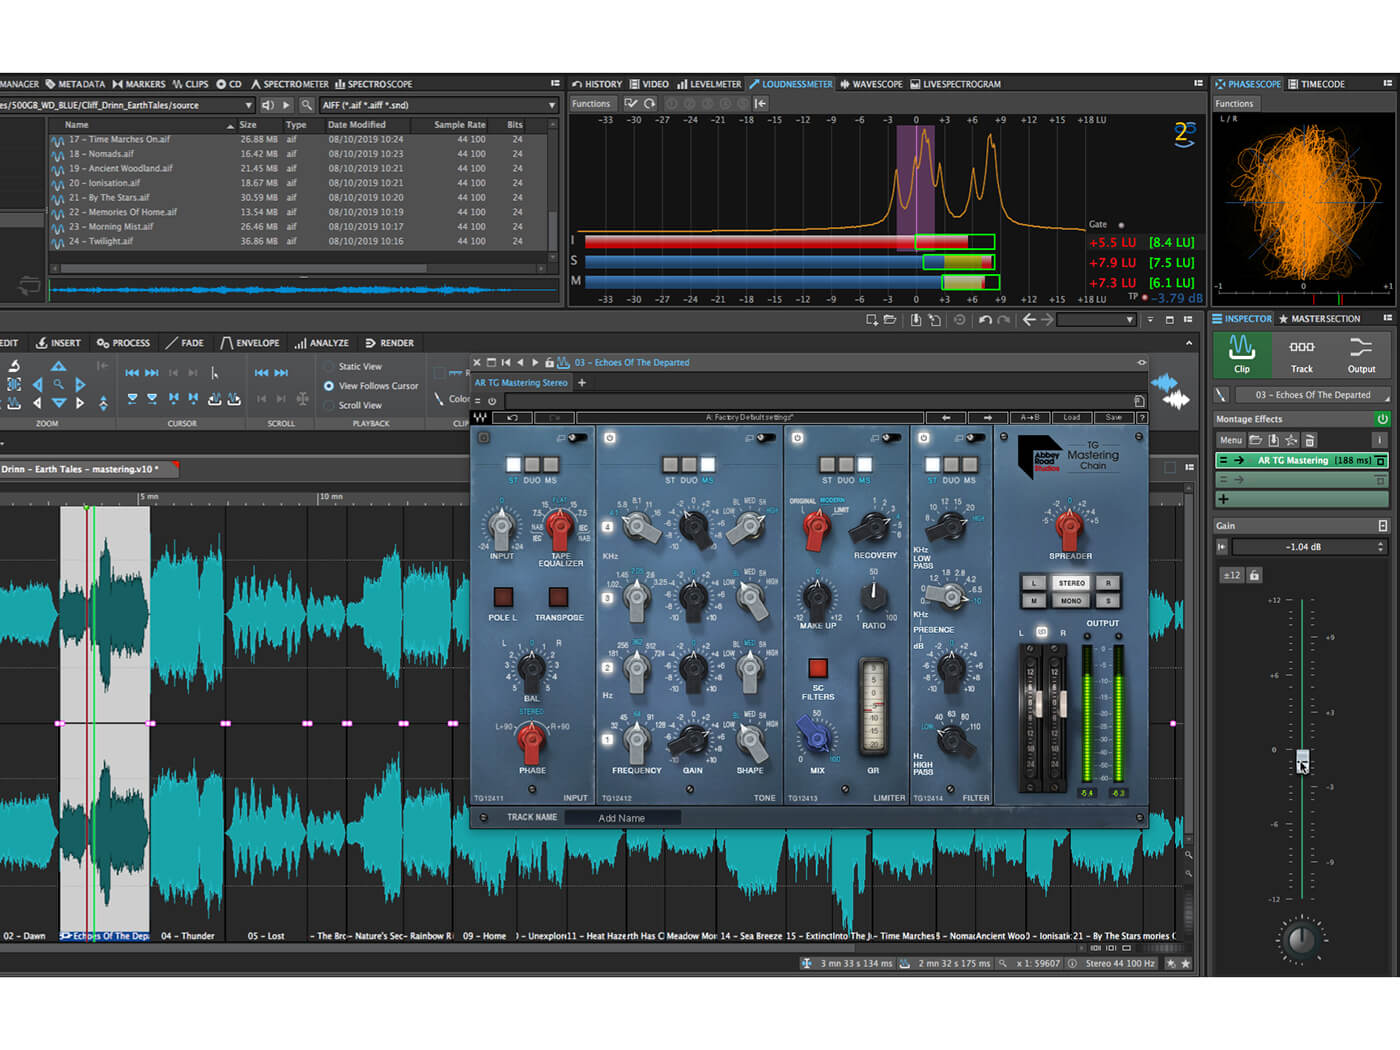
9. Click on the first clip in the montage so that it is selected and active. Click the Inspector tab of the the lower-right tool palette – this is where you can apply effects to clips, to the montage track, and to the complete montage.
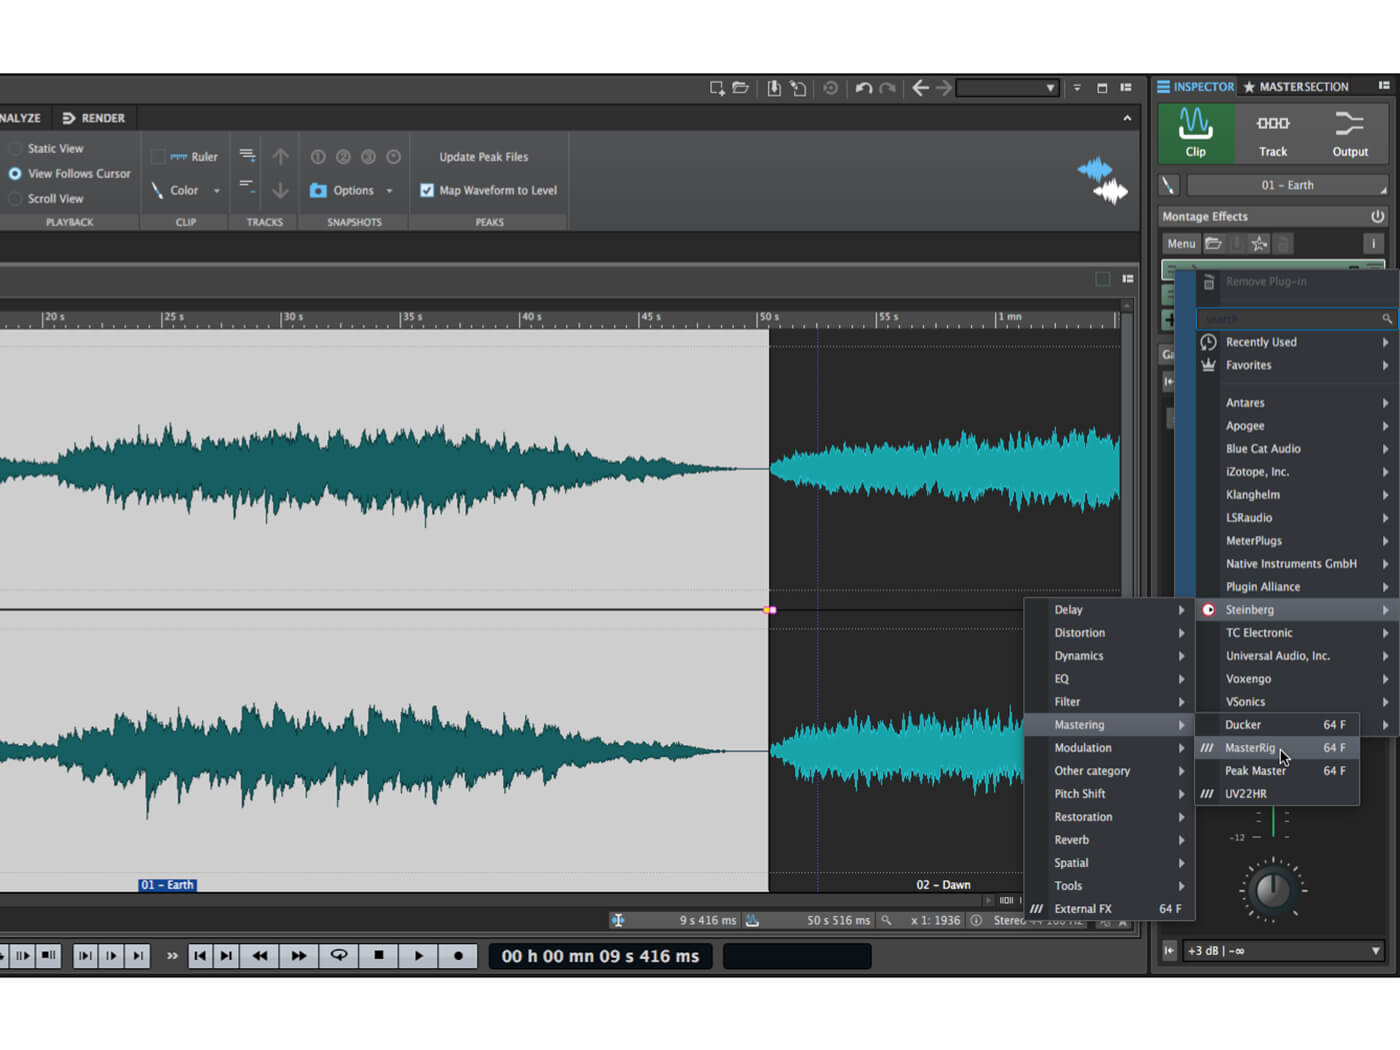
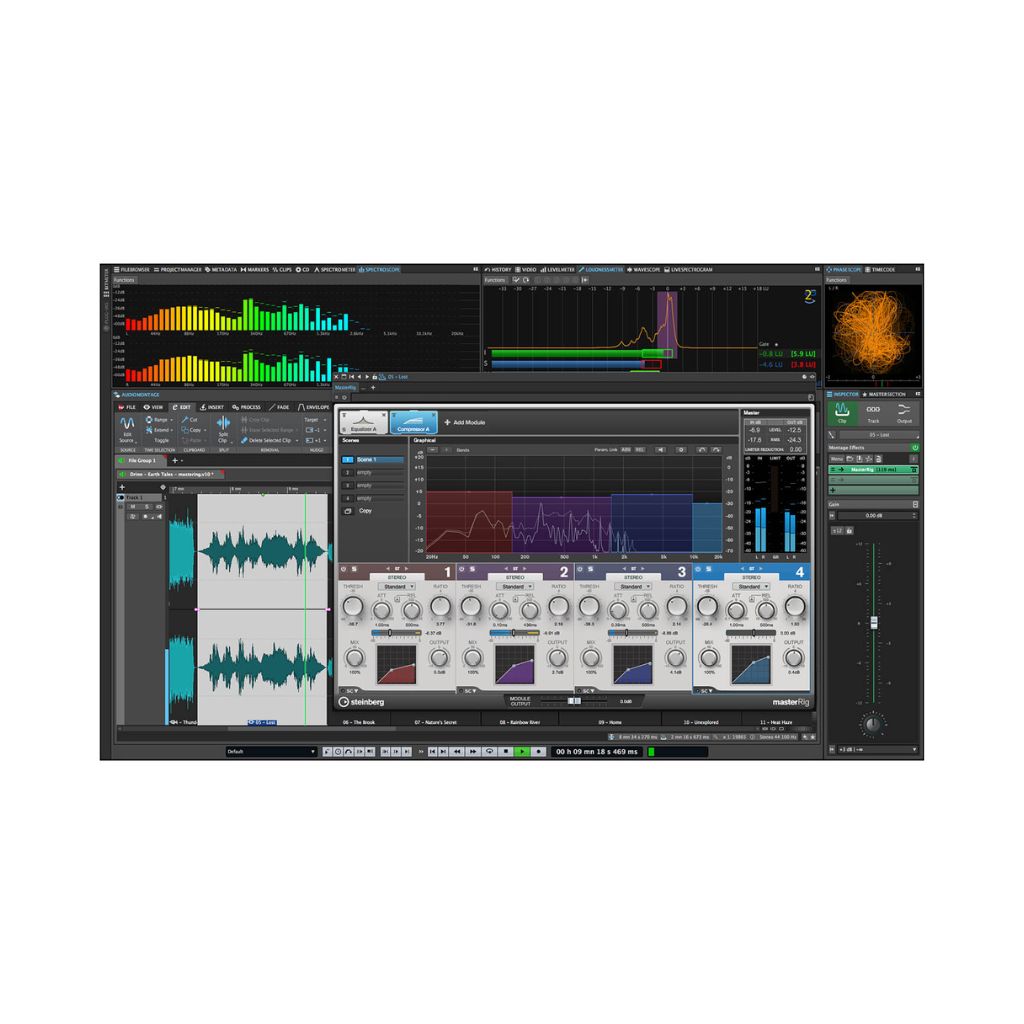
10. Select the Clip section of the Inspector. Click the first plugin slot and select Steinberg -> Mastering -> MasterRig. This WaveLab-exclusive plugin allows you to load multiple mastering-focussed processing modules, all of which support stereo and mid-side processing.
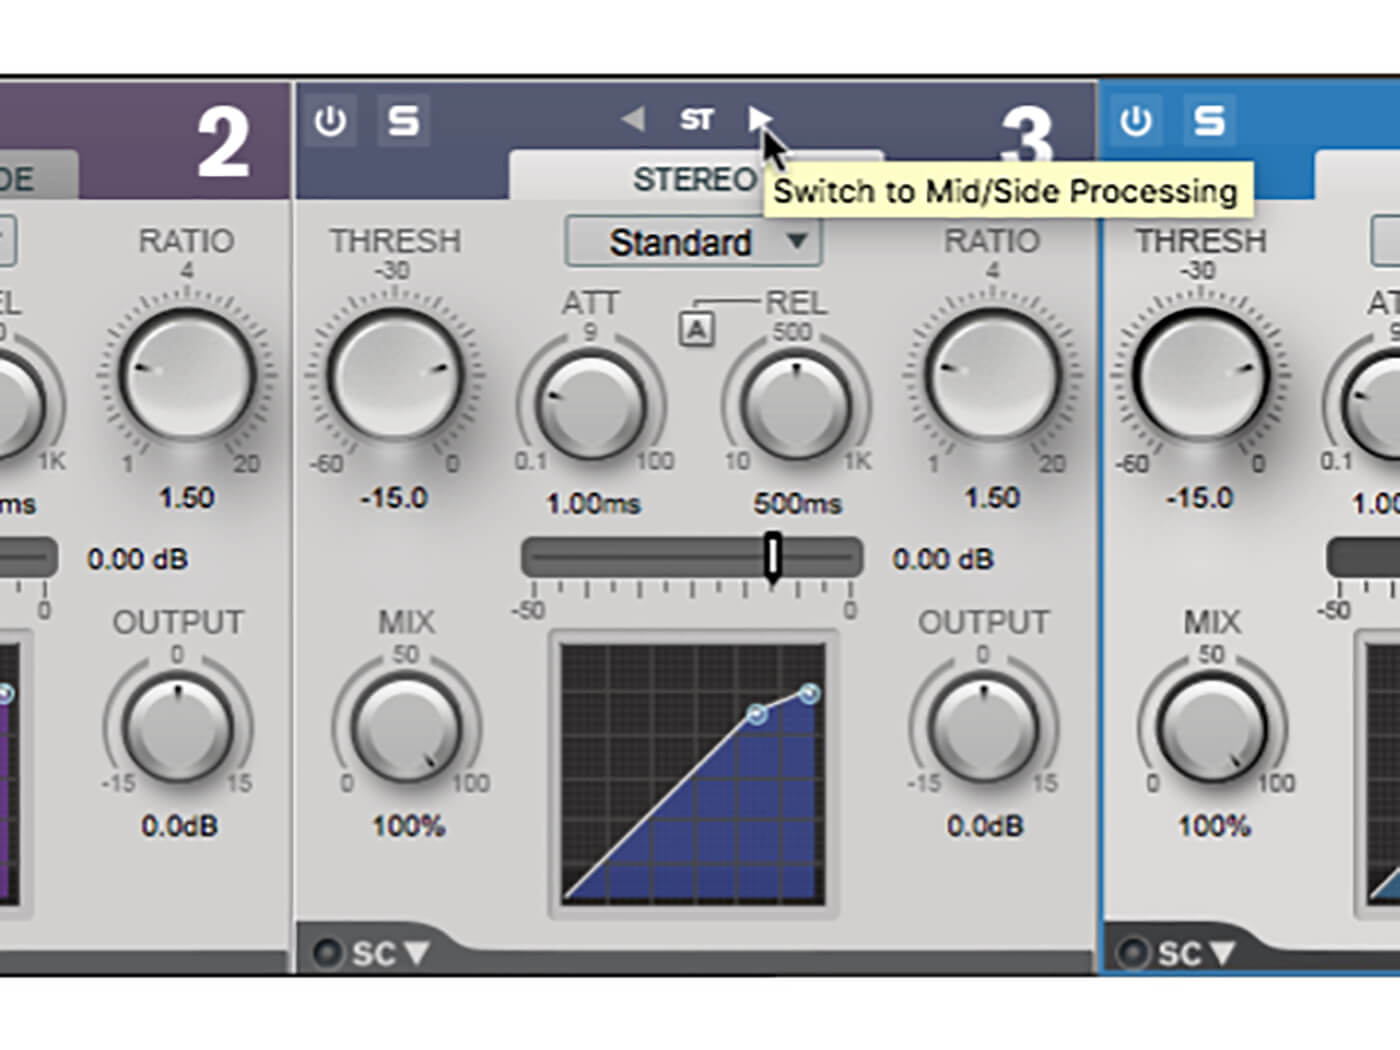
11. Set up the MasterRig EQ as needed. Then click the Add Module button and select Compressor A. Click the arrows at the top of each band to change each to ‘M/S’ mode. Notice that each band now has tabs for Mid and Side signals.
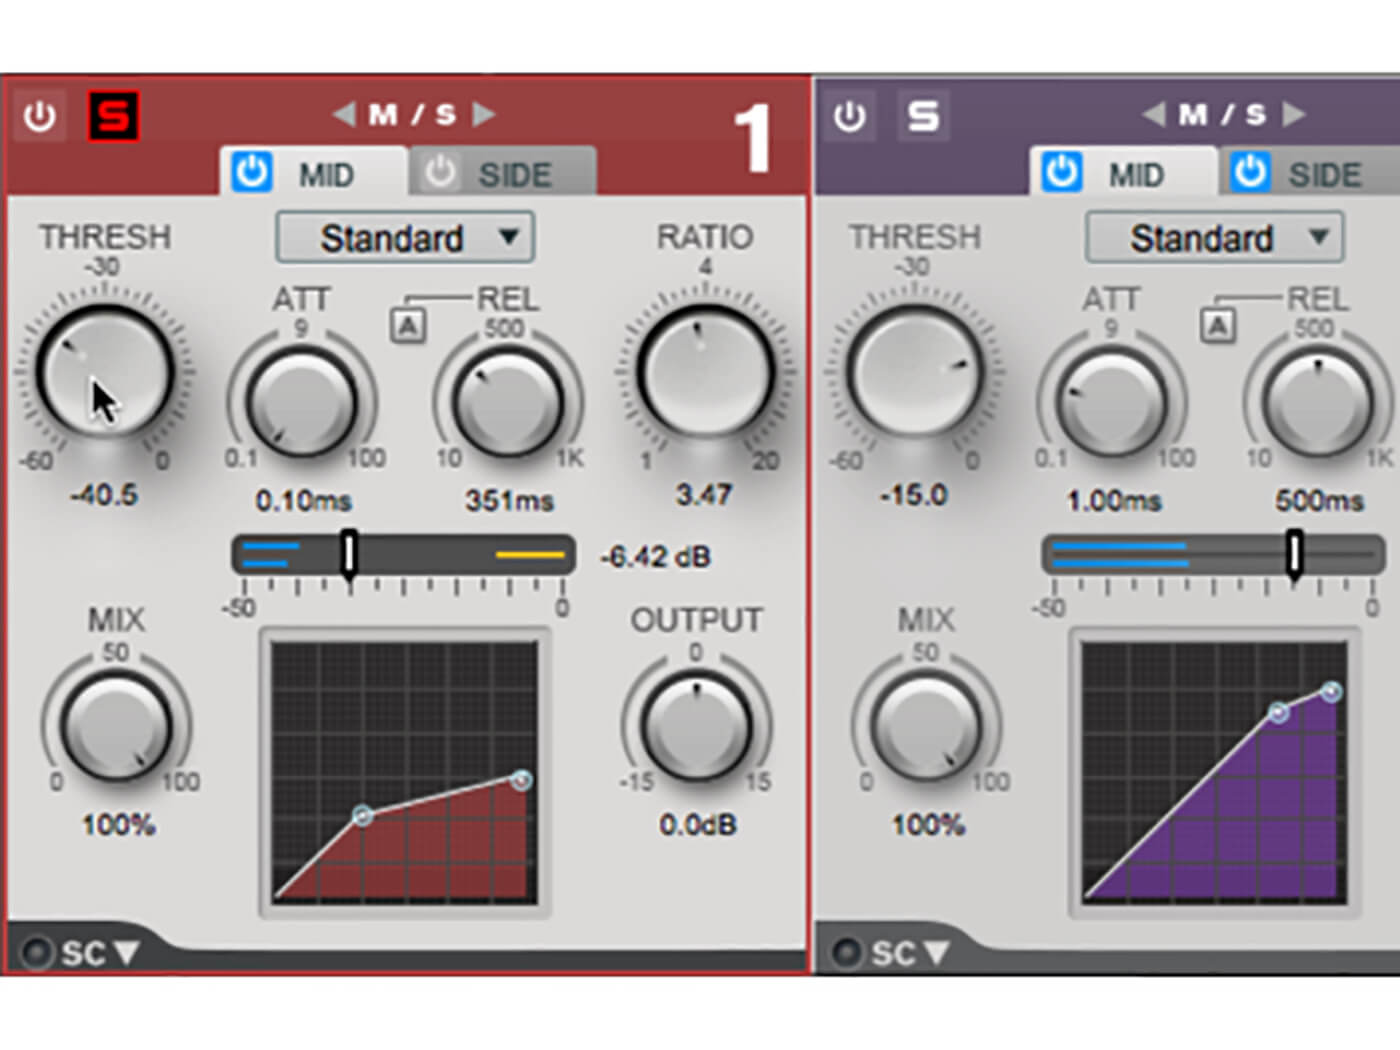
12. Solo the compressor’s first band. Set up a relatively strong (3:1 – 4:1) compression for the mid signal, giving around 6dB to 9 dB of gain reduction (the specific numbers will depend on the material being mastered).
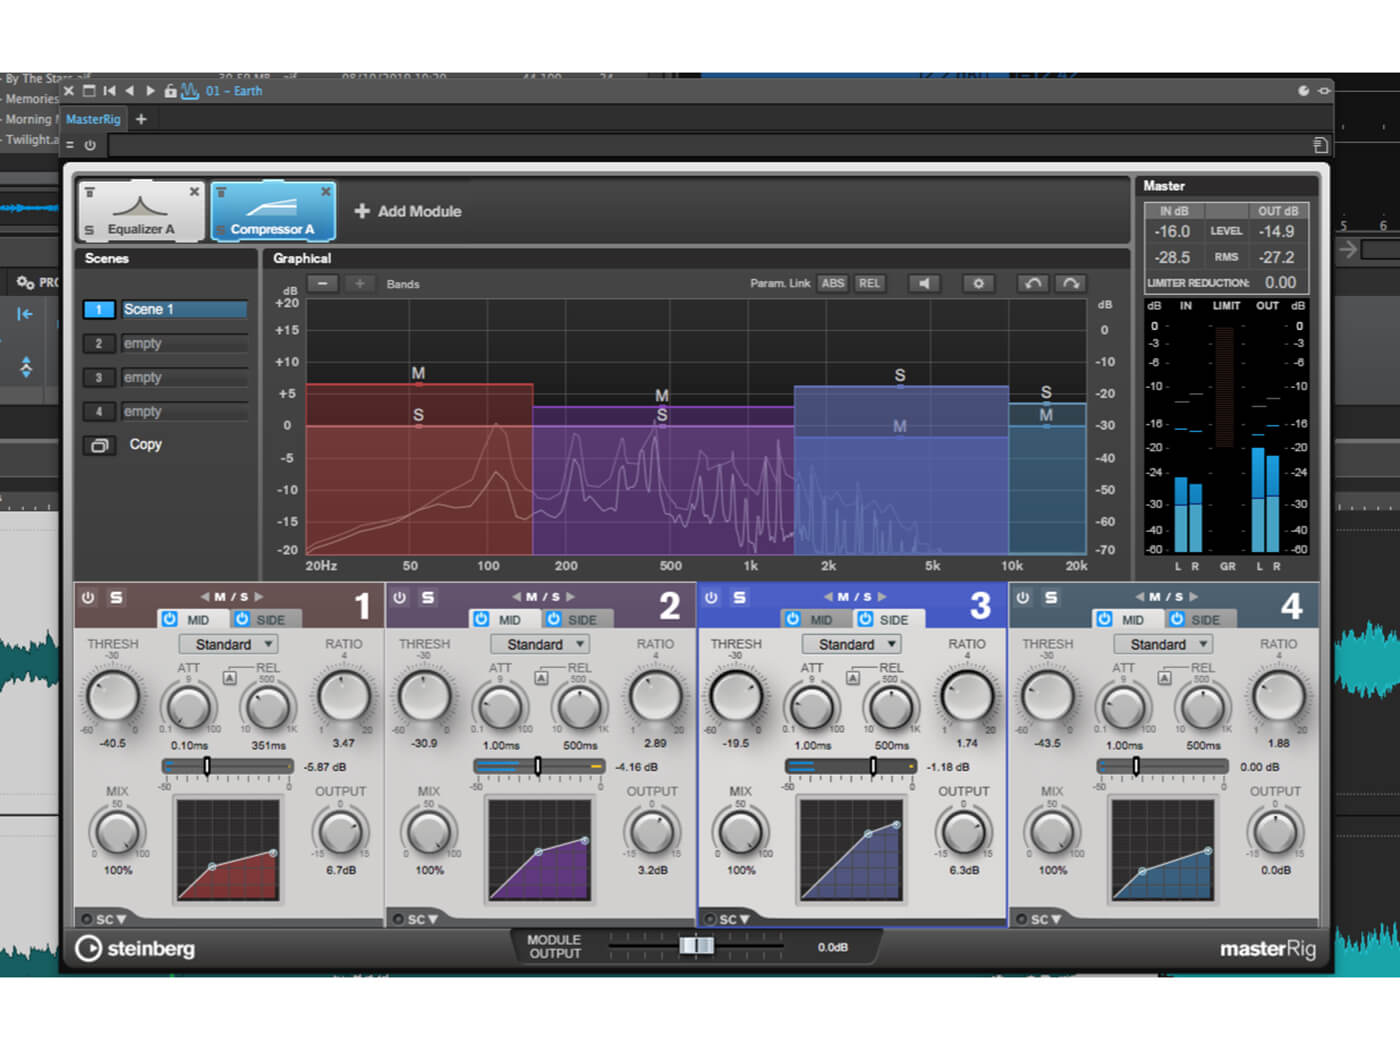
13. Switch the band to its side signal and set it up with a lower gain reduction of around 3dB. Work through the other compression bands, soloing each and setting the mid and side signal compression. Close the MasterRig panel when happy with the setup.
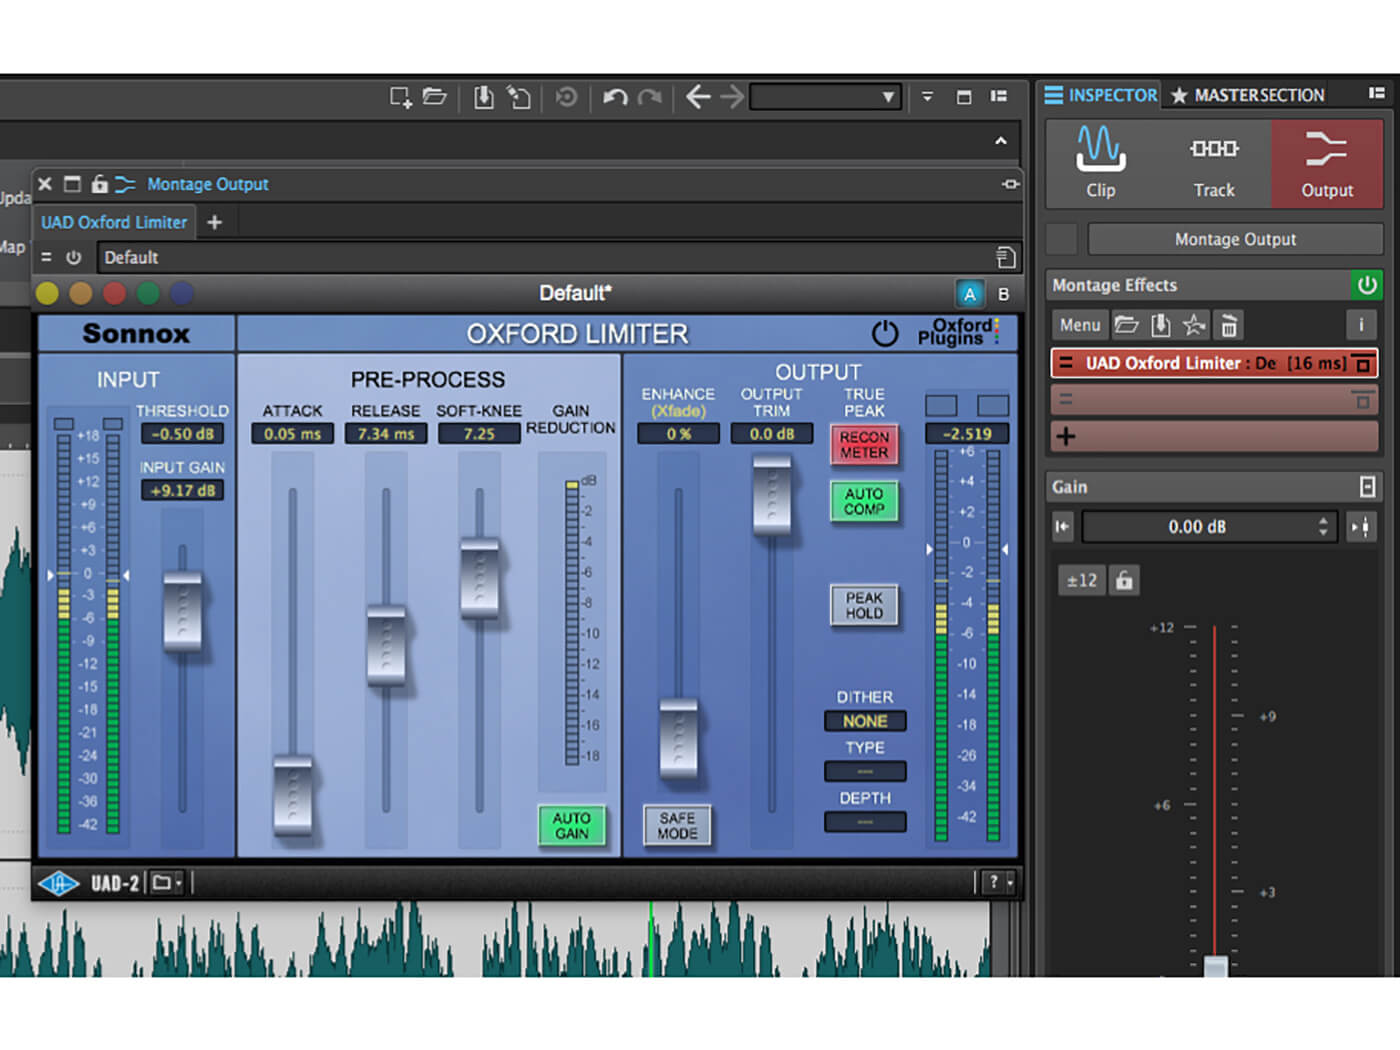
14. Work through the remaining clips, applying EQ and compression as required. When done, click the “Output” tab of the Inspector and add a limiter plugin – this will be applied across the entire montage. Set up the limiter to catch and control the loudest peaks.
15. Click the Loudness Meter tab in the upper-middle tool palette. Work through each clip, comparing their loudnesses using both your ears and the meters. Tweak clip loudness in the Inspector by adjusting clip processing settings and/or using the clip level fader.
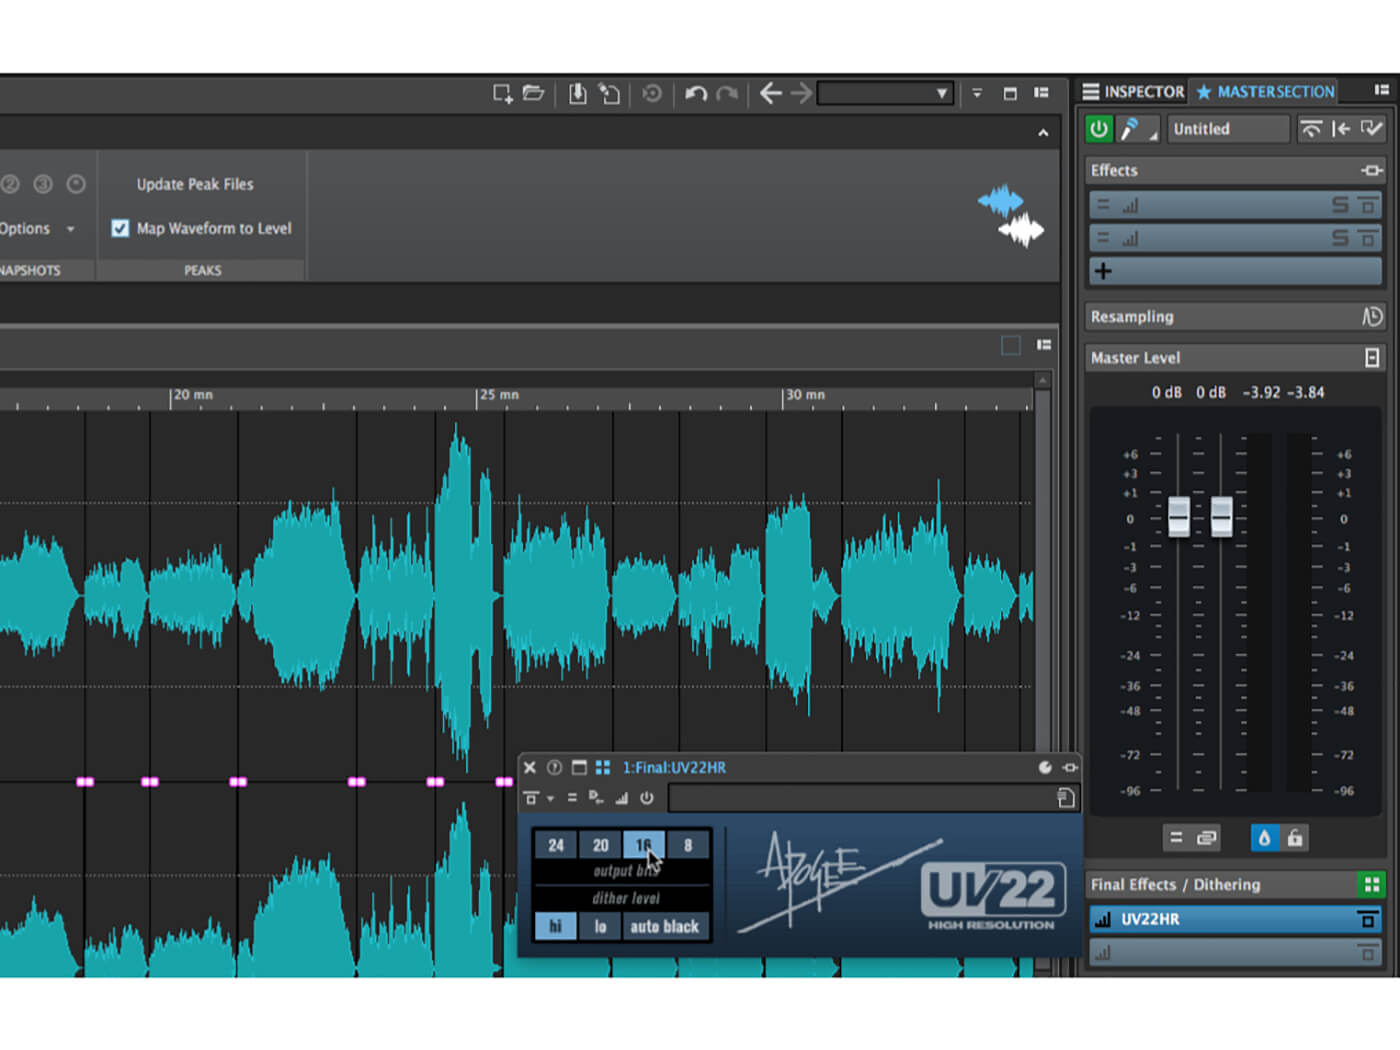
16. Click the Master Section tab in the bottom-right tool palette. Here you can add any final stage processors that you need to. Add a UV22 dither plugin in the Final Effects / Dithering section and set its bit-depth to match your target bit depth.
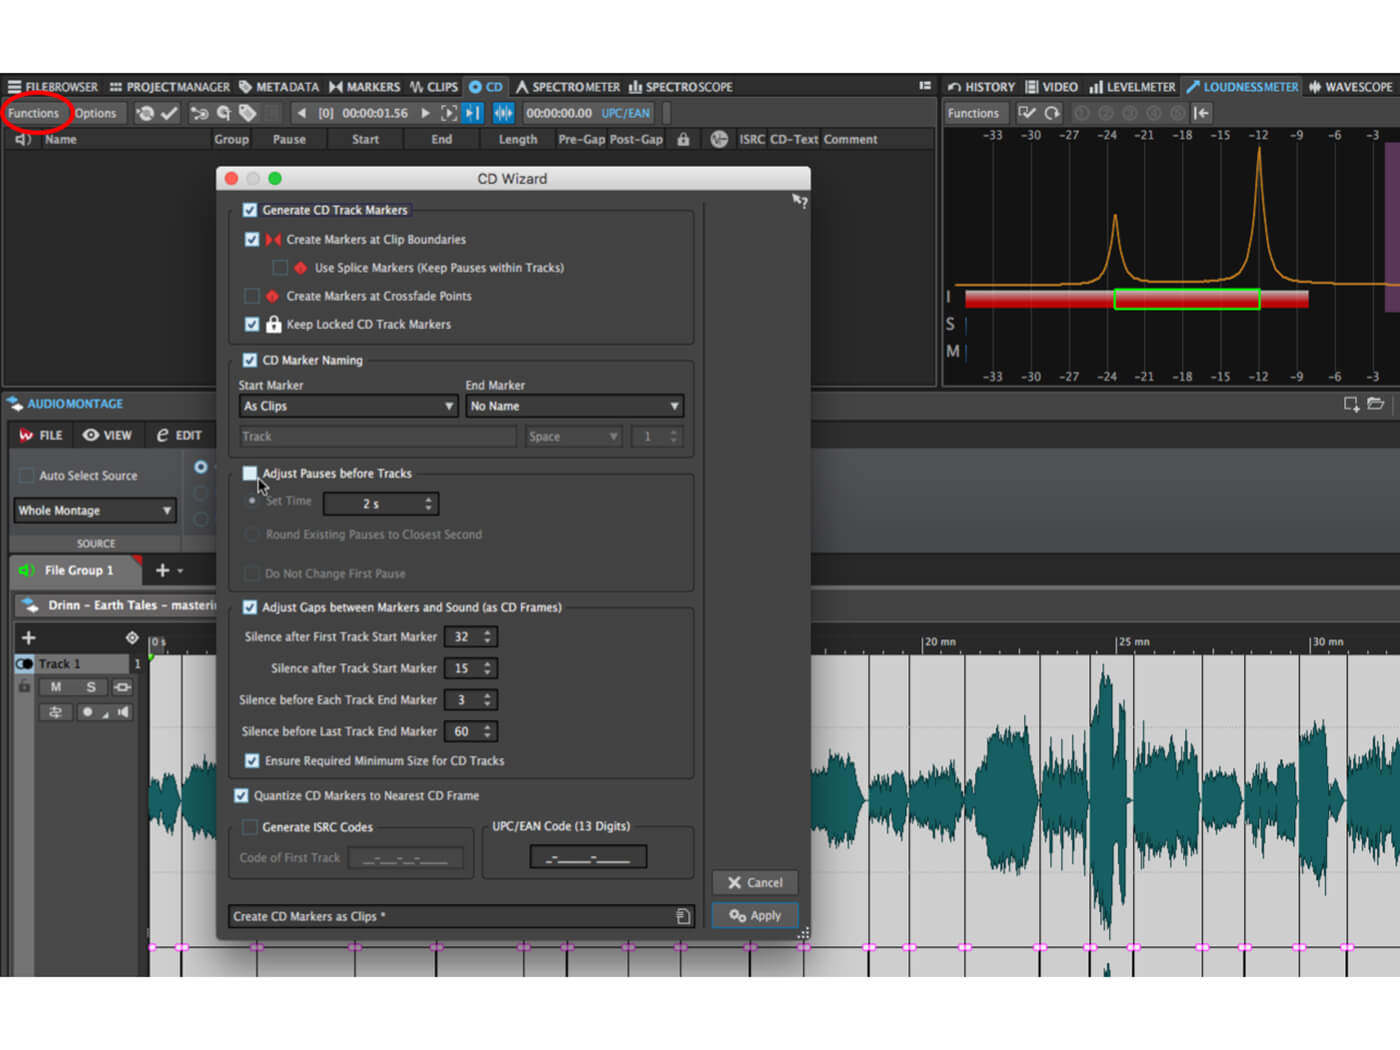
17. Click the CD tab in the top-left tool palette. Open the tool’s Functions menu and select CD Wizard. There are many settings here, but all are self-explanatory. Setup the CD as desired and click Apply to create a disc based on your montage.
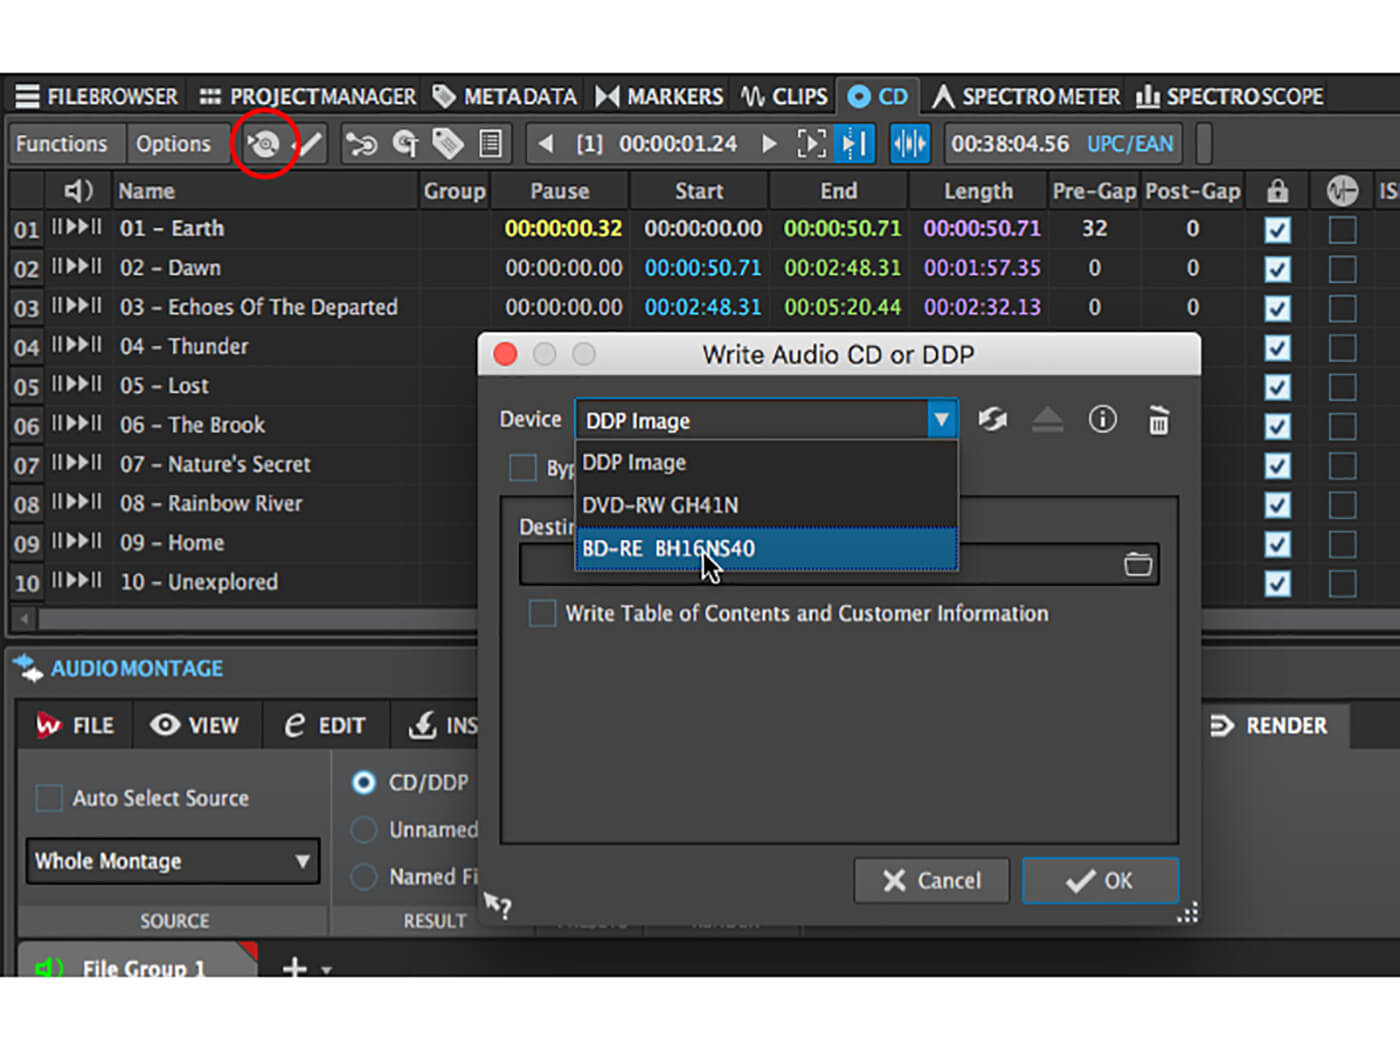
18. Use the CD tool panel to set up any CD text and/or ISRC numbers that you are using. Pop a blank CD into your writer then click the Write Audio CD button. In the popup, choose your disc writer then click OK. Job done!
For more tutorials and workshops, click here.