How to build synth textures with Mai Tai and Mojito in Studio One
Fix yourself a drink and pull up a chair as we explore how Studio One instruments Mai Tai and Mojito can be used to create flavourful, punchy soundscapes.
Over the past few months, we’ve been looking at the built-in instruments in Studio One 4.6. This month, we’re exploring the final two instruments and how to make something specific with them. Since leads and basses are among the most sought-after sounds in electronic production, we’ll build one of each. Firstly, we’ll make a tasty analogue-sounding lead using the Mai Tai synth, before looking at the monophonic Mojito and putting together a potent bass synth.
Tai-fighter
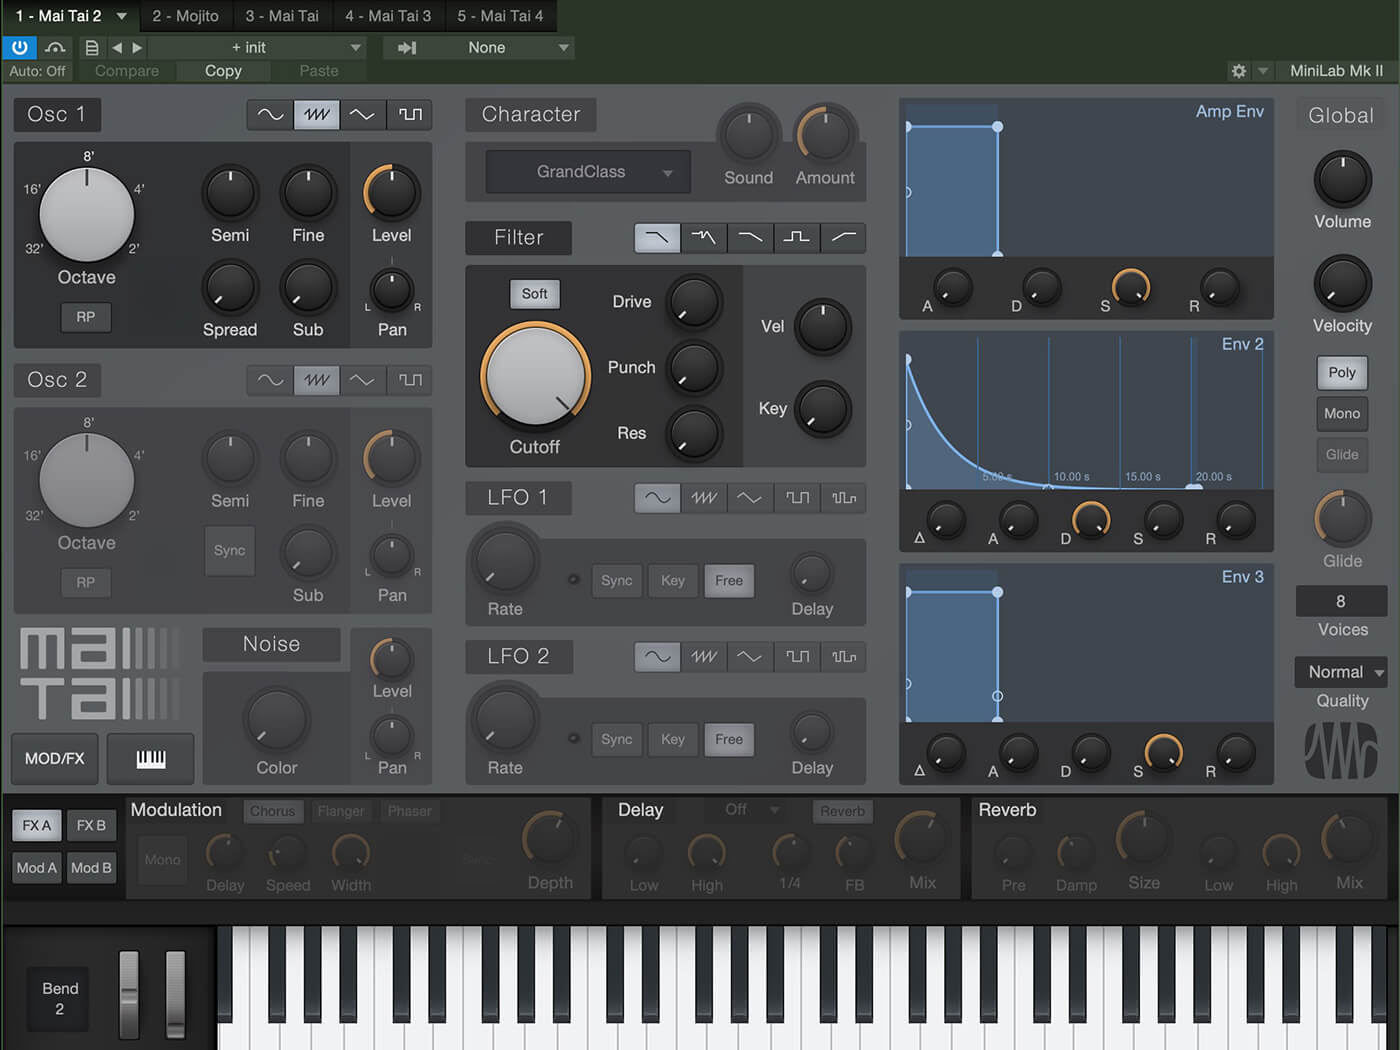
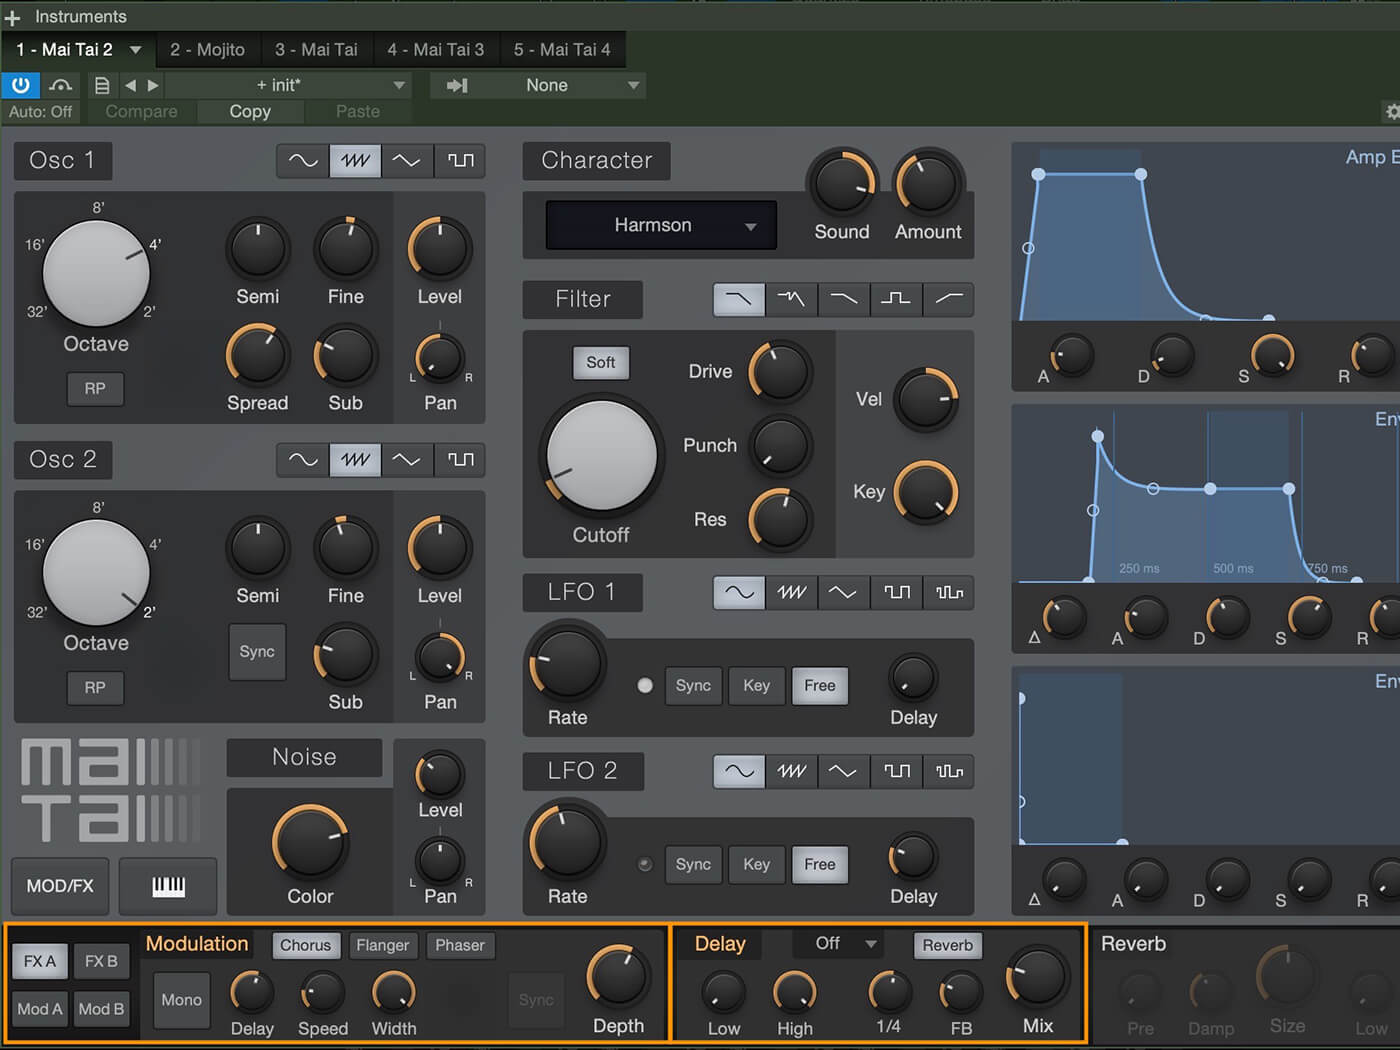
Mai Tai is a polyphonic analogue-modelling synth with a broad set of features. One patch can have up to 32 voices, which can lead to some seriously thick pads, leads, basses and more. It features two oscillators, each of which has a four-octave span, and a sub-oscillator. Expect the usual shapes (sine, saw, square and triangle), as well as oscillator spread, oscillator sync, pulse-width modulation and random phase (which sees the waveform start at random points each time the oscillator is triggered). There’s also a pair of LFOs, a noise generator, a multi-mode filter, built-in effects, and a modulation matrix. The Character processor, meanwhile, is a nifty gadget that gives extra tone-shaping and unique colour to your sounds.
We find it helpful to start with a short sequence and let it play while we tweak our patches but you can just as easily play notes from a controller. Firstly, initialise Mai Tai, which will give us a fresh palette to work with. Start with a single oscillator and no modulation, and bring its octave range up. Then bring in the second oscillator and do the same. To get a nice fat analogue sound, detune the oscillators. Bring one oscillator down and the other up by a few cents to thicken things. Panning the oscillators left and right will help too.
For a beefier sound, add some sub-oscillator to both oscillators. Additionally, you can make the sound grittier by adding some noise colour and a bit of noise level. Next, use the Character Processor to add harmonic interest and adjust the filter section to achieve a round analogue tone.
Don’t be afraid to experiment with the modulation matrix to add character (and some cool performance controls) to your lead patch. Adding a touch of delay or another effect can make for a fantastic finishing touch, just be careful not to overdo it.
Mojito magic
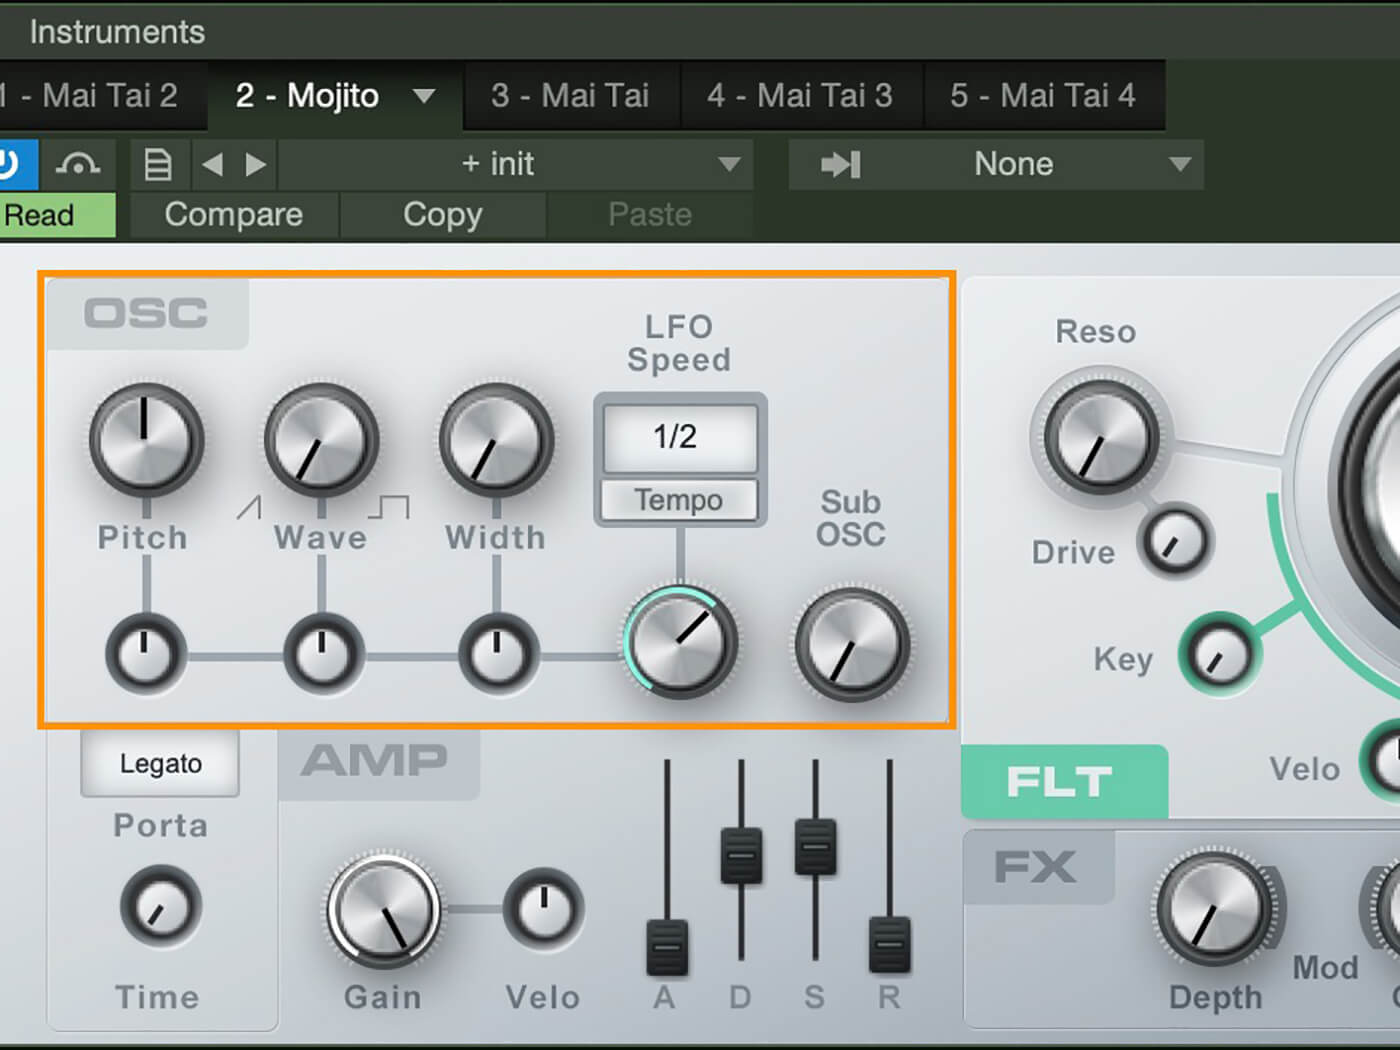
Contrary to its polyphonic sister, Mojito is a subtractive mono synth with one oscillator, as well as a filter, a simple modulation section, an amplitude envelope, portamento, and basic effects, plus a sub-oscillator. Mojito’s oscillator spans two octaves, one above and one below the key played. Its waveforms are limited to sawtooth and pulse but you can blend the two for more or less even harmonics.
Begin by adjusting the pitch, wave shape and width of your oscillator section to get the sound you’re looking for. A sawtooth waveform makes for grittier bass sounds, but let the sound lead you and edit to your own preferences. Next, decide how much you want to modulate the oscillator. Adjust to taste and apply some sub-oscillator to fatten the sound.
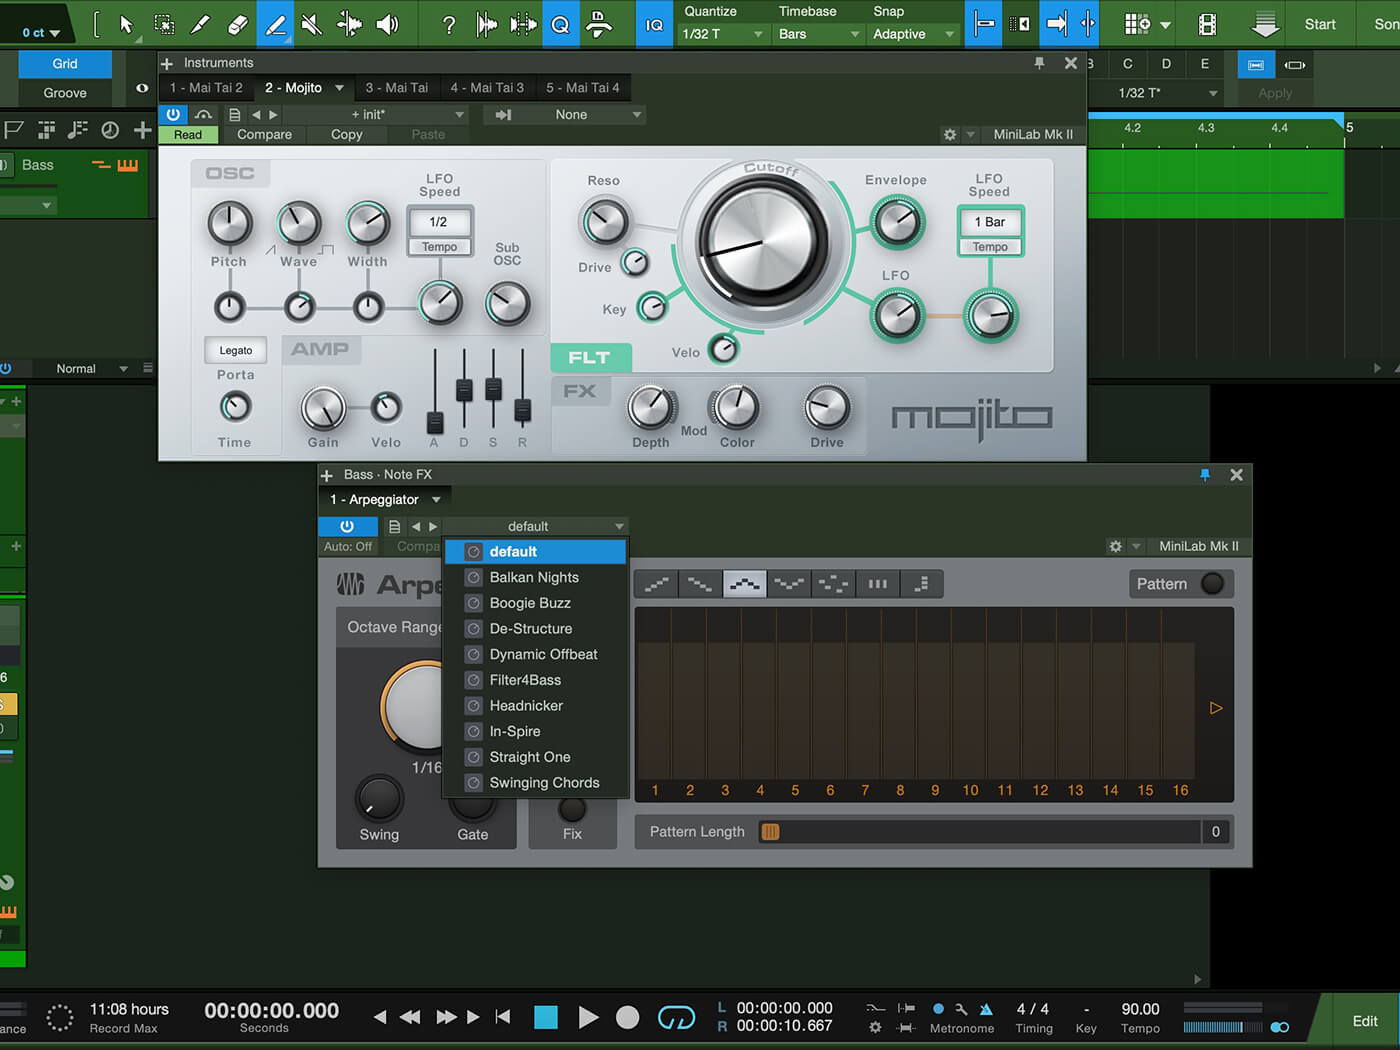
Adjust the filter and resonance to add growl to your patch. Adding drive to a bass can help it cut through a mix, and using modulators such as key range, velocity, the LFO and the envelope will lend it a degree of movement. Apply a nice chorus effect and additional drive to make the bass patch more characterful. Dropping Note FX onto an instrument is also a great way to add more harmonic interest – use an arpeggiator and tweak the velocity, gate, swing and length of the arp sequence for some one-fingered virtuosity.
As before, don’t be afraid to play around. If it sounds good to your ears, then it is. Sculpting your own sounds is the best way to ensure your productions sound like no-one else’s. Studio One’s instruments make that easy to achieve.
Building synth textures with Mai Tai and Mojito: step-by-step
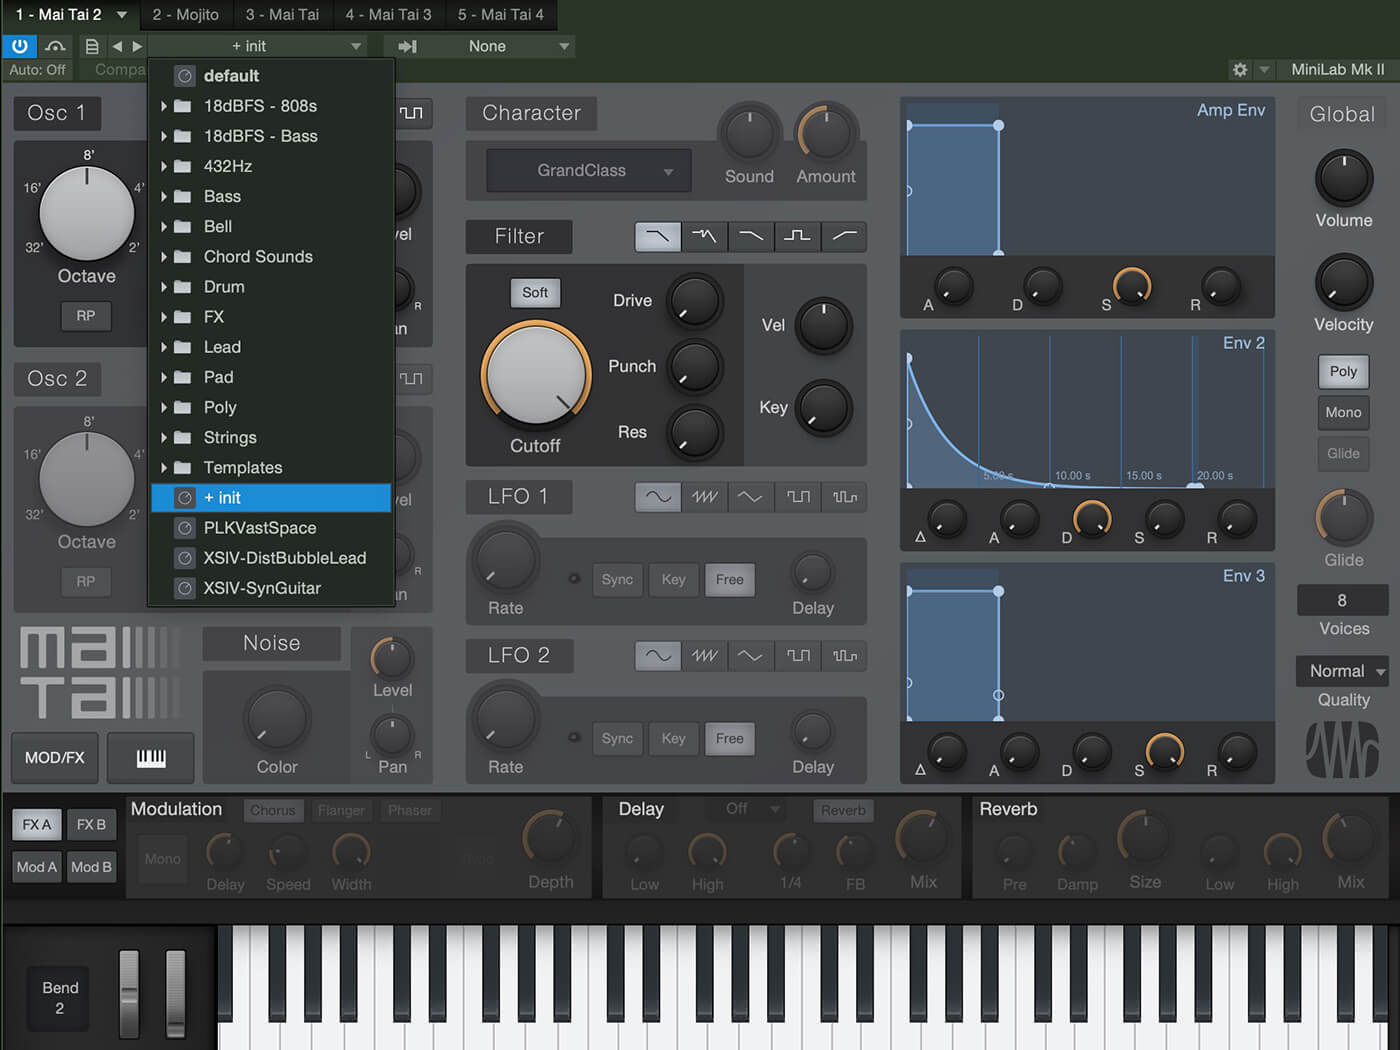
1. Drag Mai Tai onto the Arrange area to create a track. Once Mai Tai is open, initialise the patch so we can build our new one from scratch.
2. This gives us a single oscillator and Filter section with which to start shaping our sound. Activate a section by clicking on its name.
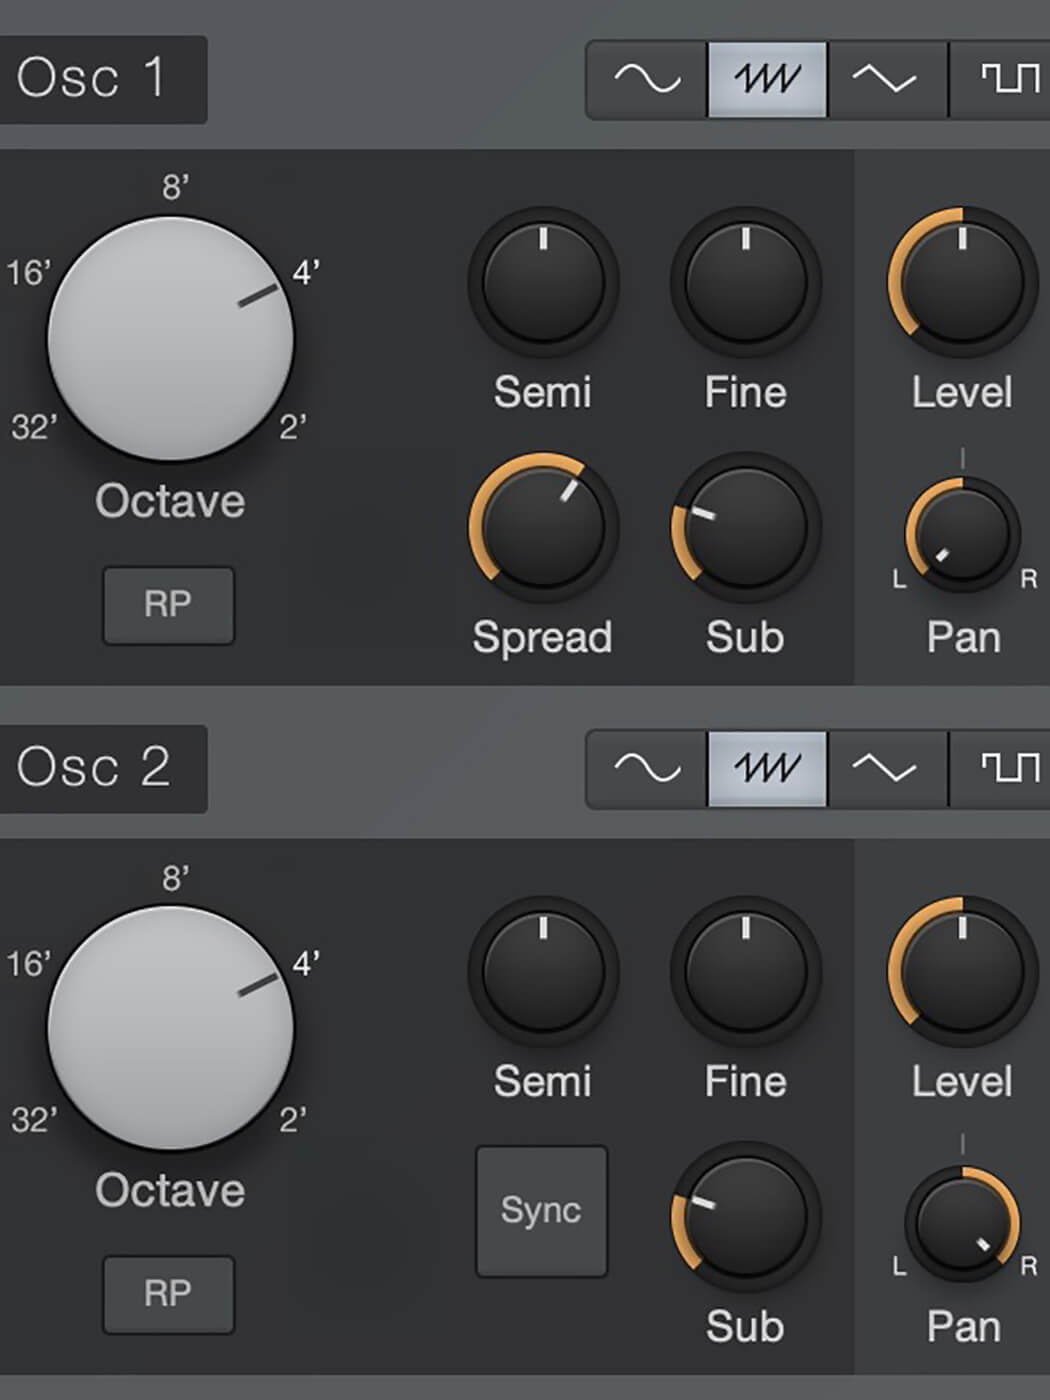
3. Turn both oscillators on, set their ranges to 4 and pan them left and right. Adjust the spread for some width and add sub-oscillators for extra weight.
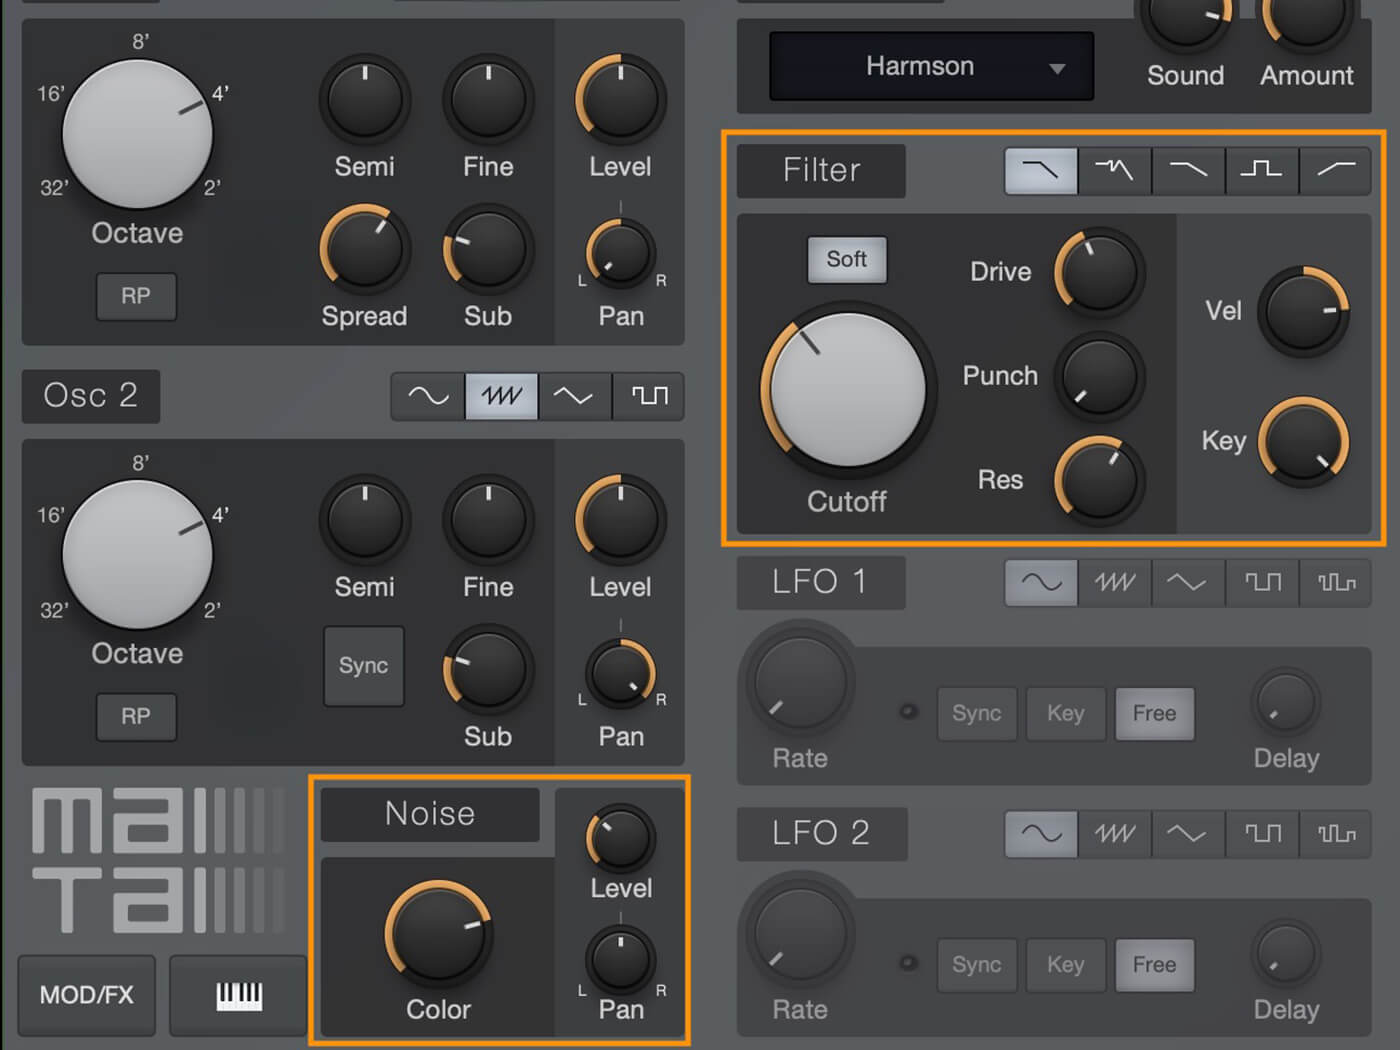
4. Turn on the Noise section and adjust to taste. Tweak the filter cutoff and resonance to your needs. Modulate the filter using both velocity and key range to create some movement.
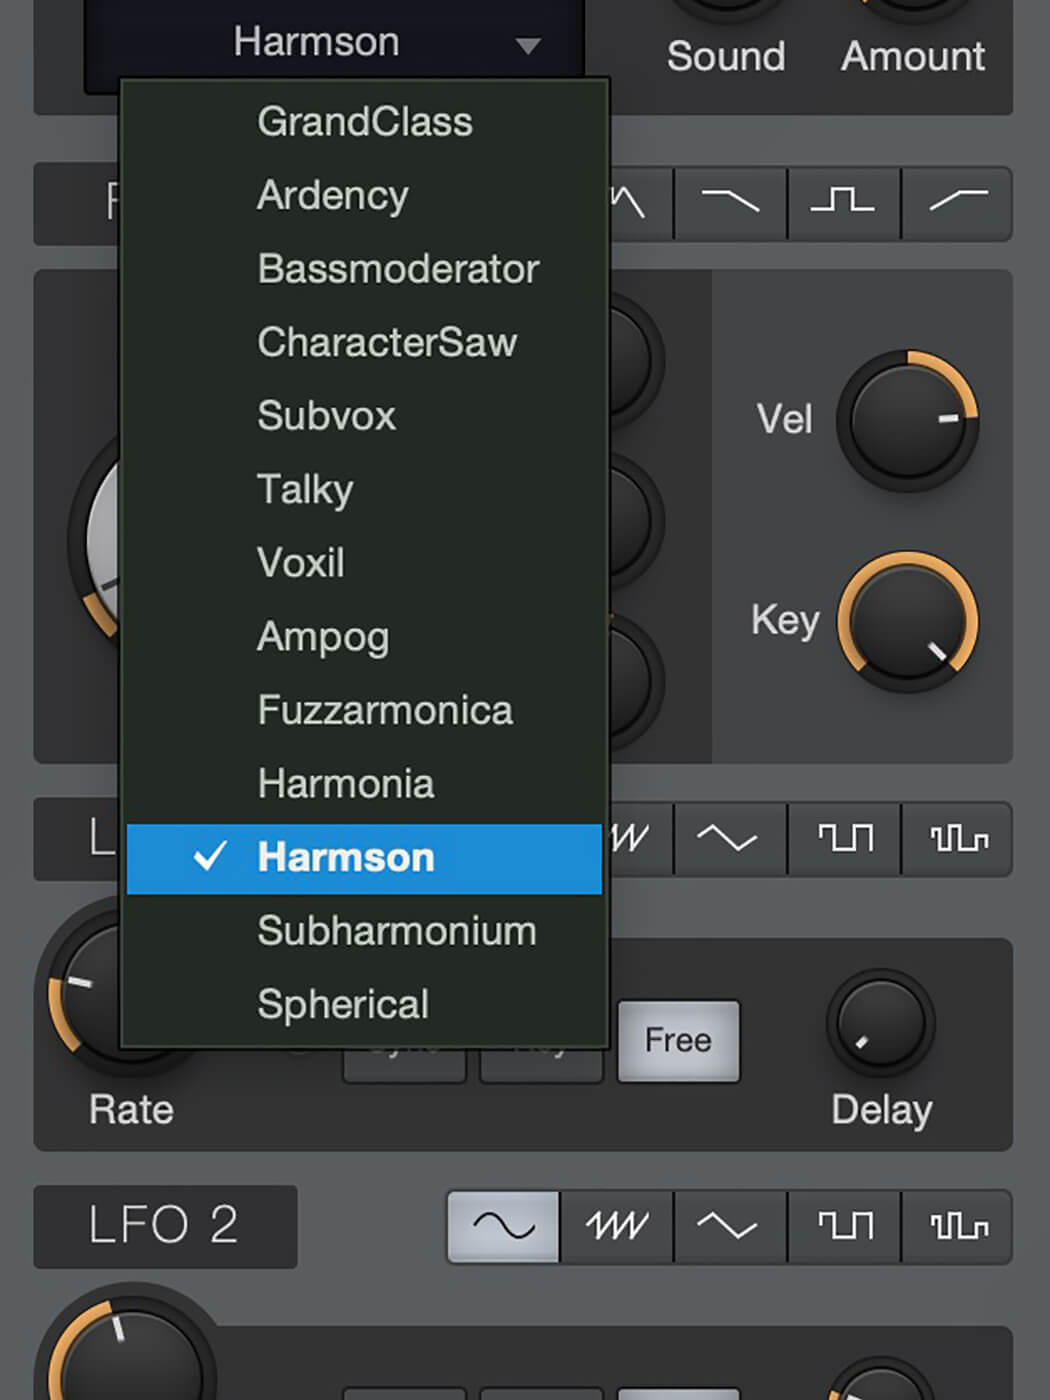
5. The Character section has options for changing the tonal characteristics of your sound. Try Harmson and blend to taste.
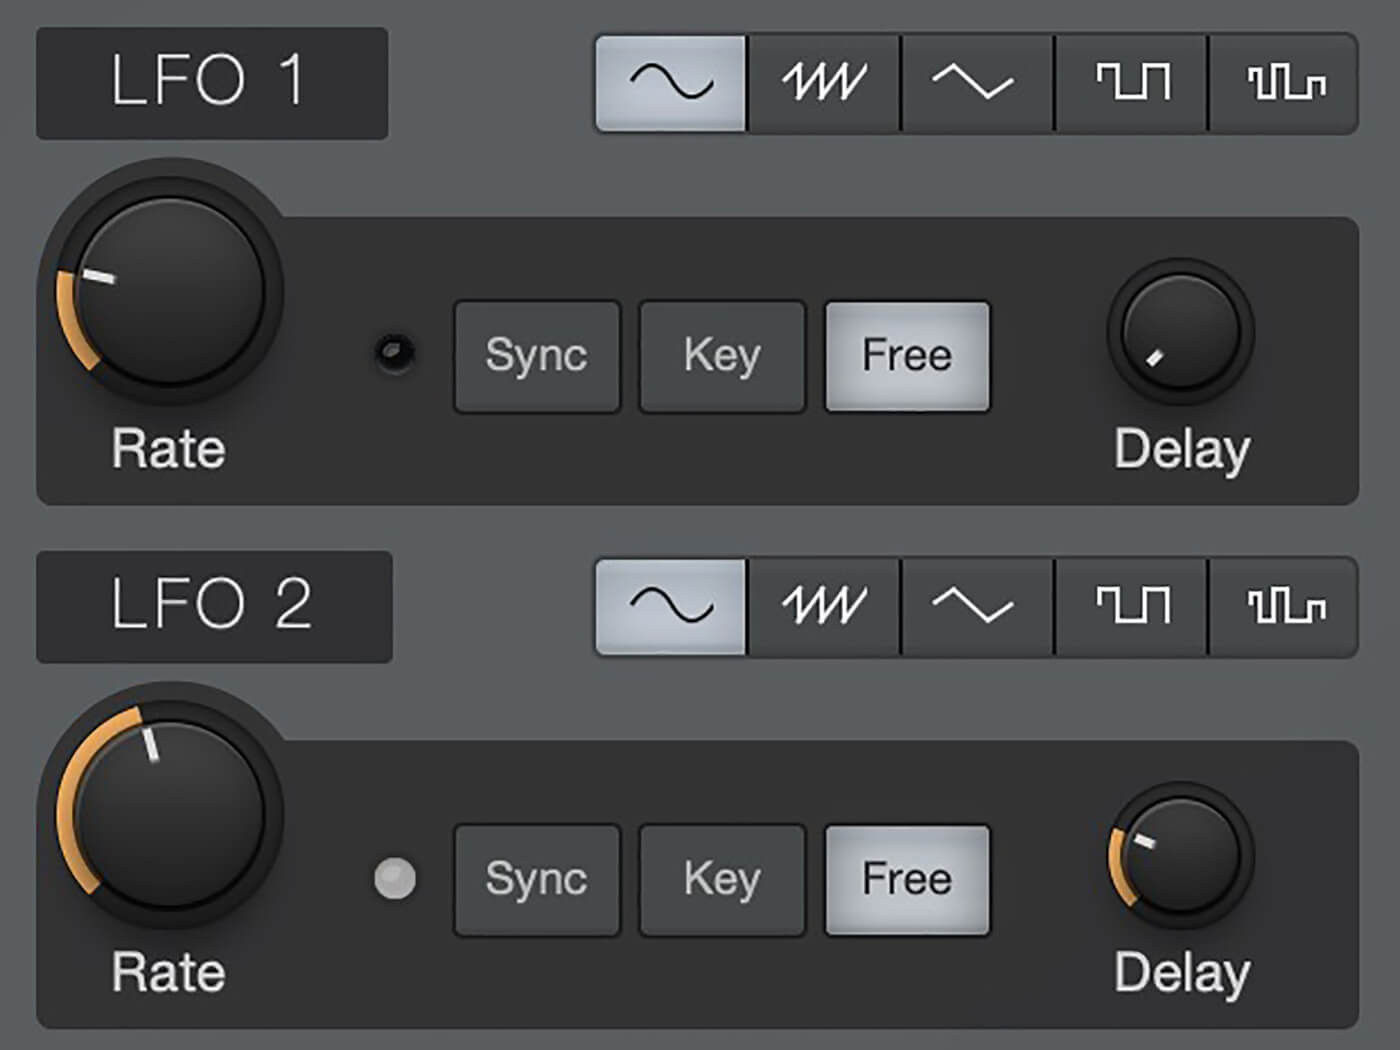
6. Use the LFO section. Choose how to make your sound move and how quickly you want it to do so. You can modulate one LFO with the other using the modulation section.
![]()
NOTE FX Note FX are built-in Studio One utilities that can enhance your performance. They include the Arpeggiator, a 32-step sequencer that can take single notes or chords and transform them into rhythmic runs; the Chorder, a customisable chord generator; the Repeater, a MIDI repeater that copies notes you play and creates repeats; and the Note Filter, which filters out notes individually or in a range, or by velocity.
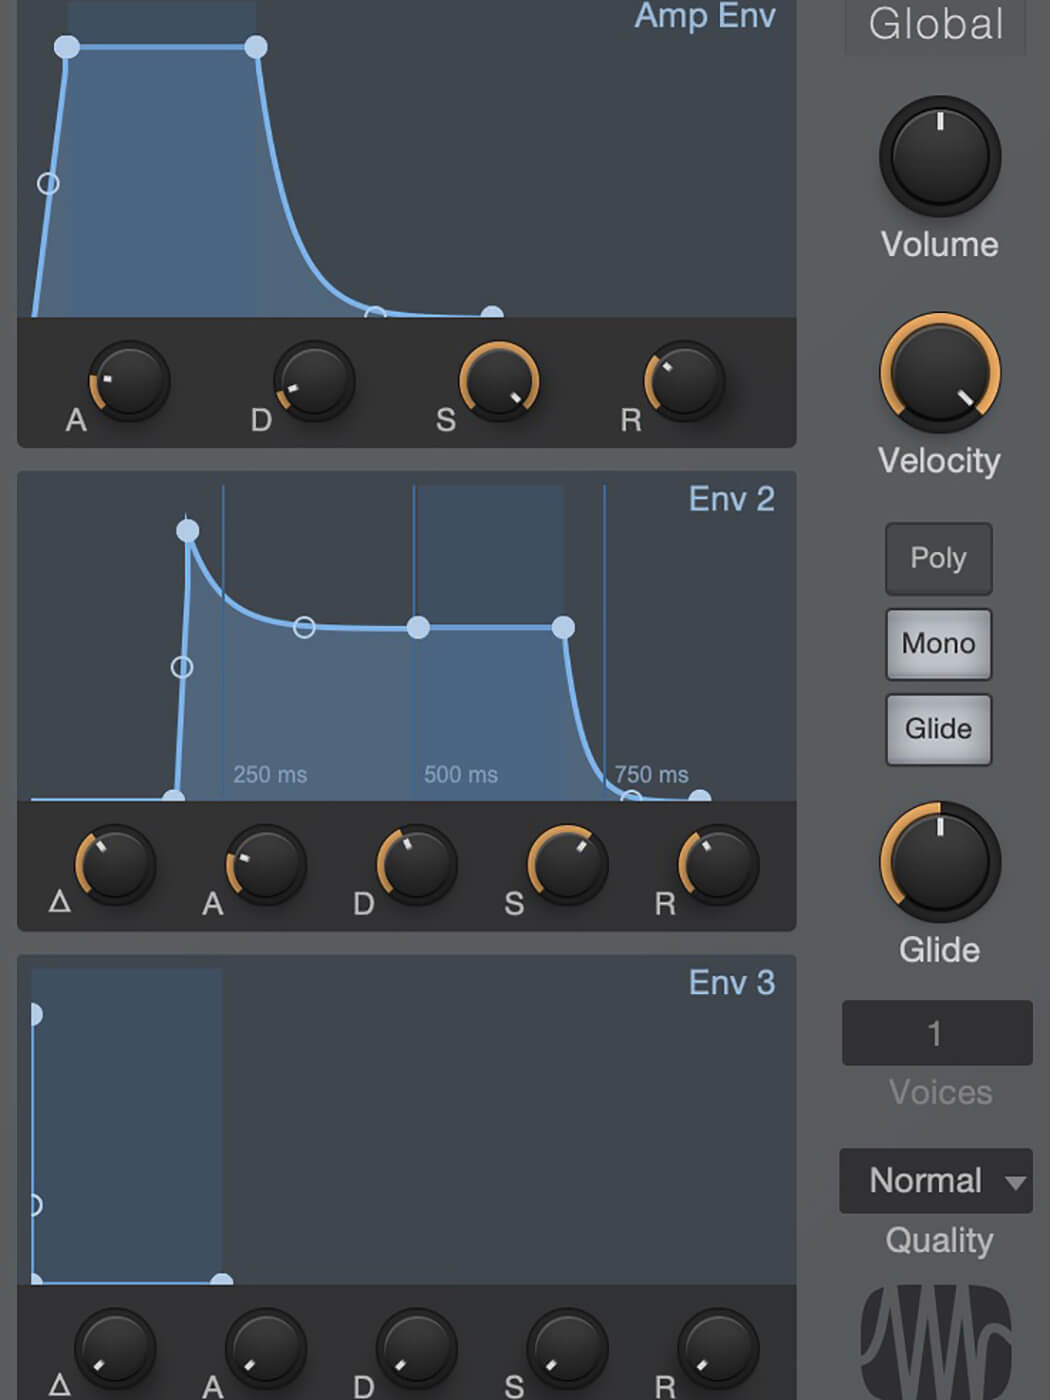
7. Adjust the amplitude envelope to shape the patch. Take off a bit of attack to round it out. Adjust Env 2 as shown. Make this a mono patch for now.
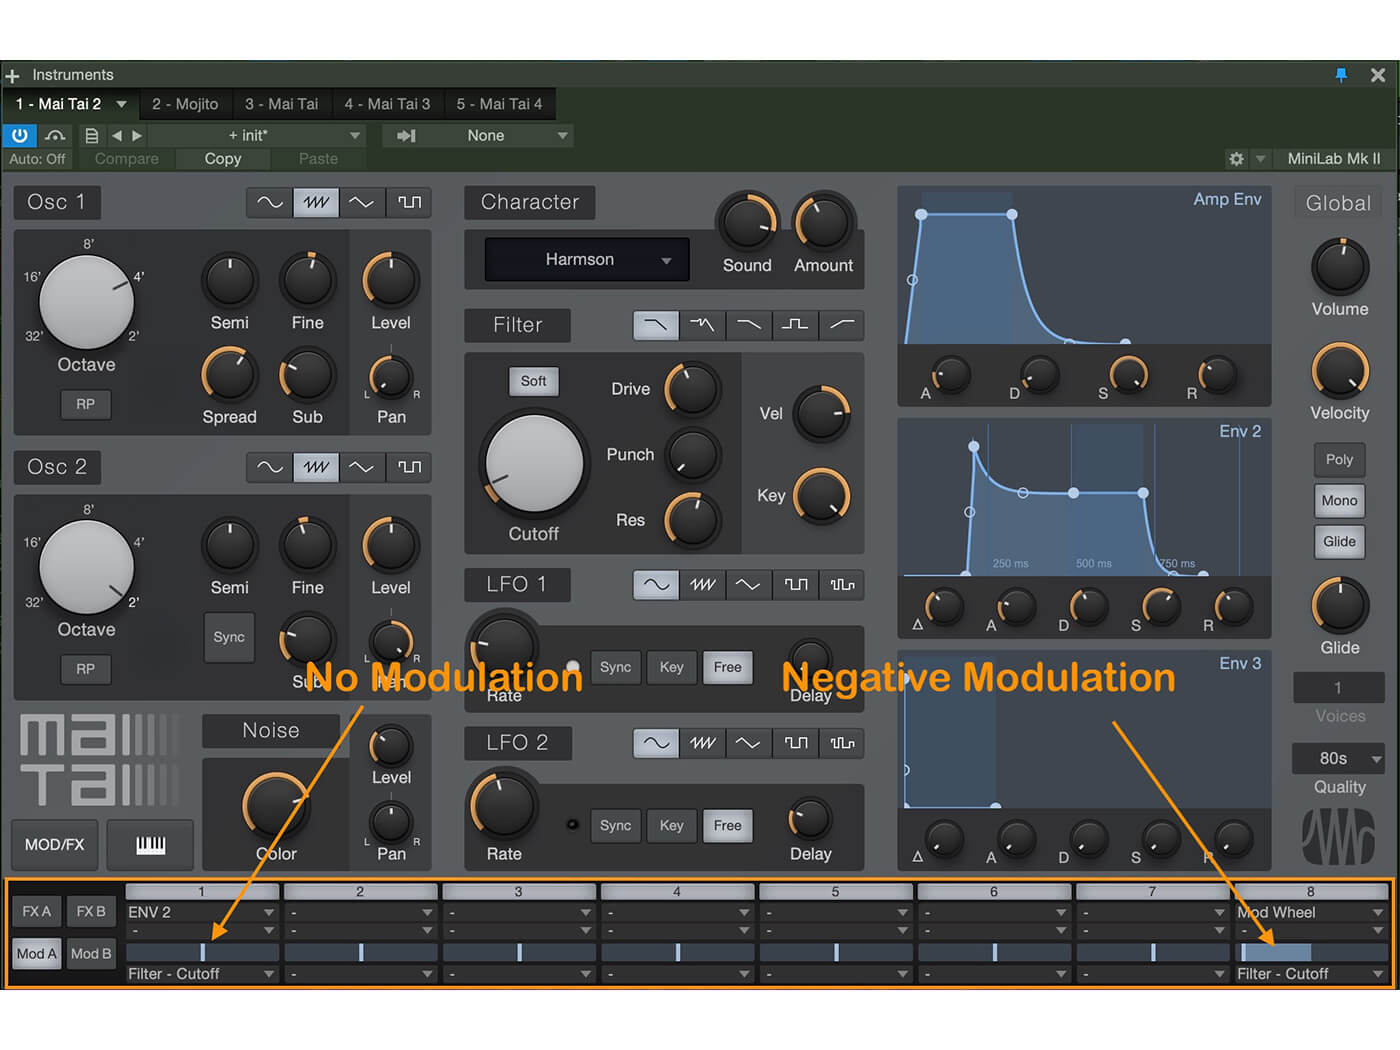
8. Open the modulation matrix and assign Env 2 to modulate the filter’s cutoff frequency. Assign the modulation wheel to the filter cutoff. Remember to adjust the amount sliders.
9. Apply chorus and adjust to taste. Add a little delay and feed it through the reverb by clicking the Reverb button.
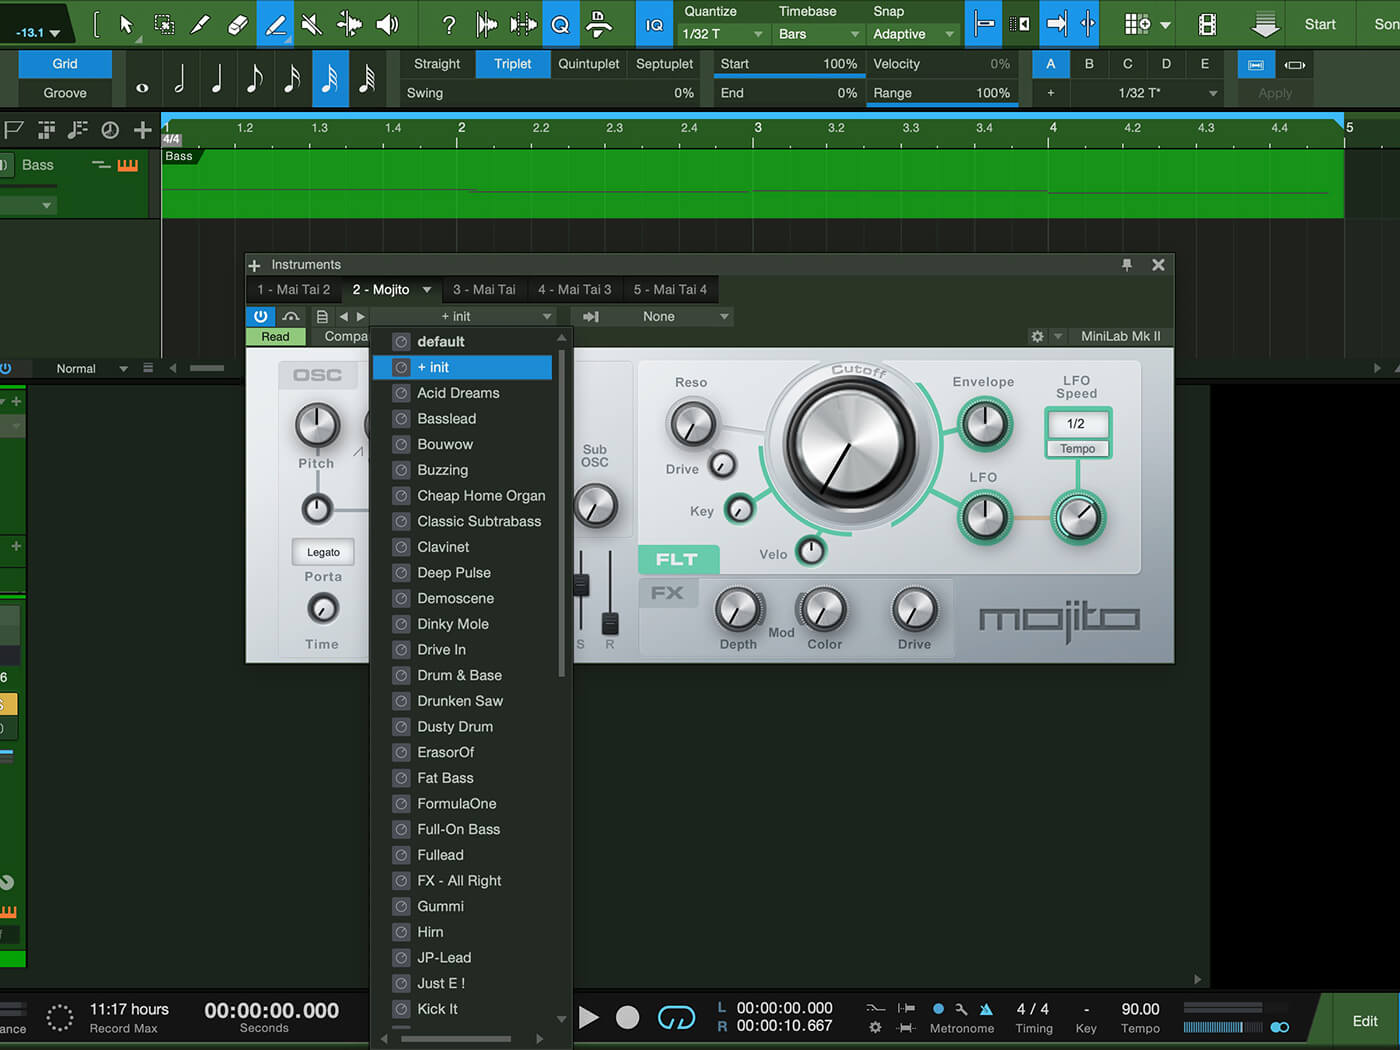
10. Begin with the Mojito patch in the same way you did Mai Tai – drag it from the browser and initialise the patch.
11. Starting with the oscillator, adjust the pitch and dial in your waveform shape (saw is good for bass). Widen it a bit – but always use width sparingly with bass. We want it in the middle of the mix.
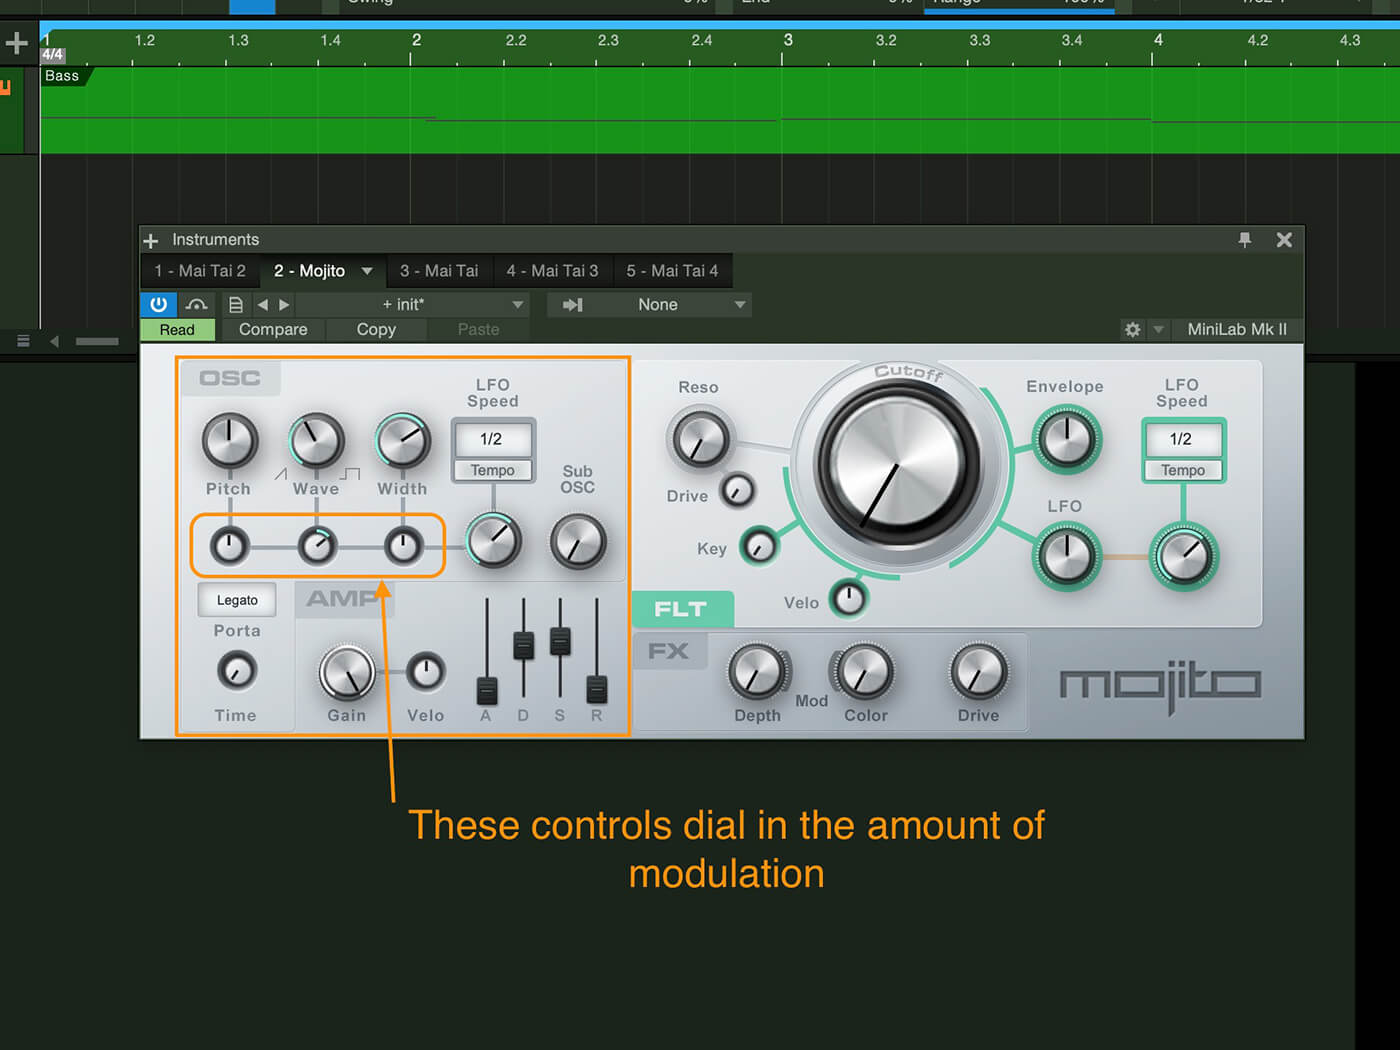
12. Dial in the amount of modulation you want in the oscillator section using the small knobs below the main oscillator dials. Tweak your LFO speed and add some sub-oscillator.
![]()
MULTI-INSTRUMENTS Dropping more than one instrument on a track creates a multi-instrument, which might mean layered instruments or split instruments. You can add Note FX to all or to just a single instrument within the multi-instrument. Multi-instruments have an assignable macro panel to help you map the key parameters you want to control.
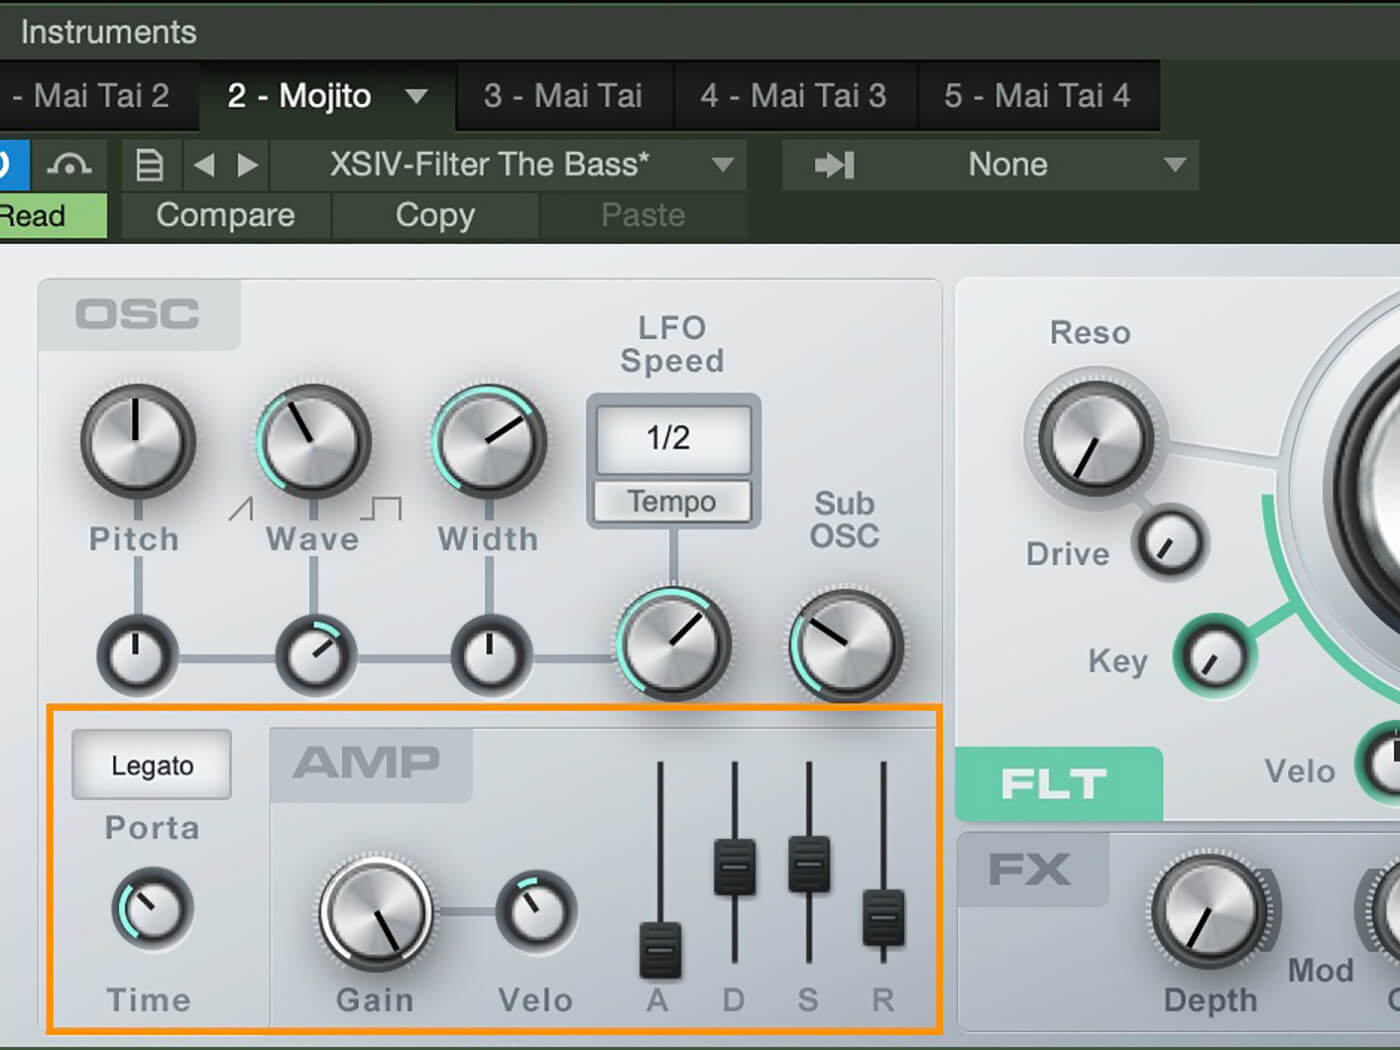
13. Add portamento to give a little glide to your notes. Begin shaping your sound in the envelope section. Adjust to taste.
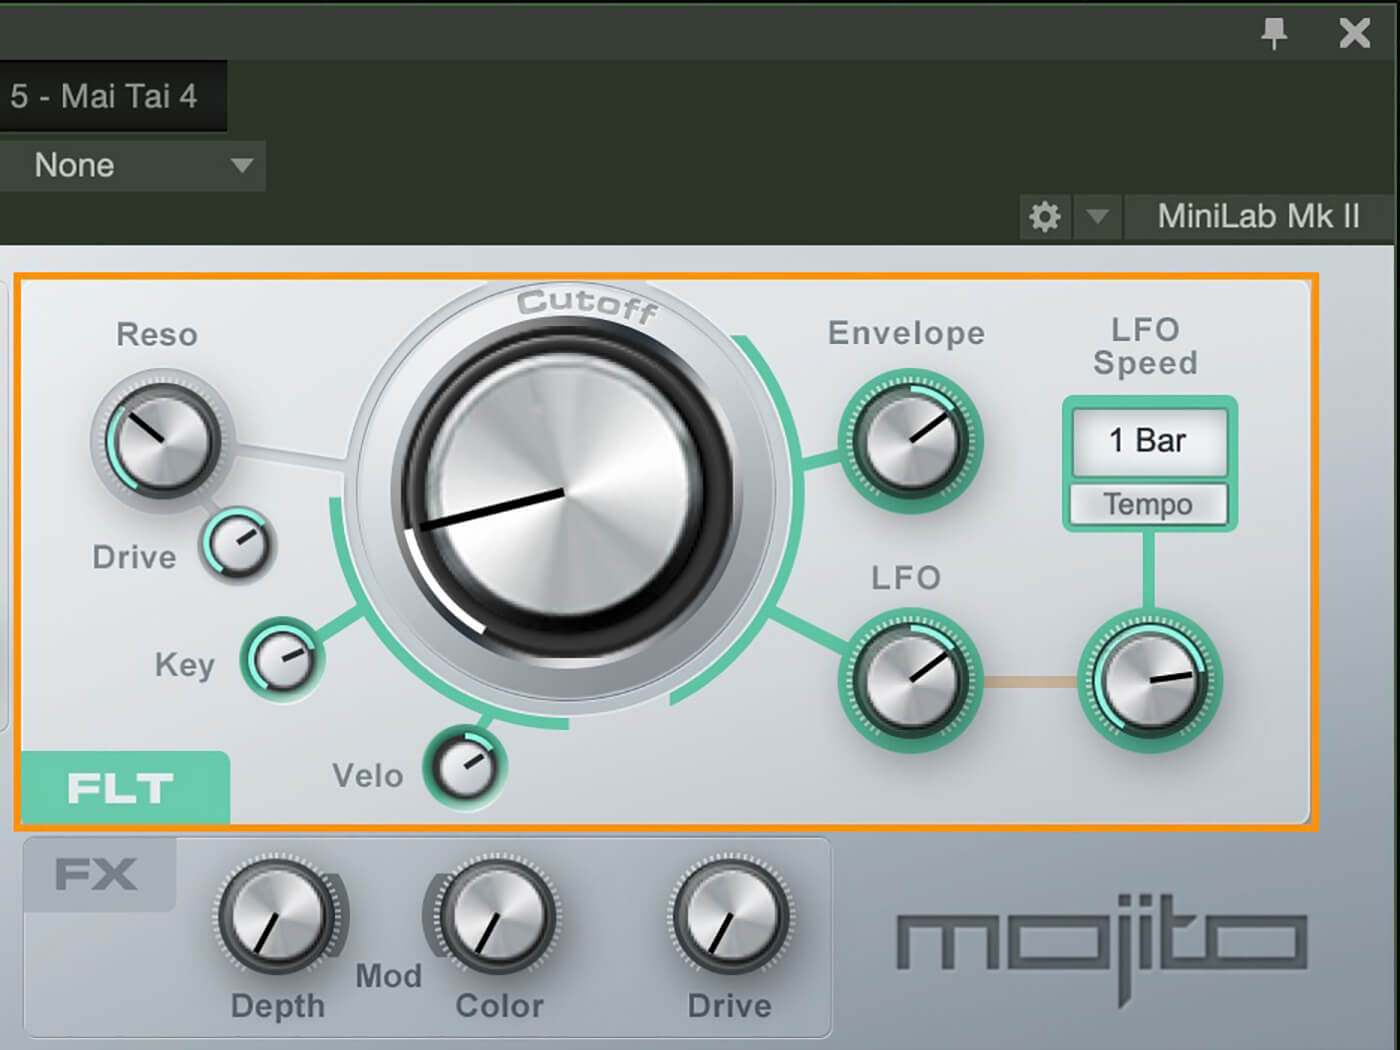
14. Adjust the filter settings to get your bass to cut through the mix. Use velocity, key range, the envelope, and LFO to modulate the filter and add flavour.
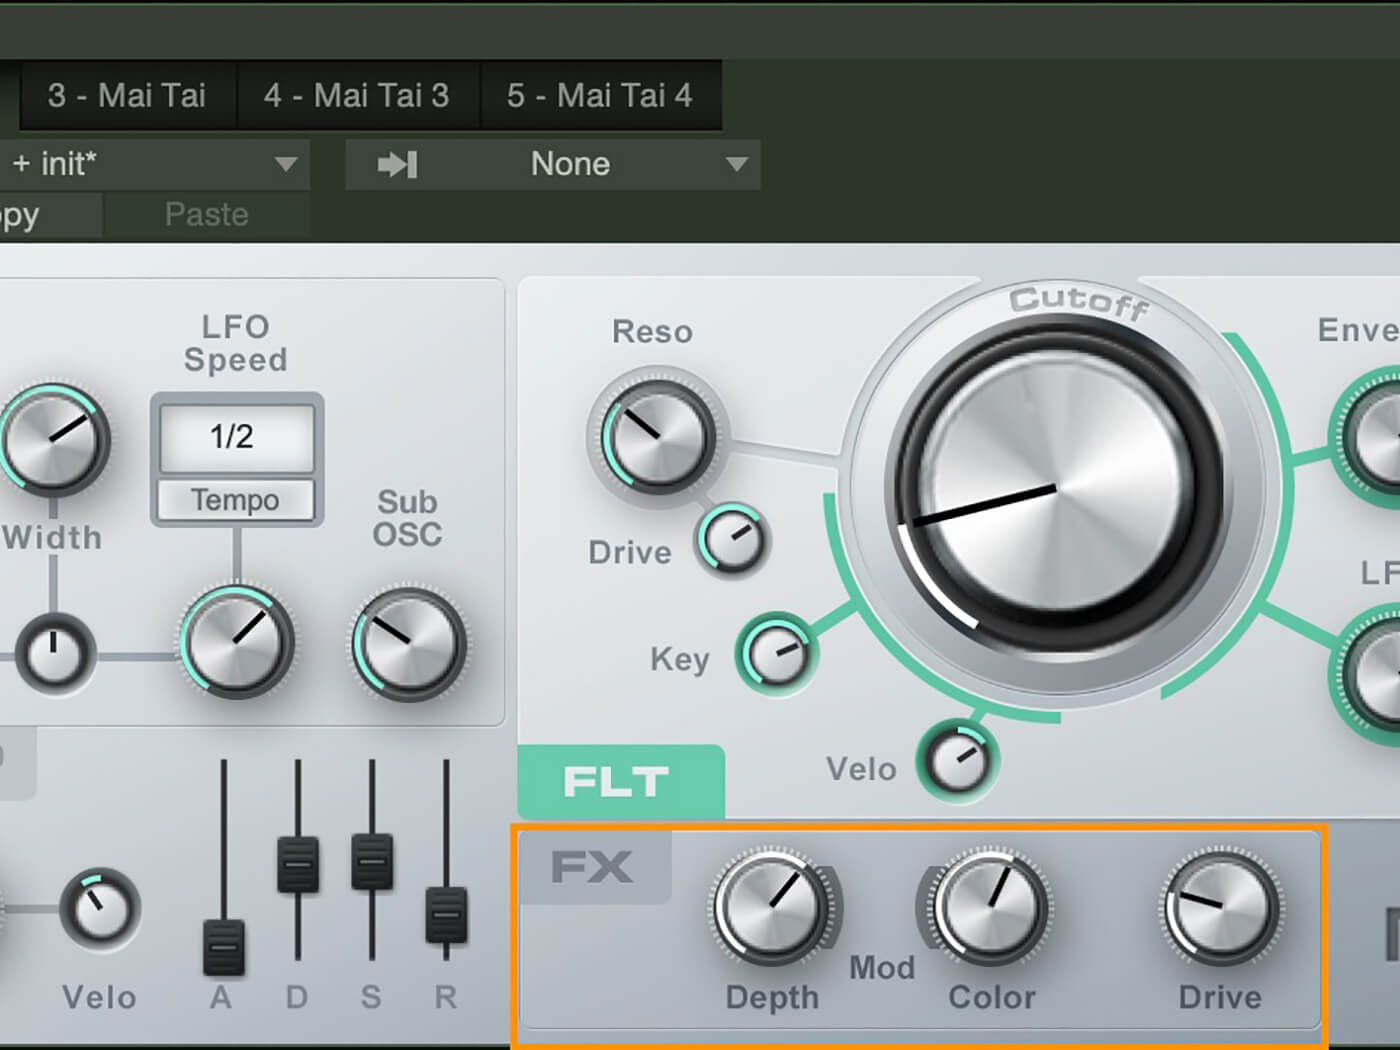
15. Use the FX section to add a chorus-style effect for some motion and thickness. Add drive to further help the bass cut through.
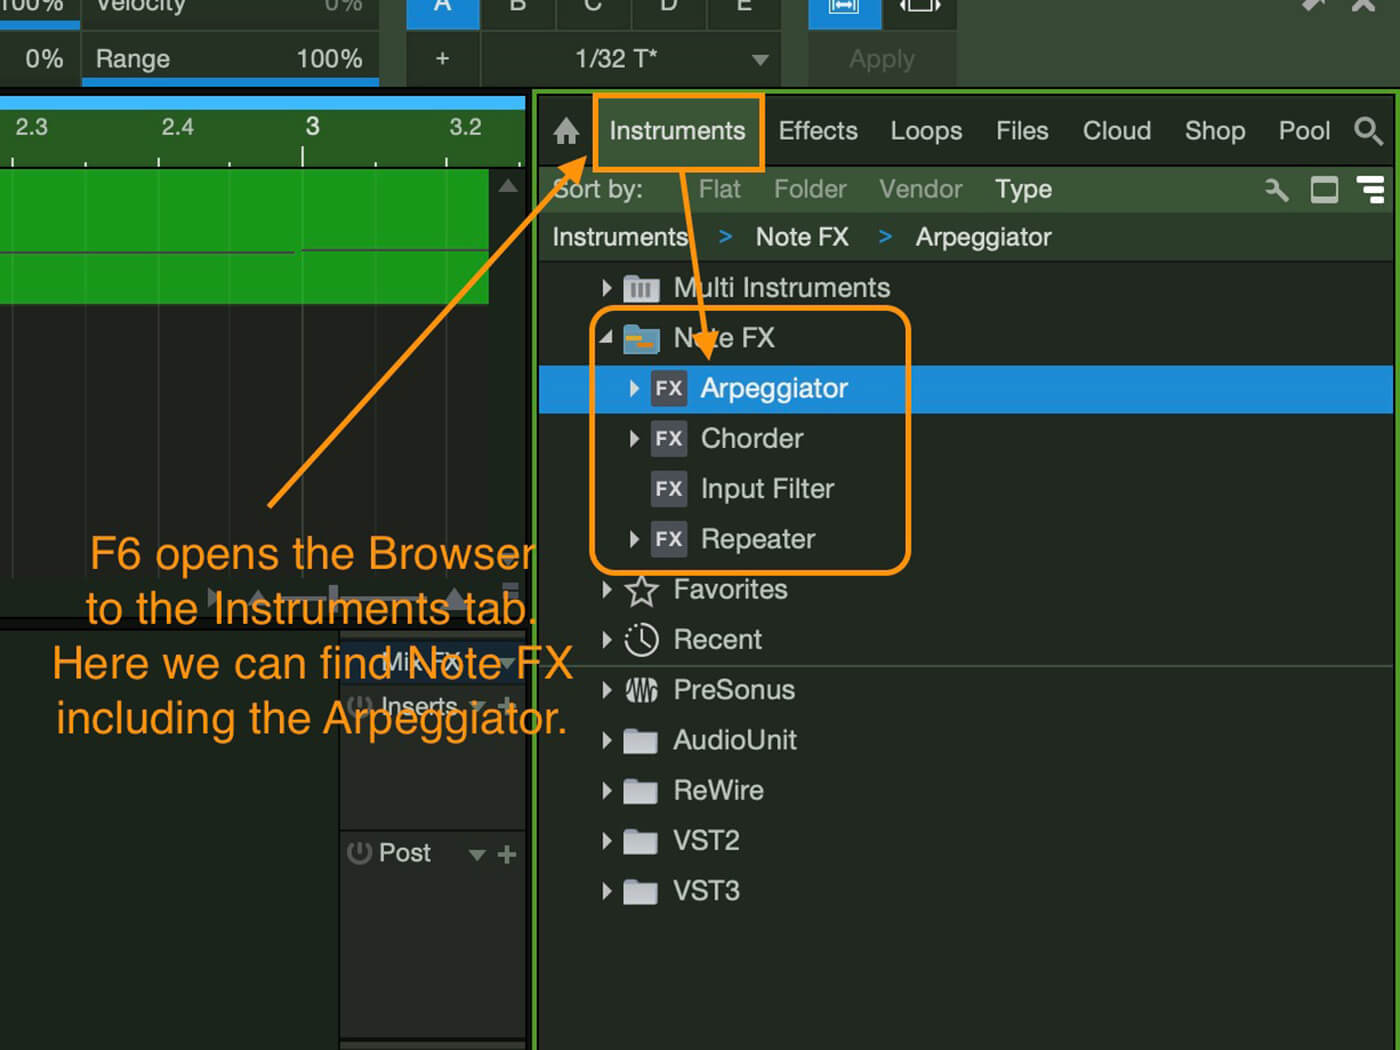
16. Now add some flourishes. Press F6 to open the Instruments tab in the browser, and find the Note FX at the top.
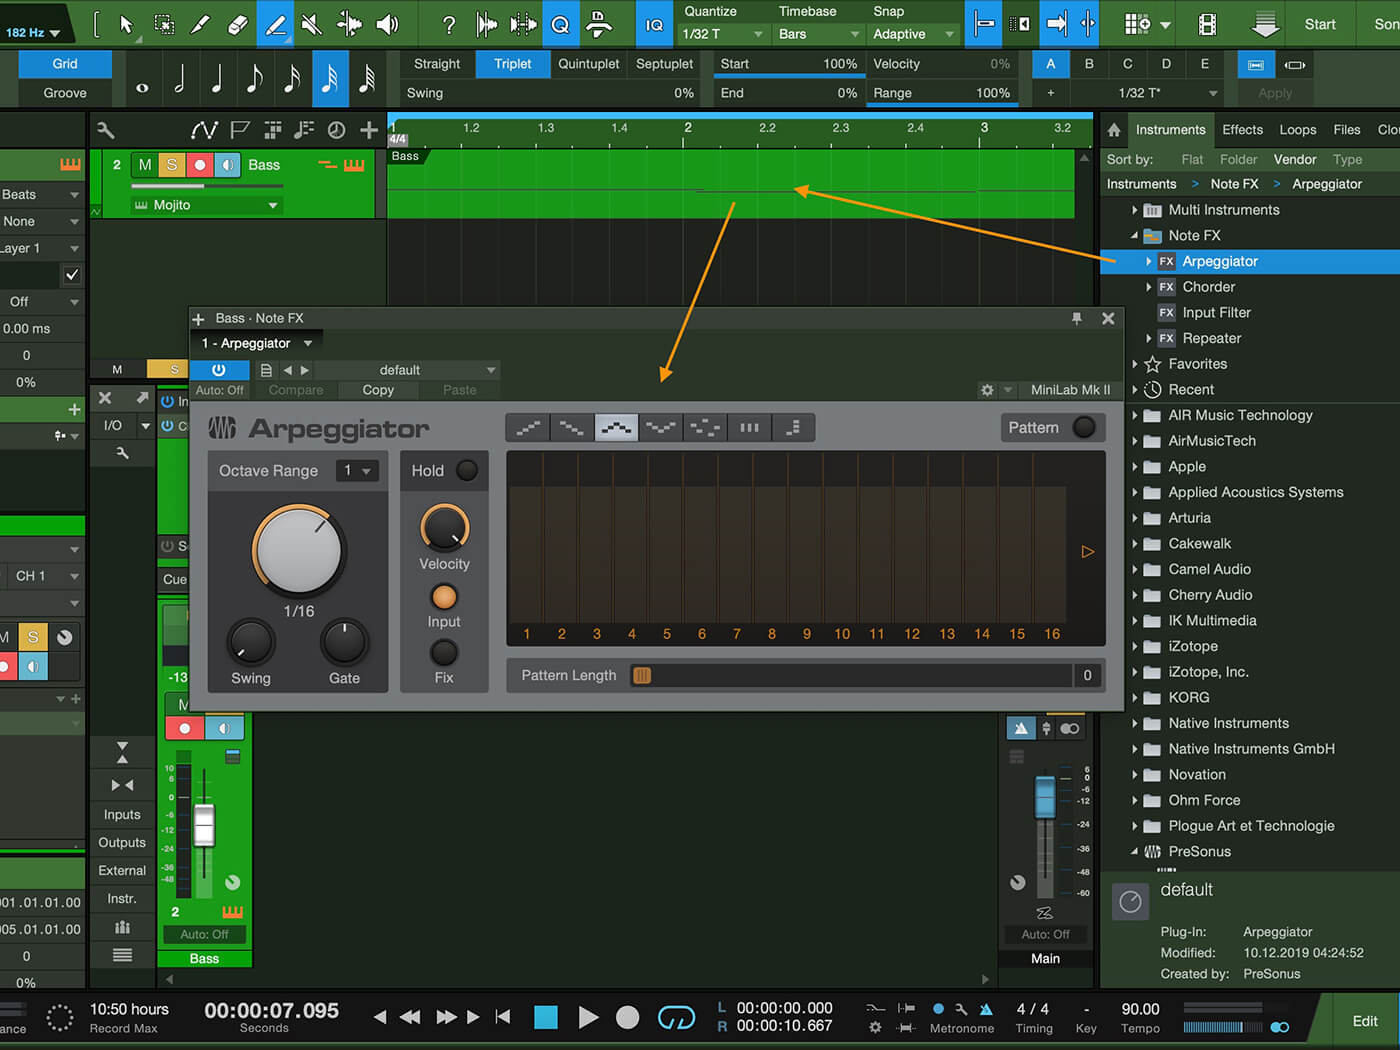
17. Open Note FX and drag the Arpeggiator onto your bass track. The track icon will now show that there’s Note FX on the track.
18. Clear the Arpeggiator and then tweak as shown. This will give you a nice filter-bass sound akin to what you might hear on an old Depeche Mode track.
For more PreSonus Studio One tutorials and workshops, check here.