Mix referencing with Nugen A|B Assist in Pro Tools
It’s easy to compare two effects chains, or switch between your mix and a reference with Nugen’s A|B Assist in Pro Tools. Follow our in-depth step-by-step guide to master this key weapon in the producer’s armoury.
Making comparisons, and deciding which of two or more options is the best, is one of the fundamental requirements in audio work. Whether it is comparing between two different, yet similar processors; between your mix and someone else’s; your mix and the rough mix; or comparing between your mix and a reference track, having a quick and easy capability to switch is vital.
This is especially true at the start of your career, when you don’t yet have an intuitive idea of what each processor will do in context, and with the sheer range of plug-ins and affordable outboard available even to beginners knowing what to use and when to use it can be overwhelming. But even experienced engineers have to face up to not always knowing what the best decision is for a mix. And every time you add a new processor to your arsenal, you add further complexity to the decision of what to use.
Shall I compare thee…
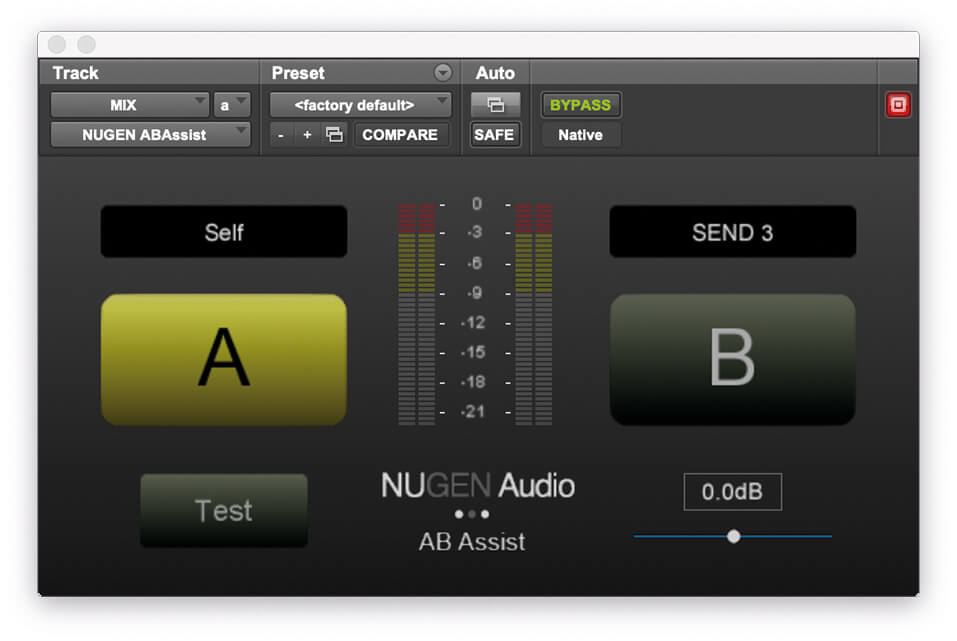
Nugen’s A|B Assist is a free tool for Pro Tools users which lets you quickly compare two signal sources in a mix, without reverting to overly complicated use of the solo and mute switches. Most importantly, it enables you to create a blind A/B test between two signal sources so that you can test your preference without preconceived ideas influencing your judgment. Additionally, Nugen A|B Assist has a built-in gain slider, which can be used to adjust the gain of the two signals, to better match them before making any decisions. However, this gain adjustment is made manually, so it’s best to pair the A|B Assist plug-in with some good metering.
A|B Assist comes in two parts; Nugen Send and Nugen A|B Assist. Nugen Send is the first part of the plug-in, and is placed on one channel, while Nugen A|B Assist is then placed on the channel you’d like to compare the first channel with. This can be another channel within your mix, or the master buss itself. Nugen Send mutes the channel it is on (although this function can be bypassed) and sends the signal directly to the A|B Assist plug-in. The Nugen A|B Assist plug-in can then be used to switch between the two signal sources. This ensures that only one of the two signals is heard at any one time, and that you can switch between the two with a single button press.
Keep it constant
In this workshop, we’re going to look at a couple of the ways in which we’ve been using Nugen A|B Assist to aid us in our mixing and mastering sessions – both for comparing individual plug-ins and for comparing our mix with a reference mix.
When comparing two plug-ins, for example two different compressors on a vocal, it’s important to keep the rest of the signal chain constant. In the plug-in world, this can be done simply by duplicating the channel. However, if you are running an outboard EQ as part of the chain before the compressor, it is still possible to compare two separate channels, by using two Aux channels, both fed from the output of the channel with the outboard EQ on it. This enables you to send the same signal to both compressors without requiring a second analogue EQ.
Using Nugen A|B Assist with references is a great way of comparing your mix with a range of alternative mixes. We like to bring in a template channel with all of our reference mixes on into the session. This channel puts each new reference on a different playlist, and each time we will also add any rough mixes or client references to this template in our project. This way we can quickly compare our favourite mixes with our mix using A|B Assist. Then, by switching playlist, we can also compare the client’s references and rough mix in the same way. This method also saves time, and means we can slowly build up a personalised library of reference music that we can quickly import into any project.
The features in Nugen A|B Assist may not be as instantly desirable as a new EQ or compressor, but the tool is useful in both mixing and mastering scenarios, and as such should be an essential addition to your Pro Tools plug-in folder. It can be downloaded from the Avid Application Manager, although licensing will require signing up to a free account online with Nugen.
Mix referencing with Nugen A|B Assist: step-by-step
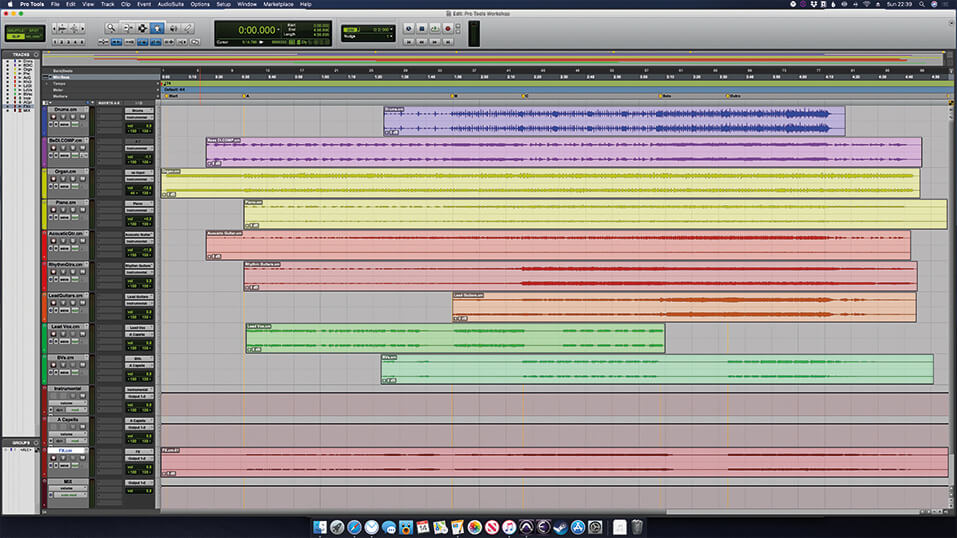
1. Open the Pro Tools Workshop session. We’re using a slimmed-down version of Reptile’s track Shore, which we’ve used in previous MusicTech sessions.
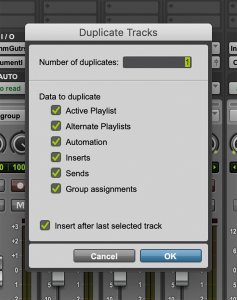
2. Duplicate the lead vocal channel and add an instance of Bomb Factory’s 1176 emulation, BF-76, to the first channel.
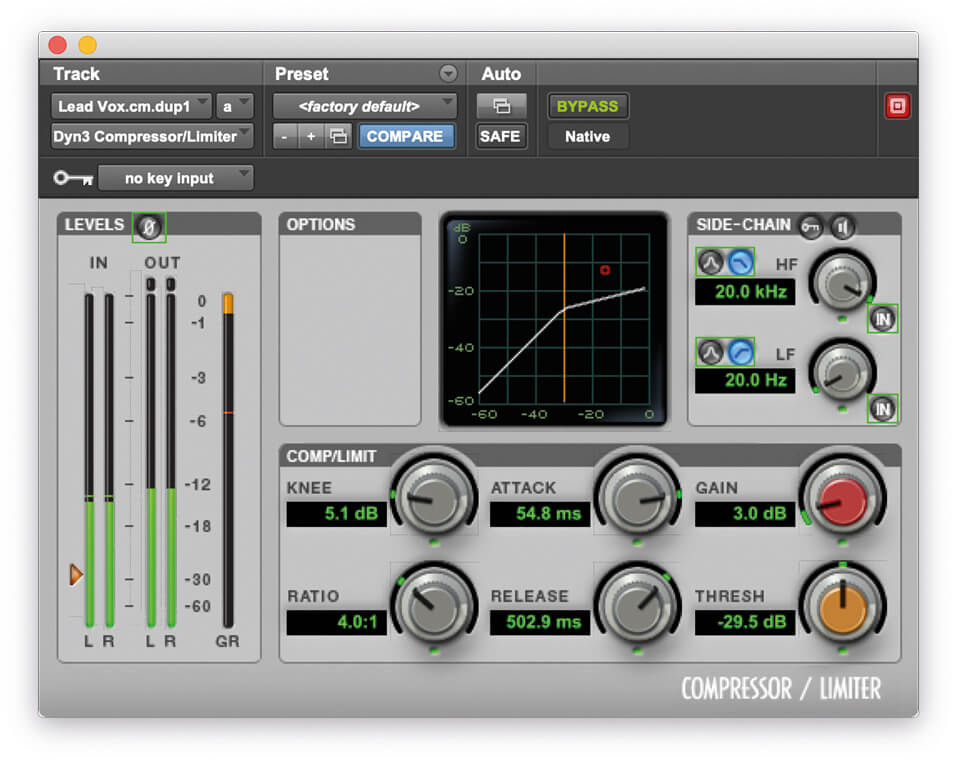
3. On the second channel, add an instance of Avid Dyn III and set up both compressors to get around 3dB of gain reduction.
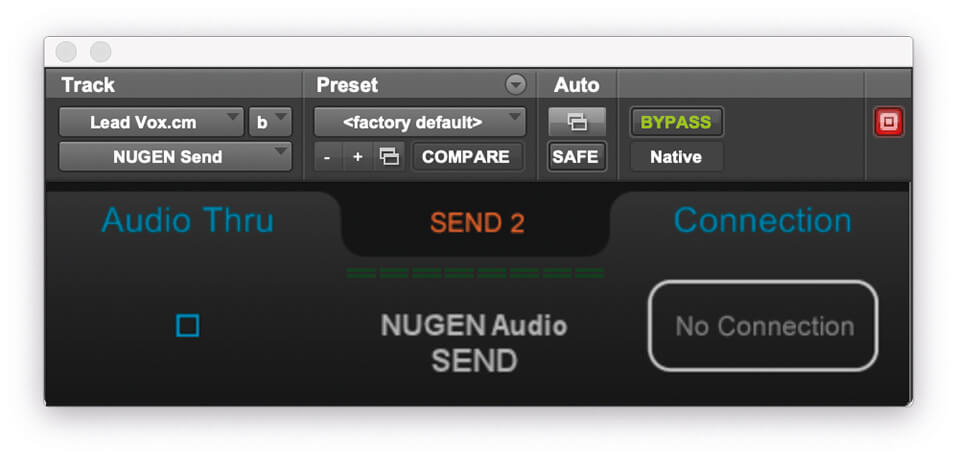
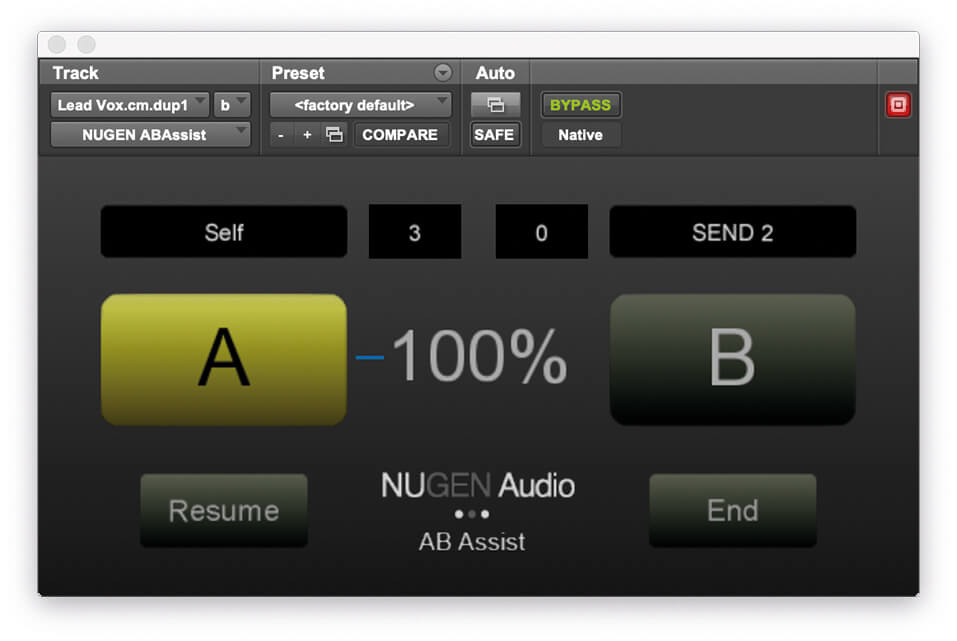
4. Insert an instance of Nugen Send onto the first Lead Vocal channel.
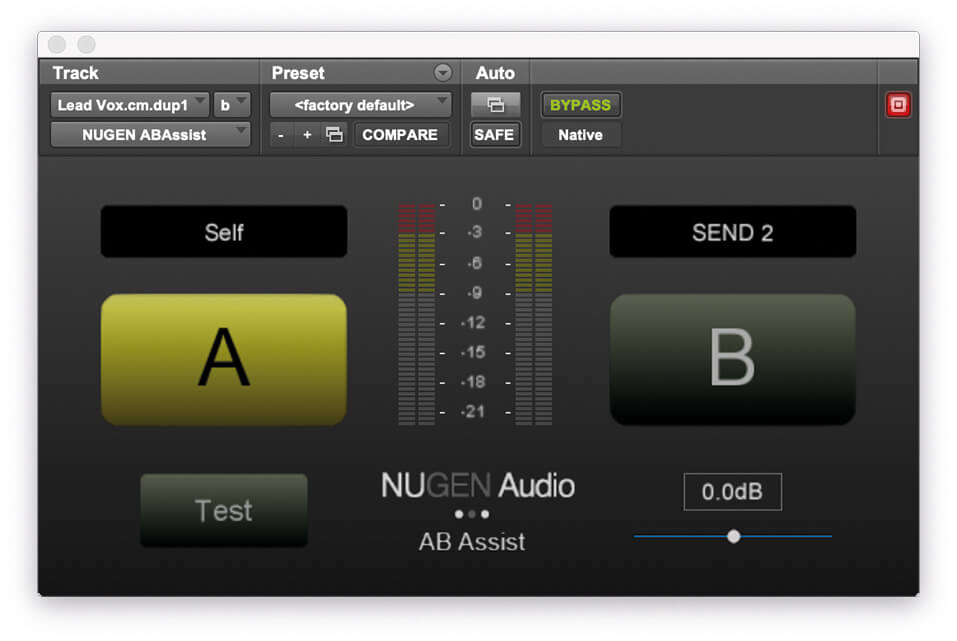
5. Then add an instance of Nugen A|B Assist onto the duplicated Lead Vocal channel. The two vocal tracks should sound pretty different.

6. To compare between the two channels, simply click on the A and B buttons in the Nugen A|B Assist plug-in.

7. You’ll probably find that the two different compressors result in different output levels. You can correct for this using the gain slider in Nugen A|B Assist, which turns the Send channel up or down.
8. Once the two channels are aligned, press the test button. This will begin a (very useful) blind A/B test.
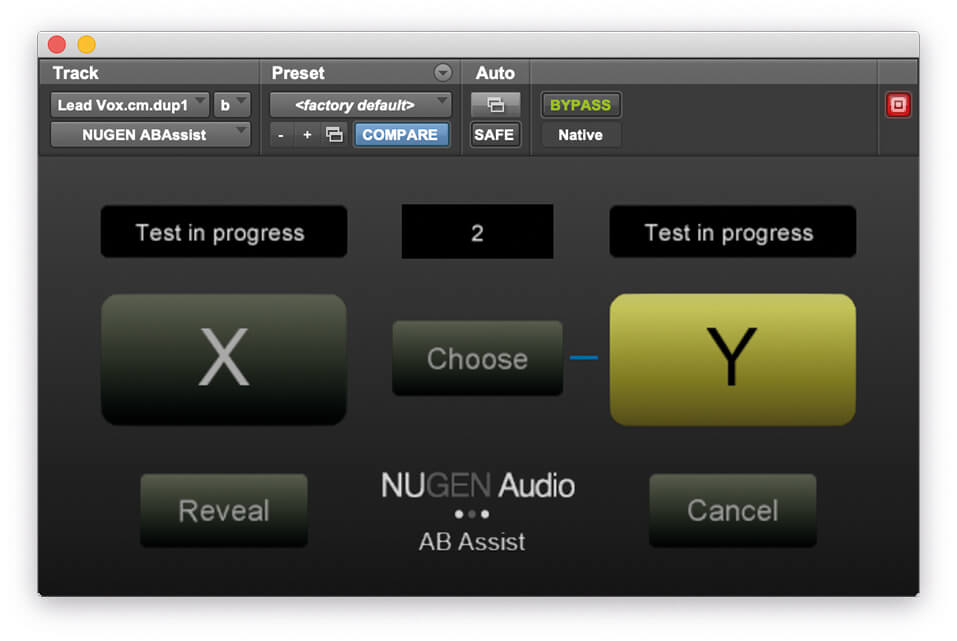
9. In the test, you can choose from X or Y, and each time you choose A|B Assist will reshuffle, and enable you to go again.
10. Once you have tested yourself a number of times, press reveal to see which of the two you preferred. Don’t worry if you don’t get 100 per cent each time; knowing that you have mixed opinions is sometimes as valuable as knowing what your preference is.

11. Once you’ve picked your preference, remove the unwanted channel, and the remaining instance of either Nugen Send or Nugen A|B Assist.
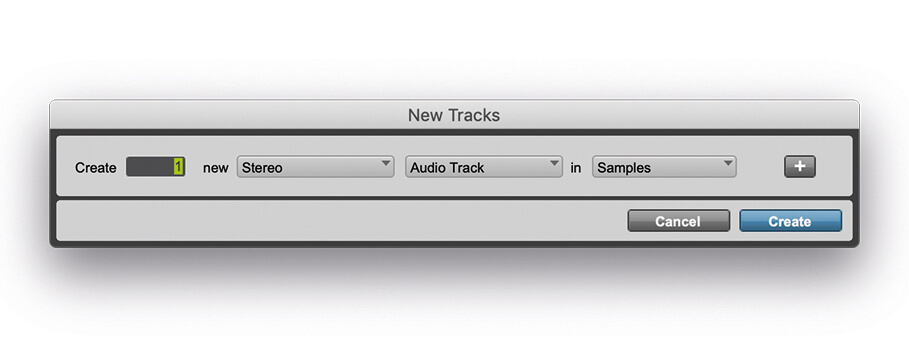
12. Now add a new stereo audio channel to the mix, and drag in your favourite reference mix from your music collection.
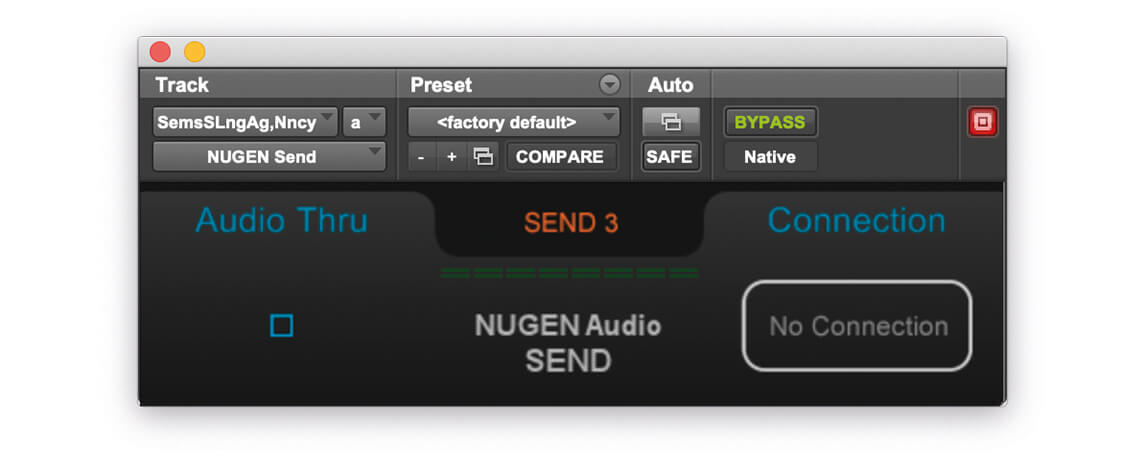
13. Now we’re going to add an instance of Nugen Send to the new reference channel.
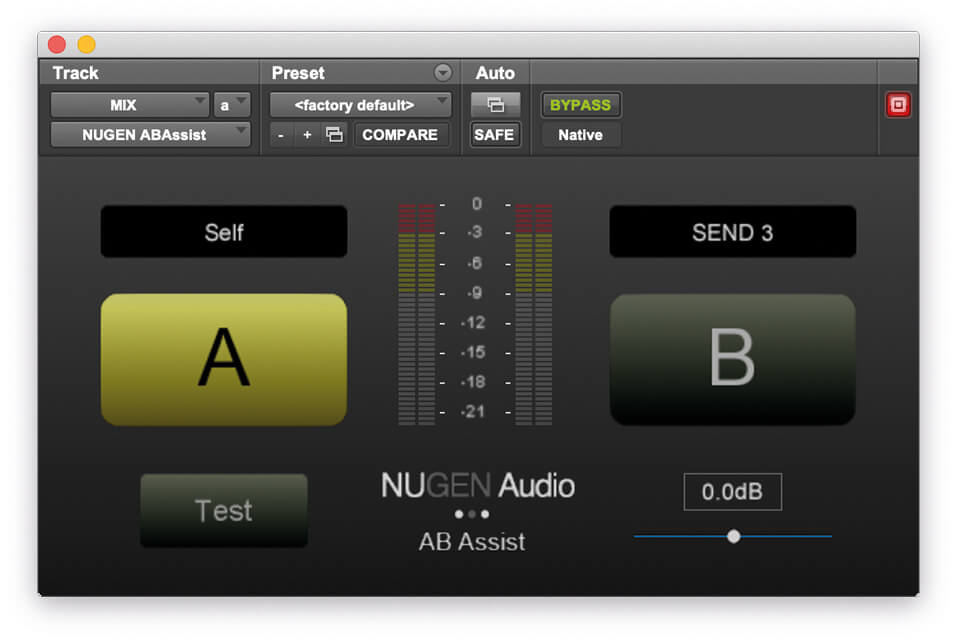
14. Place Nugen A|B Assist on the master channel, but make sure it’s after any additional mix buss processing.

15. Now you can easily compare your mix with the reference mix by simply clicking between A and B.

16. Now you can add another song from your music library to a new playlist in the reference channel…
17. You can now compare this new reference with your mix. You can add as many reference mixes as you want to the reference channel, using a new playlist each time.
18. Once you’re done, it’s good practice to remember to bypass or remove Nugen A|B Assist from your master buss, and delete the reference channel, or make it inactive.