How To Get Creative with Parallel Processing in Ableton Live
Parallel processing has become the technique de jour, be it compression, distortion or any other kind of sound colouration. Declan McGlynn guides you through the process… The process of duplicating a signal and heavily processing one while balancing back in with the other dates back to the days of disco, where producers out of New […]
Parallel processing has become the technique de jour, be it compression, distortion or any other kind of sound colouration. Declan McGlynn guides you through the process…
The process of duplicating a signal and heavily processing one while balancing back in with the other dates back to the days of disco, where producers out of New York would duplicate the drums and heavily compress them in order to create more smack and power.
In the DAW world with potentially listless channel counts and numbers of plugins, we’re not limited to a single parallel process. In fact, we can process the same sound multiple times and with Ableton Live, within the same channel.
Let’s take a look at some of the parallel processing techniques and sounds you can achieve in Ableton Live.
Parallel processing: step-by-step
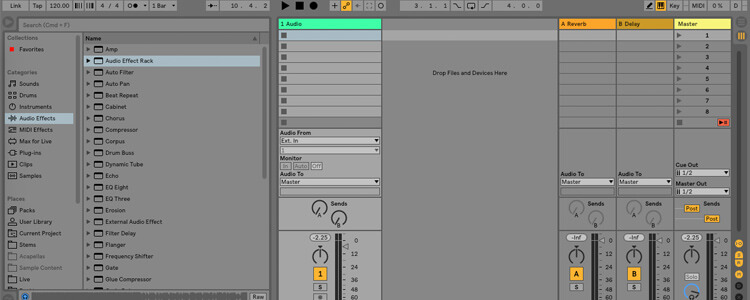
1. Understanding Chains
Before we start, it’s important to understand a very Live-specific concept – Chains. Chains are essentially new layers of the same sound, with their own processing chains, volume, panning, solo and mute options. In both the hardware world and in most other days, we’d use an auxiliary channel to duplicate the signal and apply the parallel effect but in this case we’re going to use Chains. It will be become clear why later.
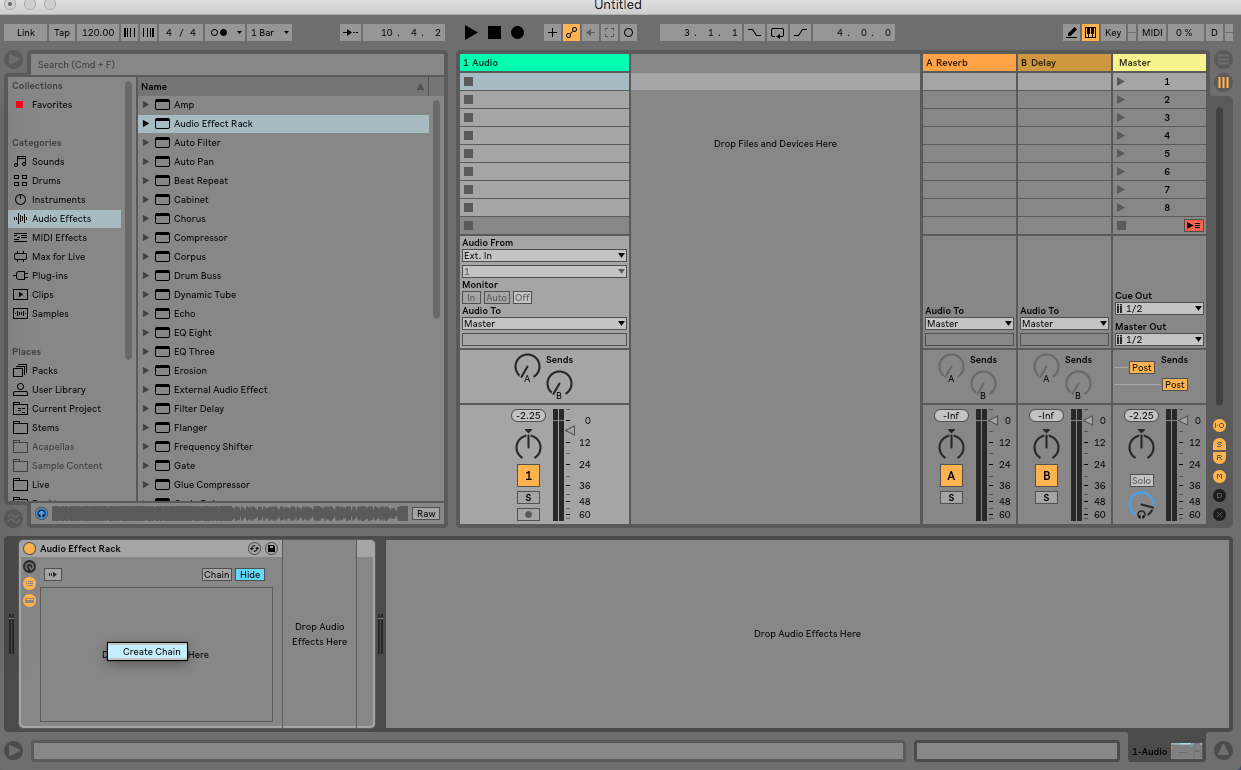
2. Creating a Audio Effects Rack and Chain
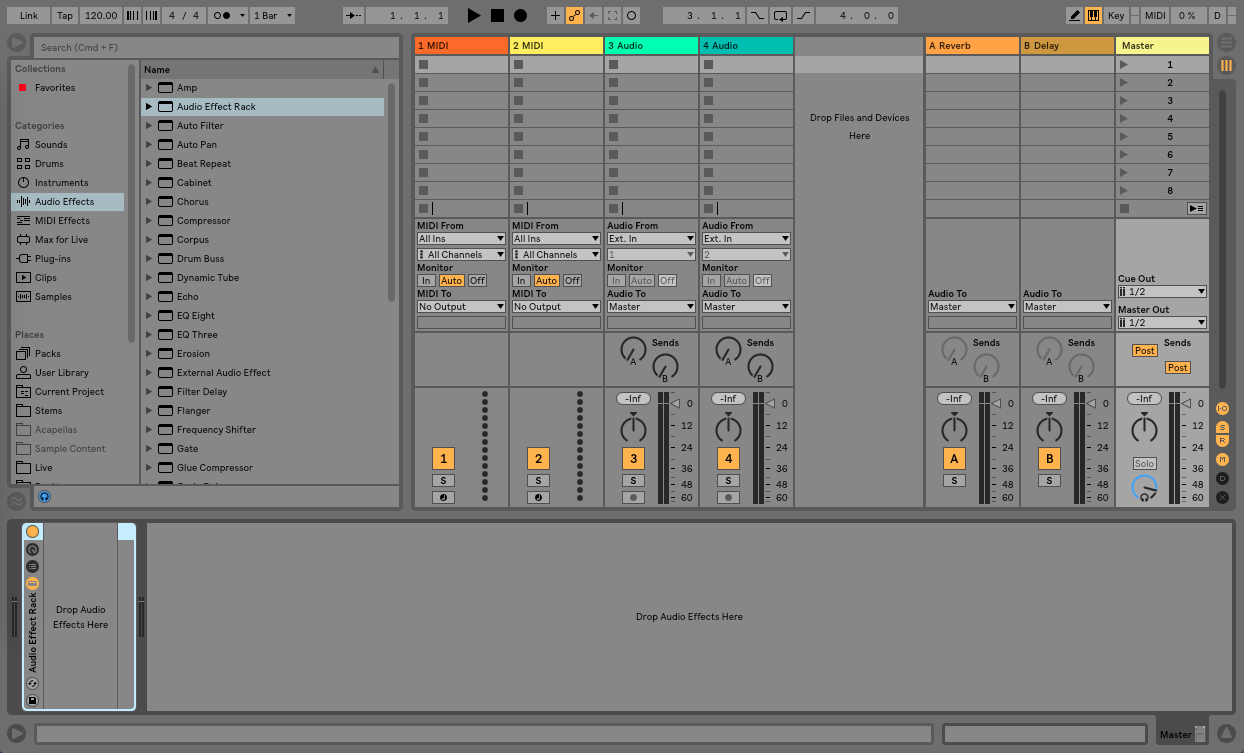
On your Audio or MIDI channel, drag in the Audio Effect Rack device from the Audio Effects menu in Live. Before dragging in any effect device into the Rack, click the small button that shows three lines and dots. This is the Chain List. Right-click where it says Drop Audio Effects Here and select Create Chain. Now right-click again and create another Chain. This will double the volume of the current channel so don’t press play just yet.
3. Loading up a compressor into the new chain

Select the first chain and press Cmd+R and rename the Chain ‘Dry’. This will help us keep track of things later. On the second Chain, rename it ‘Compression’. Load Ableton’s Compressor device into the second Chain and mute the ‘Dry’ chain my clicking on the yellow speaker icon.
4. Settings and muting the original
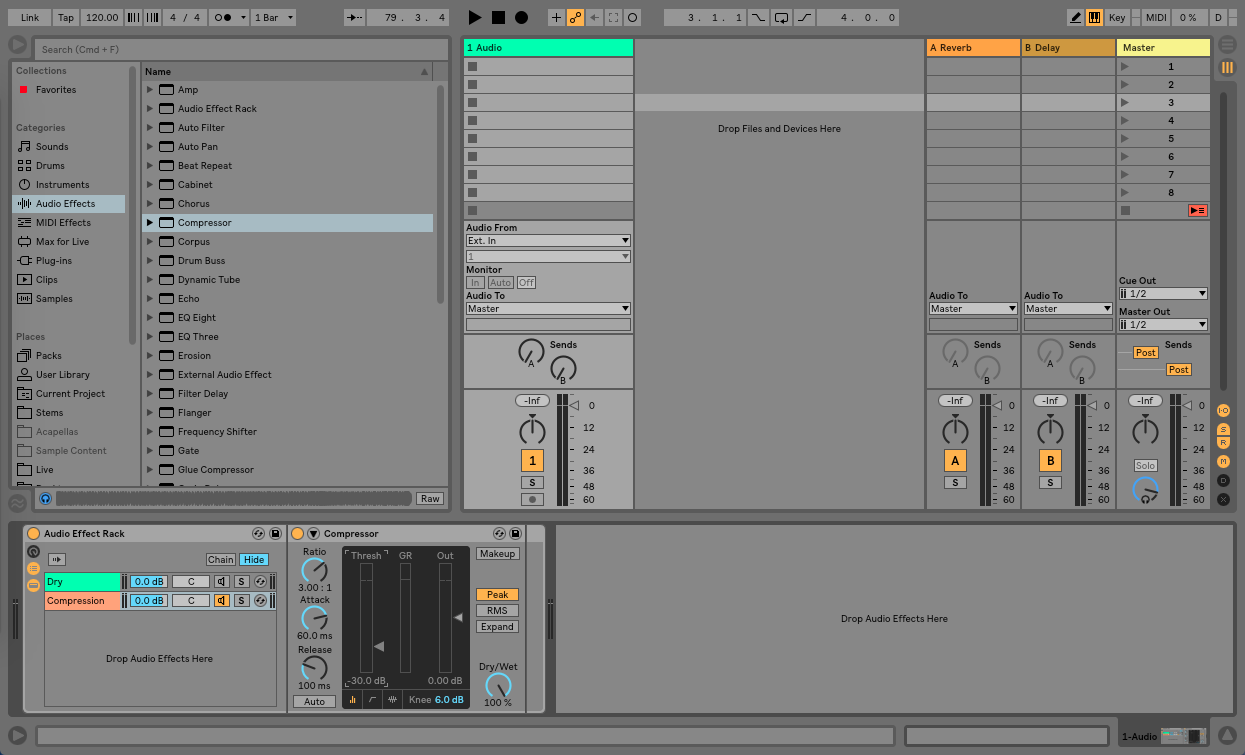
Now it’s time to set up the Compressor device for extreme compression. Set the Ratio to a setting of 3.00:1 and over, set the attack time long – around 60ms – and set the release time short – around 100ms. What we’re trying to do here is only allow the initial transients – in this case, a drum beat. Lower the threshold all the way down to around -30dB and vitally, make sure that ‘Makeup’ button is switched off, otherwise Live will try compensate for any gain reduction automatically.
5. Balancing volume

Load in a drum loop of your choice – anything will work but softer acoustic drums can demo the process best. Lower the volume of the ‘Compression’ chain and re-activate the ‘Dry’ chain by pressing the speaker button. Press play and slowly bring the volume of the ‘Compression’ chain up until the transients begin to be enhanced. Alternatively you can shorten the attack time and turn the makeup gain back on to enhance the ‘tail’ of the sound over the initial transient.
6. Benefits of using Chains
So what’s the benefit of using this type of parallel processing over an aux send? Well, first of all you remove any potential phasing issues between plugins – not every DAW automatically compensates any buffer time on their return channels especially when sending one return channel to another. The benefit of using Chains is you can stack multiple instances of the same signal – up to 127 in fact – all within a single channel. So now that we have our snappy transients, let’s add more parallel processing to the mix,
7. Parallel Distortion
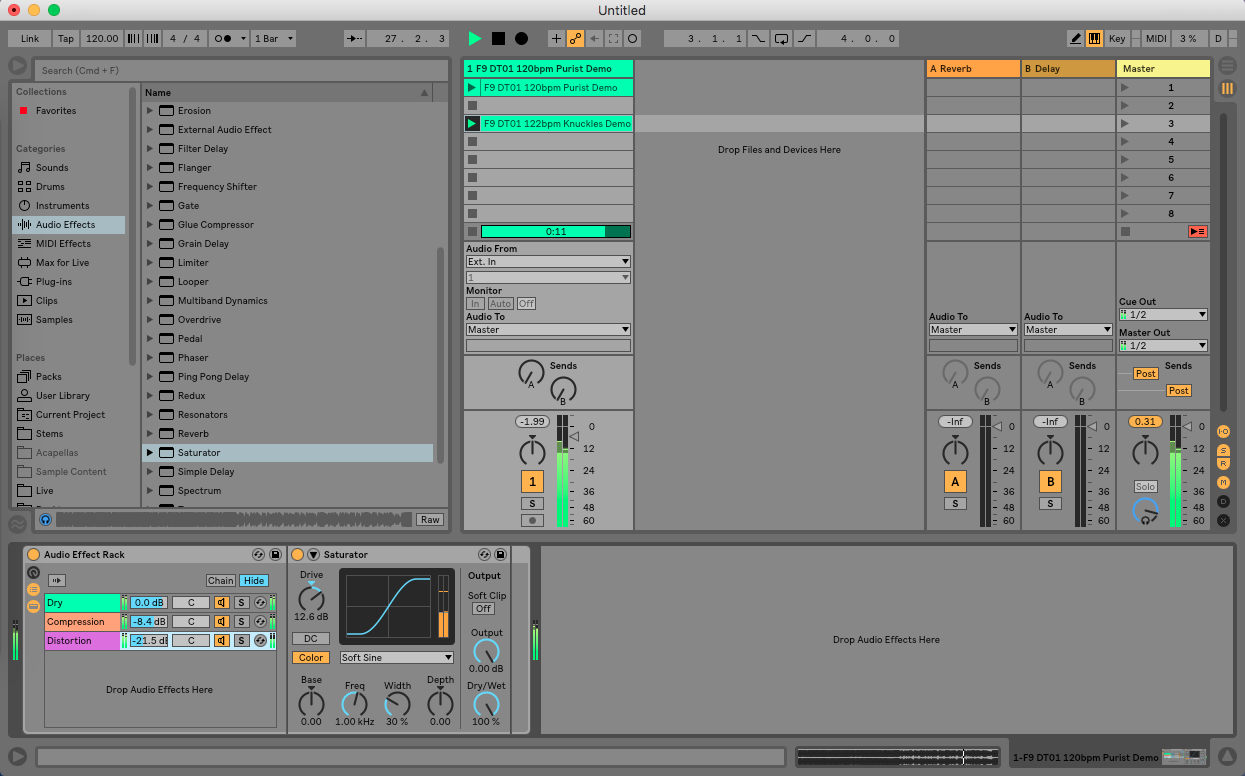
While full-blown distortion on a mix buss can be overkill, the benefits of some types of distortion – natural compression and pleasant harmonics – can add a lot of character to your sound. Right-click and create another new Chain and rename it ‘Distortion’. You can use any plugin you like for this but we’re going to use Live’s Saturator. Again, as it’s complimenting the signal and not overloading it, we’re free to go quite hard with our settings.
8. Multiple FX per chain
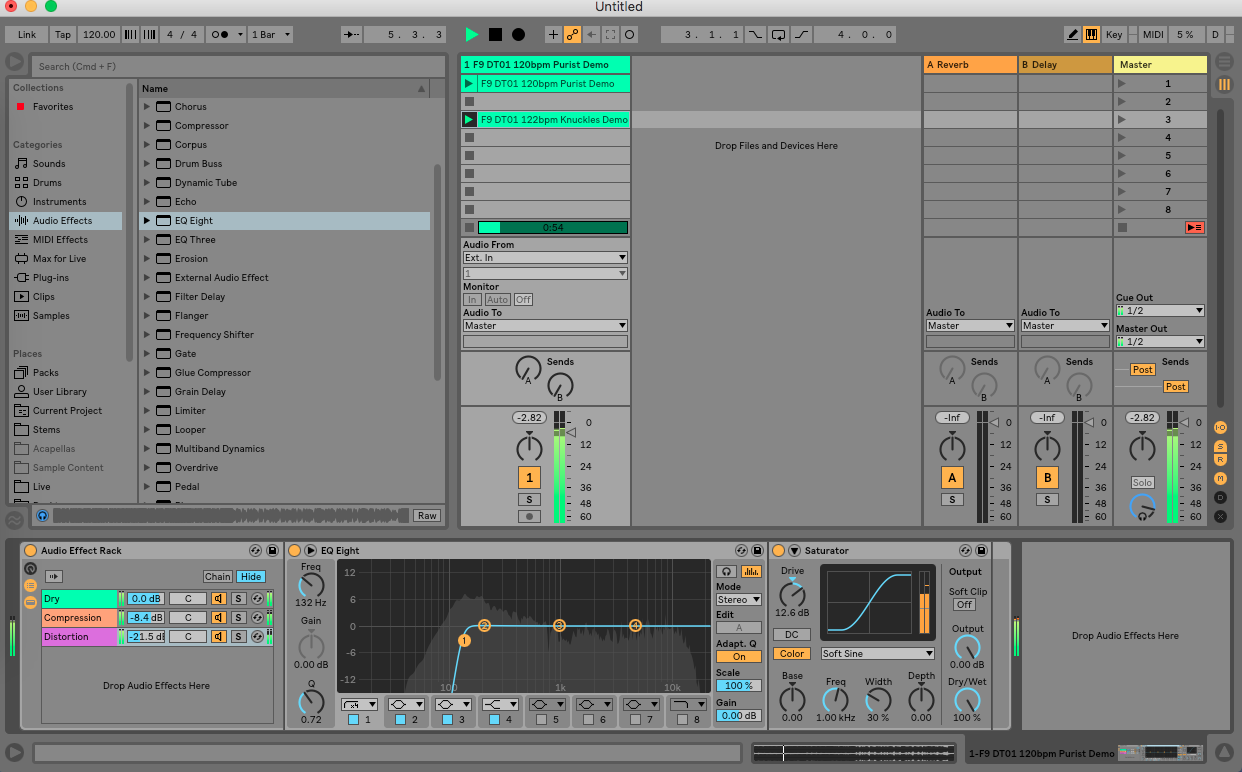
Depending on the sound source, you may want to roll off the low end before the distortion hits as it can often, as new harmonics are created, the effect can cause muddiness in the low-mids. In fact, don’t be afraid to add multiple effects to the same Chain. EQing pre- and post-parallel compression give you even more control over what you boost or enhance.