Make luscious leads with the stunning freeware Synth1
Unlock the potential of this amazing Nord Lead 2-inspired synth with our guide to its most powerful features.
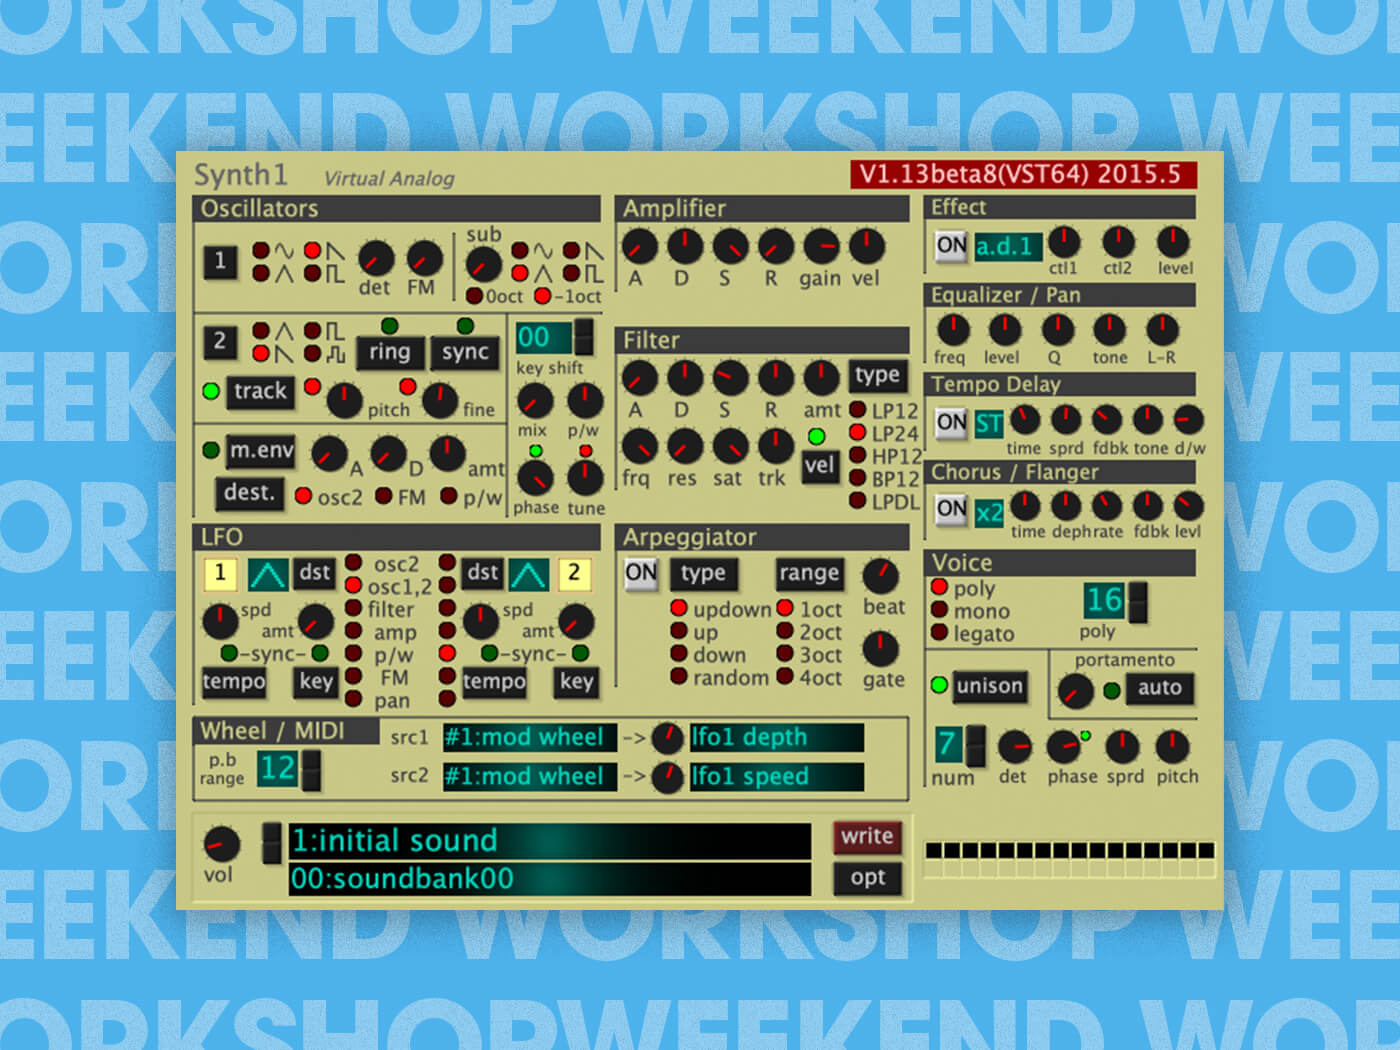
Make luscious leads with the stunning freeware Synth1
Most freeware synth emulations are relatively simple, based as they are on hardware synths from the 70s and 80s. Daichi Laboratory’s Synth1, however, is a much more substantial prospect thanks to its inspiration being the rather sophisticated Clavia Nord Lead 2 from 1997. While not a perfect clone of the Nord Lead 2, over its development, Synth1 has gained some unique new features that make it an exciting synth to explore in its own right, especially thanks to its non-existent price-tag.
In this tutorial, we’ll show you how to use some of Synth1’s sound-sculpting capabilities to create some exciting and expressive lead sounds. You can find the completed patches here if you’d like to check your work.
What you’ll need:
- A DAW
- Synth1, which you can download here.
1. Starting out with a clean slate
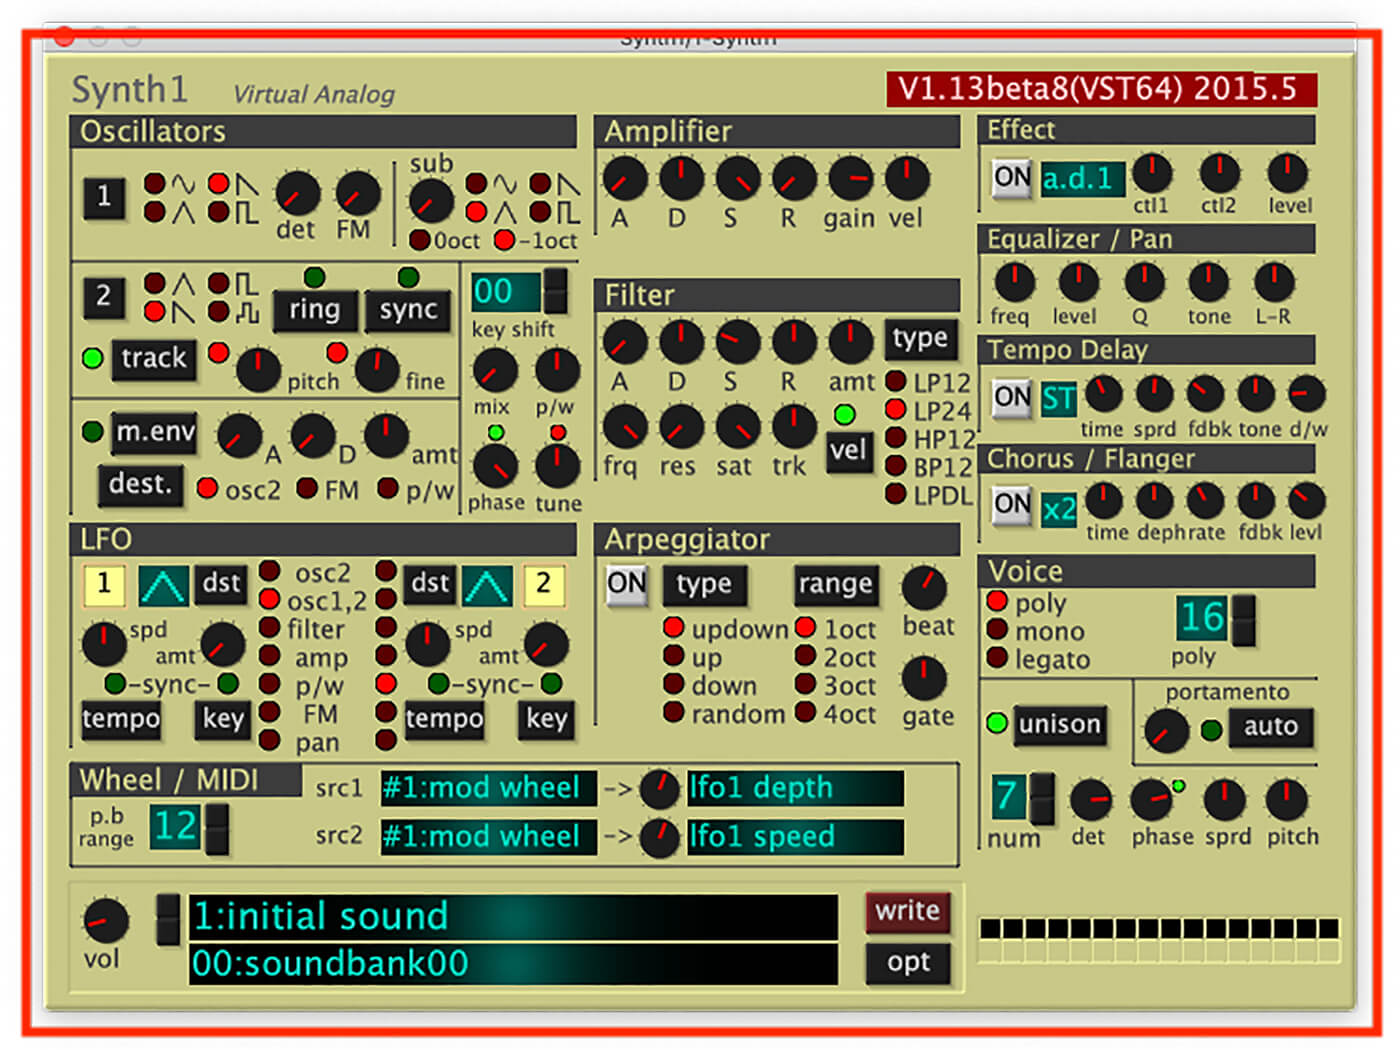
Synth1 defaults to a preset called Initial Sound, a basic, brassy polysynth patch. We can turn this into a properly initialised patch quite simply. First, we’ll deactivate the Tempo Delay and Chorus / Flanger effects by clicking their On buttons.

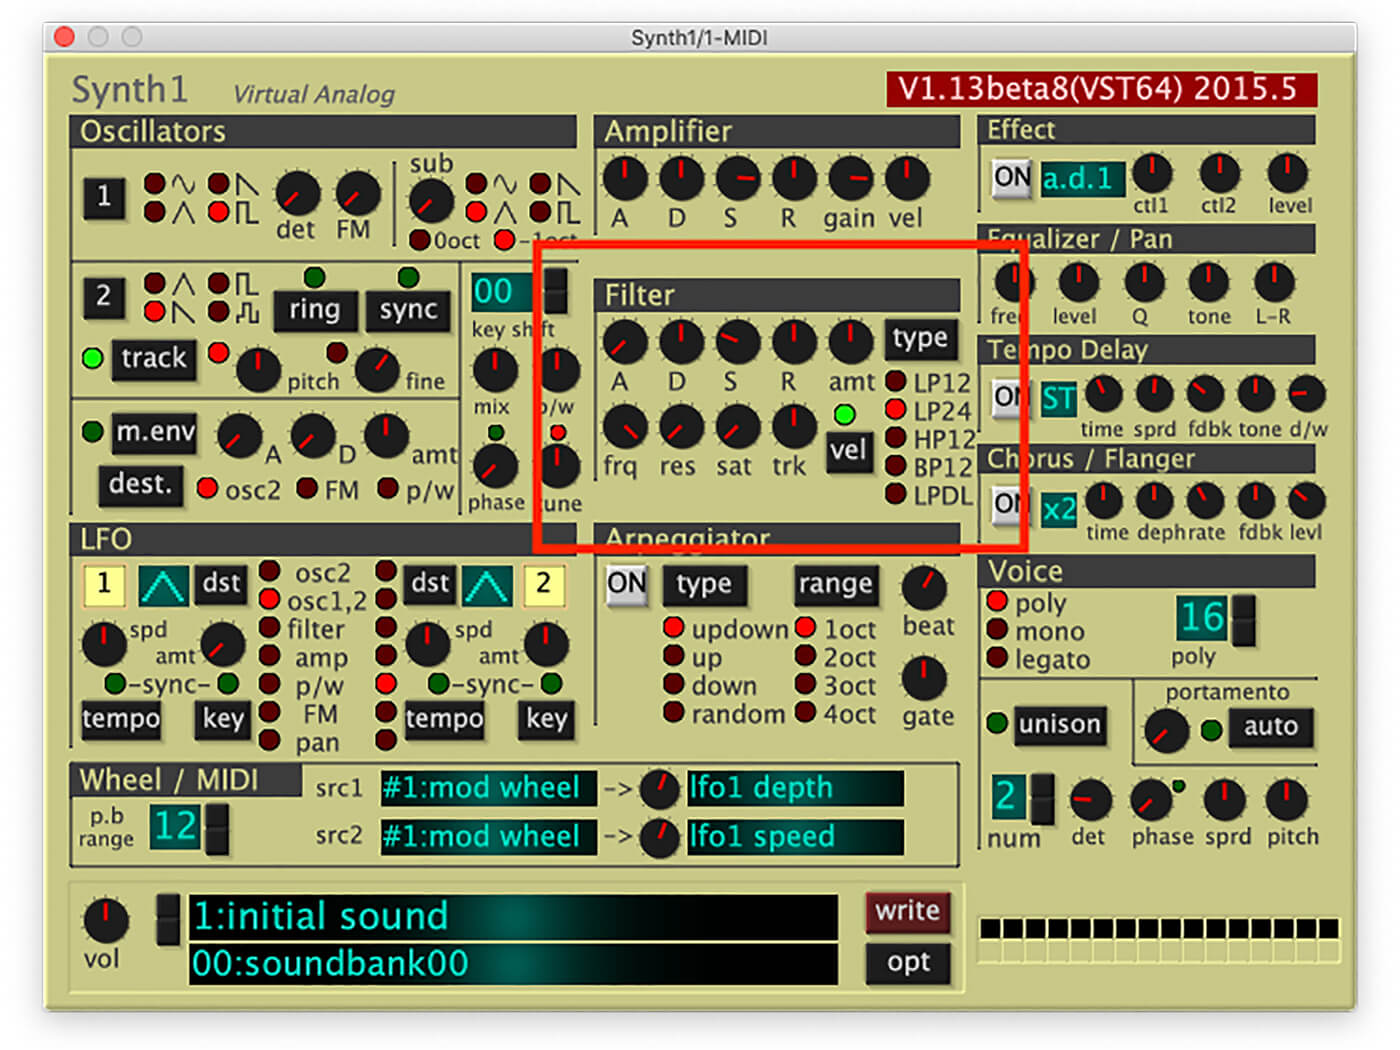
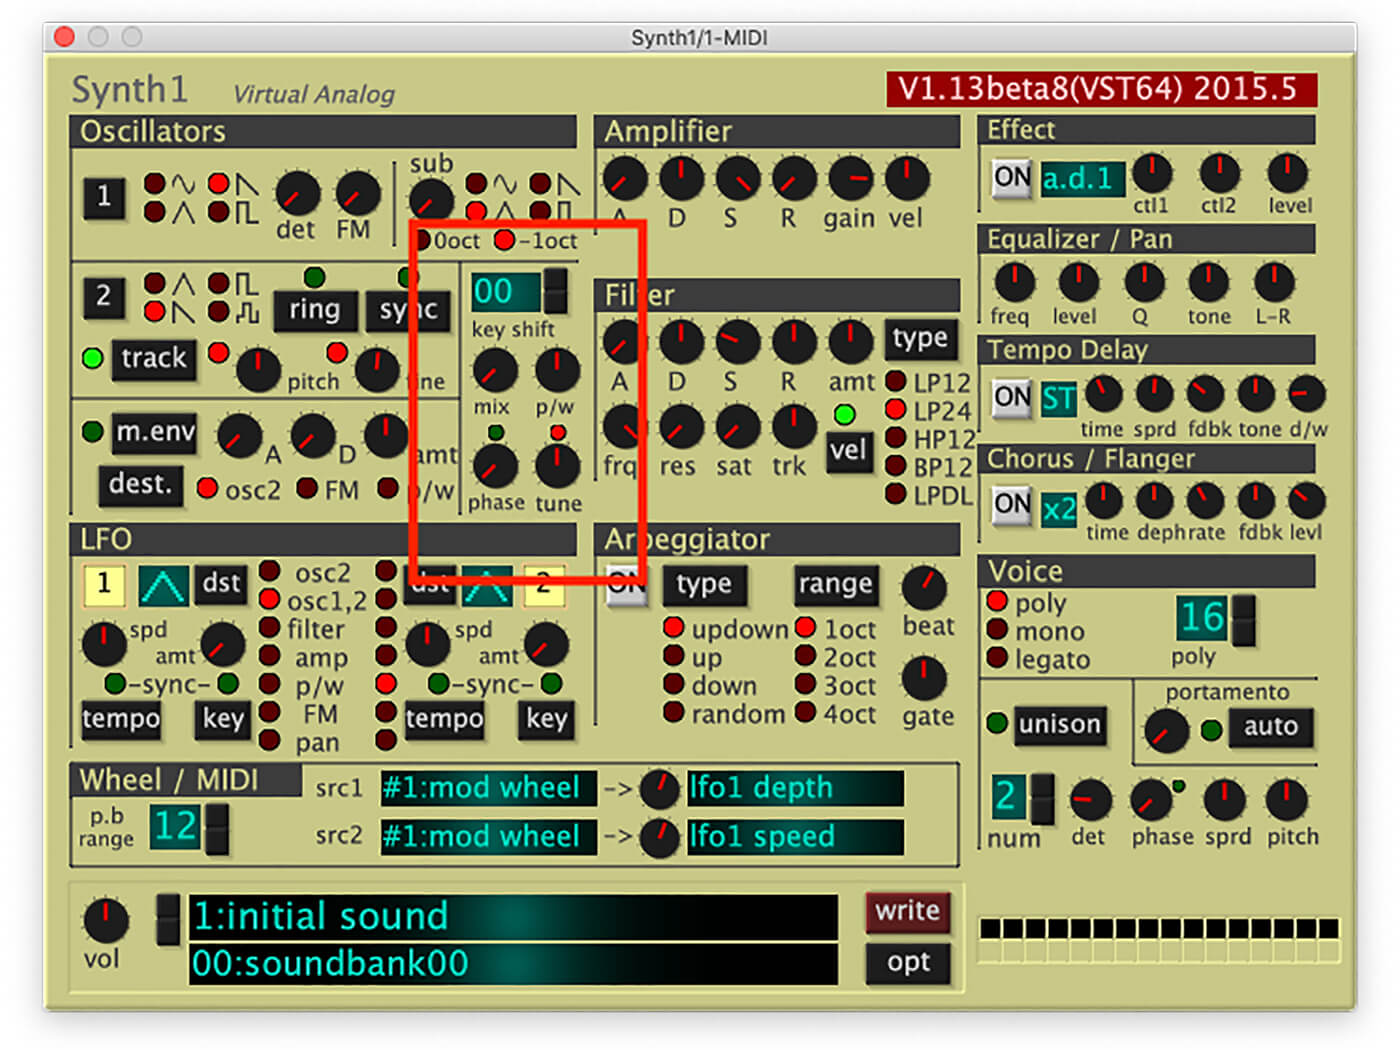
Next, in the Filter panel, we’ll open up the filter cutoff frequency (frq) and turn down the resonance (res) and filter envelope amount (amt) to 00 so the filter isn’t affecting the sound.
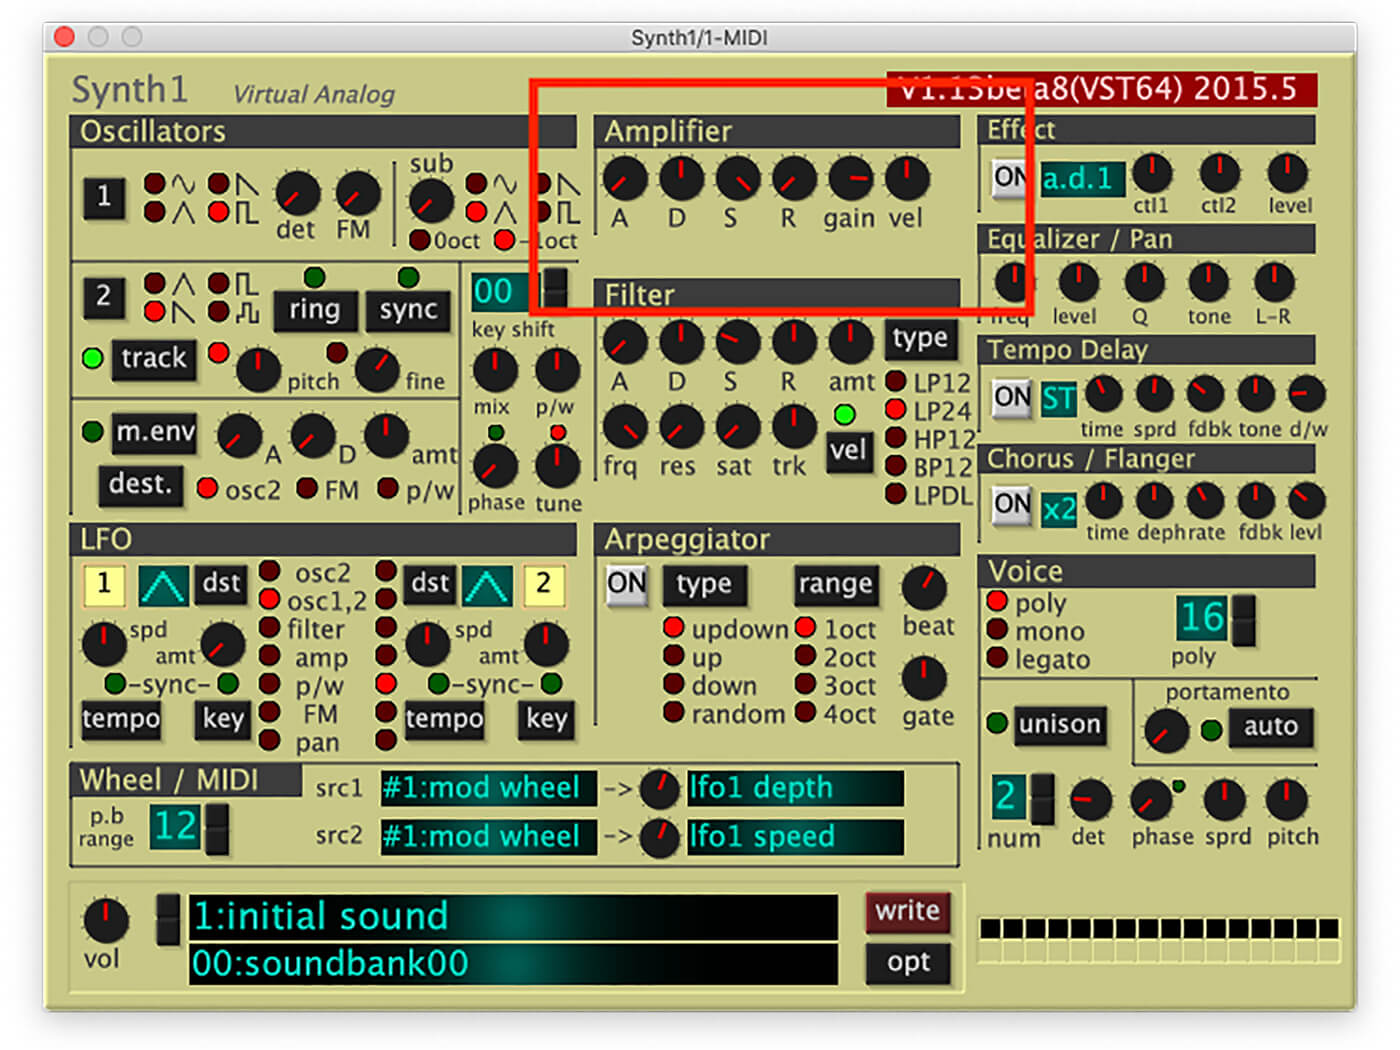
In the Amplifier panel, we’ll turn up the sustain (S), and turn down the attack (A) and release (R) to give us a static volume level.
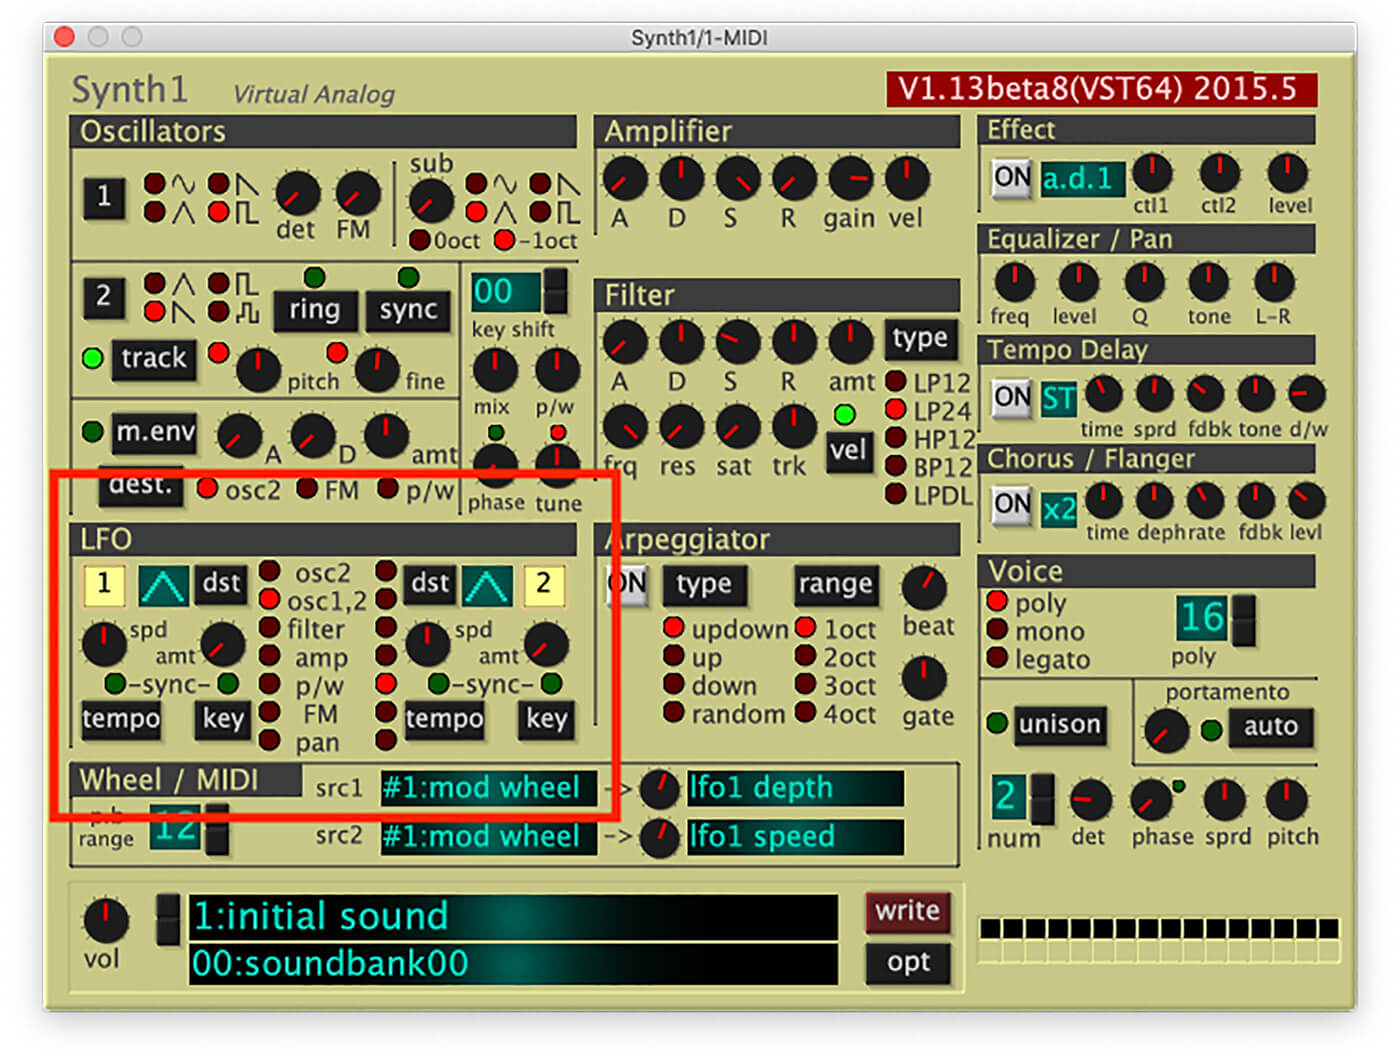
You’ll notice that while our patch is now sounding much simpler, it’s still got a bit of movement to it. This is because the oscillators are slightly detuned, and LFO 2 is set to modulate the pulse shape’s width amount.
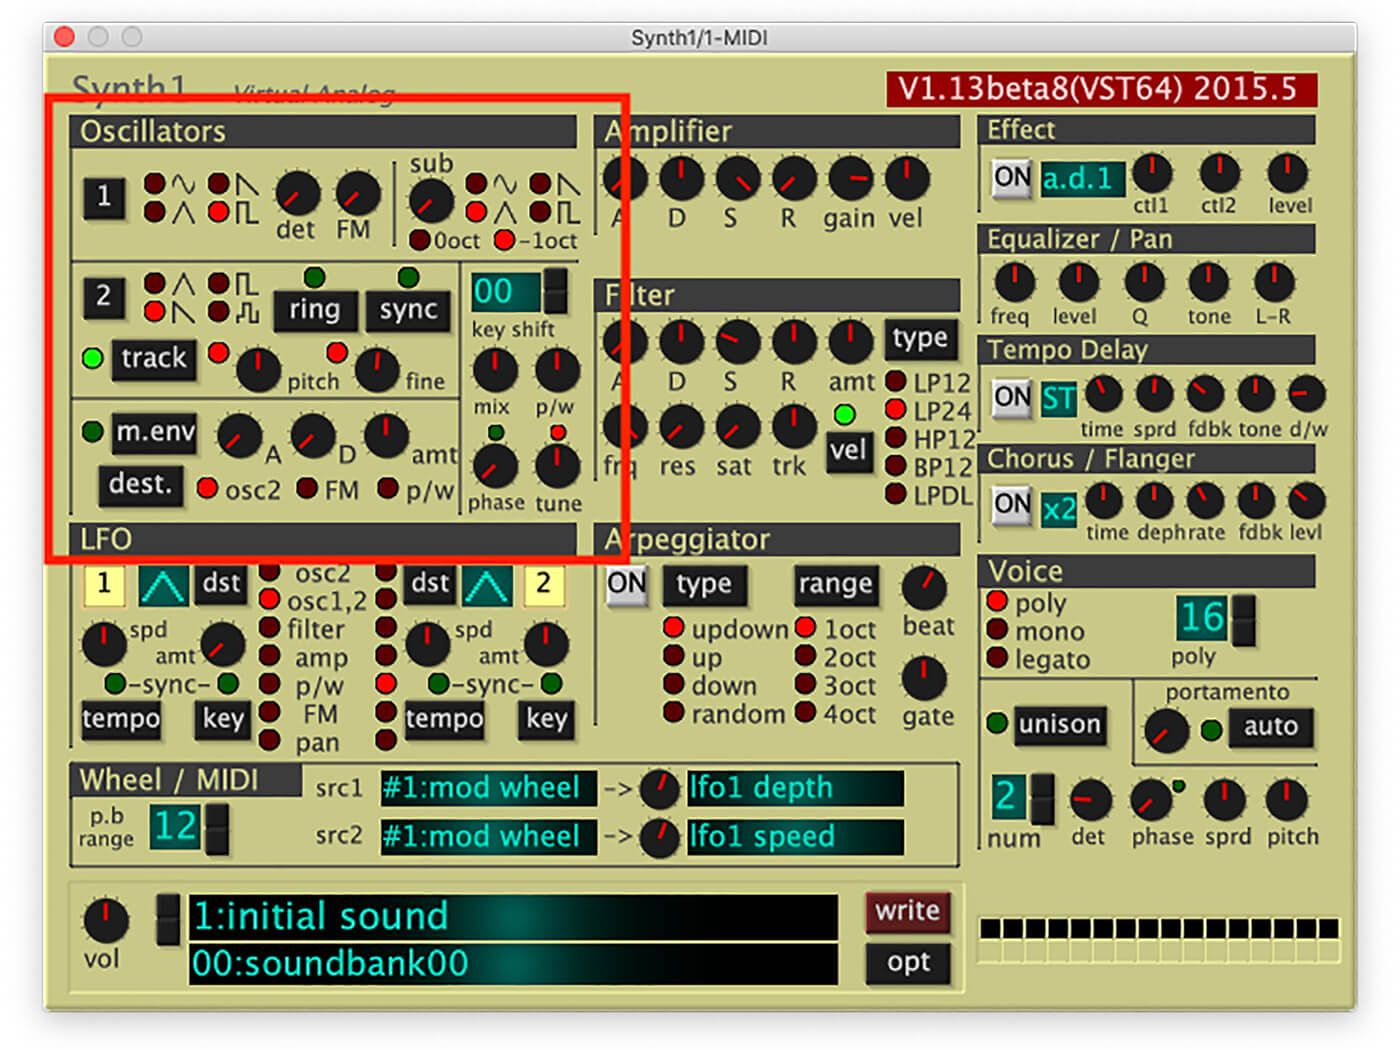
Turn down the fine tune (fine) knob in the Oscillator 2 panel down to 00 cents.
Next, turn down the LFO 2 modulation amount (amt) to 0.
While we’re at it, let’s set oscillator 1 to a sawtooth shape by clicking the sawtooth icon. 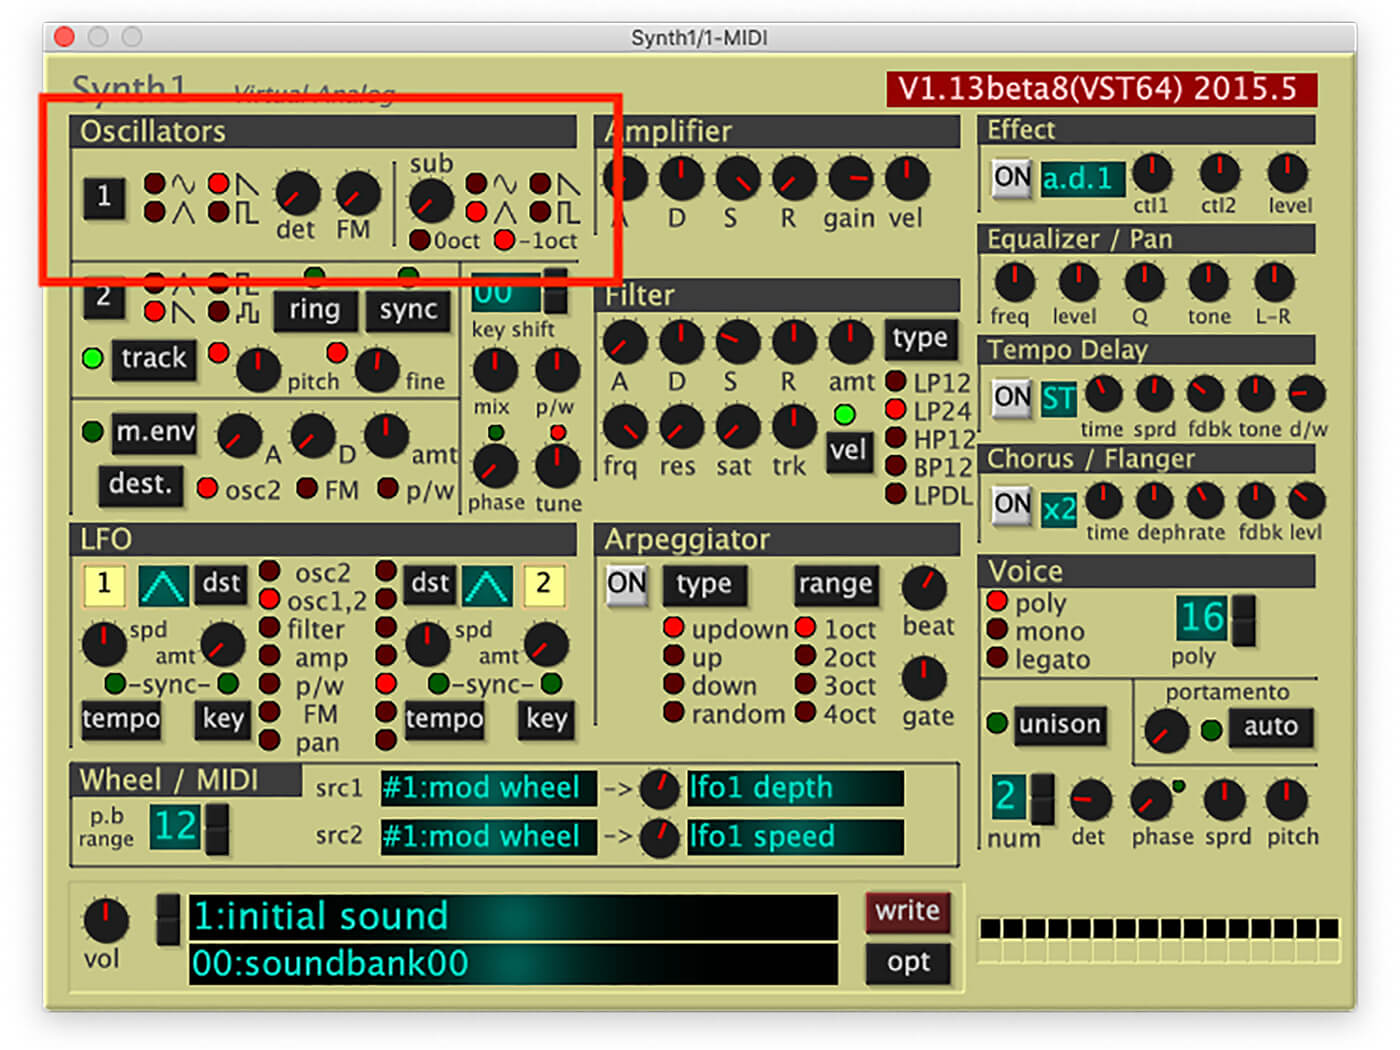
Then, turn down the mix knob to 100 : 0 so that we’re just hearing oscillator 1.
Now we have an unfettered single-oscillator sawtooth patch that while simple-sounding is the ideal way to start exploring the synth’s features. We’ll save this as Init.fxp, which you can find in the completed patches folder.
2. Exploring the oscillator waveforms
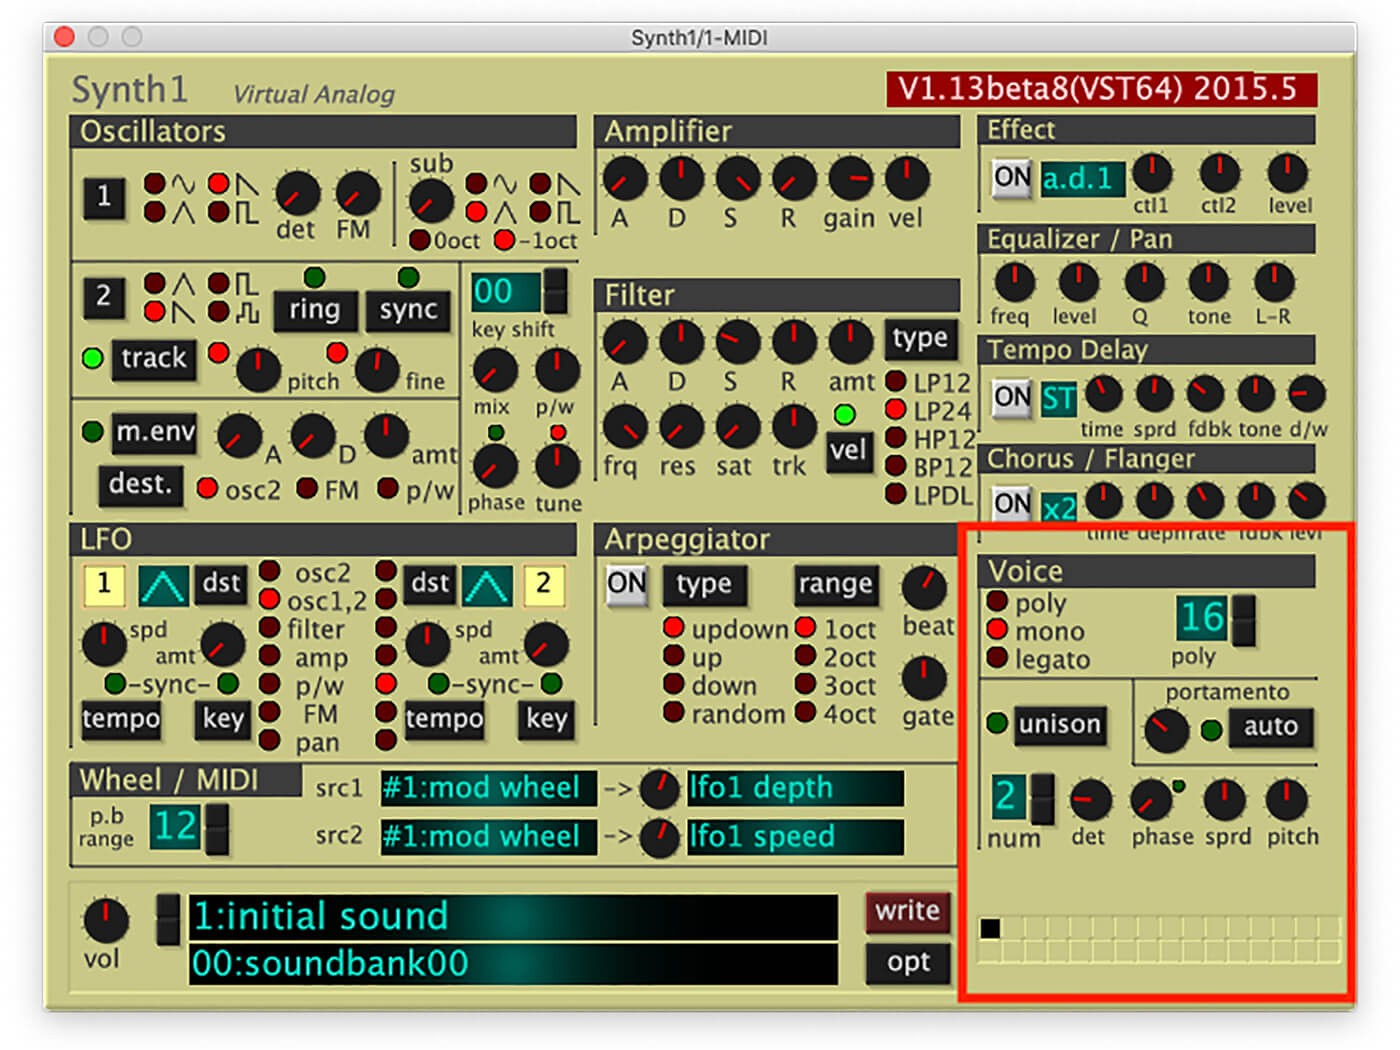
Let’s turn our custom initial patch into a more expressive, playable sound. In the Voice panel, set the playback mode to Mono and turn up the portamento time to 40.
This gives us a G-funk style bendy sawtooth lead, and if we temporarily turn the Tempo Delay back on it’s ideal for making some Summer Madness-style vibes.
Deactivate the delay again, and try switching oscillator 1’s shape to the triangle and sine waveforms. These will give you a more mellowed out G-funk sound in the vein of Warren G’s Do You See.
Switch to the pulse waveform, and turn up the LFO 2 destination amount. You’ll hear the pulse width modulation (PWM) kick in and become more obvious as the value is increased. Set the LFO 2 destination to 66, then turn up the LFO 2 speed (spd).
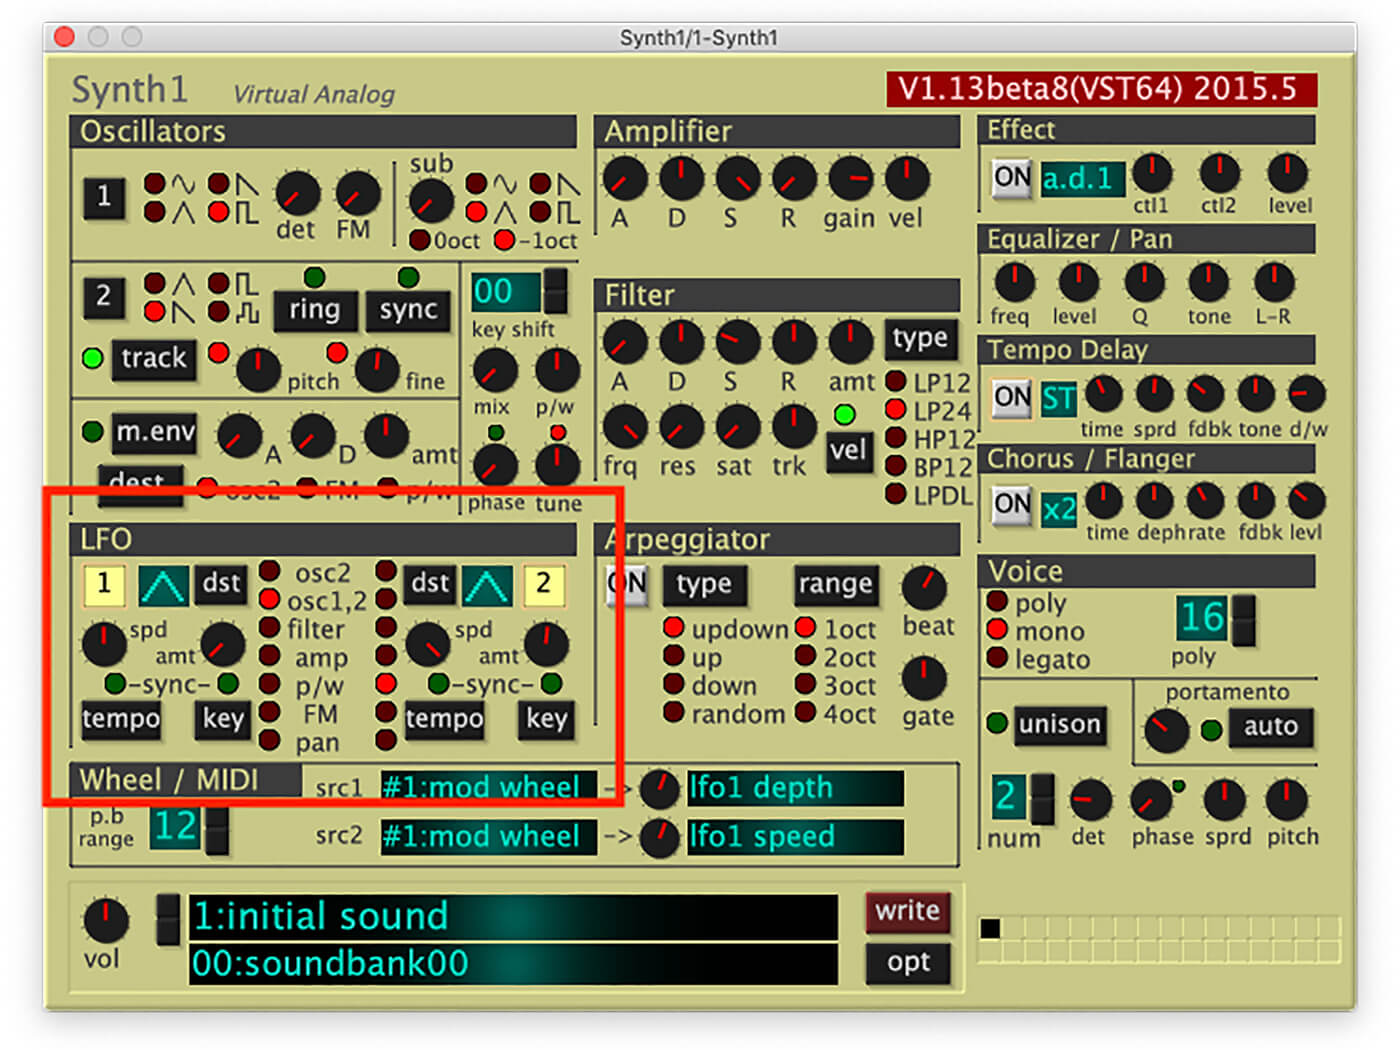
At the high end of its value range, you’ll get some crazy results that vary drastically depending on the key played!
Clearly, this isn’t the most practical patch for playing or sequencing, but if you’re after filthy resampled Reeses it’s got tons of potential. We can make it sound even meatier by turning up the saturation (sat) knob in the Filter panel.

Even though we’re not actually filtering the sound at the moment, the saturation is still applied and it really beefs up the sound.
3. Characterful movement with frequency modulation
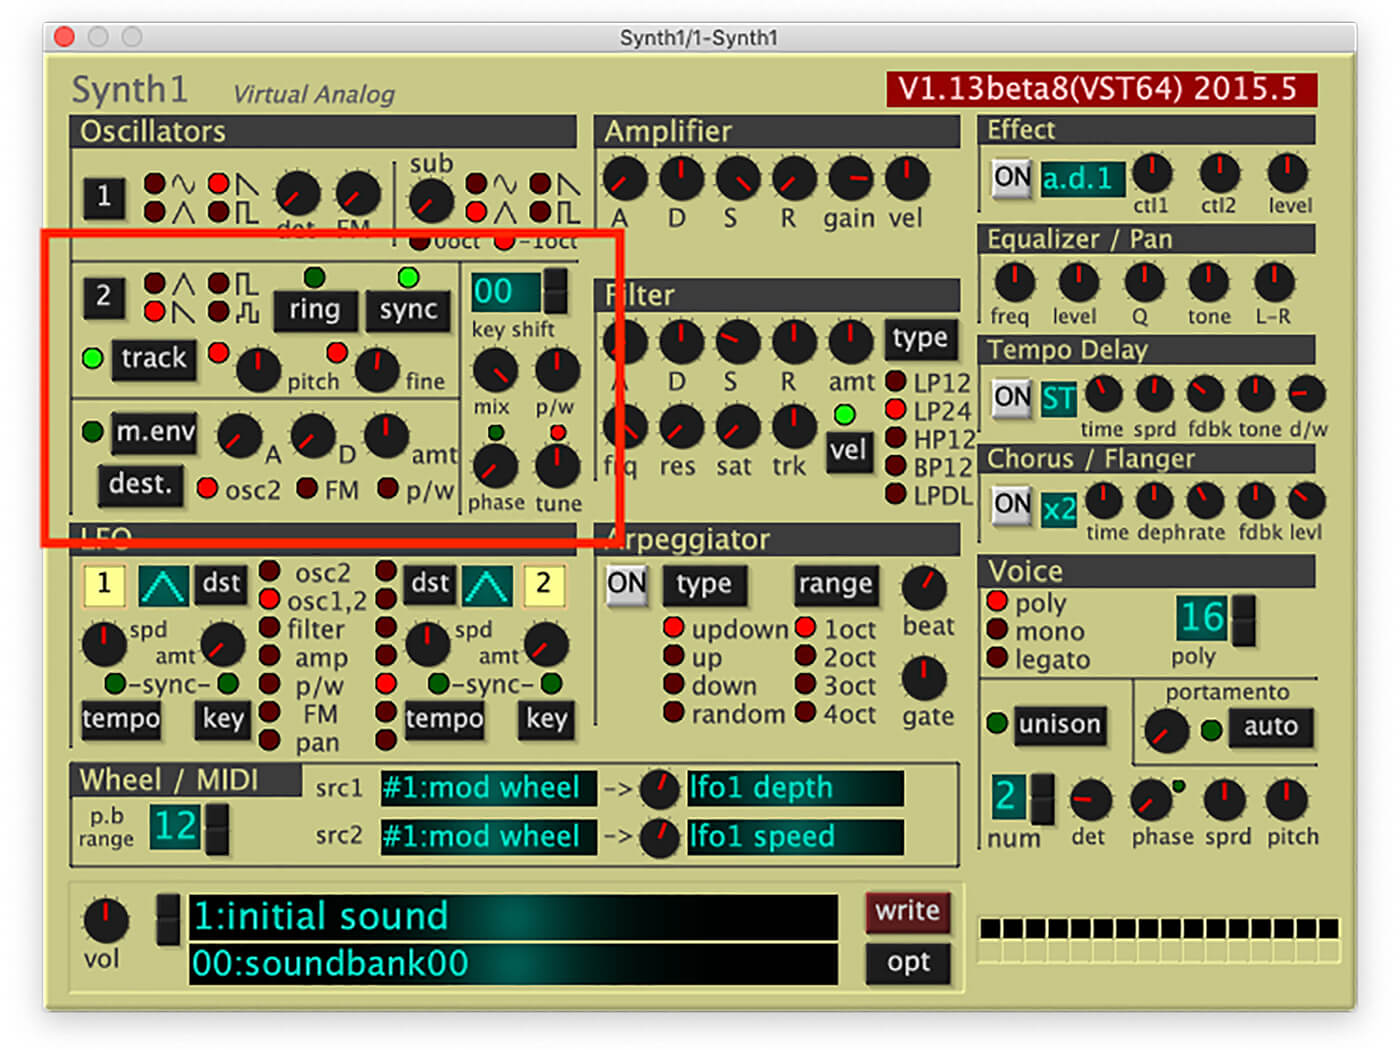
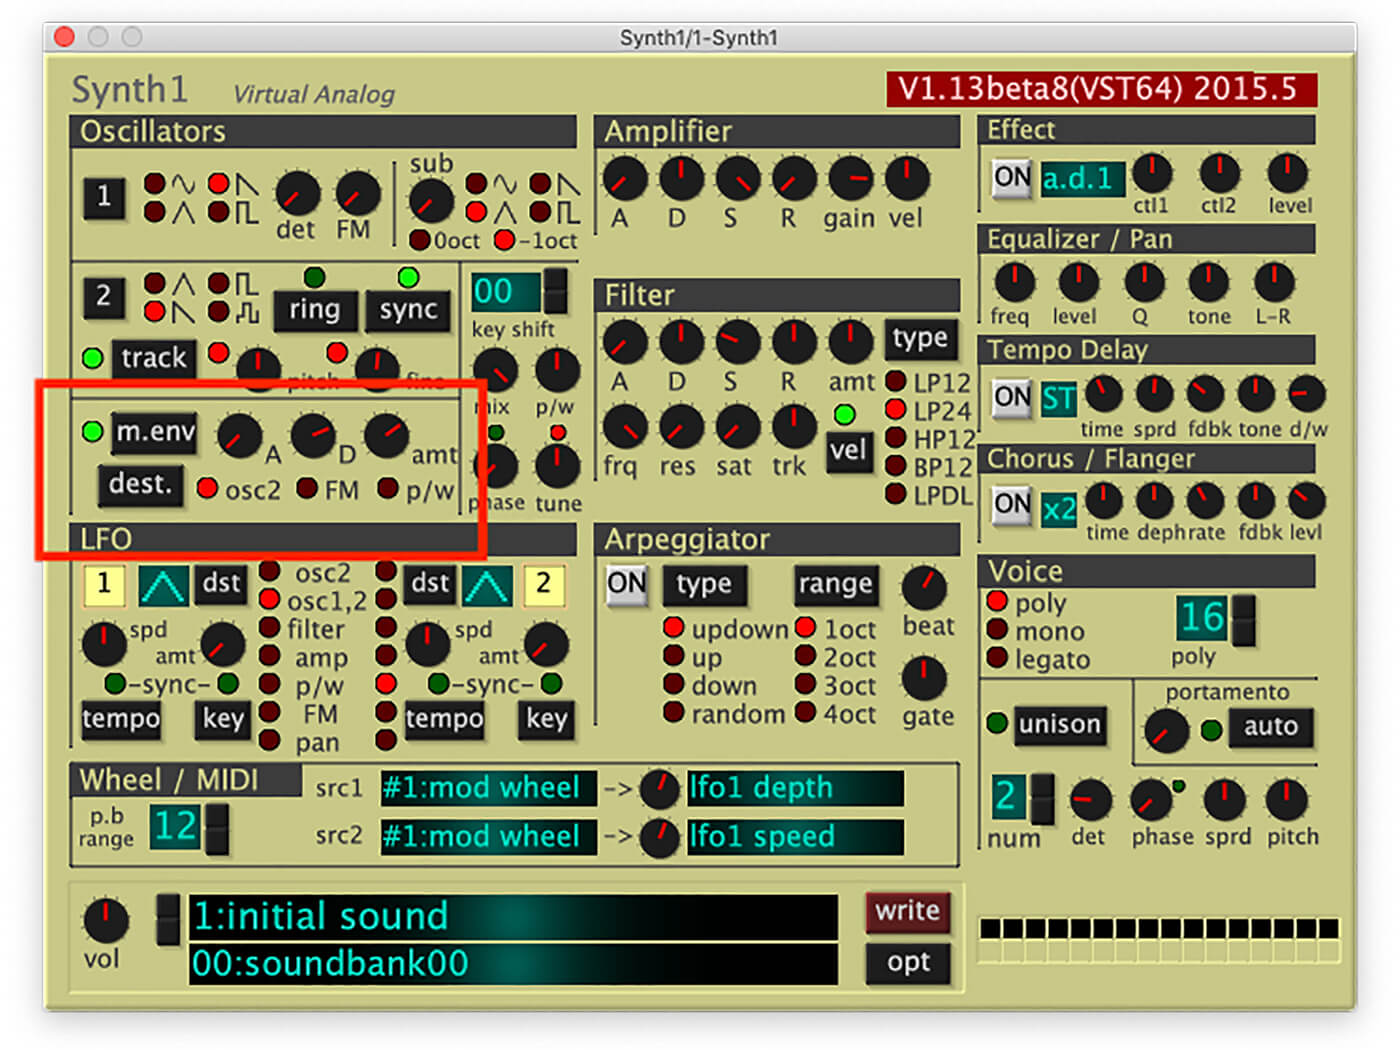
Clearly PWM can have a big impact on the sound, but we can get even more exciting textures with Synth1’s frequency modulation (FM) capabilities. Let’s return to our Init.fxp patch, and set oscillator 1’s waveshape to sine. Turn up the FM knob in the oscillator 1 panel, and you’ll hear the sound become raspier as the value increases. Let’s return the FM value to 0 and modulate it to create a dynamic sound. To do this activate the Modulation Envelope (m.env), and set its destination to FM. Turn up the Modulation Envelope’s decay (D) to 50, and set its amount (amt) to +40.
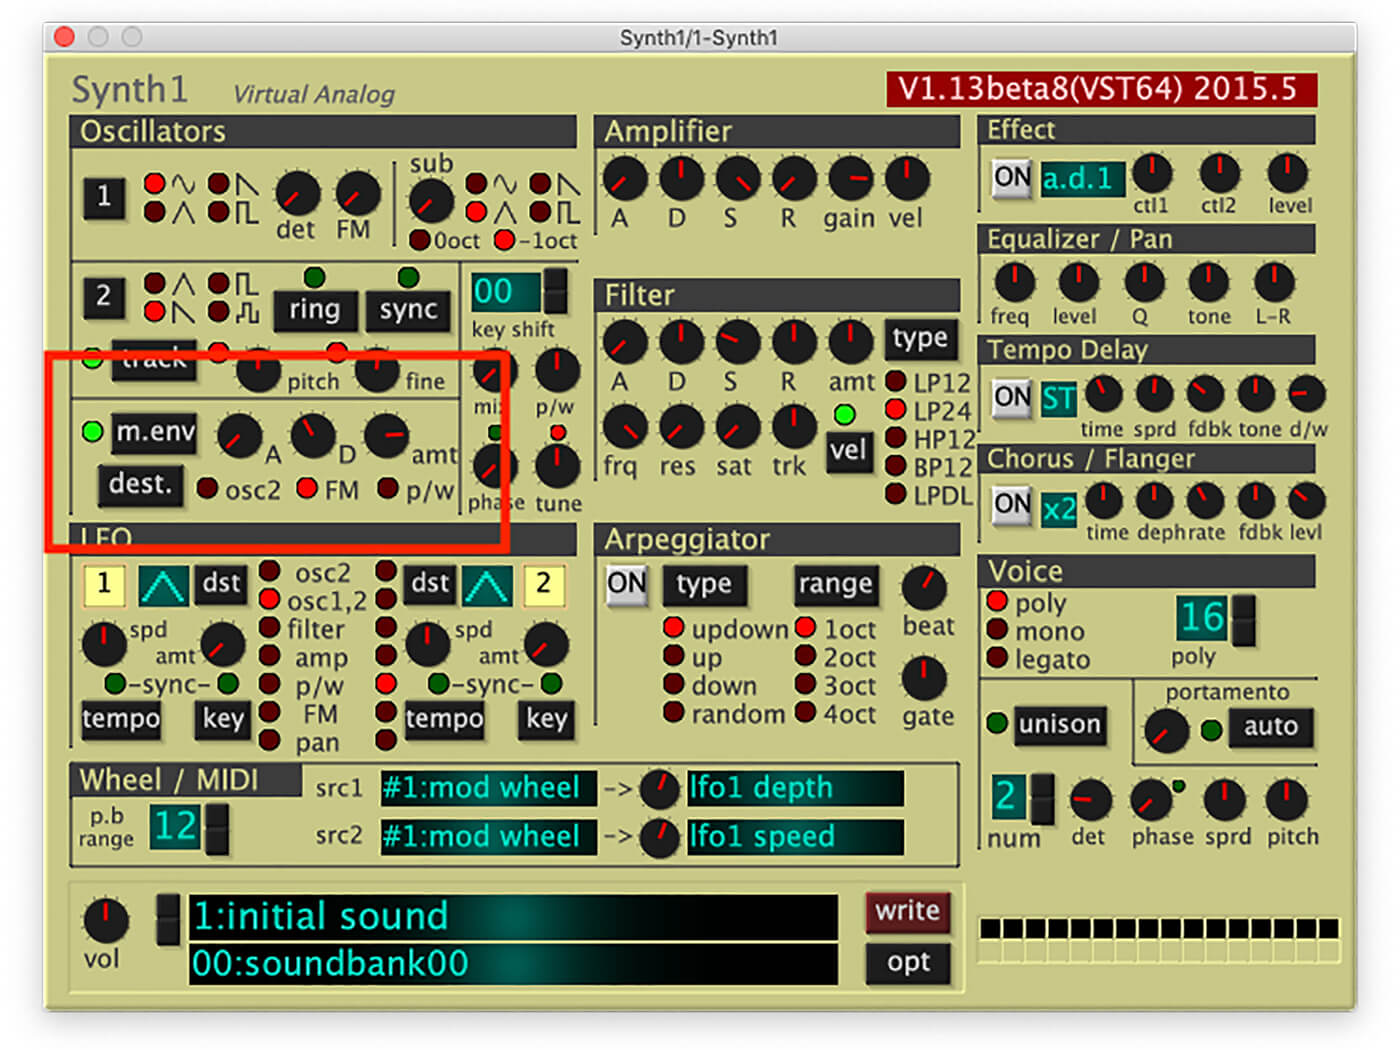
This gives us a simplistic FM sound that’s a bit rough around the edges. Let’s smooth it out a bit by changing oscillator 2 (the modulating source of the frequency modulation) to the triangle shape.
We can adjust the timbre of the FM effect by adjusting oscillator 2’s pitch. Try turning it up to +36 for a digital tine-style effect.
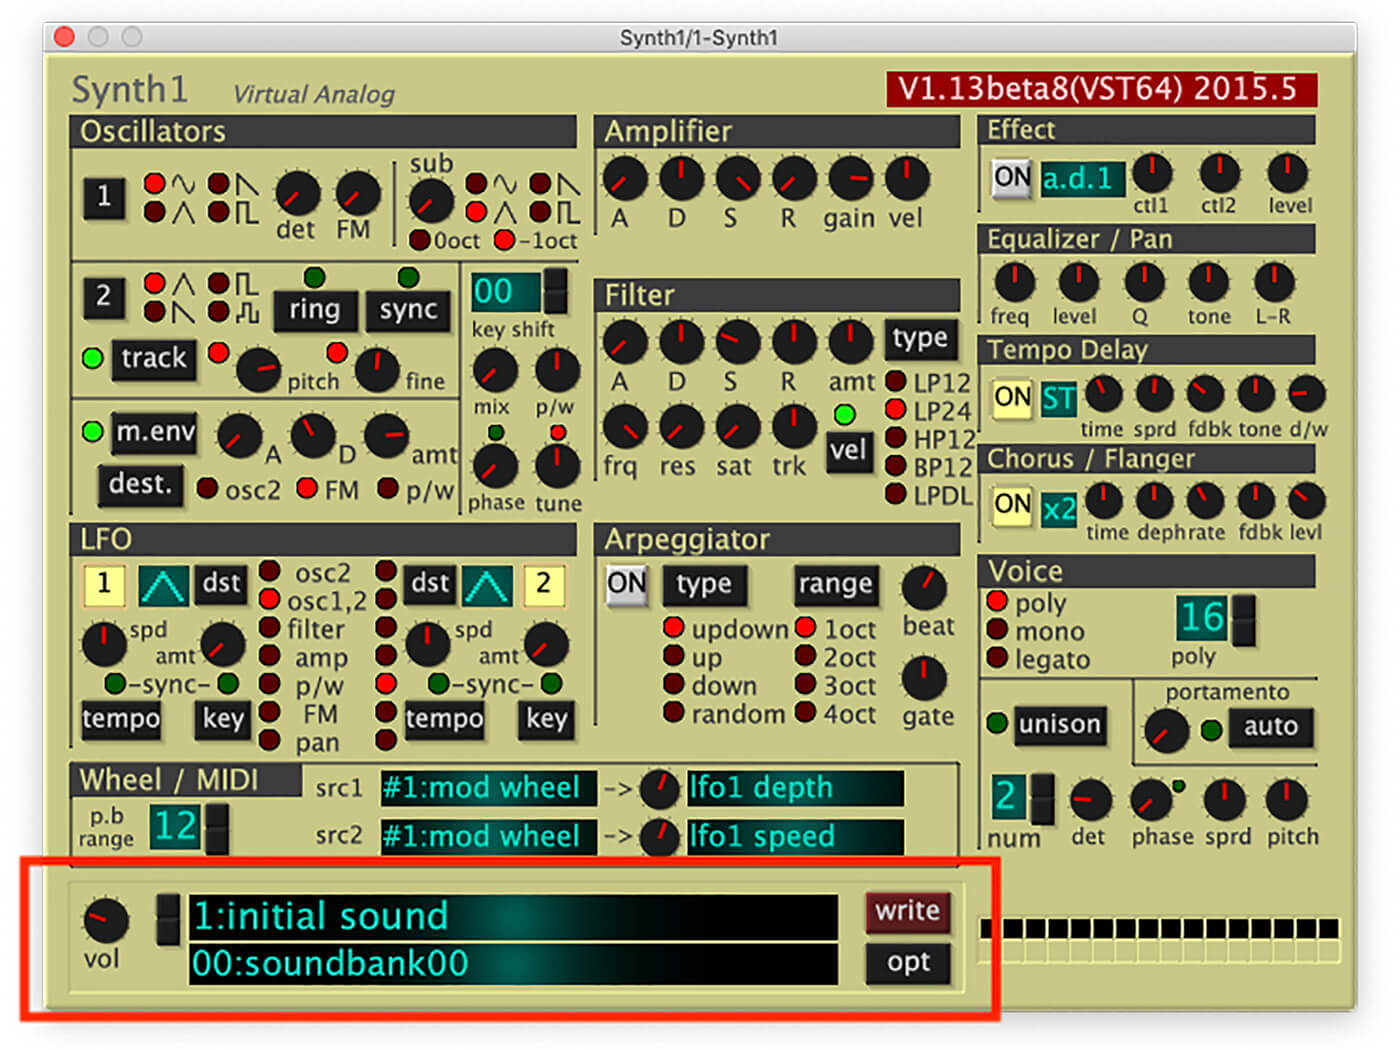
Activating the synth’s Tempo Delay and Chorus / Flanger give us a lush tone, and turning down the master volume (vol) in the bottom left-hand corner of the interface to 30 or so means we can play broken chords without clipping the master.
Try using different oscillator 2 pitch tunings to change the patch’s timbre, and create a variety of effects.
4. Hard sync sweeps
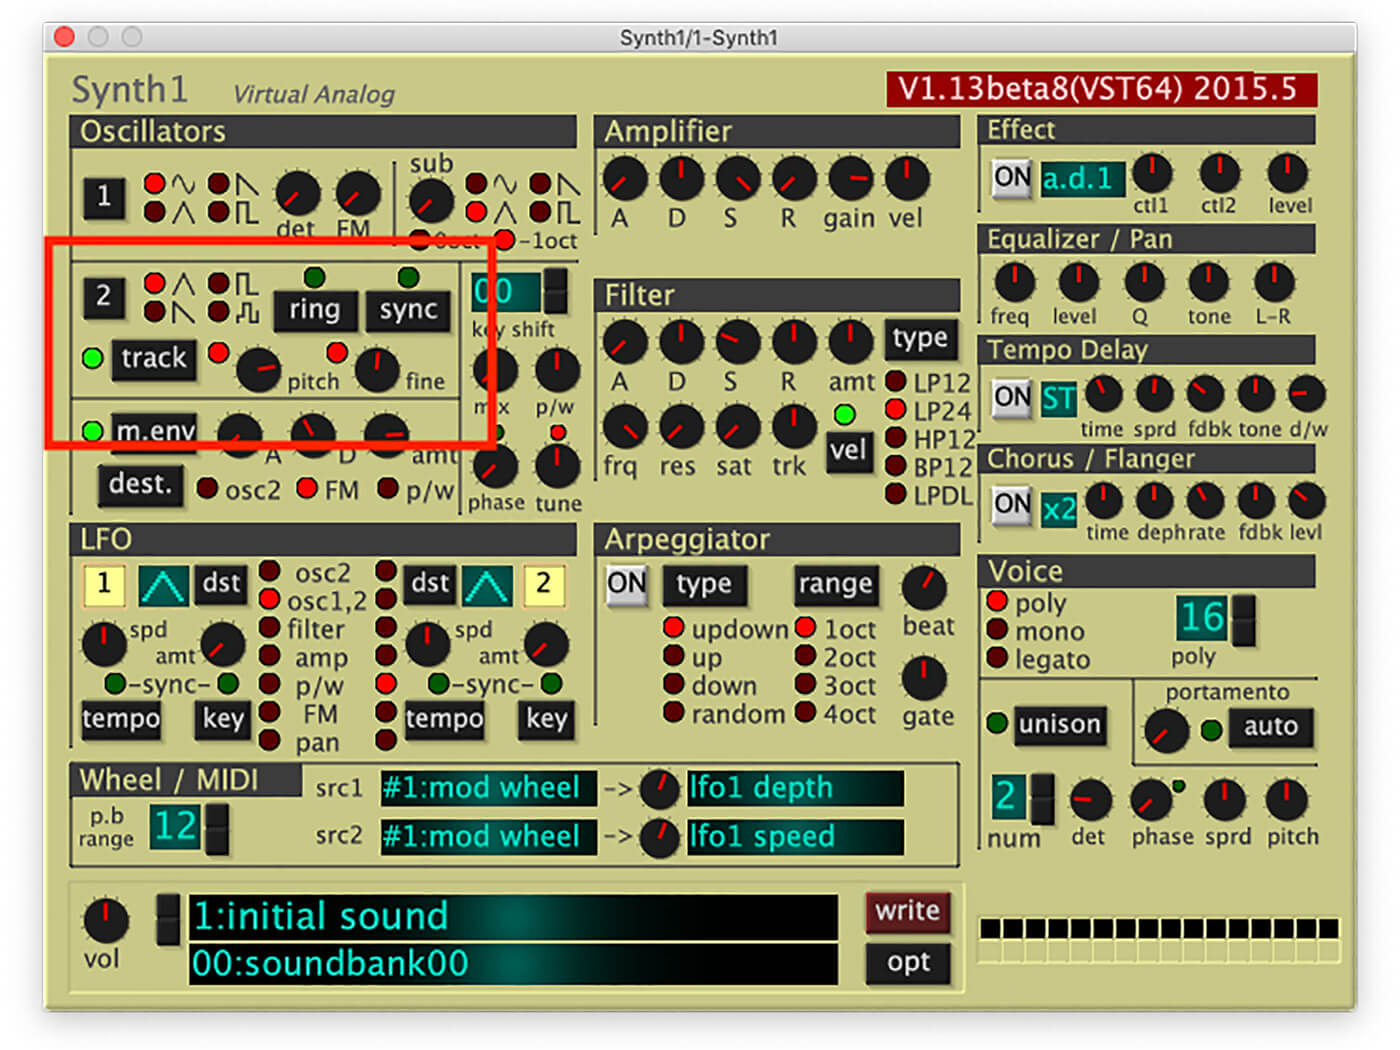
Let’s return to the Init.fxp patch, and this time we’re going to pull a similar trick, this time using Synth1’s hard sync capability. We can sync oscillator 2’s waveform to restart every time oscillator 1’s waveform completes a cycle, perfect for creating a classic lead effect.
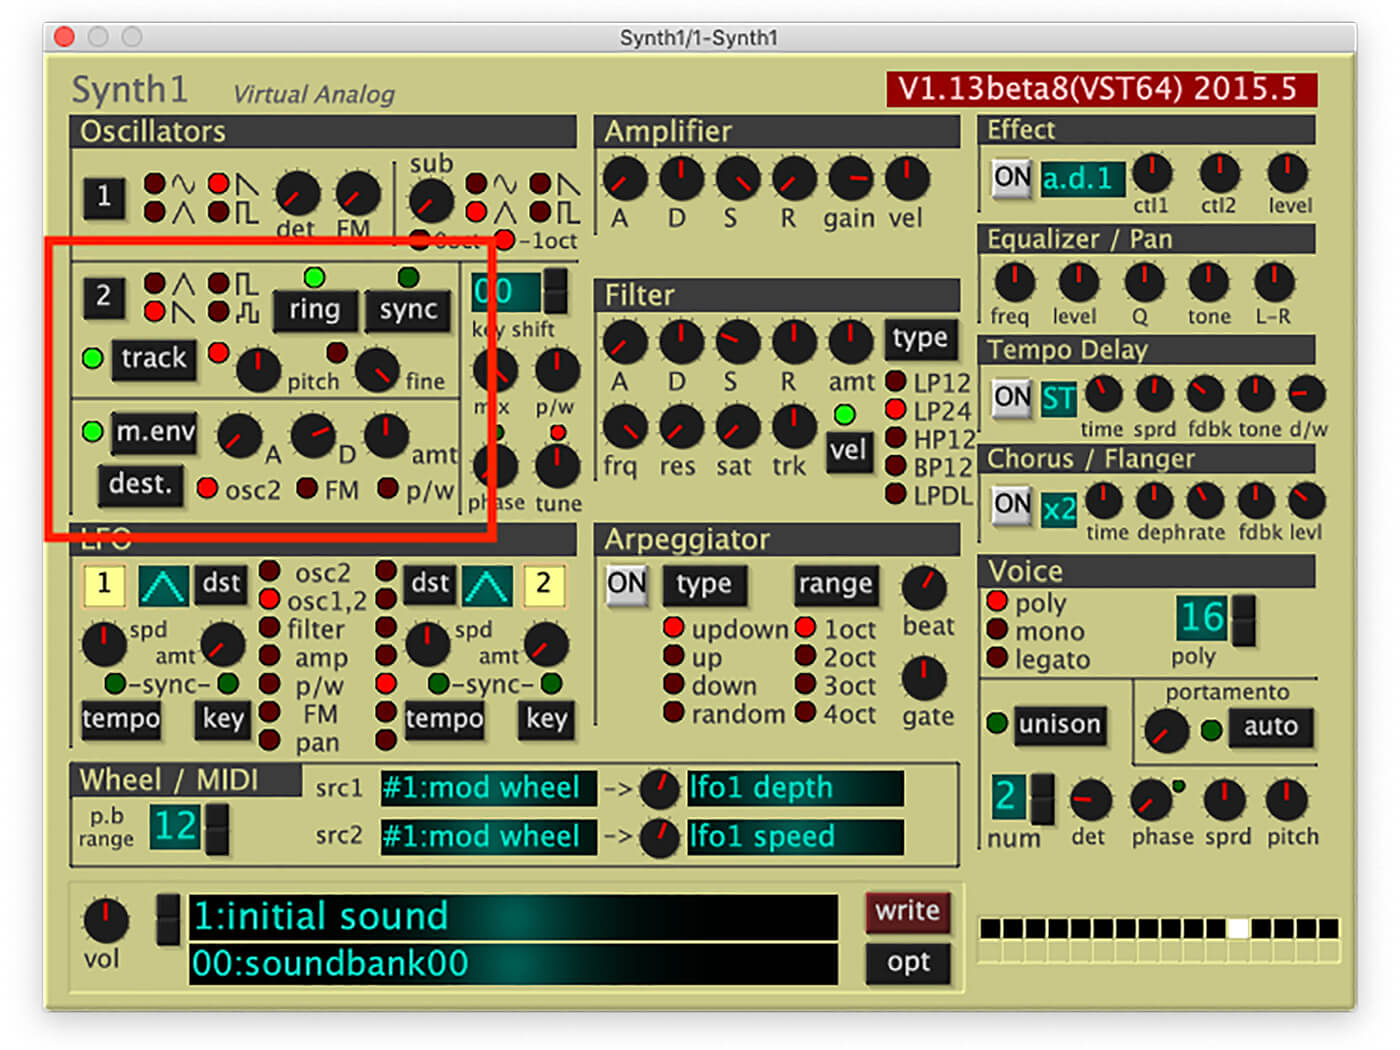
Turn up the mix knob in the Oscillators panel to 0:100 so we just hear oscillator 2, and activate the sync button.
This won’t have an effect on the sound until we adjust oscillator 2’s tuning. Try sweeping the pitch knob while you play a note, you’ll hear that with the sync button activated this results in a change in oscillator 2’s timbre rather than its pitch.
We want to use modulation to create this sweep for us, so return the pitch parameter to 00 and activate the Modulation Envelope. This is already set to modulate oscillator 2’s pitch by default, so we just need to turn up the decay and amount to 95 and +24 respectively.
This gives us a punchy, dynamic lead sound with a unique character as heard in No Doubt’s Just a Girl.
5. More Reeses with ring modulation
If you turn off the sync button and activate the ring button, you’ll hear our hard sync patch turns from a lead into a really crusty, filthy FX sweep.
Turn down the Modulation Envelope amount knob to 00 which stops the oscillator 2 pitch modulation, and turn up oscillator 2’s fine control to +61 cent.
You’ll notice that the more detuned oscillator 2, the faster the sound ‘beats’. As such you adjust the fine parameter to fit the rhythm of this ring mod Reese fits with your project. This sound also works well with saturation, and you can significantly change its timbre by turning up the sat control to maximum.
6. Supersaw superstore
Another trick Synth1 has up its sleeve is the ability to make a half-decent ‘supersaw’. Return to Init.fxp, and click the unison button in the Voice panel. The number below the unison button is the number of unison voices used. Turn this up to 7, then set the detune (det) knob to its right, up to 104. Note that using unison voices will make the synth’s output very loud, so turn down the vol to 20.
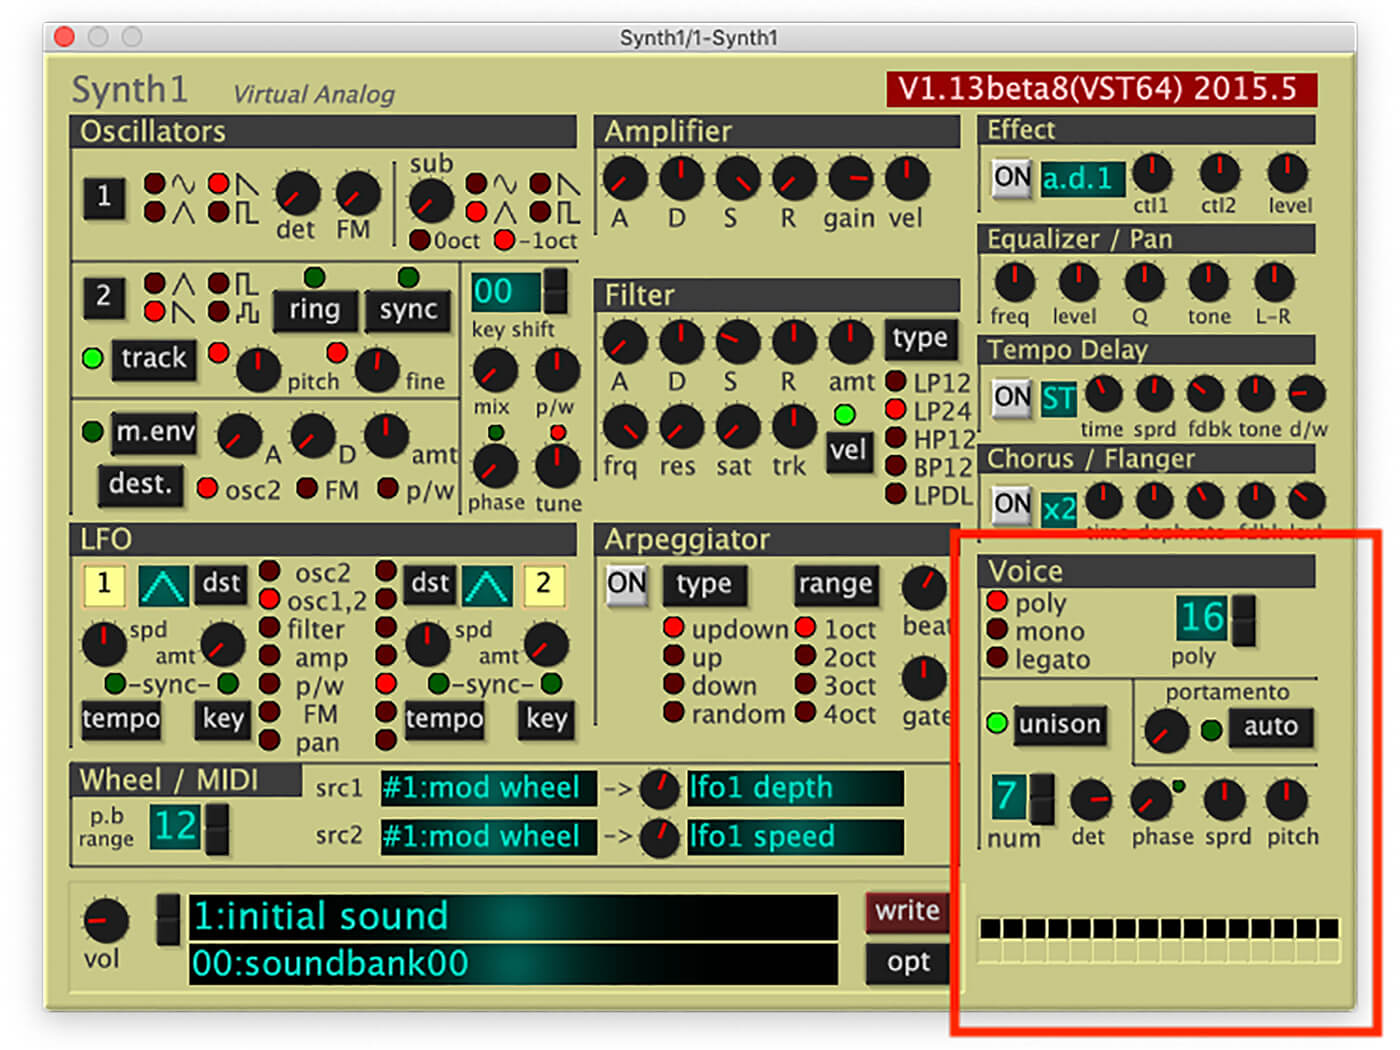
This gives us a fairly chunky supersaw, which we can tailor to our taste with the spread (sprd) and pitch knobs. The phase knob is less obvious, and in fact, it won’t have an effect, until you fix the oscillators’ phase by turning up the phase knob in the Oscillators panel. Set this to 127, then you can use the phase knob back in the Voice panel to adjust the phase between the root unison voice and its detuned buddies. This lets you fine-tune the timbre of the sound, and this is another sound that works well with filter saturation, though you will need to turn down the master volume even further.
Happy synthing!
Let us know how you got on with this workshop and share your lead sounds in the MusicTech Creator Community Facebook Group.
Check out more Weekend Workshops here.