Logic’s Drum Machine Designer In-Depth
Behind the simplicity of Drum Machine Designer is a powerful and ultra-flexible drum production tool. Mark Cousins takes a closer look… Released with Logic Pro X 10.1, Drum Machine Designer was an intriguing proposition by Apple – in part, an accessible and immediate tool for electronic drum production, but also an inventive reimagining of Logic’s […]
Behind the simplicity of Drum Machine Designer is a powerful and ultra-flexible drum production tool. Mark Cousins takes a closer look…

Released with Logic Pro X 10.1, Drum Machine Designer was an intriguing proposition by Apple – in part, an accessible and immediate tool for electronic drum production, but also an inventive reimagining of Logic’s existing Ultrabeat instrument implemented in a completely original way.
For users who are new to Logic Pro X, there’s little doubt that the immediacy and sonic power of Drum Machine Designer – especially when paired with a Drummer track – is appealing, but for an existing user it can seem slightly perplexing, given the existing set of tools. In truth, though, there’s something for everyone to learn and experience, either for new Logic Pro users peeling back Drum Machine Designer’s many layers, or for more experienced users of the software wanting to harness its unique powers.
Designer Drums
Drum Machine Designer was specifically designed as the electronic counterpart to the acoustically inspired Drum Kit Designer, both of which are designed to work with Logic Pro X’s Drummer track system. A Drummer track, of course, lets you construct rhythm tracks with incredible ease and efficiency, letting you specify performance qualities rather than having to program a rhythm from scratch.
Drum Kit Designer was the natural extension to this, giving you complete access to the acoustic kit on a piece-by-piece basis, whether that meant changing the EQ on the kick drum, for example, or swapping different snare drums.
The concept with Drum Machine Designer, therefore, isn’t just to provide you with a virtual drum machine, but also an array of signal-processing options that a professional engineer would apply to each kit element, so as to give the drum machine that elusive ‘punchy’ sound. Load a Drum Machine Designer patch, therefore, and you’ll actually add 30 or so channel strips into your mixer, complete with a range of associated plug-ins for each strip.
Creating the same configuration in Ultrabeat is possible (indeed, Drum Machine Designer is actually powered ‘under the bonnet’ by Ultrabeat) but it does necessitate extensive rerouting as well as adding a host of additional plug-ins.
Whether you’re a new user, therefore, or somebody used to Logic’s workflow, the key to really understanding Drum Machine Designer is to look closely at its implementation, noting how its various elements relate to Logic’s mixer.
Understanding this interaction ultimately gives you more control: whether that’s something as simple as changing the kit’s reverb for a plug-in of your choice, or even replacing Drum Machine Designer’s included content with samples of your own.
Kit Piece
The first part of understanding Drum Machine Designer is to look at how it appears in the mixer. On the uppermost level we see the instrument itself with a collection of plug-ins instantiated across its insert path. These plug-ins affect the entirety of the kit, often starting with a Multipressor for extra loudness, and the Compressor to give the kit some extra ‘mix glue’.
Expand the instrument (using the small arrow at the bottom of the channel fader) and you’ll see a series individual output channels for each part of the kit, each with their own set of associated insert effects.
Slide the mixer along, and you’ll see that the individual parts of the kit are then summed to a series of six busses, each with their own set of compression and EQ settings, as well as sent to an instance of Delay and Reverb.
The busses represent the instrument groups – usually kick, snare, hi-hats, two percussion groups and the cymbals – letting you easily rebalance the ‘macro’ elements of the kit, as well as make any changes to each of the individual components.
The Grid
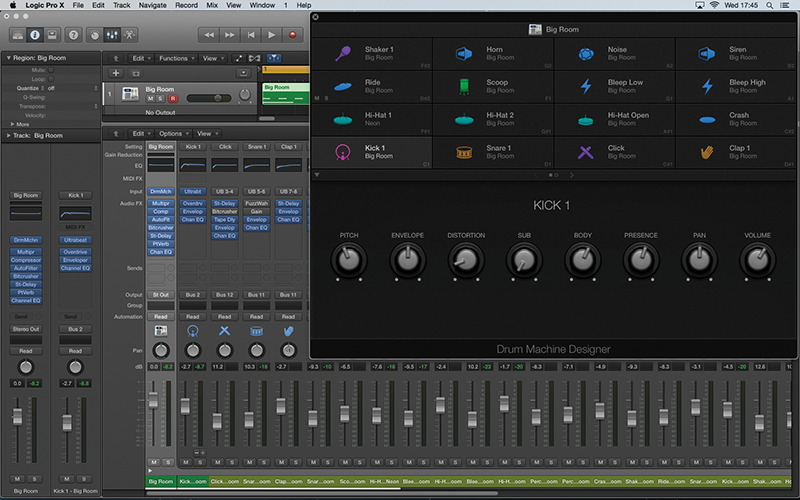
The elegance of Drum Machine Designer is that the main GUI lets you control a complex routing and FX setup with relative ease. Clicking on each grid’s cells lets you investigate each part of the kit – either swapping out different samples (using the Library as a means of navigating the different kit piece samples), or adjusting a selection of key parameters that, in turn, control the plug-ins inserted across the individual instrument channels.
Rather than having to hop between multiple plug-in windows, therefore, you can simply dial in more Body, for example, or add a touch of Distortion.
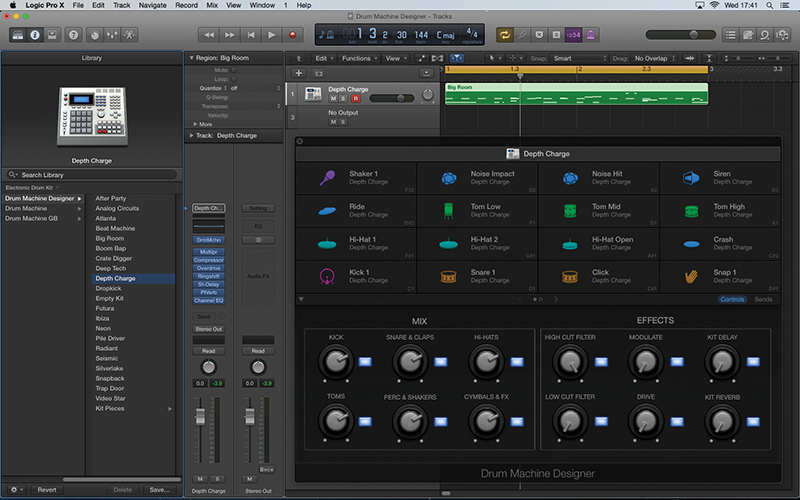
Clicking on the top on the instrument’s name in the top of the plug-in window gives you access to the macro options, split between a Controls and Sends window. On the Controls level, you can access the relative levels of the grouped kit’s pieces (kicks, snares, hi-hats and so on), as well as an Effects area that lets you quickly insert a range of effects (including filters, delays, bitcrushers and reverbs) across the kit as a whole.
By contrast, the Sends window lets you apply reverb and/or delay to specific groups of the kit so, for example, all the snares could be sent through to reverb, while the cymbals have a small touch of delay.
The Beat Goes On
Opening up the various layers of Drum Machine Designer can be a little like opening Pandora’s Box, but what it offers is an almost unrivalled amount of flexibility, as well as a ‘release quality’ output from the moment you load the plug-in. Take a look through the walkthrough to see how Drum Machine Designer’s various parts can be tweaked to your liking, allowing you to explore the scope of the instrument rather than just wade through its presets.
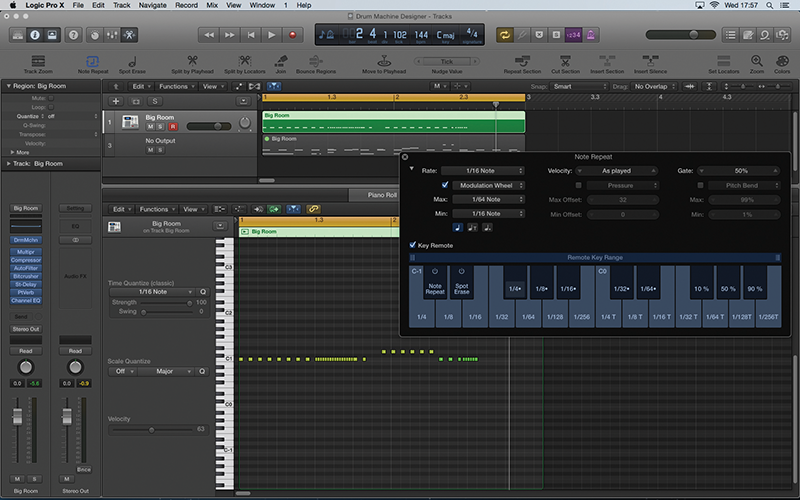
As well as Drum Machine Designer, we’ll also explore Logic Pro X’s Note Repeat and Spot Erase functions. These new features are designed in tandem with Drum Machine Designer and make it quicker and easier to program complex machine-like patterns from just a few simple keyboard moves
Importing Your Own Samples
There’s a wealth of content to get you started with Drum Machine Designer, but sooner or later, you’ll want to start creating your own kits. For a completely blank starting point, consider loading the Empty Kit preset.
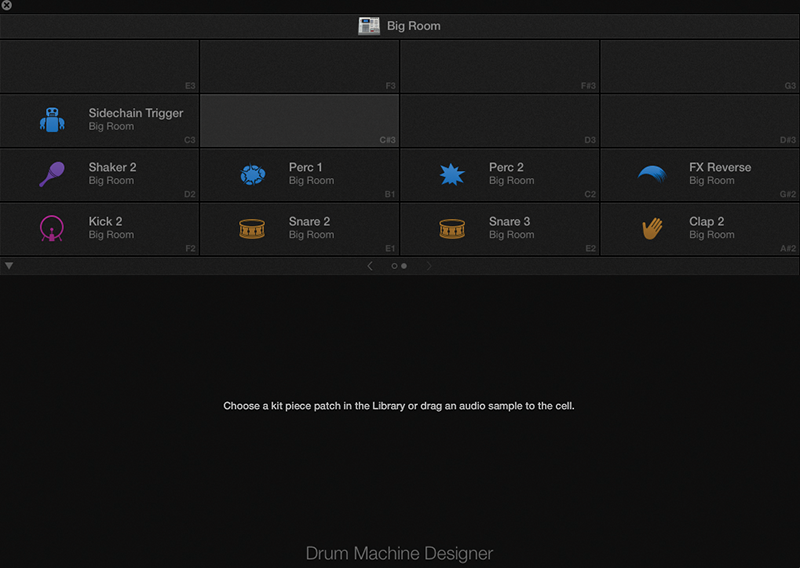
To import samples, simply drag-and-drop directly onto Drum Machines Designer’s grid, noting how Logic will also create corresponding mixer channels for each sample you add. Another alternative is to customise an existing kit.
With an existing kit, try Ctrl-clicking on a cell and selecting Clear Cell from the drop-down menu to erase its current contents. Samples are played back at pitch, but you can use the Pitch and Pitch Fine controls for creative re-tuning of the samples.
Step by Spep – Mastering Drum Machine Designer
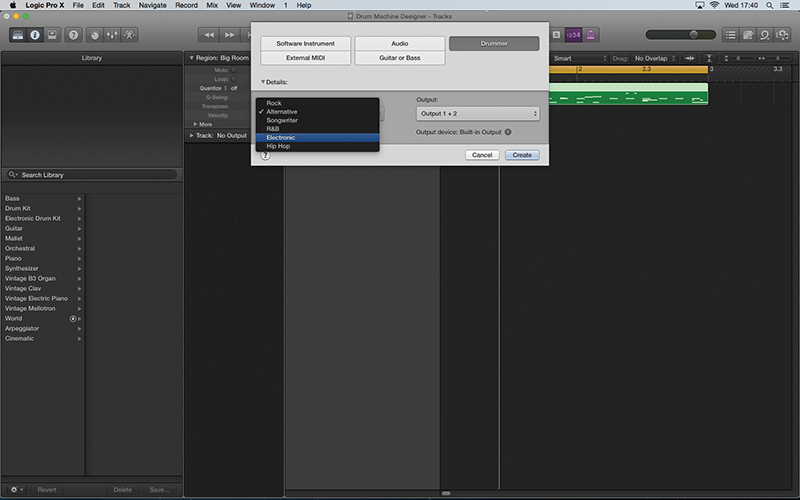
1: There are two ways of opening Drum Machine Designer. One approach is to create a new Drummer track and select one of the Electronic genres (R&B, Electronic or Hip Hop). Drummer is a great option if you want a quick solution to pattern programming.
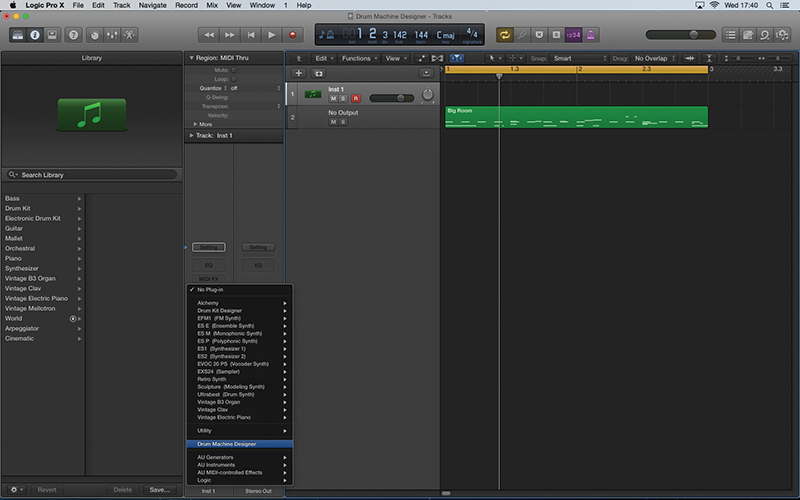
2: If you’re happy to program your pattern from scratch, consider using the Instrument slot as part of the channel mixer to instantiate Drum Machine Designer. The patches use a lot of plug-ins, so you might need to be patient while it loads.

3: From the Library window you should be able to browse the 20 or so different kits that are included with Drum Machine Designer. You can quickly audition the individual sounds by clicking on the respective grid cells, or playback our included MIDI region.
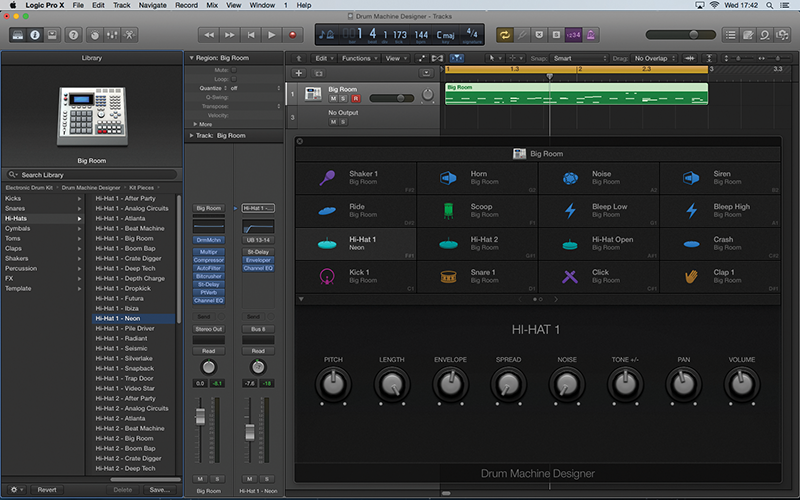
4: When you click on any of the grid elements, you should find that the Library updates to display the other pieces available from the alternative kits. This makes it easy to assemble a hybrid kit by mixing-and-matching kit pieces.
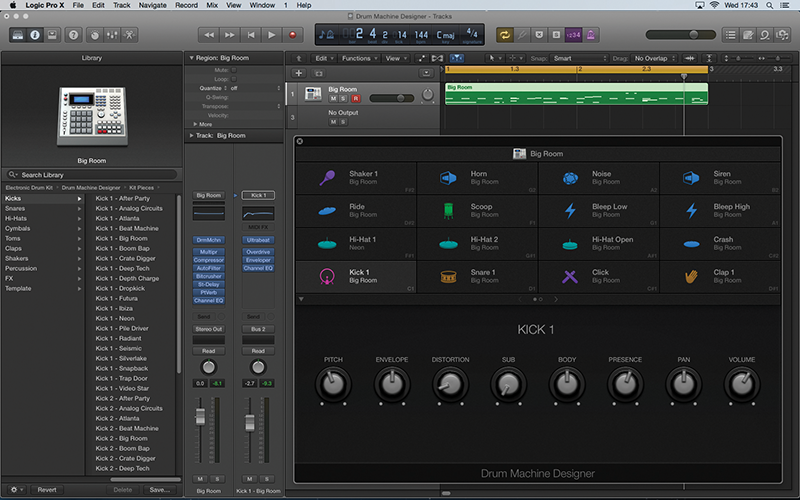
5: On the lower pane, you’ll find individual controls for each of the kit elements: these include Pitch, Volume, Distortion and instrument-specific controls like Body and Presence. Note how the precise set of controls varies between each of the grid cells.
6: Open the mixer area and expand Drum Machine Designer using the small arrow at the bottom of the channel strip. You can now see what these cell-specific controls relate to. Try changing the Body, for example, while looking at the EQ overview.
Click Here to Continue
This tutorial is endorsed by Point Blank. With courses in London, online and now in LA, Point Blank is the Global Music School. You can study sound to picture on their Music Production Diploma courses, with pro industry tutors.
