How to perform with Live Loops in Logic Pro X 10.5
Though they’re terrific for transforming studio-based productions, Live Loops are equally powerful when used for live performance. We demonstrate how this effective feature can take tracks from the studio to the stage.
Live electronic music, built either from loops or via pre-programmed sequences, sees artists adopt a range of onstage approaches. Some simply use their DAW as little more than a playback device, perhaps adding a few ‘live’ instruments, tweaking the mix or making judicious use of the filter cutoff knob.
Thanks to tools such as Logic Pro X’s recently added Live Loops though, more ambitious musicians have taken a more interactive slant, whereby their DAW effectively becomes an instrument in itself, with a series of musical cells triggered on the fly. Creatively, this means tracks can be as long (or as short) as the performer desires, with components of the song brought in and out in response to the audience’s reactions.
What we’re exploring in this workshop, therefore, is how to reverse-engineer a track from Logic’s linear timeline to the non-linear Live Loops grid, as well as creative ways of triggering and rearranging your songs live on stage. If you’re less interested in live performance, this tutorial should still provide a valuable insight into the Live Loops workflow and, in particular, how you can move between the two parts of the application.
Going live
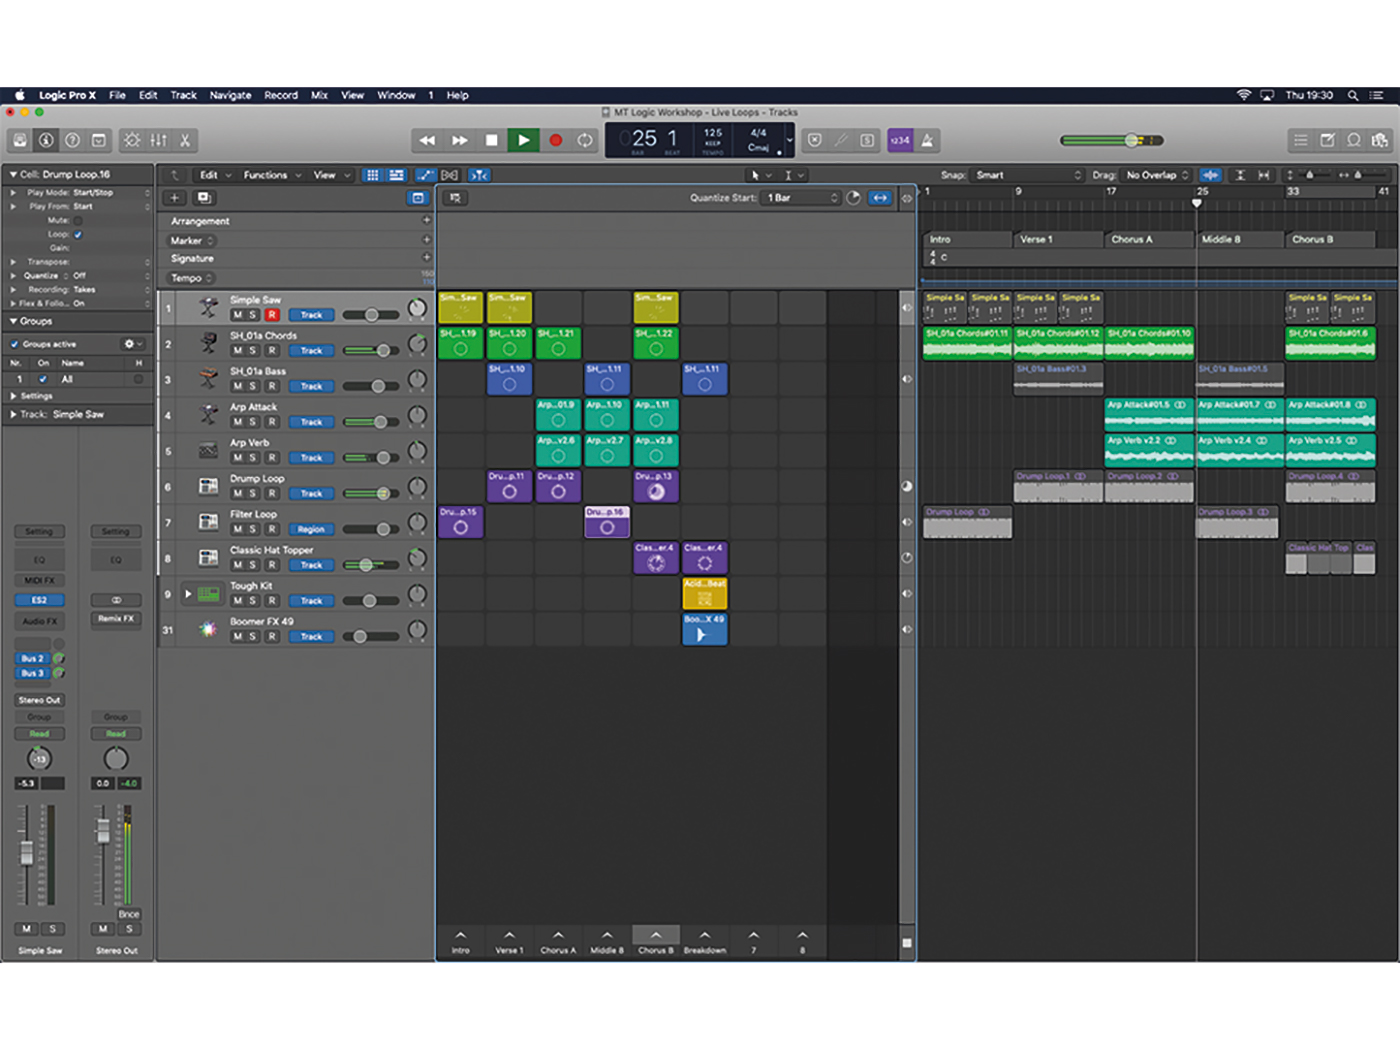
The Live Loops concept is based around the notion of cells, arranged vertically and horizontally across the screen. Each cell contains some form of musical information – an Apple Loop, an audio recording or a MIDI sequence – that can be triggered and looped indefinitely. The horizontal axis of the cell grid aligns with Logic’s tracks system so, while you can have multiple cells across the grid, only one can play from a given track at any one point. The vertical axis represents a series of scenes, which is a convenient way of triggering multiple loops at the same time.
The marvellous thing about Live Loops is the way you can trigger and structure complex collection of cells with ease. In a conventional sense, you could simply trigger your song scene by scene so that you step incrementally through a verse, chorus or middle-eight structure, for example. What’s interesting though, is that you’re not restricted to playing only the loops from within the scene, as any one of the cells can be triggered at any stage. This makes it possible to juxtapose disparate components of your track, perhaps taking a hi-hat from the chorus, for example, and cutting it into a verse.
Battery cell
The principle task in reverse-engineering a track for Live Loops is dividing an existing example into a series of loopable regions and then populating these cells accordingly. Although there’s a lot of similarity between the two production environments, there are differences between the two domains. For example, Track-based automation will need to be converted to Region-based automation if you want parameter moves to exist within a cell. You can also use the Live Loops workflow to augment your track, perhaps by adding new loops for additional breakdown sections or recording new MIDI/audio cells.
From a performance perspective, it makes sense to use Live Loops either with Apple’s own Logic Remote or with Novation’s Launchpad, largely because these controllers allow you to trigger multiple loops (across scenes) at once, rather than the single-cell point-and-click clumsiness that comes with a mouse. Remix FX is another terrific facet of Logic Remote, designed to work across the main stereo bus and provide DJ-like sonic treatments.
Full circle
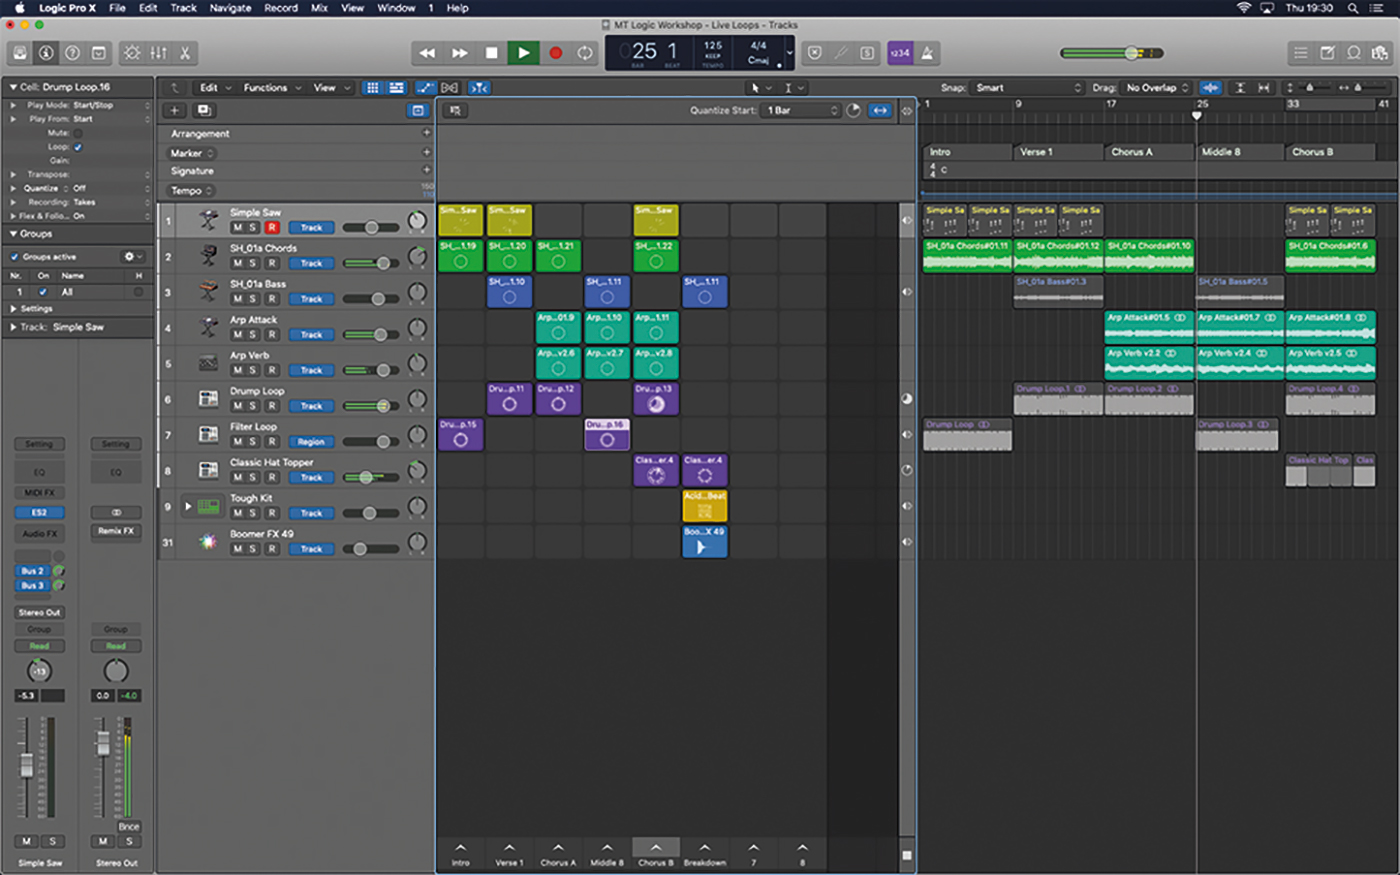
It’s worth getting to grips with the relationship between the Live Loops grid and the main Tracks area too. The divider at the top of the window allows you to switch between active areas, so that you can quickly flick between working in the traditional linear fashion and in the loop-based workflow. But this switching can also be applied on a track-by-track basis. From a live perspective, this allows you to have some tracks, such as the vocals, running from the linear timeline, while others run from the loops grid, with components able to be dropped in and out of both.
Another example of potential cross-presentation interactions is the option to record the output from the Live Loops grid back into Logic’s Tracks area. This may not be something you do on stage but it illustrates how Live Loops can make your approach to arrangement in Logic Pro X more performative – in effect, your studio becomes the stage. If you do attempt this, try saving your song as an Alternative (File > Project Alternatives > New Alternative) before you clear regions from the Tracks area. That way, you can always return to the original version of the song should anything go wrong. Once recorded, you can refine or develop the performance using Logic’s linear-arrangement tools.
Hopefully, this workshop shines a light on the relationship between Logic’s Live Loops and Tracks areas, and how you can effectively move music between the two domains. Live Loops blurs the lines between the studio and stage, Master its machinations and you might find that Logic Pro X is the perfect tool for your modern production and performance needs.
Performing with Live Loops in Logic Pro X: step-by-step
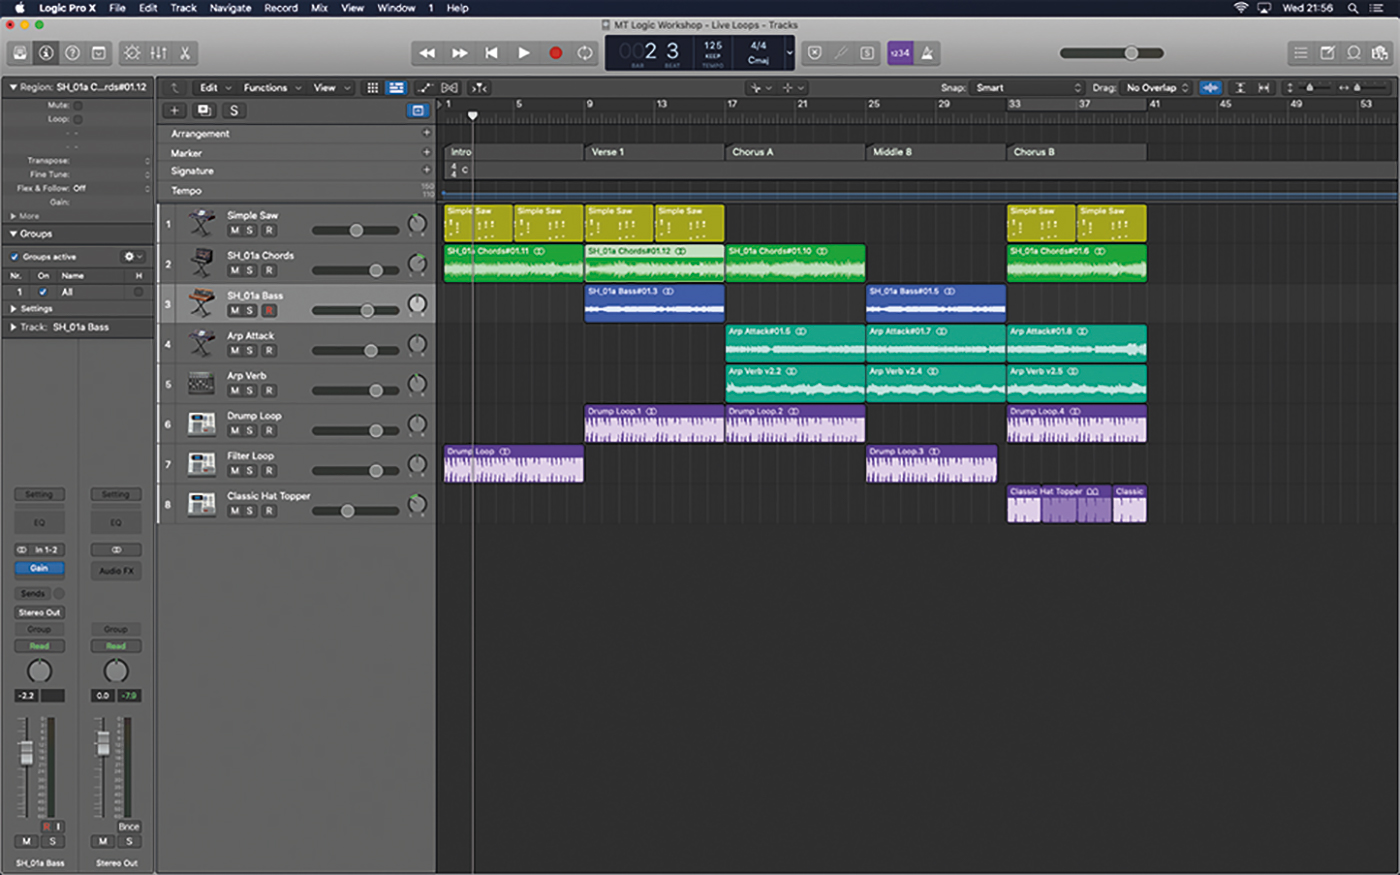
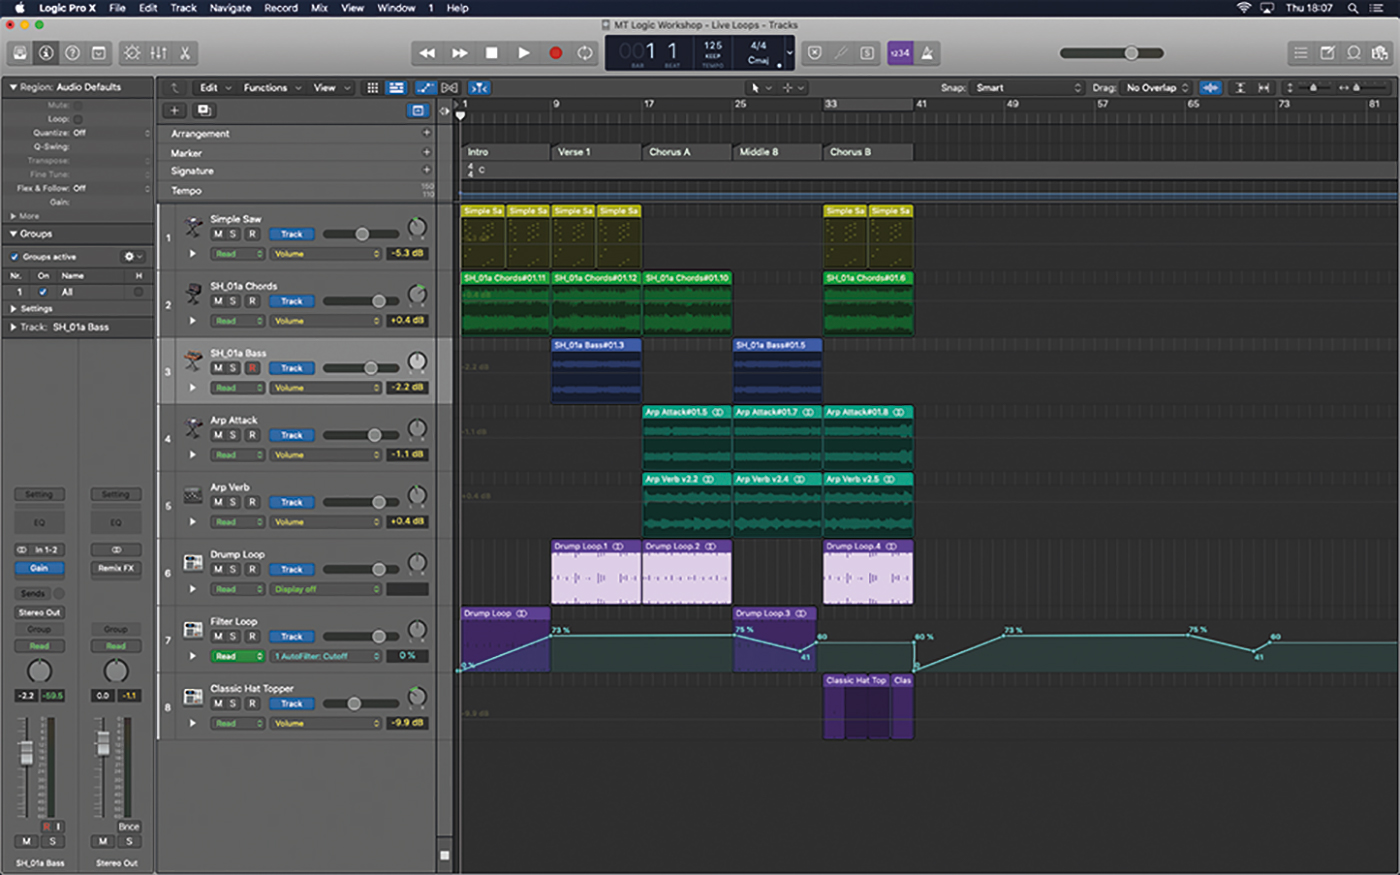
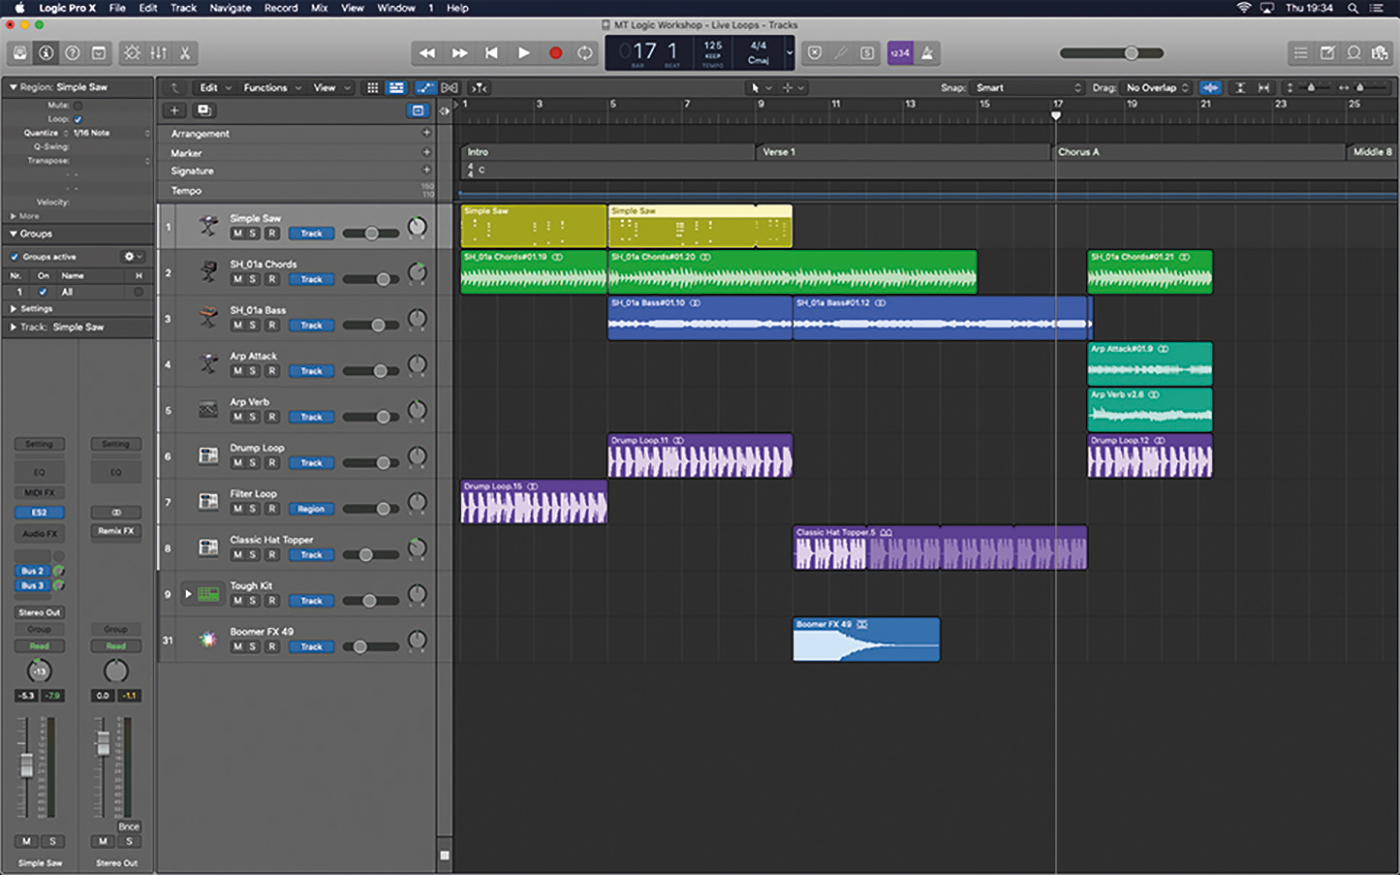
1. Our starting point is basic arrangement in the Tracks area. To prepare the project, edit the audio regions so that they all fit within the structure of the song as defined by the markers (Intro, Verse, etc).
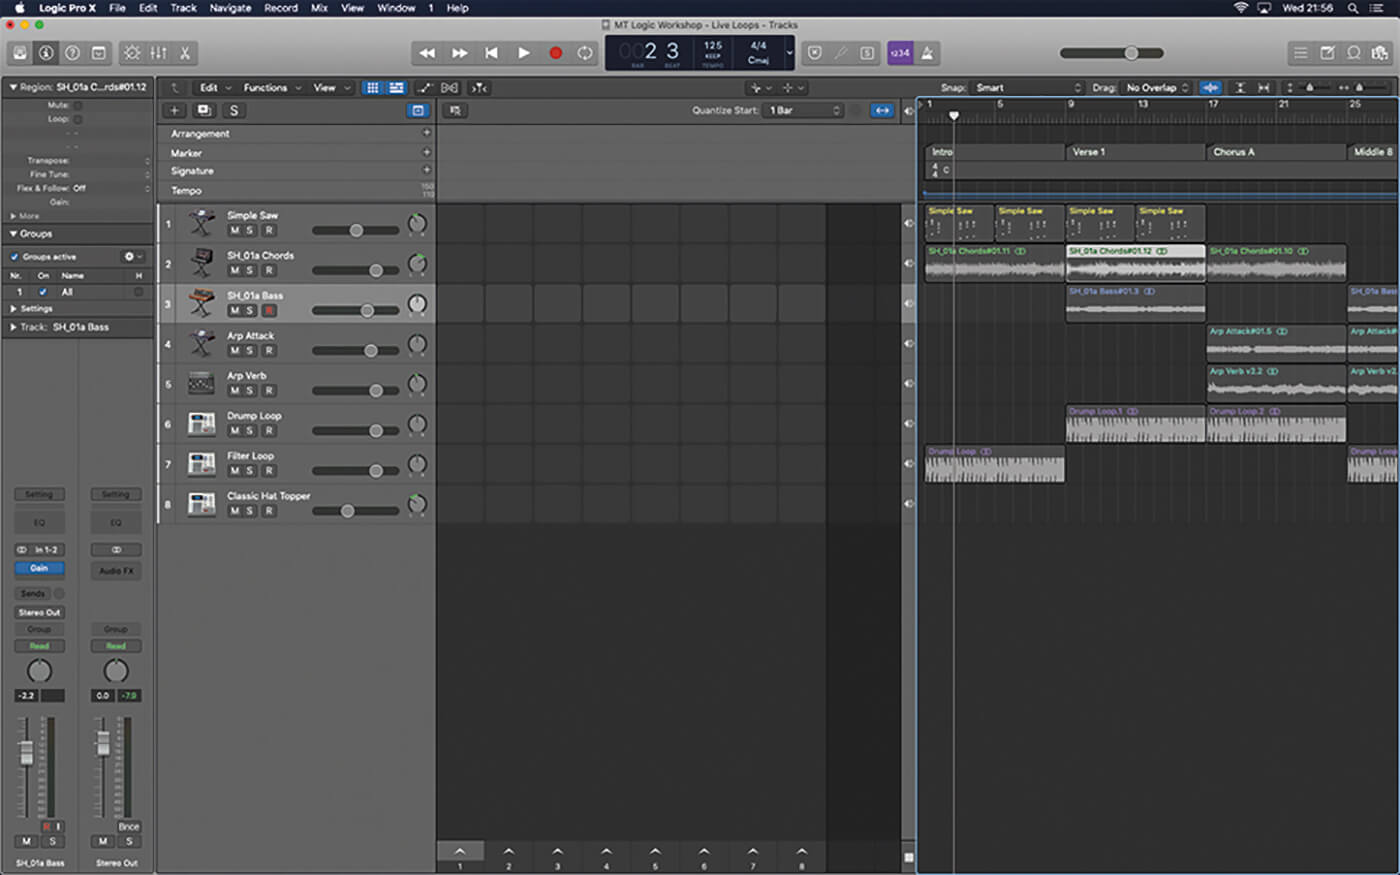
2. Open the Live Loops grid using the Show/Hide Live Loops button in the Tracks Area menu bar. The screen is now divided into two zones, one for the Live Loops grid, the other for the Tracks Area.

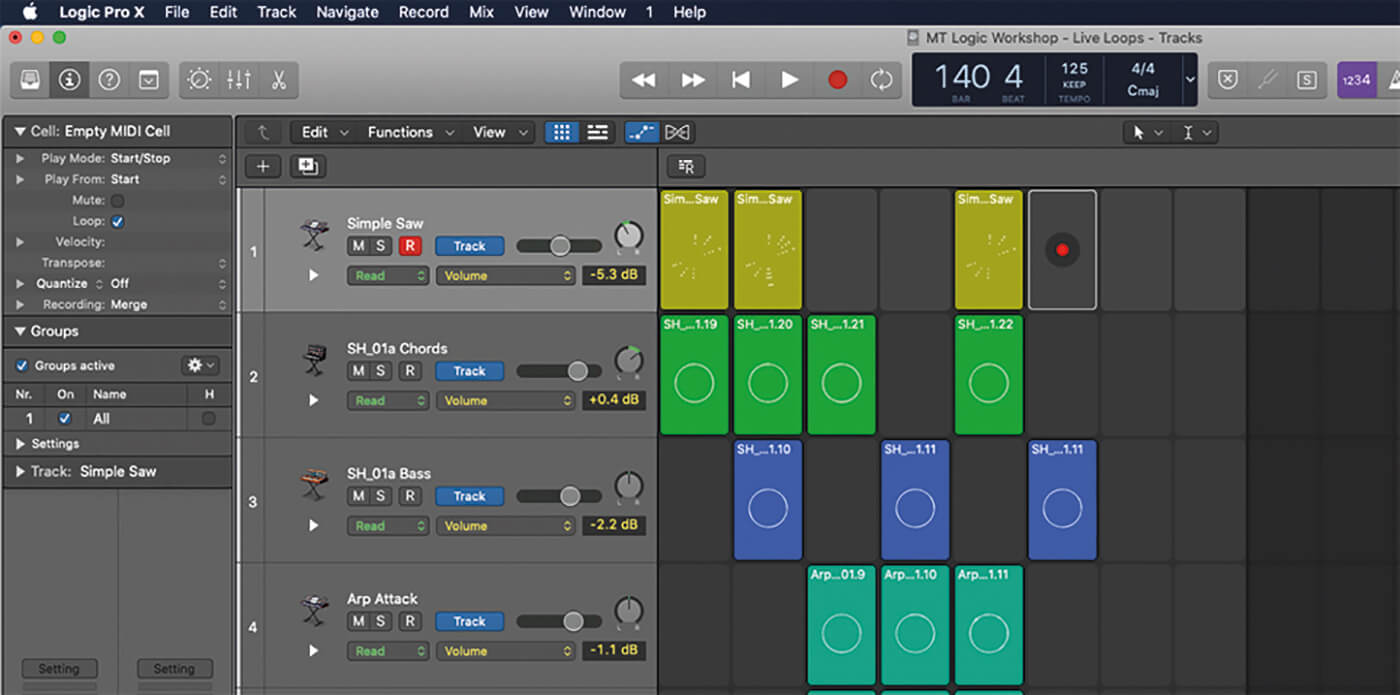
3. Drag across a MIDI region from the first track, from the Tracks Areas to the first cell in the Live Loops grid. Click the top of the divider to ensure that the Live Loops grid is active.
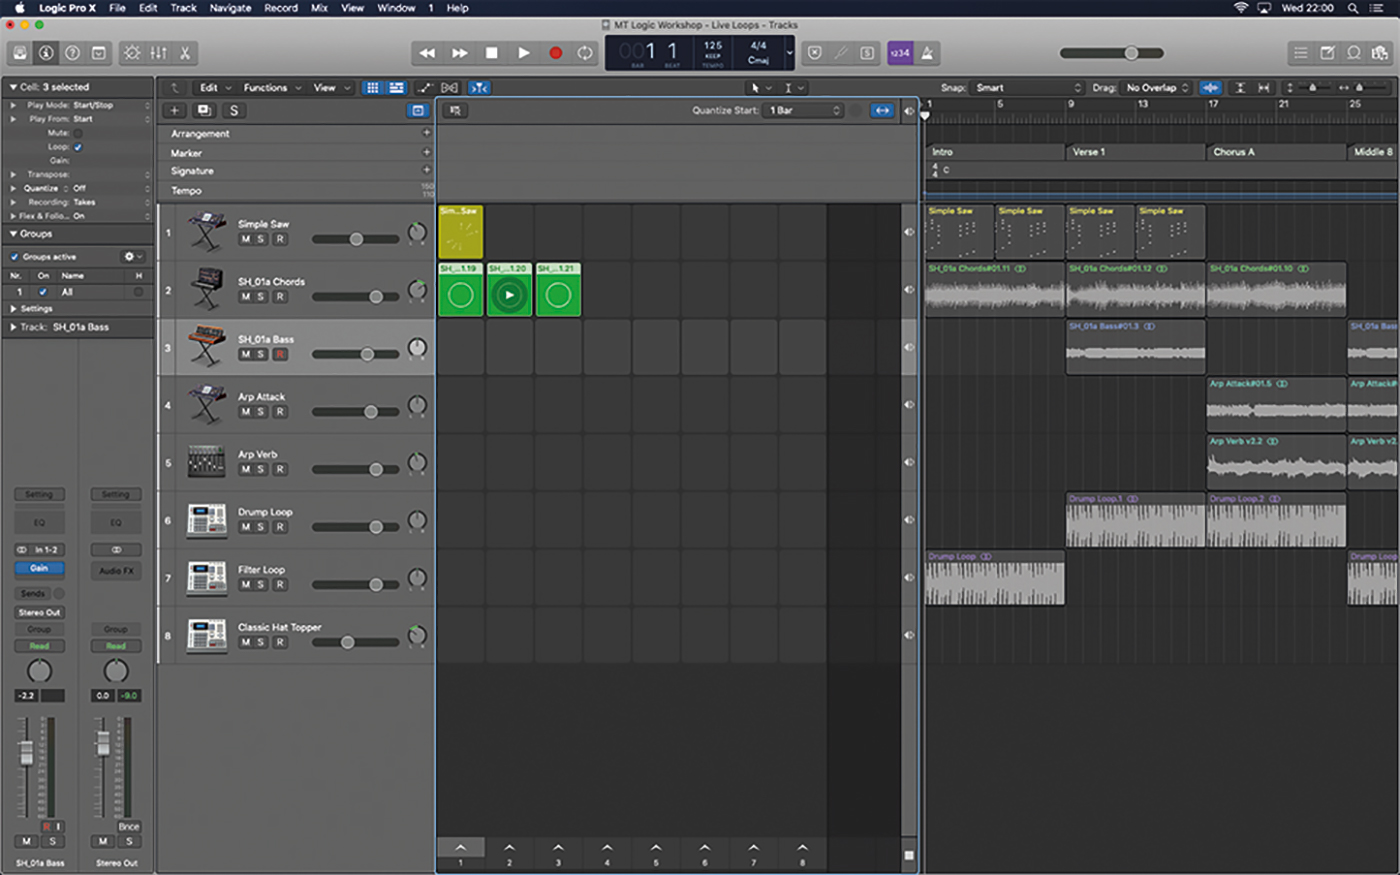
4. Move the first three audio regions on the next track to the Live Loops grid. They should now populate the first three cells. You can click any loop to play it but only one loop will play from each track.
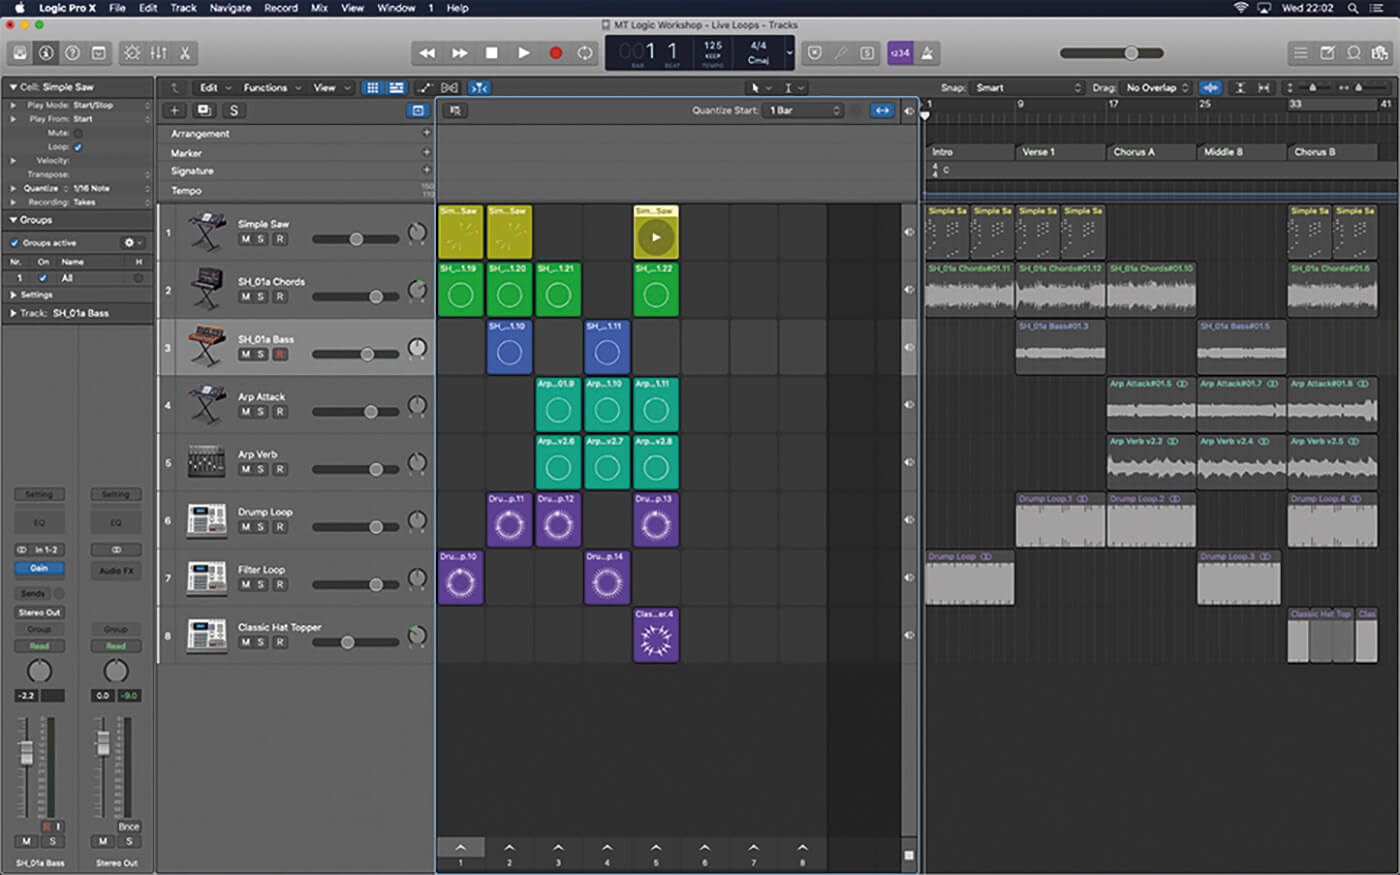
5. Populate the rest of the grid, working on the basis that the structure of the song (Intro, Verse, etc) is mirrored in the columns of the grid, which, in the world of Live Loops, are called scenes.

6. Scenes can be named to help identify what part of a song they’re from. You can trigger scenes using the arrows at the bottom, triggering all the loops associated with that scene.
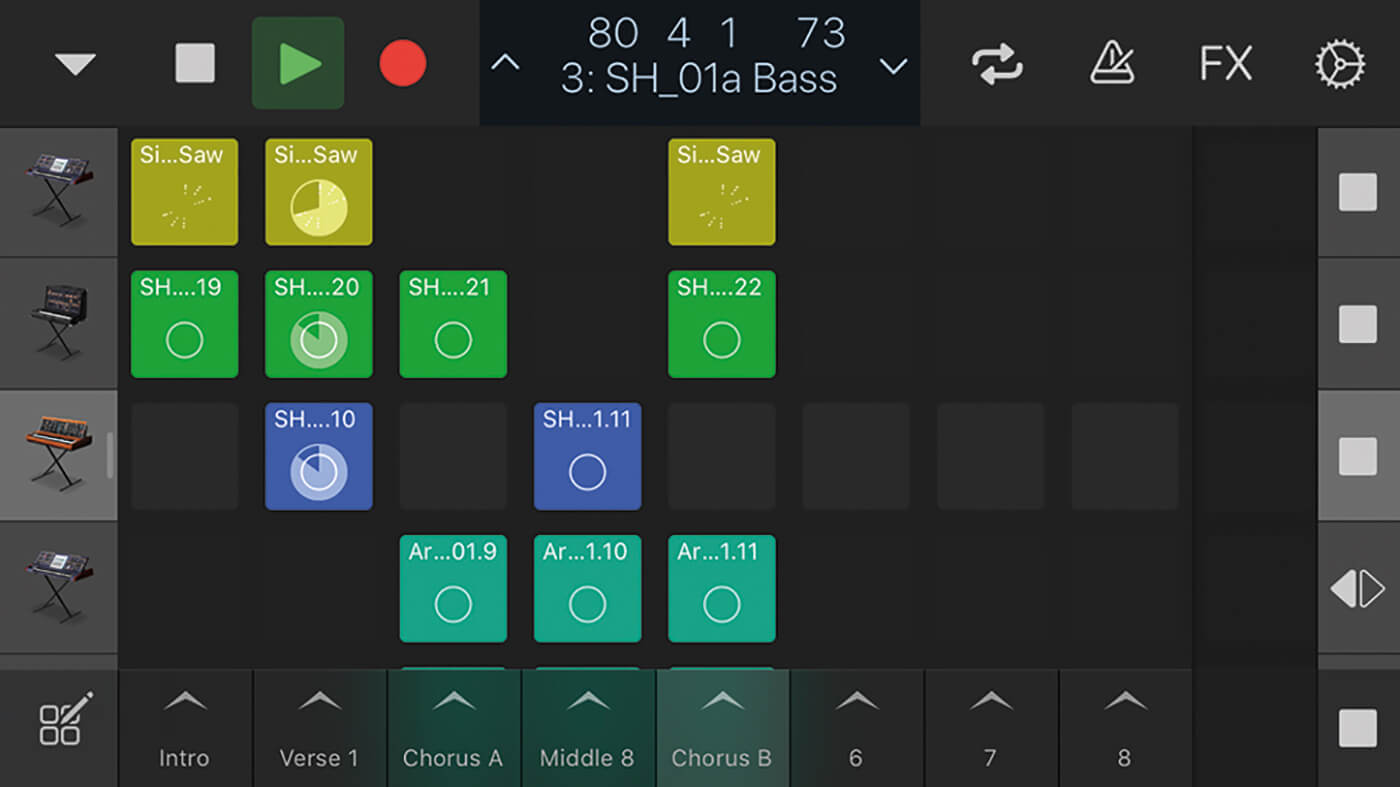
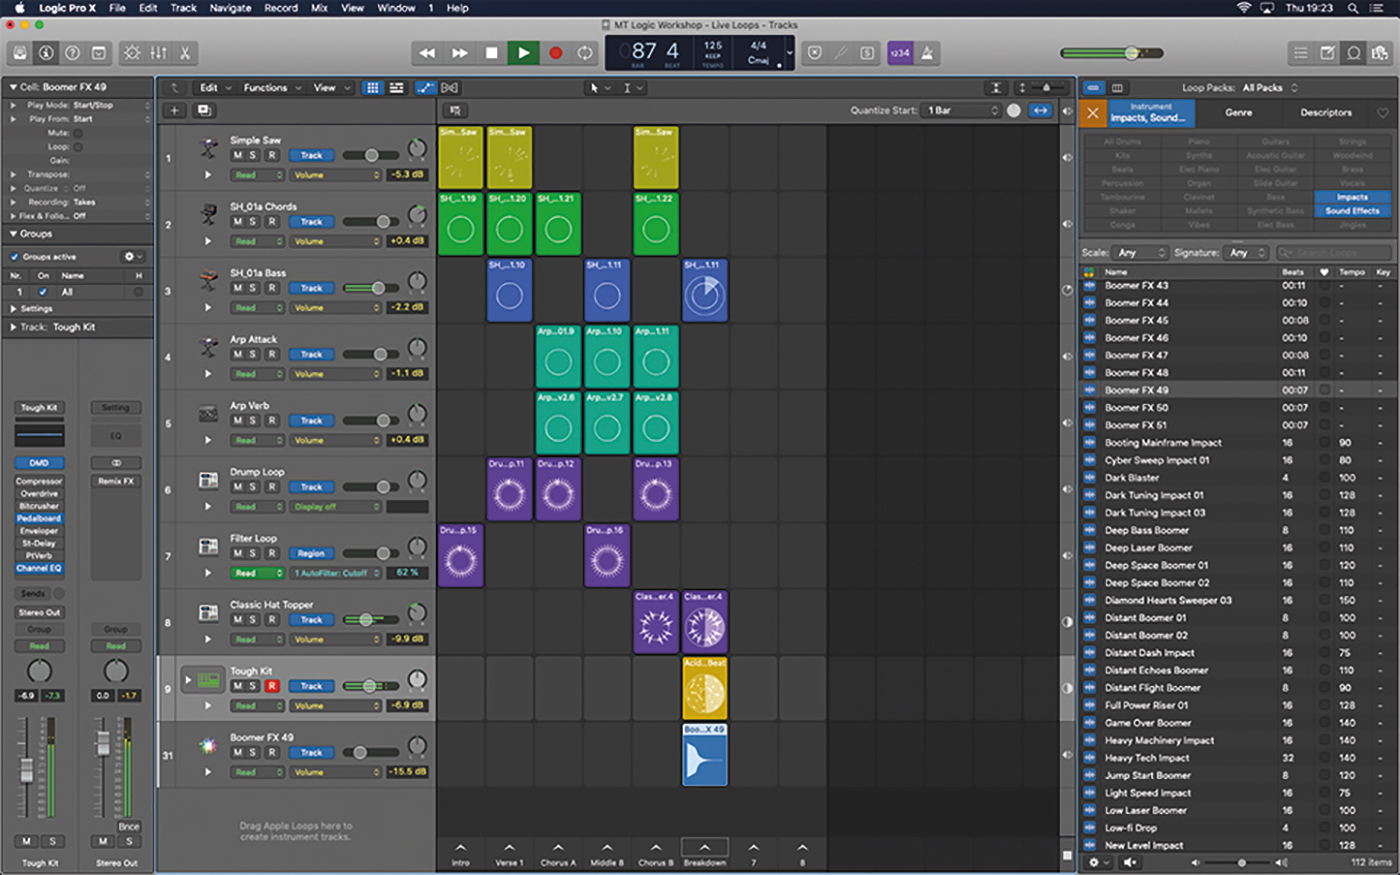
7. The best way to trigger different scenes and cells within the project is to use Logic Remote on an iPad or iPhone, as the multi-touch interface makes it easier to trigger multiple loops at the same time.
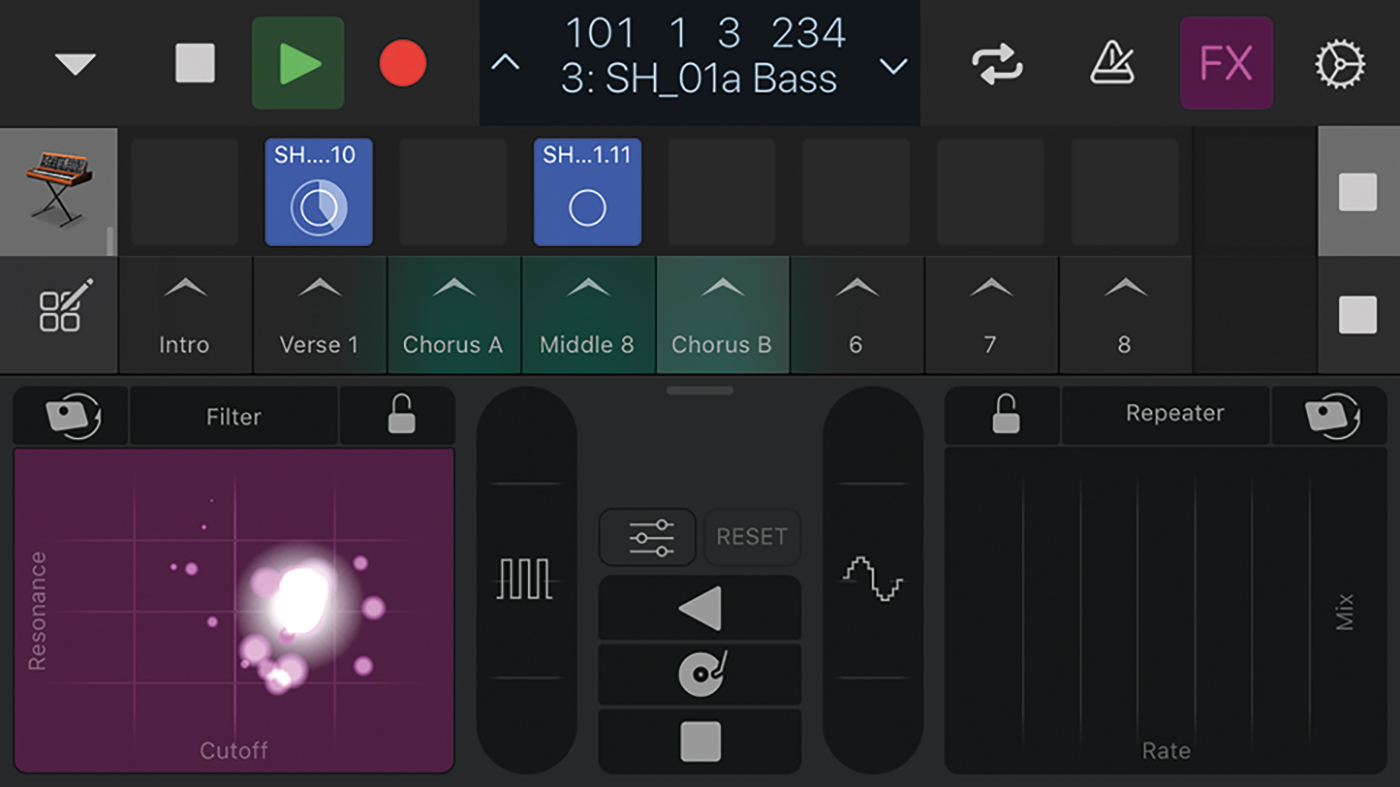
8. The Remix FX plug-in, which can be opened as a plug-in across the main stereo bus or activated via the Logic Remote app, lets you apply various DJ-like treatments across the main output of the mix.
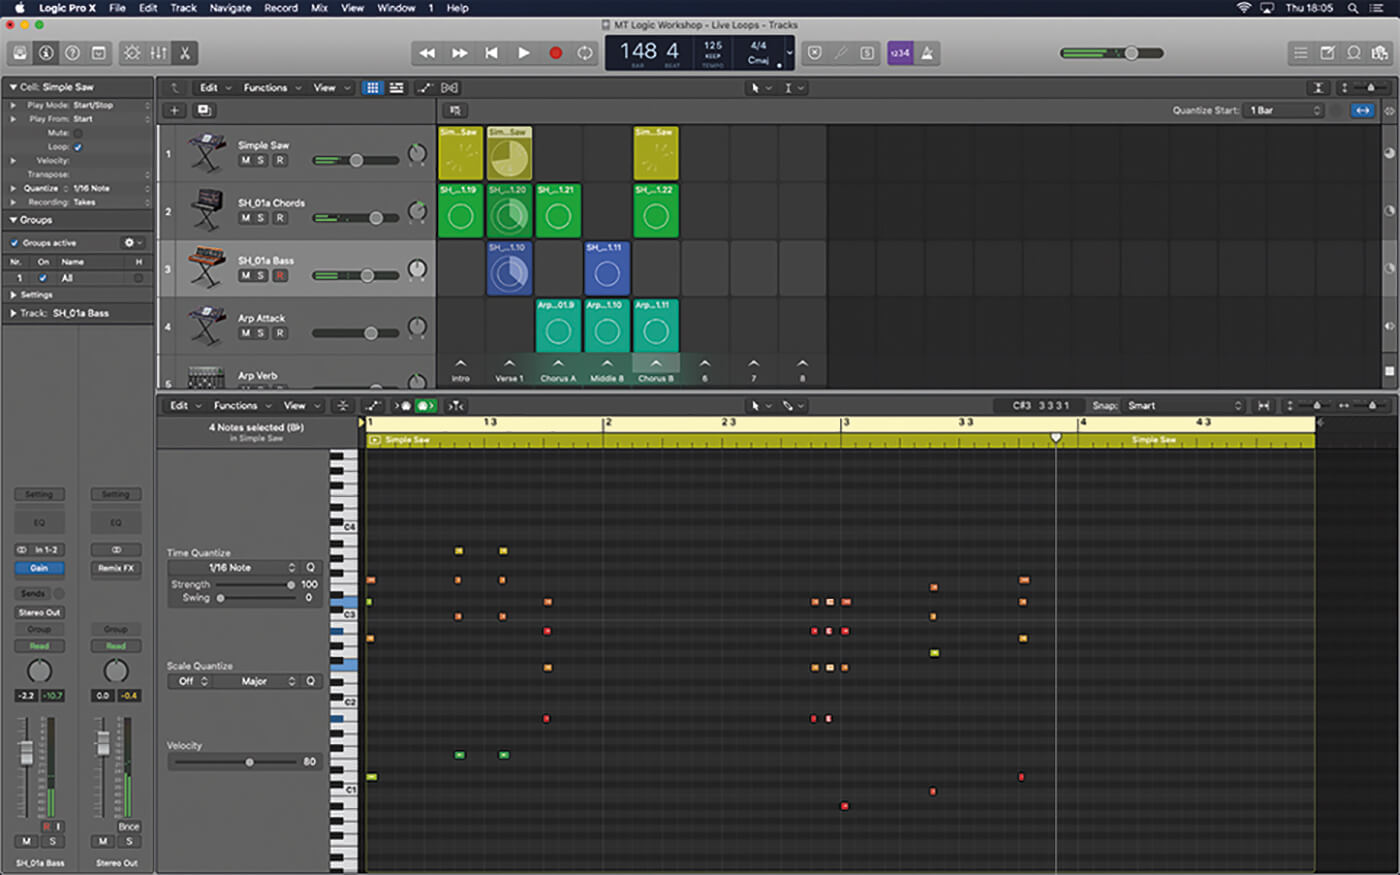
9. Cells work much the same as regions – you can record into them and edit the information they contain. Try editing one of the MIDI regions by double-clicking on it and doubling some of the notes.
![]()
FLEX YOUR MUSCLES The Live Loops grid’s default setting is for all cells to be flex-enabled, which can be a big hit on computers with limited CPU resources. If your material is all locked to the same tempo, therefore, and you have no intention of changing it, consider deactivating the Flex and Follow option via the Cell Inspector.
10. Some aspects, notably Track-based automation, don’t carry across though. The filter cutoff moves on one of the drum tracks are present in the original arrangement but not on the Live Loops.
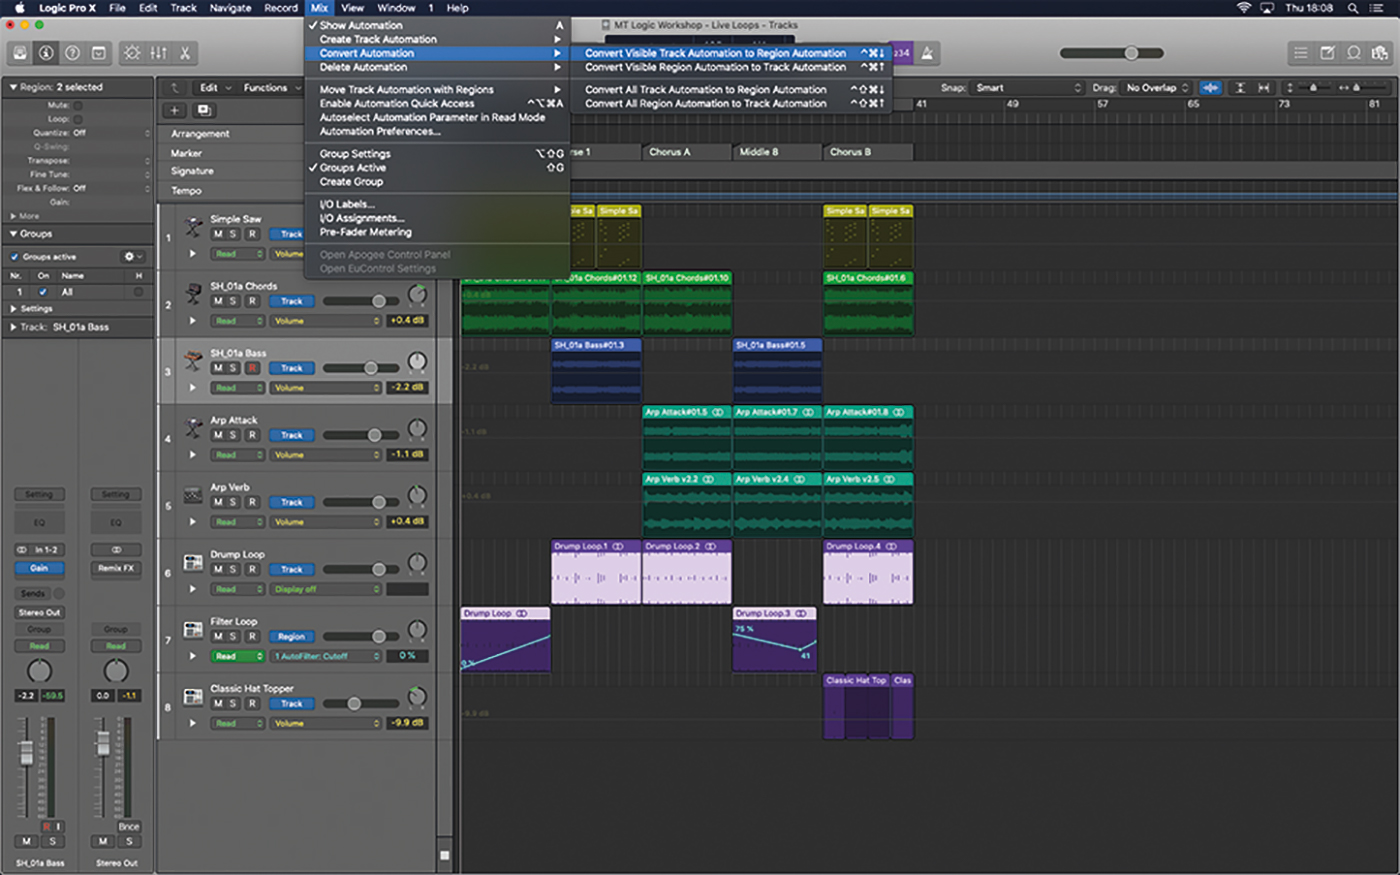
11. To move the automation moves into the grid, you’ll need to highlight the regions and select Convert Visible Track Automation to Region Automation from the Mix Menu. The automation is now written into the region.
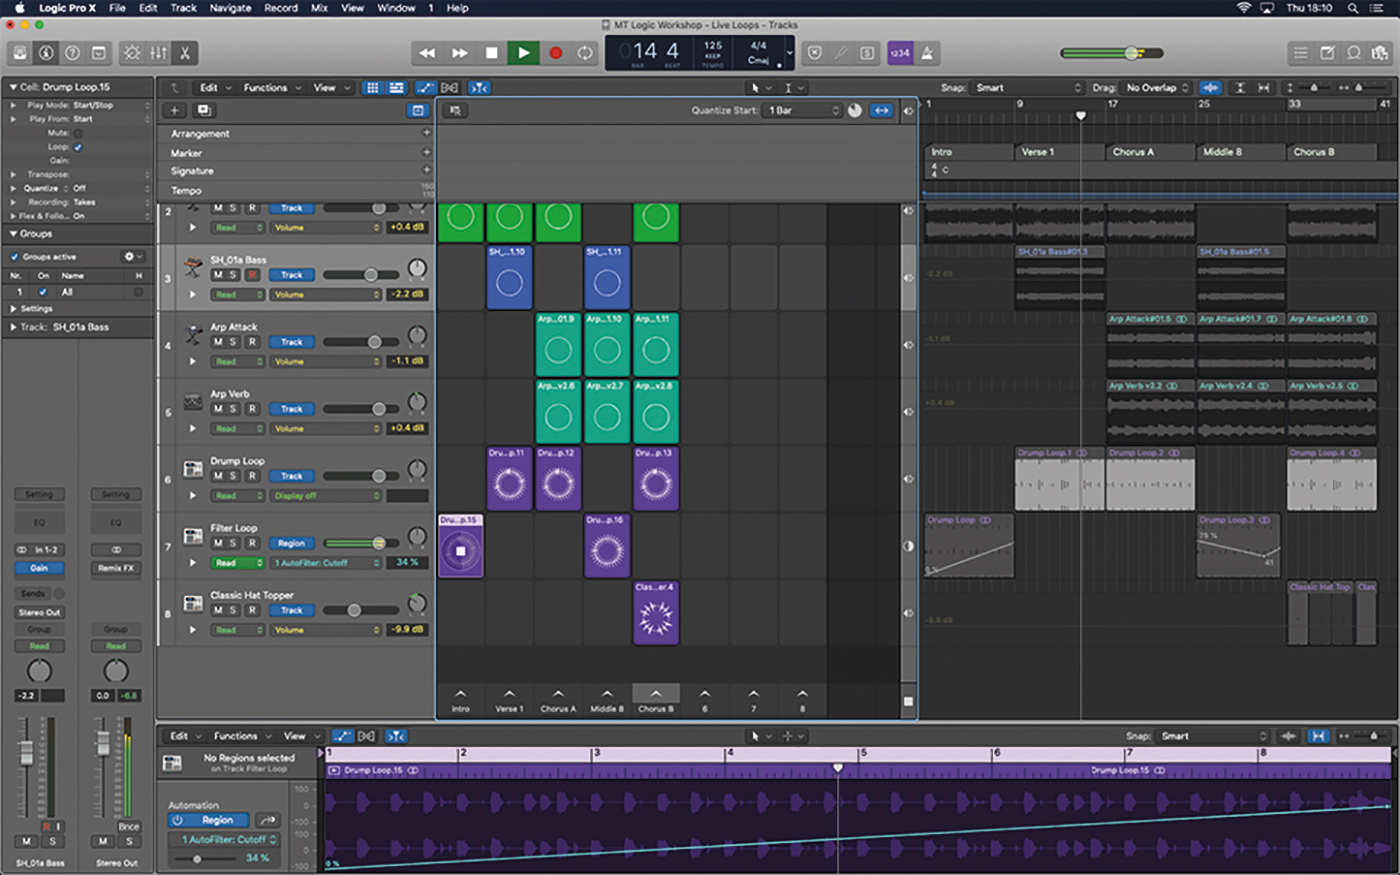
12. Delete the incorrect cells and repopulate them with regions containing the automation data. In the Live Loops grid, you can double-click the region to see the automation moves in the editor.
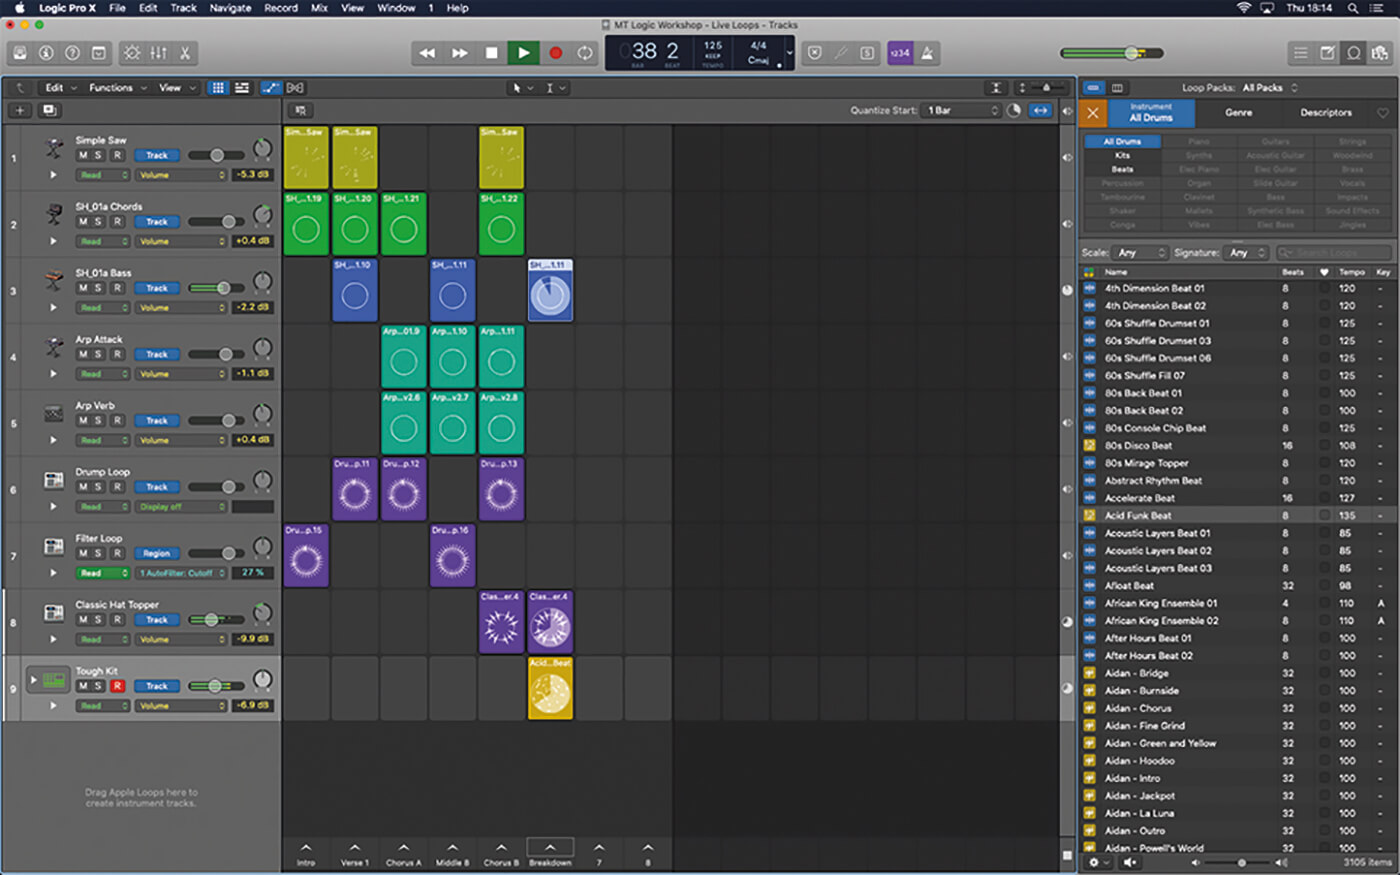
13. Of course, you can use the Live Loops grid as a means of developing your track for live performance. A quick way to do this is to build or augment new scenes with Apple Loops from the Loops Browser.
14. By default, cells are set to loop. Use the Cell Inspector to disable the loop, so that the cell only plays once when triggered. This is useful for impacts and effects that you want to play at the start of a scene.
15. To record information into an empty cell, select the track you want to record on, move the pointer to the centre of the cell and press the Cell Record button. Quantize using the Cell Inspector.
16. You can switch between the Tracks Area and the Live Loops grid on a track-by-track basis, using the divider between the two parts of the screen. This is useful if you have a fixed vocal pre-record.
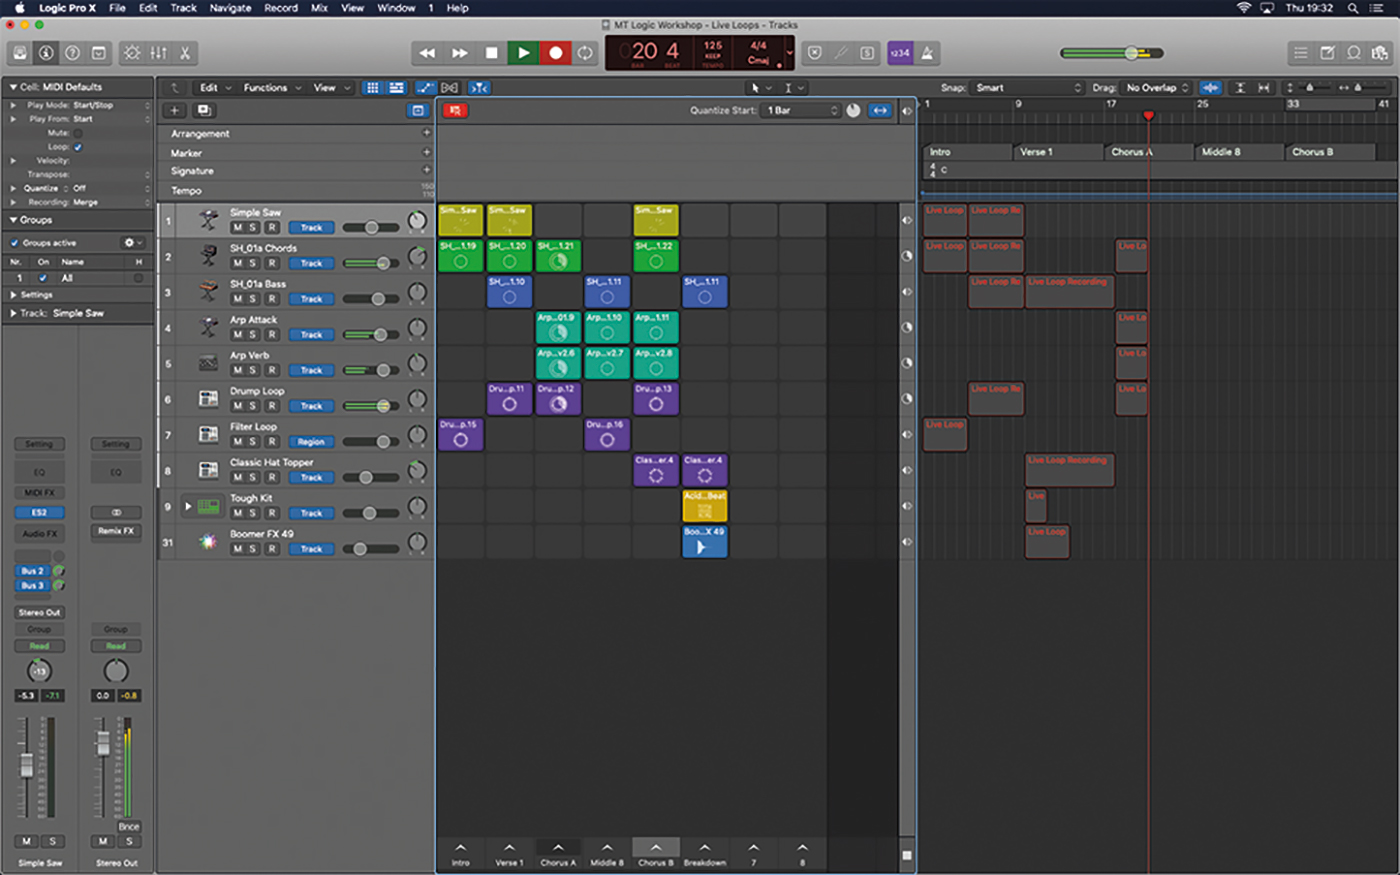
17. You can use the Enable Performance Recording icon in the top left-hand corner of the Live Loops grid to record back into the Tracks Area. Ensure the Tracks Areas is clear and then press Record on the transport.
18. Your performance in the Live Loops grid is now recorded into the main Tracks Area. This performance can then be further refined in the usual way, by resizing regions, changing the number of loops and so on.
For more Logic tutorials and workshops, check here.