Logic Pro X Tutorial – Adding Movement To a Preset With The LFO
In this instalment of the creative synthesis in Logic Pro X series, we add movement to a preset with the LFO… 1: Now we’re going to show how the LFO on Retro Synth can bring a preset very quickly to life. Dial up the Fifth Sequence preset. We like the sound with its noise element […]
In this instalment of the creative synthesis in Logic Pro X series, we add movement to a preset with the LFO…
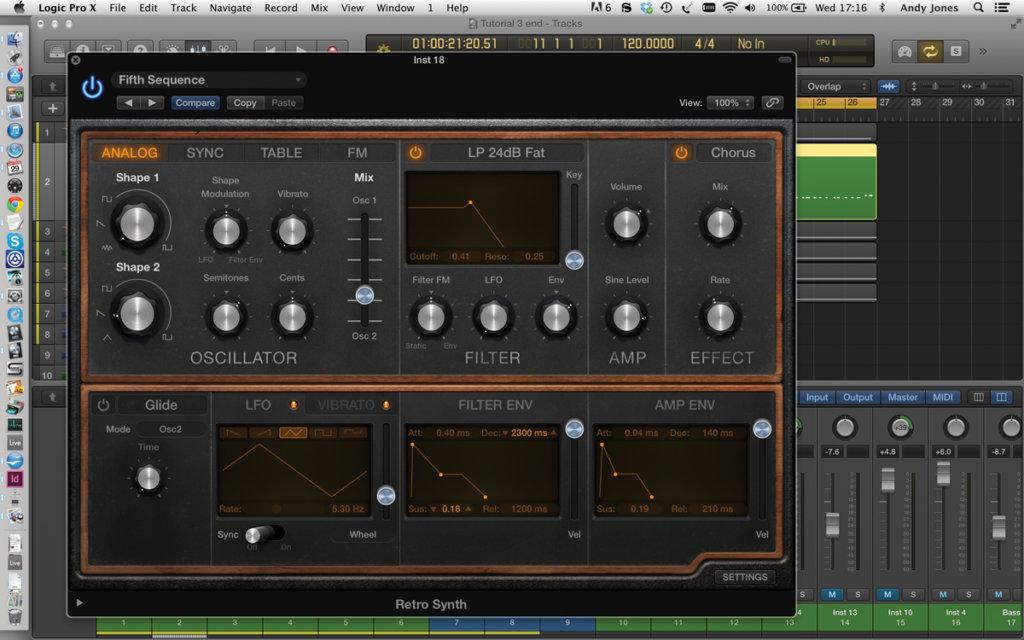
1: Now we’re going to show how the LFO on Retro Synth can bring a preset very quickly to life. Dial up the Fifth Sequence preset. We like the sound with its noise element but think we can make it better.
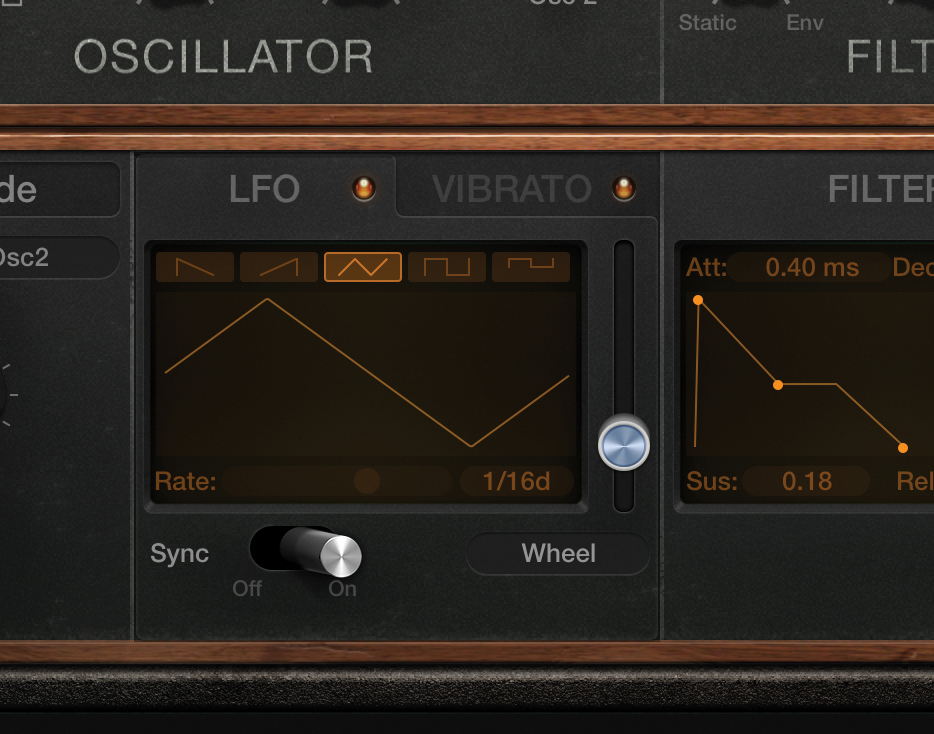
2: Apply some of the LFO to the filter parameters by nudging up the LFO dial within that section by a couple of notches. It should make the sound start to wobble but doesn’t sound great… yet
3: Now we need to play it in time so sync it within the LFO section (nudge the Sync switch to the right ‘on’ position). You can hear that it already sounds better – with added delay – but not quite right.
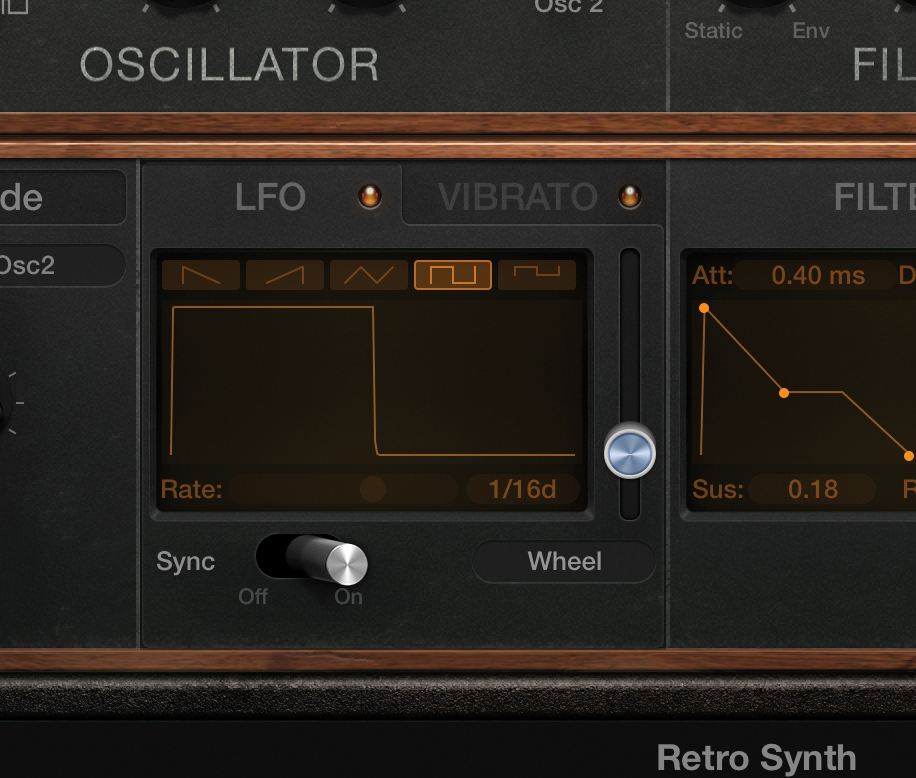
4: By changing the LFO waveshape to a square wave its impact is much more dramatic so we’ve done just that. Note how the preset sounds a little raspier and with a much quicker attack.
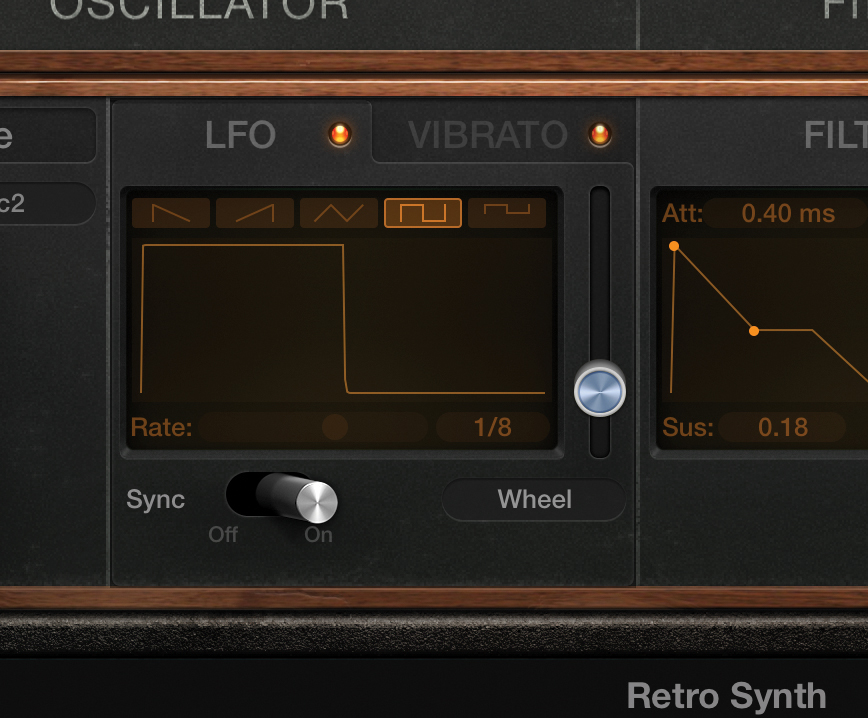
5: Now we’re really going to lock it into the groove by lowing the LFO rate down to 1/8 from 1/16th. This makes the delay far more manageable but also more noticeable.
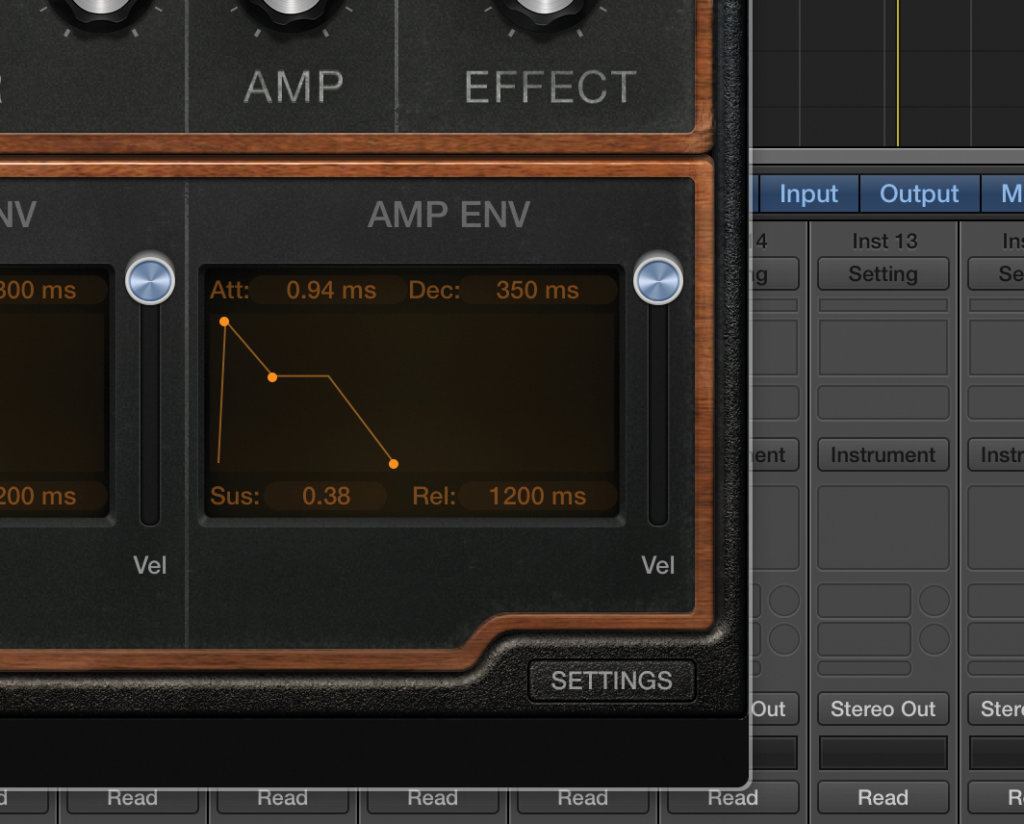
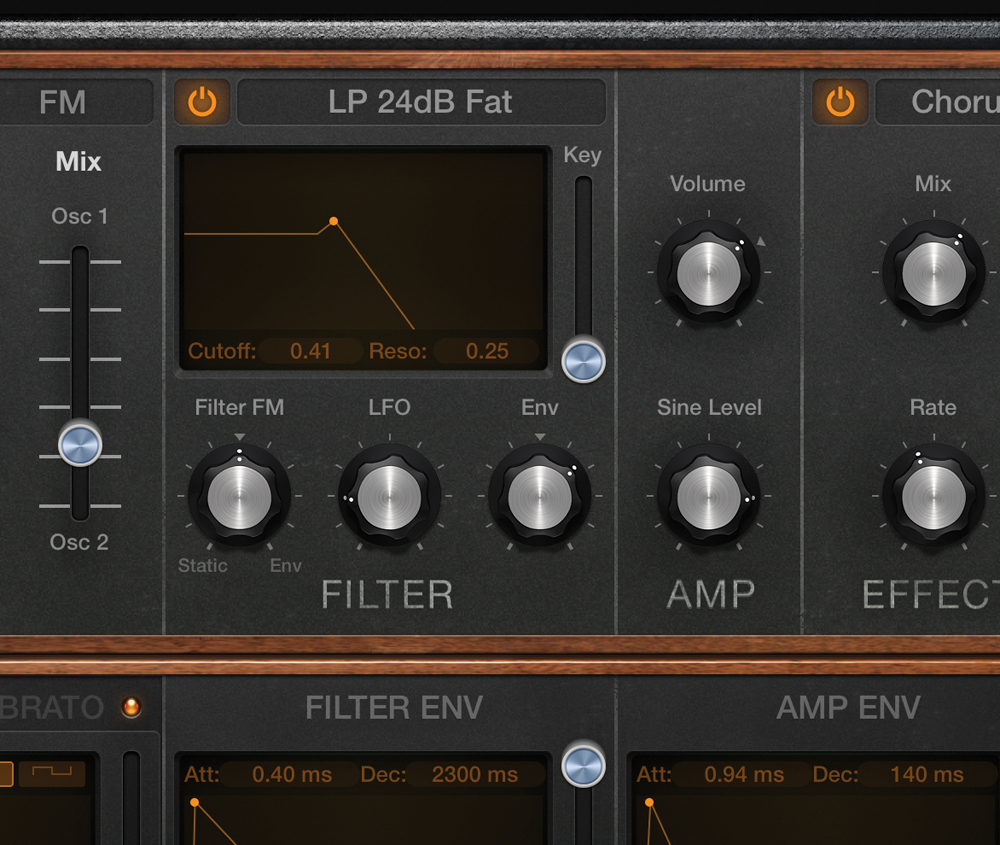
6: We’ve livened up the preset with movement and delay. Time to use the Amp Envelope trick again. Take the decay time up to 0.35 and the release to 1200ms. The sound is a lot more in your face. Compare it to the original and you’ll hear the preset has been lifted.
Click Here To Continue
Click Here To Return To The Overview Page
