Logic Pro X Tutorial – Using the Logic Compressor for EDM & New York Compression
In the first instalment we looked at influencing the side chain, now Mark Cousins continues his tutorial looking at advanced use of the Logic Compressor for EDM and New York Compression Pump It Up – EDM Side Chain Compression Another use of the Side Chain, often referred to as Side Chain compression, is the classic […]
In the first instalment we looked at influencing the side chain, now Mark Cousins continues his tutorial looking at advanced use of the Logic Compressor for EDM and New York Compression

Pump It Up – EDM Side Chain Compression
Another use of the Side Chain, often referred to as Side Chain compression, is the classic ‘pumping’ effect using in many EDM tracks. In this application, the Side Chain becomes a completely different source, usually the kick drum, which is then used to modulate the amplitude of a sustaining element of the mix, like a pad, or a reverb return.
The effect works well for two reasons. First, the kick drum gains more prominence in the mix, and secondly, the pad sound gains a distinctive pumping movement that appears to breathe in time with the kick. To apply this type of Side Chain compression, you’ll need to get creative with your routing. Firstly, route one or more sounds that you want to ‘pump’ over to a spare bus. This could just be a single pad, or indeed, the rest of the track (if you want a more extreme effect).
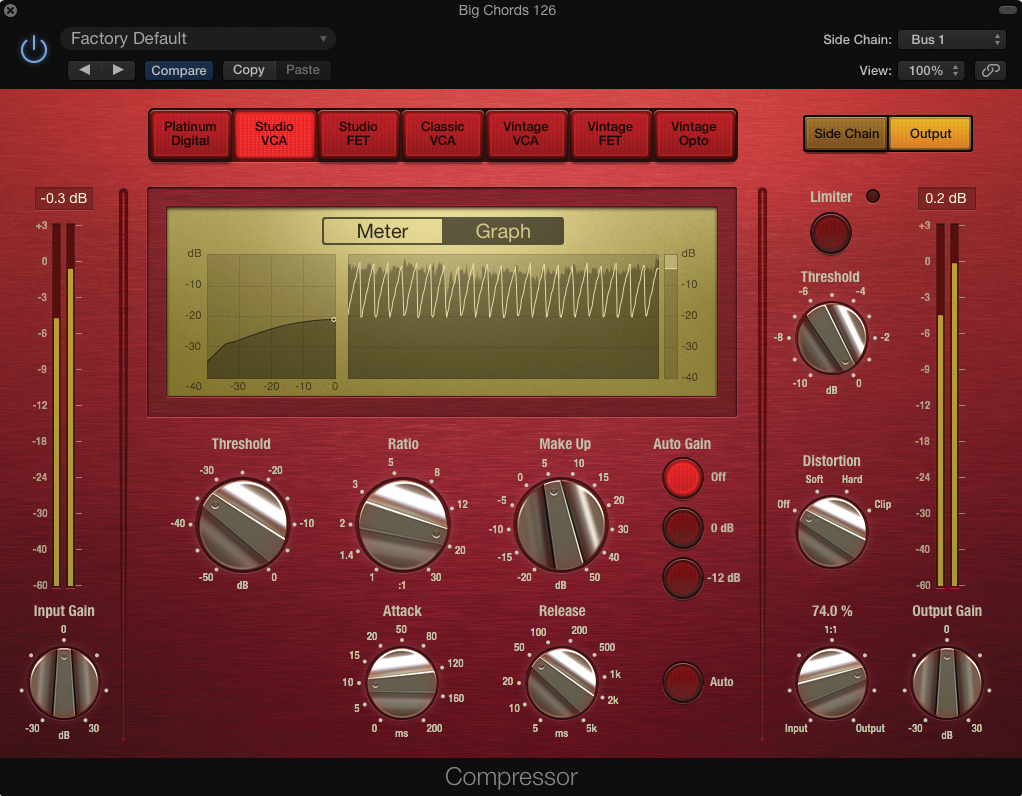
Next, route the sound that you want to drive the Compressor to a spare bus and select the external side chain input on the Compressor plug-in to the corresponding bus. As always, the finesse of the effect is in the fine-tuning, which is much easier if you use the Compressor’s Graph screen. Start with a relatively fast attack and release and find the threshold point where the kick drum starts to make the gain reduction move.
Ratio, of course, will be the amount of ‘pump’, using higher settings (8:1) where you want the pumping to be more noticeable. The most important parameter, though, is the Compressor’s release time, which you’ll want to increase in order to achieve the right graduation to the pumping effect.
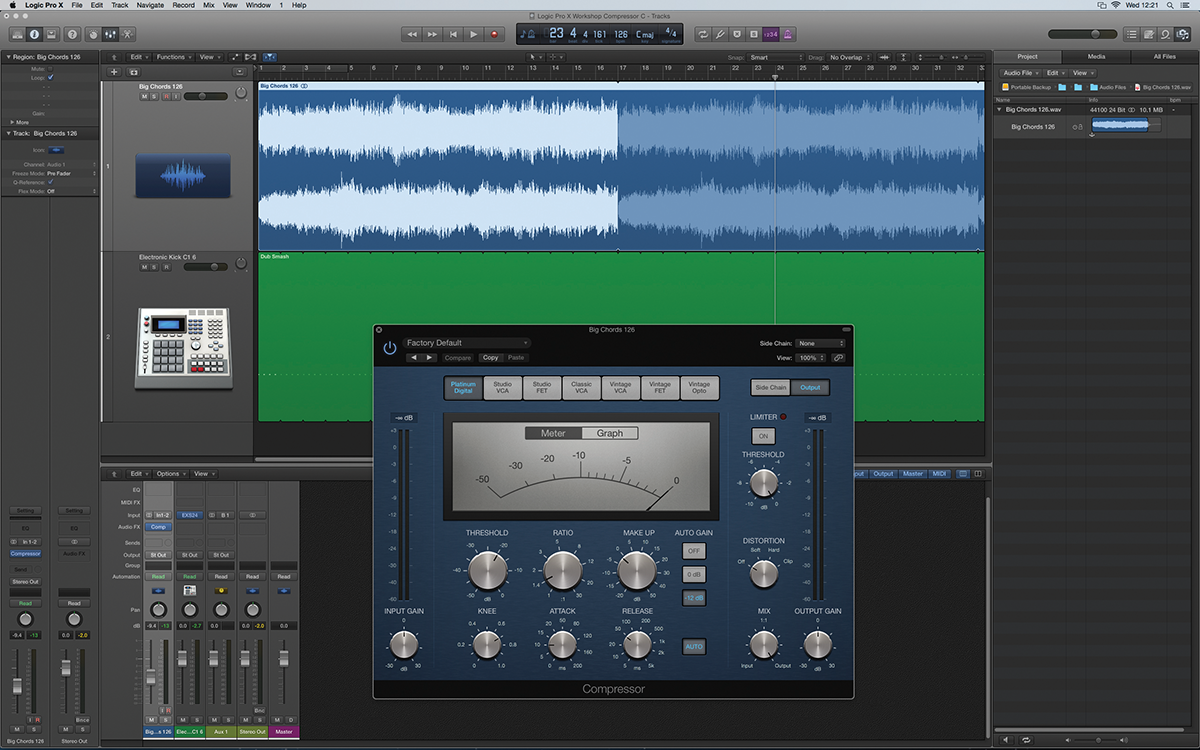
1: This example uses an external Side Chain – driven from a kick drum track – to control the Compressor across a pad sound. Loading the final Logic Project, instantiate a Compressor across the pad sound on track 1.
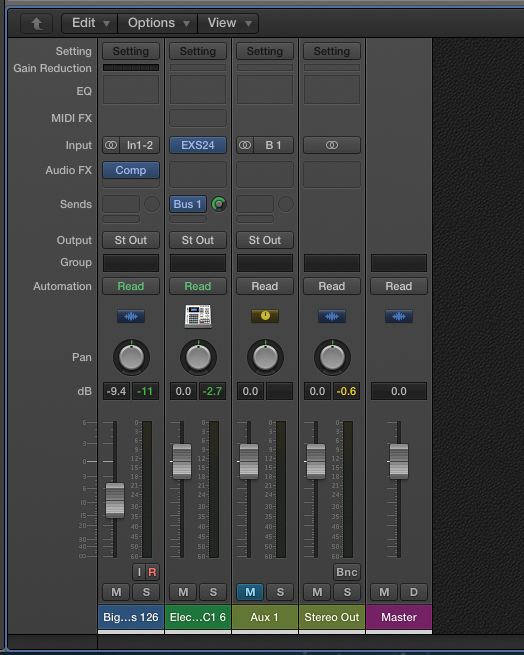
2: Route the kick drum over to bus 1, via a bus send, so that it can be used as an external Side Chain. Technically, you could avoid doing this if the track was an audio track, rather than a virtual instrument.
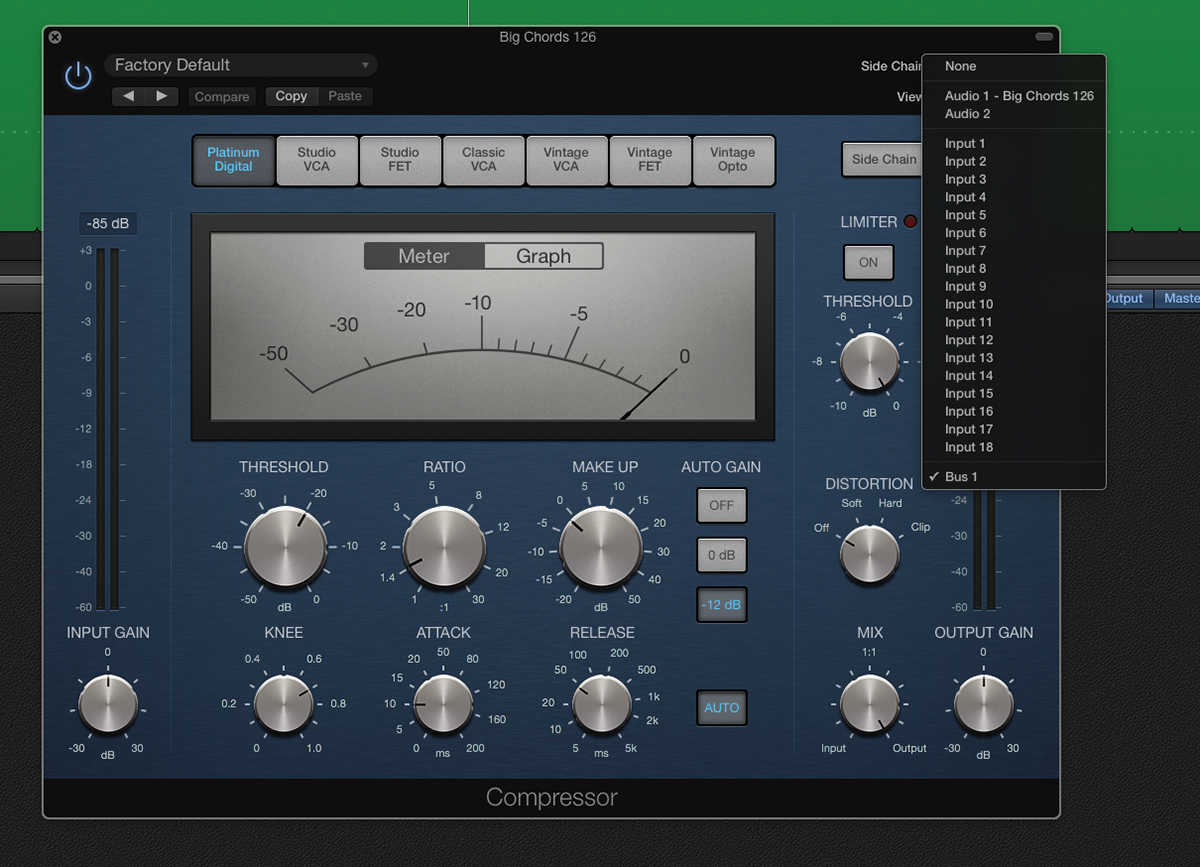
3: Moving back to the Compressor across the pad sound, select Bus 1 from the drop-down Side Chain selection menu. The list lets you select any audio track or bus used in your project as the Side Chain input for your Compressor.
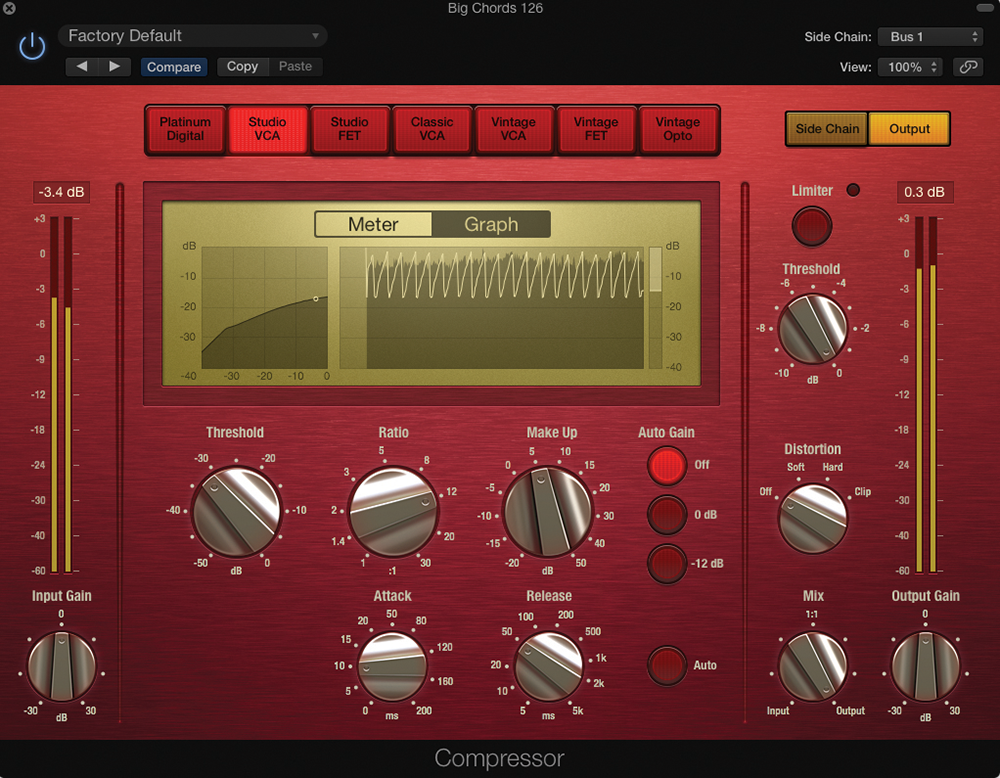
4: Adjust the threshold and ratio to achieve the desired amount of pumping. Use higher ratios where you want more gain reduction taking place, and adjust the threshold so that the pad tracks the kick drum in the correct way.
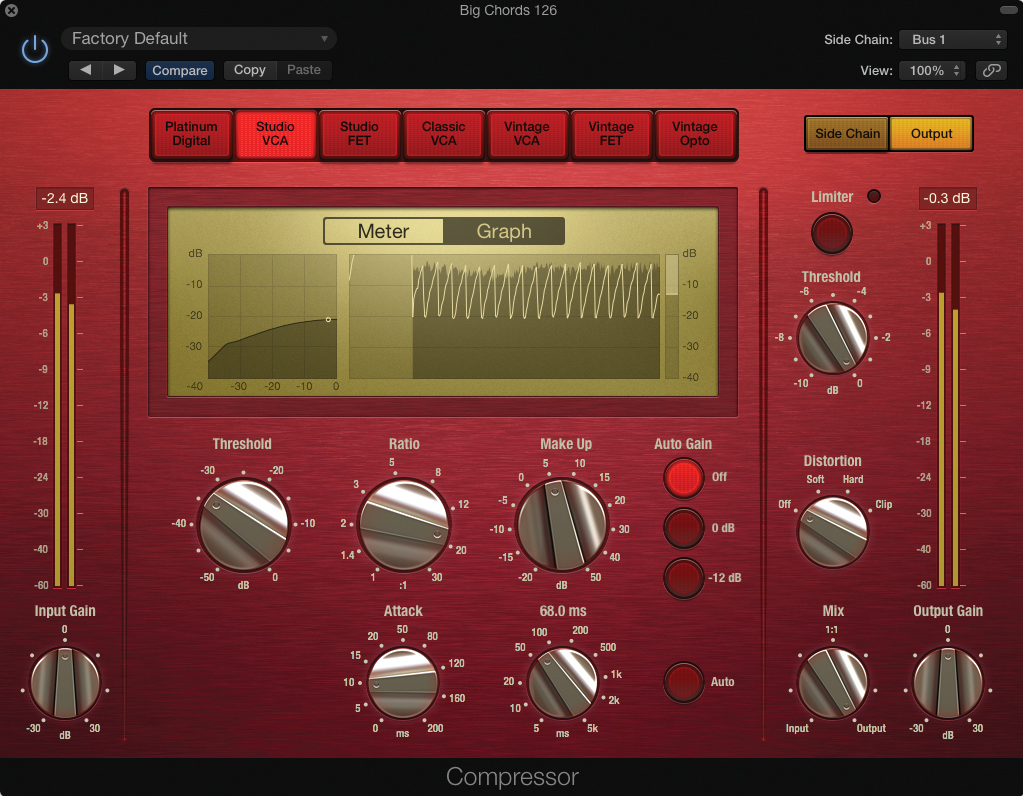
5: One of the most important parameters in this effect is the release time. As with all the settings, it’s worth looking on the Graph display to visualise the Compressor’s movements. Try increasing the release to gain a more graduated pumping effect.

6: In this style of compression, the mix control takes on a new lease of life. Use the mix control as a means of adding back some of the ‘un-pumped’ pad, while still retaining the movement of the Compressor.
New York Compression
As our final example, we’ve also taken a look at the classic New York parallel compression effect, which effectively uses compression like an effect, complete with a wet/dry ratio. The idea is that you configure a deliberately ‘over the top’ compression setting, where the drum kit is noticeable pumping, and the transients somewhat squashed, which is then fed back underneath the un-compressed signal in a moderated way.
As we saw in the original Compressor workshop, you can just use Mix control to achieve a similar result, but this misses out on some important additional features.
In our example, the compression is applied via bus sends, which lets you apply the compression on multiple tracks, and well as setting a ratio between those tracks. By leaving the compressor across the bus, we can also apply an important part of the New York compression treatment – the ‘smiling’ EQ curve across the Compressor’s output. Routed in this way, the EQ is only applied to the compression, rather than both the input and compressed signal if it was instantiated over a compressor using its Mix control
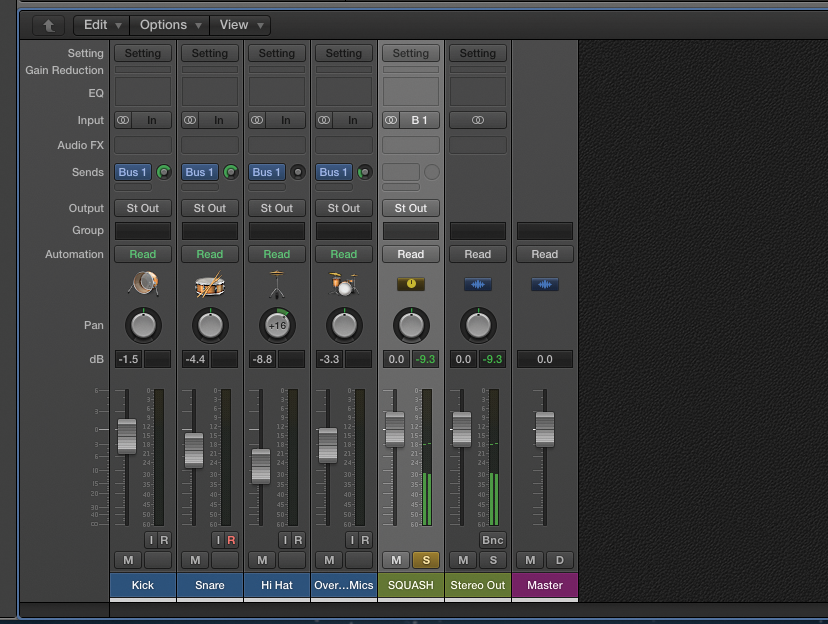
1: New York compression works as a send effect, and is most commonly applied to ‘power’ elements of the kit: the kick and snare. Create bus sends from the drums, with a greater amount sent from the kick and snare, and a smaller amount of overheads.

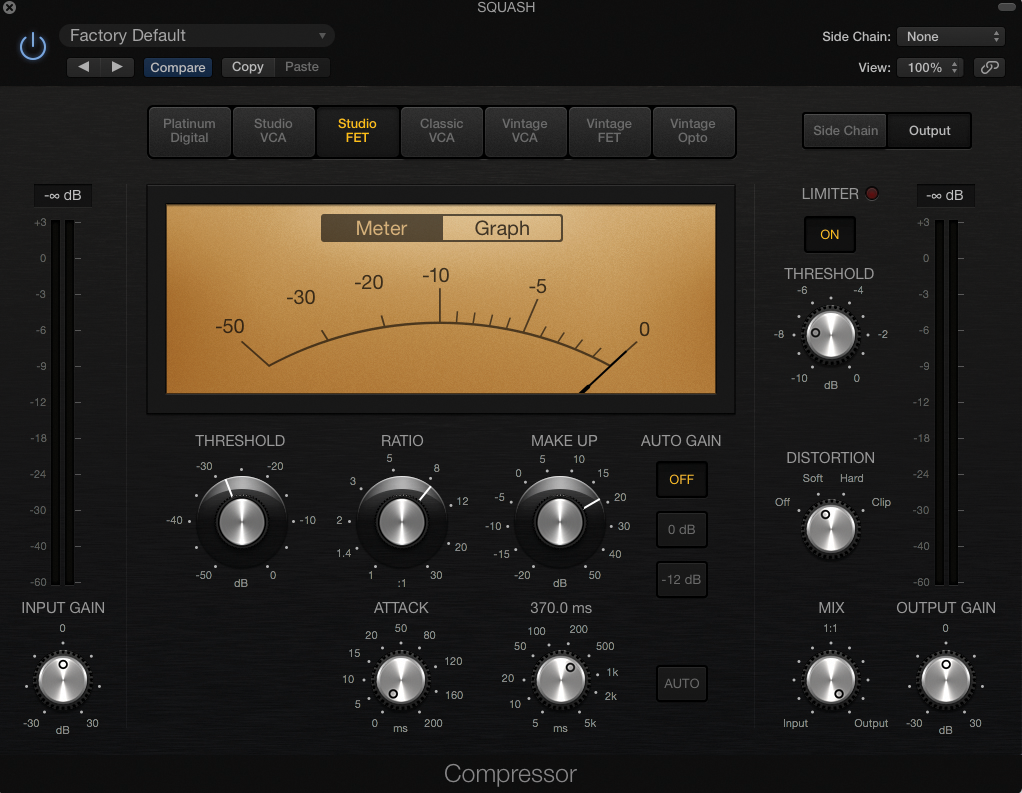
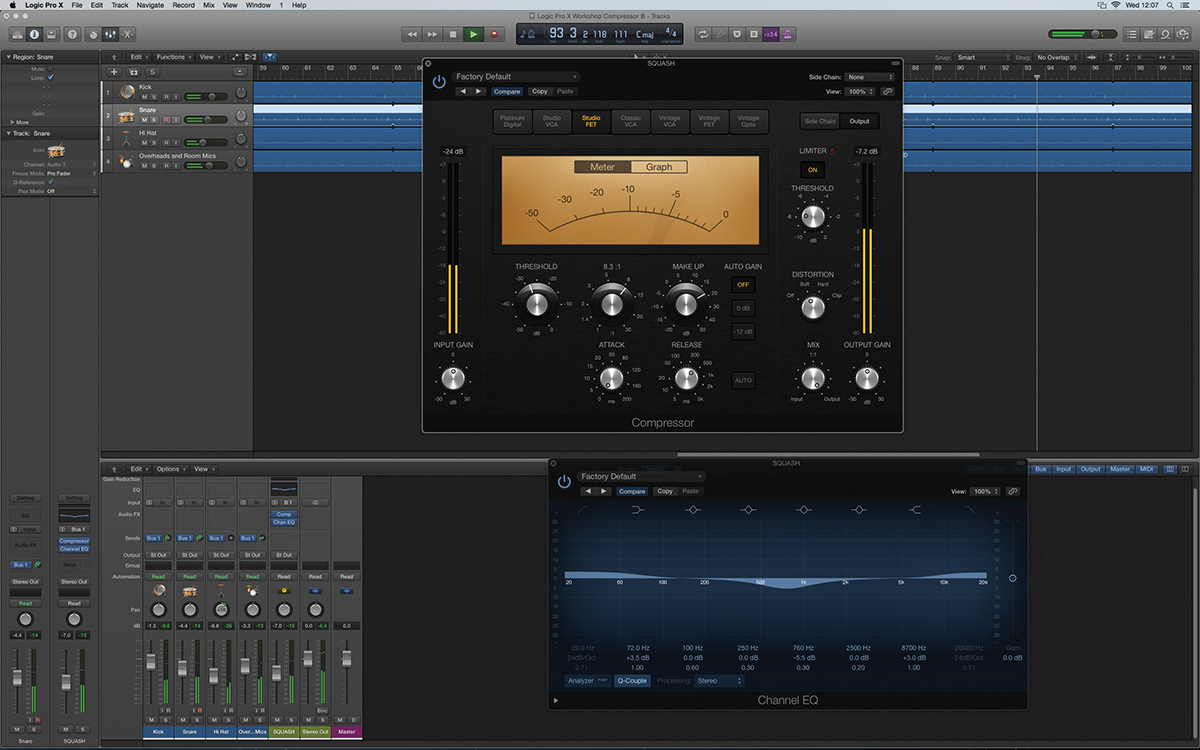
2: Place a Compressor across the resultant aux bus. Configure a heavy-handed Compressor using the Studio FET model, using an 8:1 ratio and the threshold low enough to deliver plenty of gain reduction. Subtlety isn’t important here!

3: The key to New York compression is the correct Attack and Release settings. Set the Attack to its fastest setting so that the Compressor grabs the transients, and then gradually increase the Release time so that the compressor audibly ‘pumps’.
4: If you want a little more drive, consider looking at the Output controls and adding some Soft distortion combined with a touch of additional limiting on the output. Aim for the limiter just to catch the occasional transient that slips through the net.
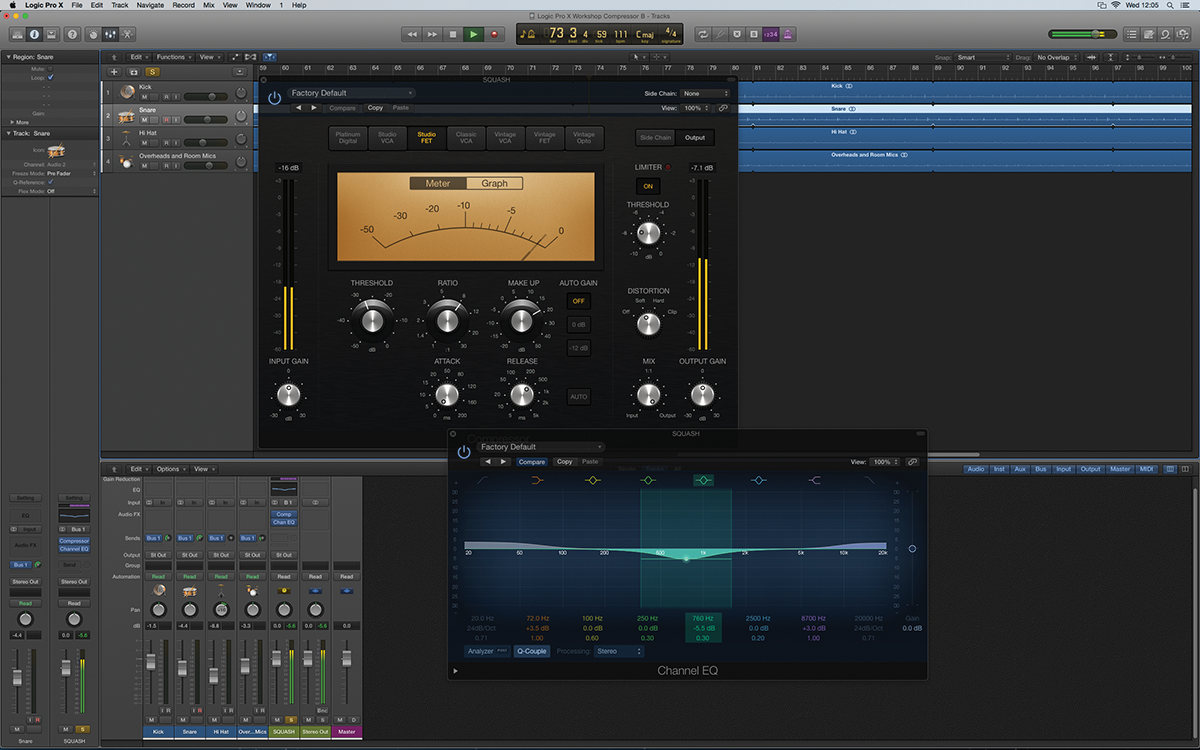
5: Add an Equalizer on the output of the Compressor, giving the compressed version of the drums more colour. Using a shelving boost at either end of the kit (80Hz and 8kHz, in this case) plus a wide dip across the middle of the spectrum.
6: The final step in to blend the compressed and equalised version of the kit in with the dry source. At its best, the effect works well applied subtly, so that the compressed channel just adds energy and body to the output.
This tutorial is endorsed by Point Blank. With courses in London, online and now in LA, Point Blank is the Global Music School. You can study sound to picture on their Music Production Diploma courses, with pro industry tutors.
