Learn to mix in Studio One 4
You’ve created a song, of sorts, in Presonus Studio One 4 and now you need to mix it. So let Andy Jones take you on a mixing masterclass, so you can turn those sonic ideas into a million dollars! Mixing your music correctly can seem like a laborious task after the excitement of getting your […]
You’ve created a song, of sorts, in Presonus Studio One 4 and now you need to mix it. So let Andy Jones take you on a mixing masterclass, so you can turn those sonic ideas into a million dollars!
Mixing your music correctly can seem like a laborious task after the excitement of getting your initial ideas into some loops, and then expanding those loops into an arrangement, so it can often be seen as the boring process. In reality, of course, you could and perhaps should be mixing as you arrange, but for this tutorial we’re going to focus on just the mixing process, really to show how important a role it plays. Yes, the excitement is in the composition, but mixing really does matter when it comes to the end results!
We’ll also use the opportunity to explore some of Presonus Studio One 4’s great features for mixing. This DAW really has come of age and many people are starting to use it, thanks to its slick GUI, dozens of included instruments and effects and its high-quality, professional-level features.
Get a song, any song
We already have a tune and have arranged it roughly for this tutorial. You can read more about how we put this piece together in our Studio One tutorial series at www.musictech.net, but the reality is that by following this tutorial, you should be able to apply some mixing principles to whatever music you are making, so feel free to load in your own tunes and follow our advice to get a professional mix.
And the mix process really does add this pro sheen. By getting levels right, spreading the music out correctly in the stereo spectrum and adding depth with EQ, you should end up with a great-sounding track with a full dynamic; one that uses every space in almost three sonic dimensions.
Mixing is all about letting your music breathe in these dimensions, so first of all you adjust the levels to try and allow everything to be heard. Then it’s onto panning to move things around the stereo spectrum and fill that space between speakers. Then we move on to EQ to fill the dynamic range with clear basses and shimmering trebles.
The workshop
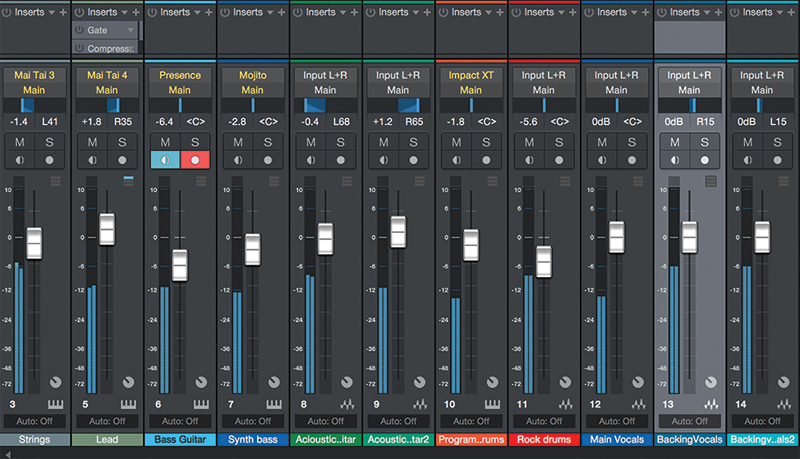
We’ll start by looking at levels and our advice when mixing is to pull everything back, and that means your monitor/speaker levels too. You might end up mixing for very long sessions, so you’ll want to monitor at low levels to give your ears a rest. By all means have an occasional blast, but generally keeping things low is good. And always take regular breaks, as listening to the same track over and over can make you tired in the brain as well as the ears.
Within your DAW keep levels peaking at -6dB and, perhaps obviously, keep everything out of the red. But do listen, rather than constantly look. DAWs are great at presenting your mixes back to you in all of those colours we chose last time around, but it’s best to mix with your ears more than your eyes, so feel free to turn your computer monitor off once in a while and just listen very carefully.
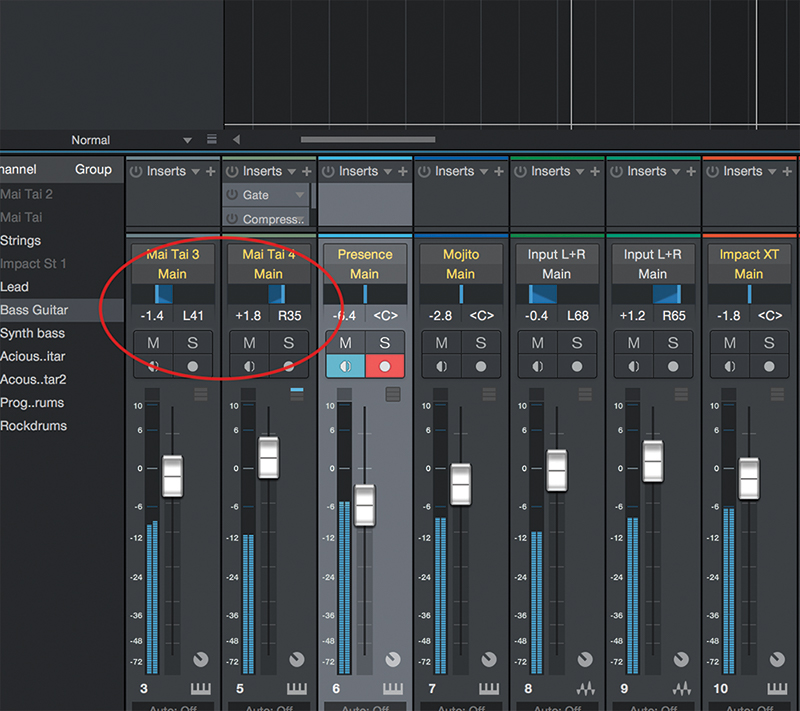
Panning is the next dimension to explore, and here you tend to leave the main vocal and all of the bassier parts in the middle and spread everything else. Keep clashing parts, like those two acoustic guitar parts, away from each other in this way by panning one left and one right. Do the same with backing vocals and make sure the main vocal can be heard above them.
EQ basics
We then move onto EQ and demonstrate how this can accentuate certain sounds in the mix without needing to drive their levels. As with panning you are trying to fill the space, but this time it’s the frequency range rather than the stereo spread. As a general rule you’ll want to roll the bass off of most of the parts bar the actual bass sounds, unless you have a bass-less mix. This avoids the bassier parts of, say, a keyboard sound, clashing with the more vital bass from a bass guitar.
However, there’s no getting away from some parts clashing that can’t be panned, namely bass and kick which should both be central, so for the rest of the workshop we show you how to use EQ to avoid such clashes. We’ll take the opposing bass and kick sounds and apply opposing EQ curves to each so that one is slightly boosted in a certain area while the other is slightly cut. These gentle EQ edits then move one away from the other, thus avoiding any muddying between the two.
That’s it for our tour of mixing in Studio One. Join us next time for more top Studio One production advice and check out our tutorials page for more know-how.
Mixing in Studio One 4: step-by-step
1. First up, listen out for levels. Anything distorting? In general, it’s better to listen rather than look at your mix, but there can be tell-tale signs, such as red peaking on tracks and the output. Time to pull everything back.
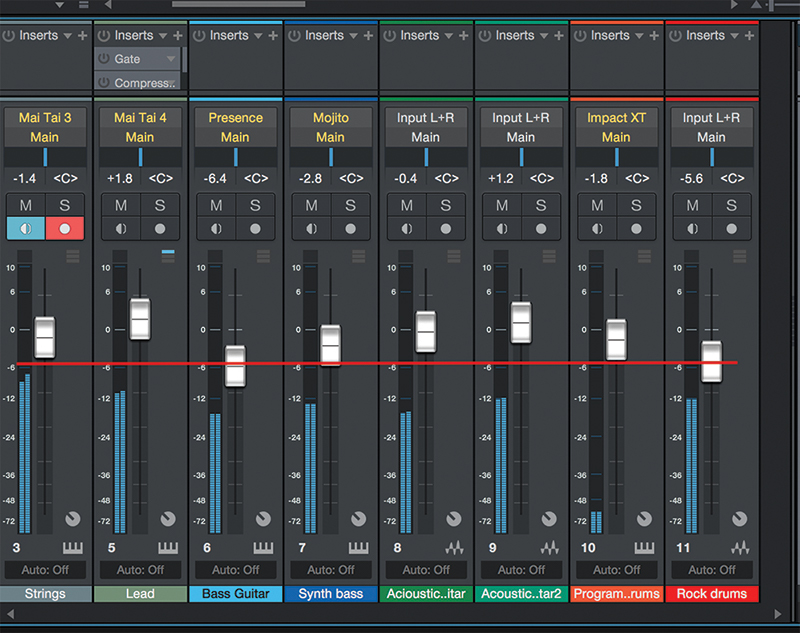
2. If you mix at low levels you’ll be doing your ears a favour, but engineers often recommend pulling everything back to peak at -6dB to leave some headroom for mastering engineer – the next process after mixing.
3. Adjust levels so nothing is too prominent and so you can hear everything. This is simply the first level adjustment. We’ll be coming back around to this constantly, especially after the next phase.
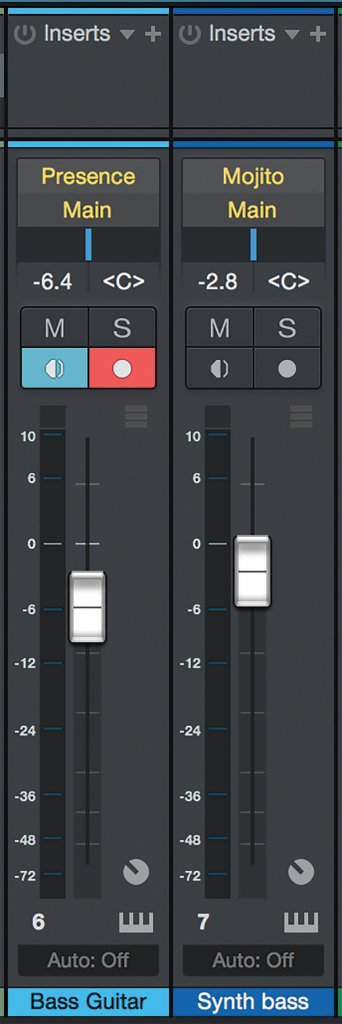
4. Panning allows you to place each track in the stereo field. Bass, kick and all low frequency sounds stay central. This can cause issues with sounds sitting on top of one another but don’t worry, we’ll return to this.
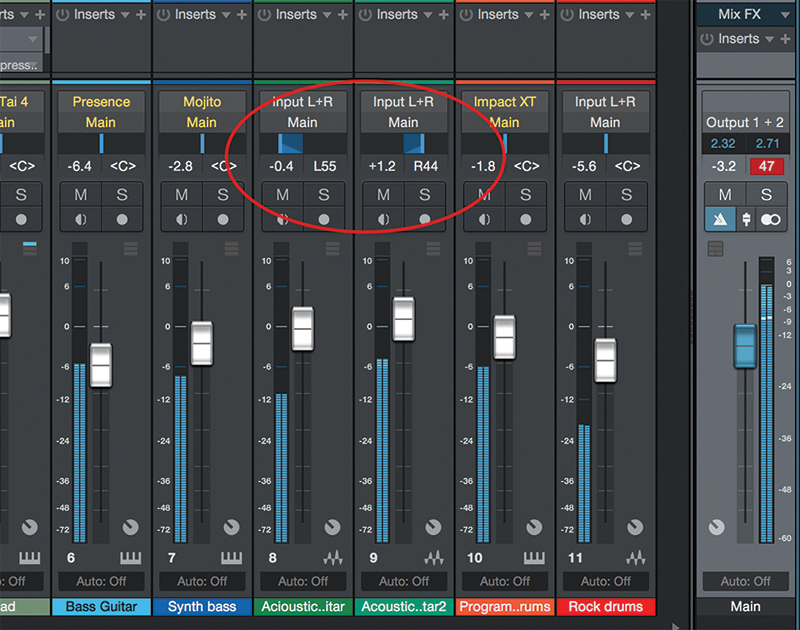
5. The popular ’imagine it’s a band on stage’ theory can apply so think of your tracks, as you would looking at a band on stage. Guitarists playing to the left and right of the vocalist? Well, let’s place our guitar parts as such.
6. We’ve got two keyboard parts and, as they both occupy a similar frequency, we’ll move them left and right too, so they don’t clash. Not as extreme as the guitarists but experiment with both. If it sounds good, it is good!
![]()
We’ve used Studio One’s Arranger Track to create our song as it makes creating Intros, Verses, Choruses and more very easy. You can then drag these and all the parts associated with them around the arrangement, duplicate them and a lot more to make creating a complete song a breeze.
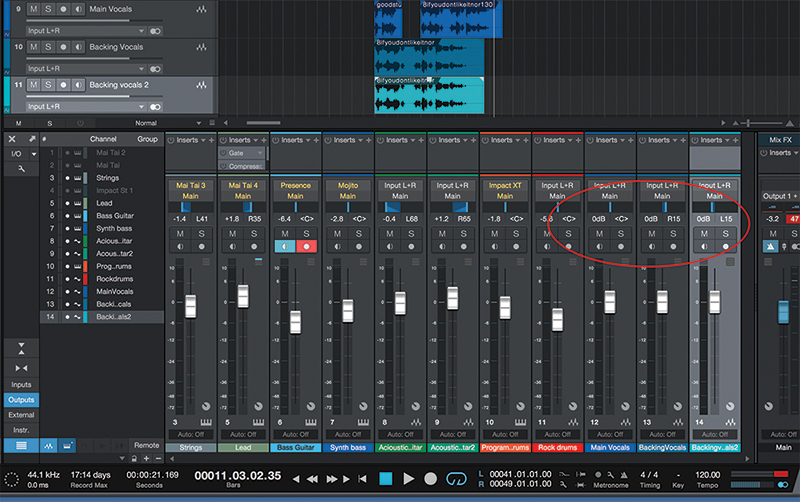
7. We’ve added some vocalists. Again, the lead vocalist sits in the middle and you could group the backing vocalists either side or, as we’ve done, slightly to the left and right, or even both backing vocalists to either side.
8. With percussive parts you can pretty much go wild and experiment with some extreme panning, but like anything in mixing it’s best not to be too extreme unless you are deliberately trying to go for a certain effect.
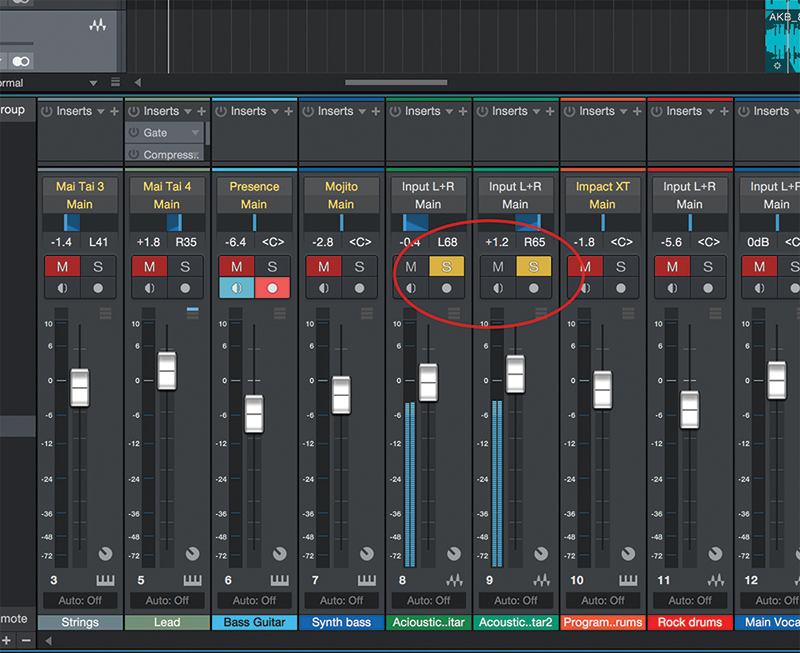
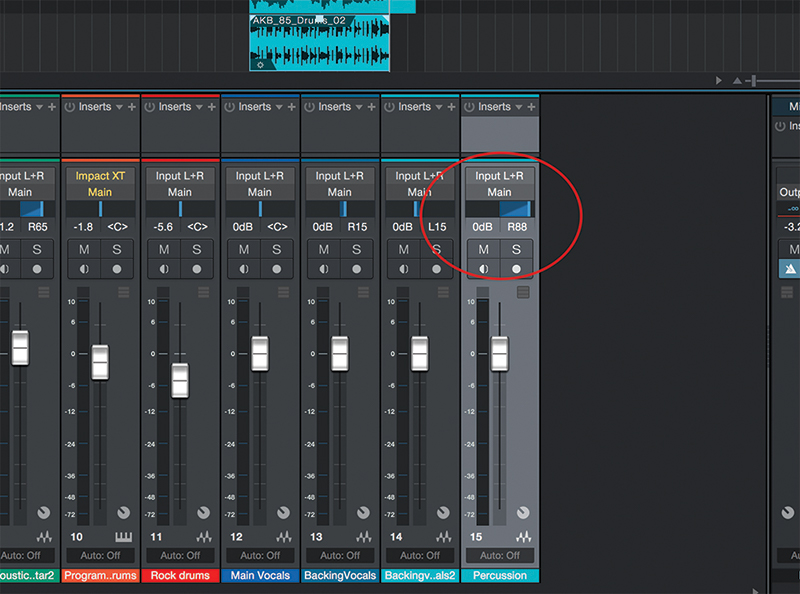
9. Use the Mute and Solo buttons to bring tracks in and out or check groups of similar sounds against one another. Here we have just the guitars solo’d to check they are okay. Do this across all groups of similar sounds.
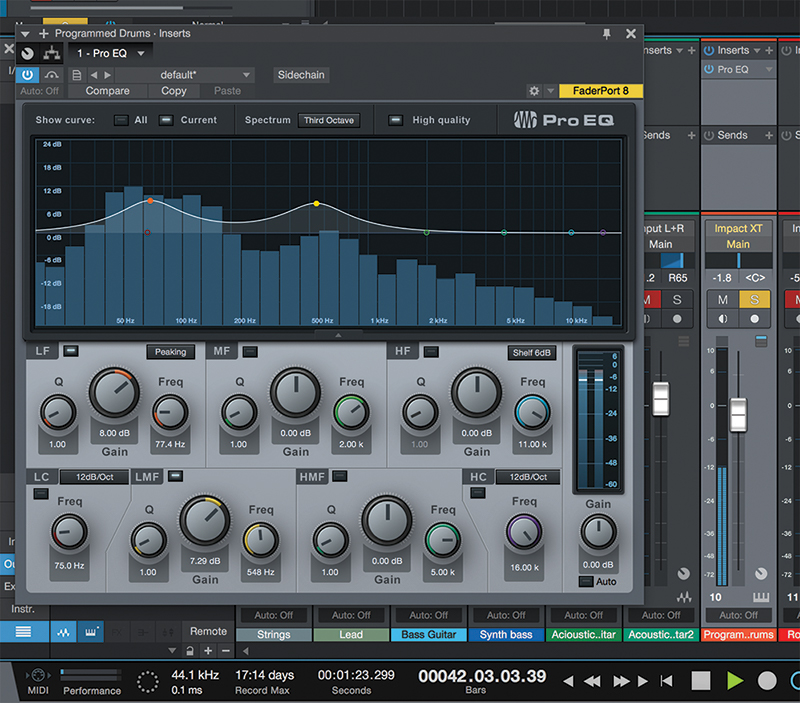
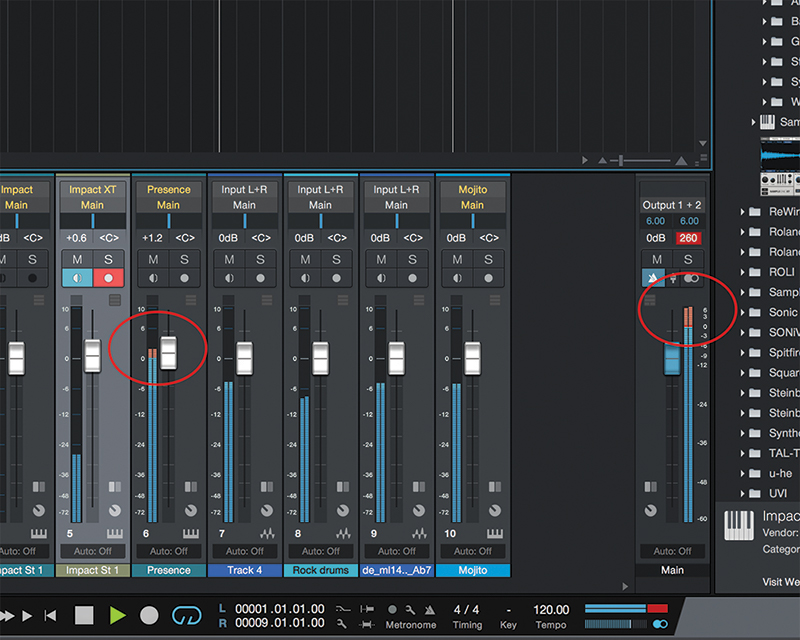
10. The programmed drums track is still sounding weak so we’re going to bring in a touch of EQ which will boost it and make it more prominent. Solo and un-solo it to hear the effect.
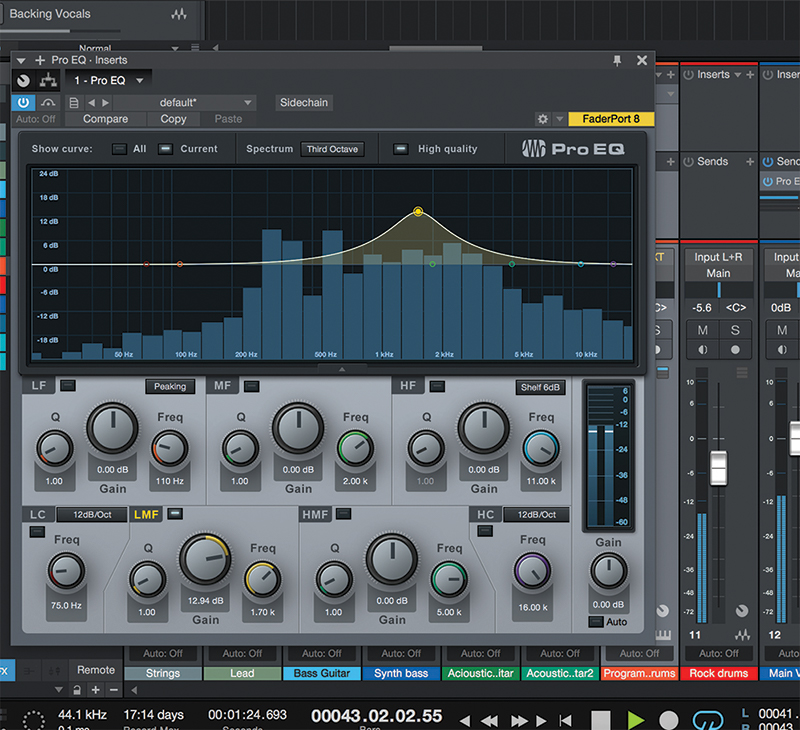
11. We’ve done the same thing with the vocal. Rather than pushing the volume, we’ve simply nudged the EQ up at around 1.5kHz to make it stand out more from the backing vocals.
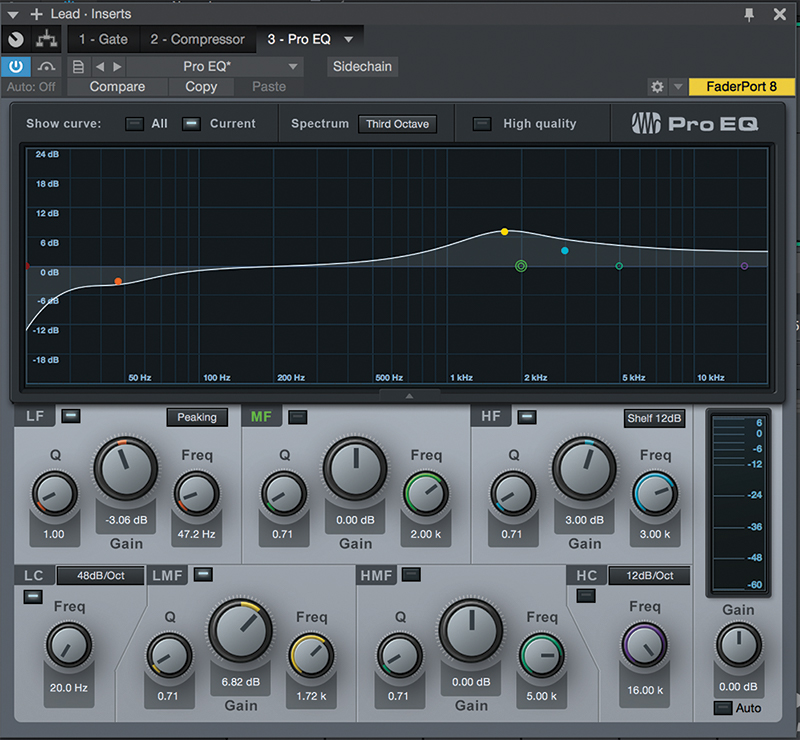
12. We’ve applied the same thing to the Lead sound, taking the bass down a little (it’s a good idea to reduce the bass on most instruments so they don’t clash with the bass parts) and nudged it up at around 1.7kHz.
![]()
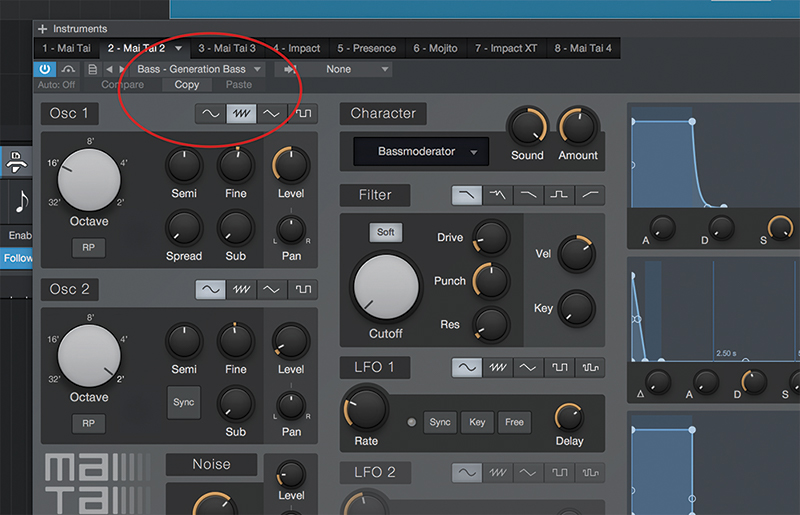
One of the best ways to prepare for mixing in any DAW is to have a template set up with compression and EQ on every channel. It saves time as EQ especially is your friend when it comes to mixing and you might find you’ll use it on every track.

13. Now we’re turning our attention to a couple of bassier aspects of the mix. Solo your kick, bass and drum parts and listen carefully whether these low frequency parts are interfering with one another. Ours certainly are!
14. You might think that a lazy solution would be to change the bass preset sound to one that doesn’t clash so much, and don’t be frightened to take this simple route, although we like our bass sound so we’ll find another solution.
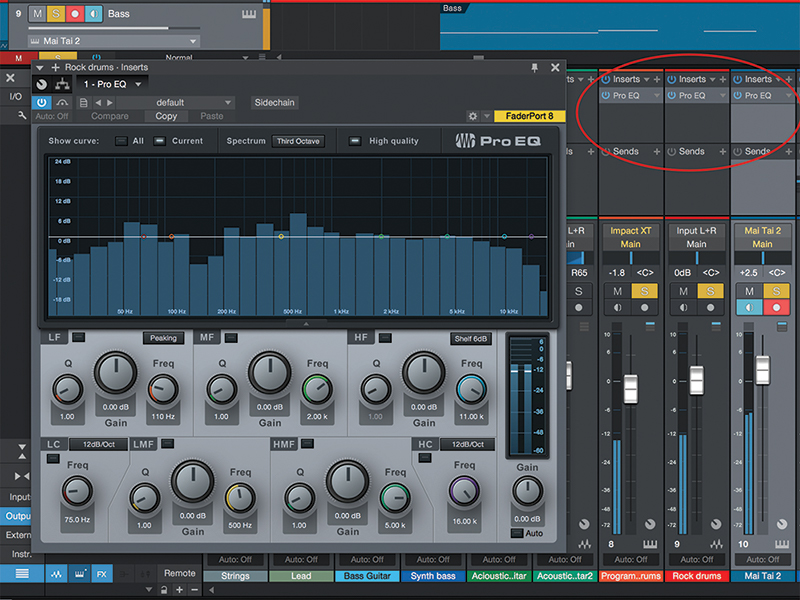
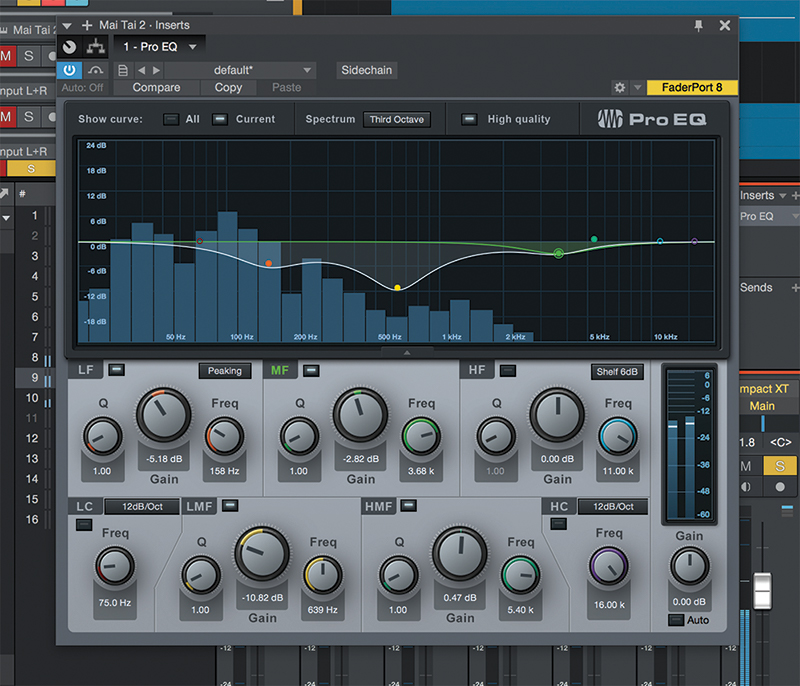
15. And that solution is creative EQ-ing. In this case, we’re going to EQ the bassier sounds away from one another, so make sure you have a Pro EQ placed on both kick and snare and the rock drum loop that we’re using.
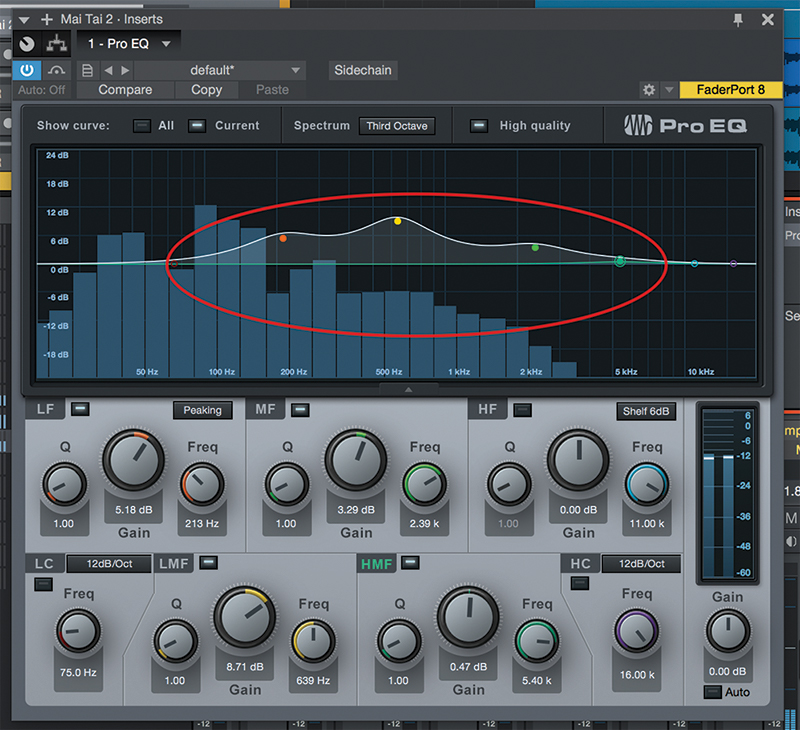
16. We’ll apply opposing EQ curves to each of the clashing bass parts, starting with a boost as shown to the main synth bass part. Already the sound as been lifted away from the kick and is more distinct.
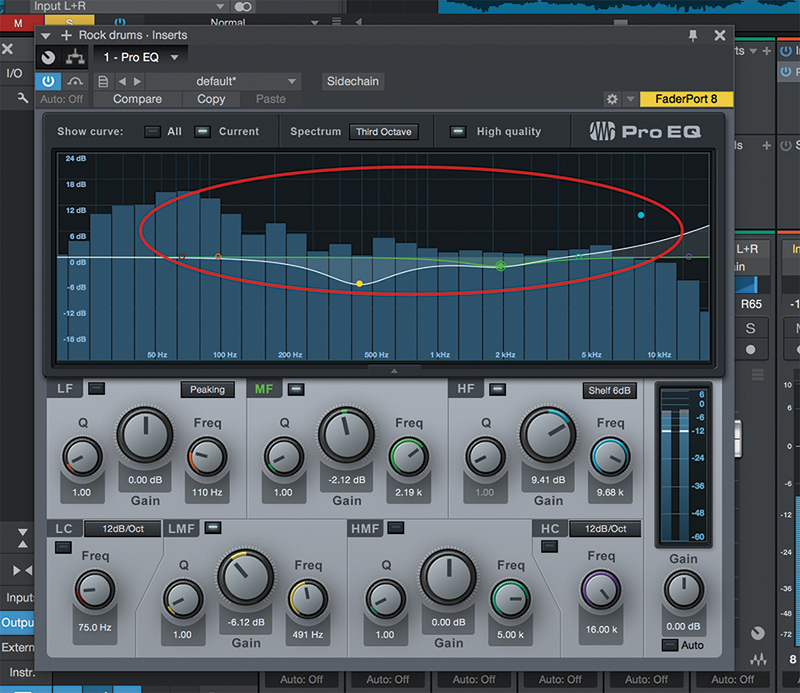
17. We’ve applied the opposite curve to the rock drums and that accentuates the difference. We’ve also applied a slight boost to its higher frequencies that helps to lift it even further.
18. Do try the opposite way around too, that is, cut the bass and boost the drums. In this case it definitely sounds better the first way we did it but it was certainly worth a try!