How to create your own sample instruments in Pro Tools
With UVI Falcon, Pro Tools users have access to far more than just another workstation synth with presets to scroll through. We show you how to use it to build your own instruments in Pro Tools, from scratch…

Last time, we looked at Pro Tools 2018’s recently added virtual instrument, the UVI Falcon. We took a basic look through the features of what is a very deep and powerful workstation, capable of complex synthesis and sampling techniques. Here, we’re going to delve a little deeper into the instrument. We’re going to use a sample library we’ve recorded ourselves to build a sample-based instrument from scratch.
For this sample instrument, we’re going to use samples of a 16-key Malian balafon, purchased at the Maison des Artisans in Bamako, Mali, while fortunate enough to be visiting the country for the Festival Au Désert back in 2010. The instrument was recorded in Metropolis Studio A, with assistance from Liam Nolan, through a stereo pair of Neumann TLM 170 microphones placed about three feet above the balafon and a further spaced pair of Neumann M 49 room mics. We recorded four velocity layers per key, and have mixed the close and room mics together to create 64 samples to be loaded into Falcon.
It’s possible to create a sample instrument from a single sample, using the built-in pitch-shifting to map a single note out across the whole keyboard, but the further from the source pitch you get, the more synthetic the sampling is going to be. Similarly, you can use the amplitude envelope to map velocity to level, but this won’t give you the variation in tonality that a real instrument gives when it is played heavily or softly. In the early days of sampling, when hard-disk space was at a premium, it was standard practice to use as few samples as possible.
While it could be argued that the limitations of the sampler helped to create the character of those instruments, they didn’t tend to sound all that realistic. More recently, hyper-sampled instruments with tens or even hundreds of samples per note are being created, providing incredible detail. However, this level of detail takes an incredible amount of time and patience, not to mention skill, from the performer, recordist and sample library coders.
For this sample instrument, we’ve recorded four samples per key, capturing each of the 16 keys, which are tuned to G#/Ab, B, C#/Db, E and F#/Gb (an E major pentatonic scale, commonly played as a C# minor pentatonic), spread out across three octaves. From this, we can create a sampled balafon with some of the dynamic response of the real thing, with velocity controlling which of the four samples per key is played, as well as at what volume. We have a greater pitch range than the real instrument, too, by using pitch-shifting to create the missing notes of the chromatic scale.
In addition to pitch, it’s important when building a sampling instrument to get the amplitude envelope configured in a realistic-sounding way. Most instruments have a complex relationship controlling the note length, with the musician able to hold notes for considerable amounts of time, while other instruments are more percussive in nature, such as the balafon we’re using here.
Each time a key is struck with the mallet on the balafon, it rings out for a fixed (and quite brief) length of time. It could be muted, to shorten the length of the note, but there isn’t much a musician can do to lengthen it further. For playing as a sample instrument, we want to emulate this type of behaviour, so we don’t need to set up any sample looping points to try and extend the length of the note.
Similarly, we want to try and make sure that the full sample plays out every time a key is hit. This is done from the amplitude envelope in the sampler. This module also controls how much variation there is when triggering a sample at its lowest and highest velocity position. If we don’t set some amplitude variation, then we will only hear the four velocity strengths that we’ve recorded providing any dynamic interest.
Learning how to create your own sample instruments opens up whole new creative options in Pro Tools with UVI’s Falcon instrument. In addition to sampling any unusual instruments you come across, you can also create unique, custom instruments from any sounds you might happen to record.
The more you experiment with sound design, the more sounds you might come across that you want to be able to create entire instruments from. Sampling enables you to pitch-shift even a single example across a whole range of notes to create custom instruments.
Create a sample instrument using UVI Falcon: step-by-step
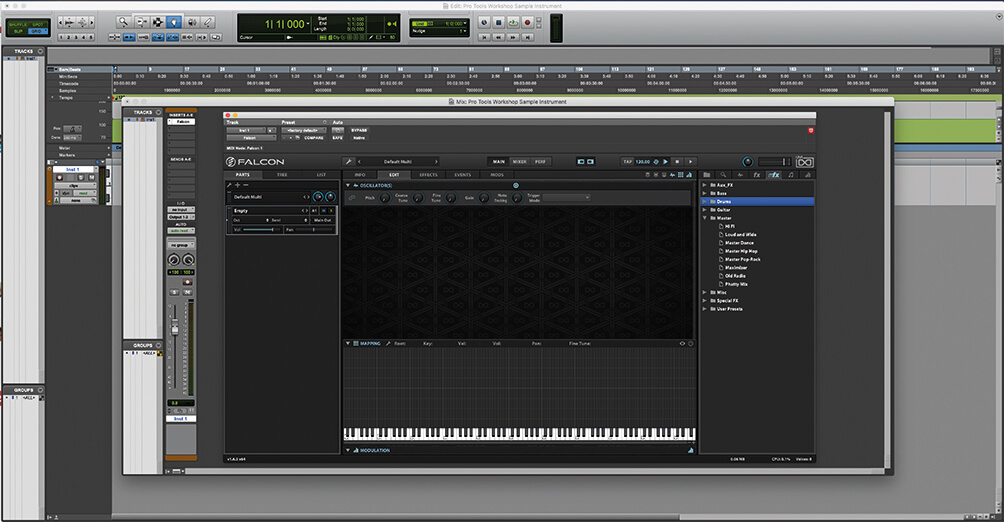
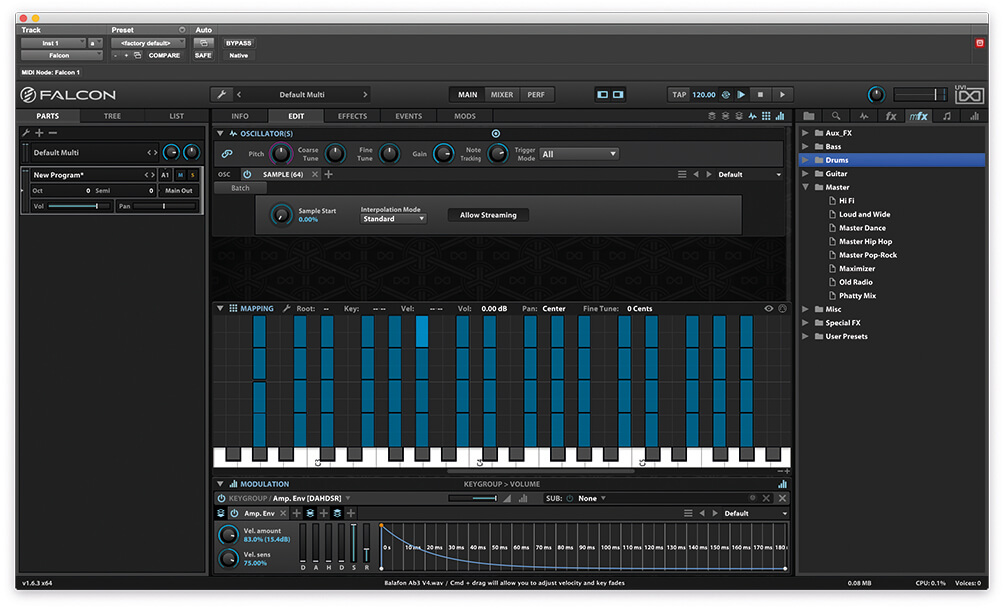
1. Our Pro Tools project this issue contains a single instrument channel with an instance of UVI Falcon in the first plug-in slot. You’ll find the project file on the DVD, or at MusicTech.
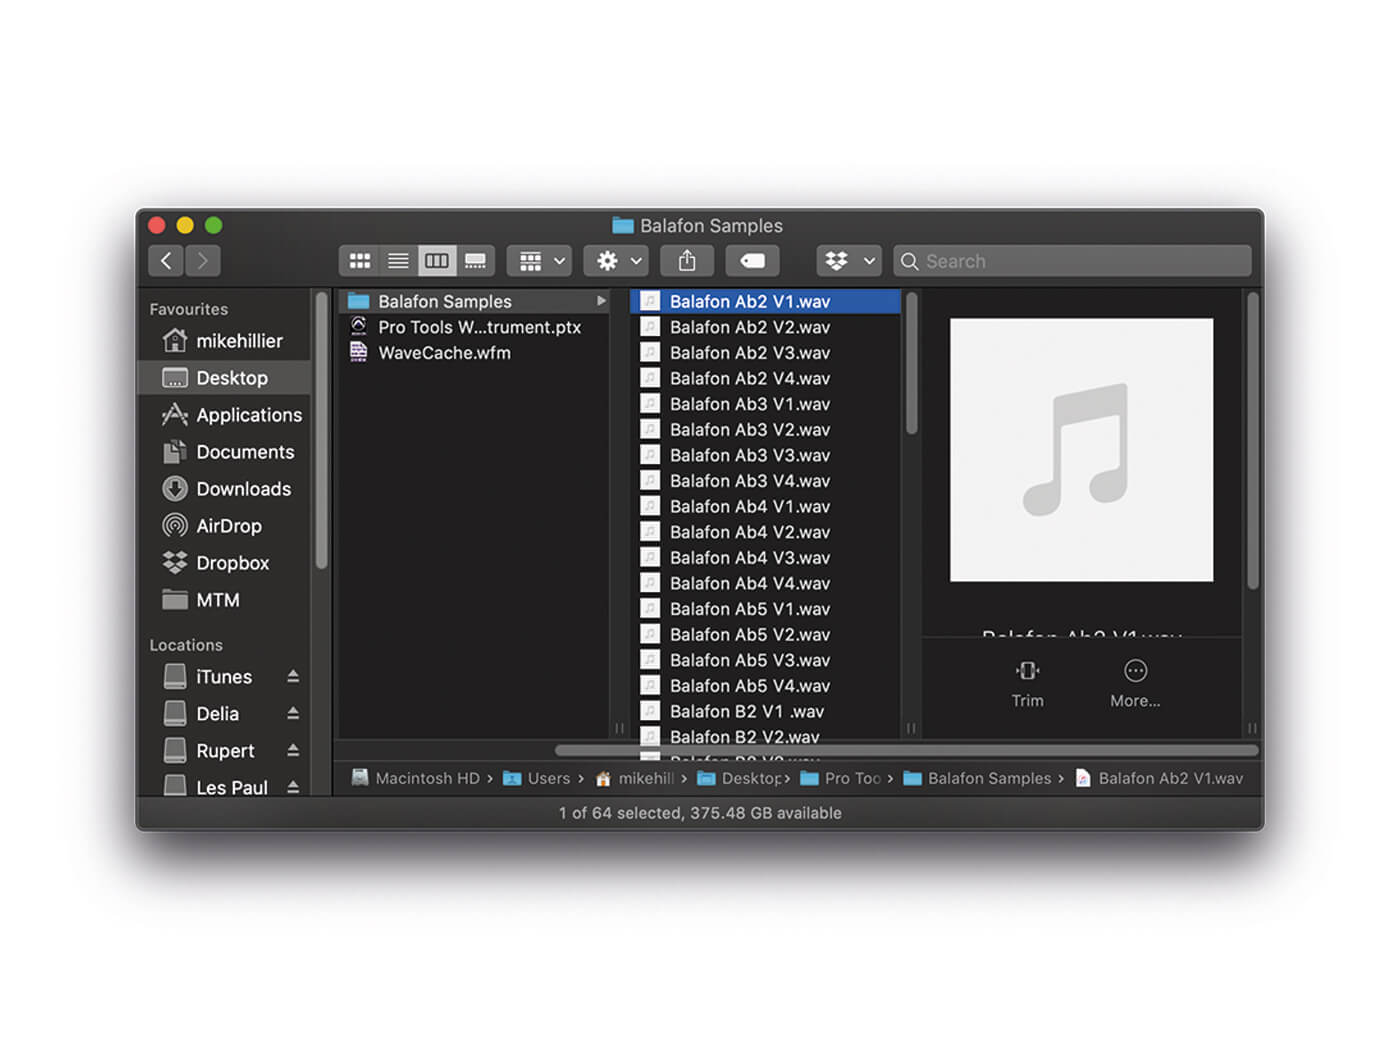
2. In the project folder supplied with the workshop, you’ll find a folder containing the 64 sample/audio files which we’re going to use to build our balafon instrument.
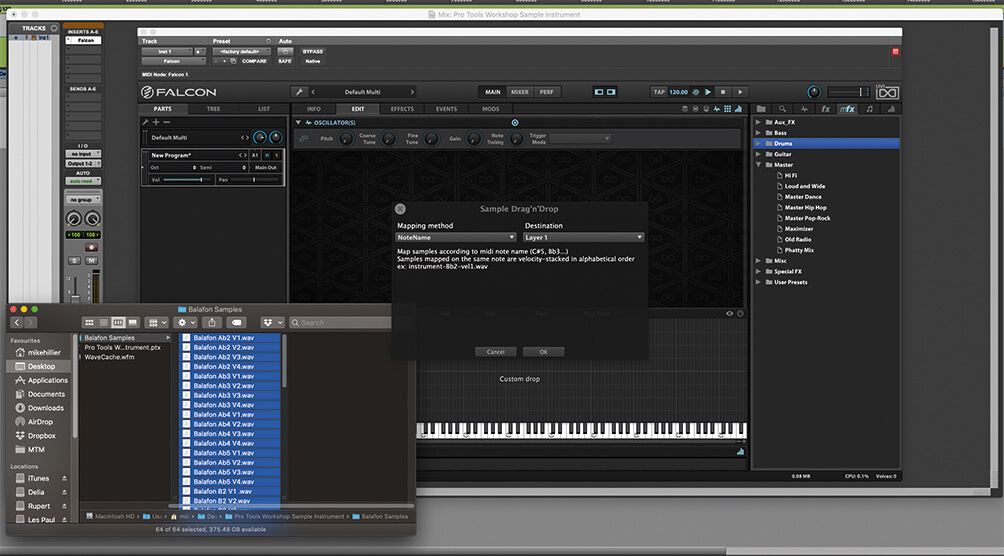
3. Now it’s time to drag the sample files from the balafon that we have supplied from the project folder onto the Falcon GUI while holding the Alt (PC) or Option (Mac) key.
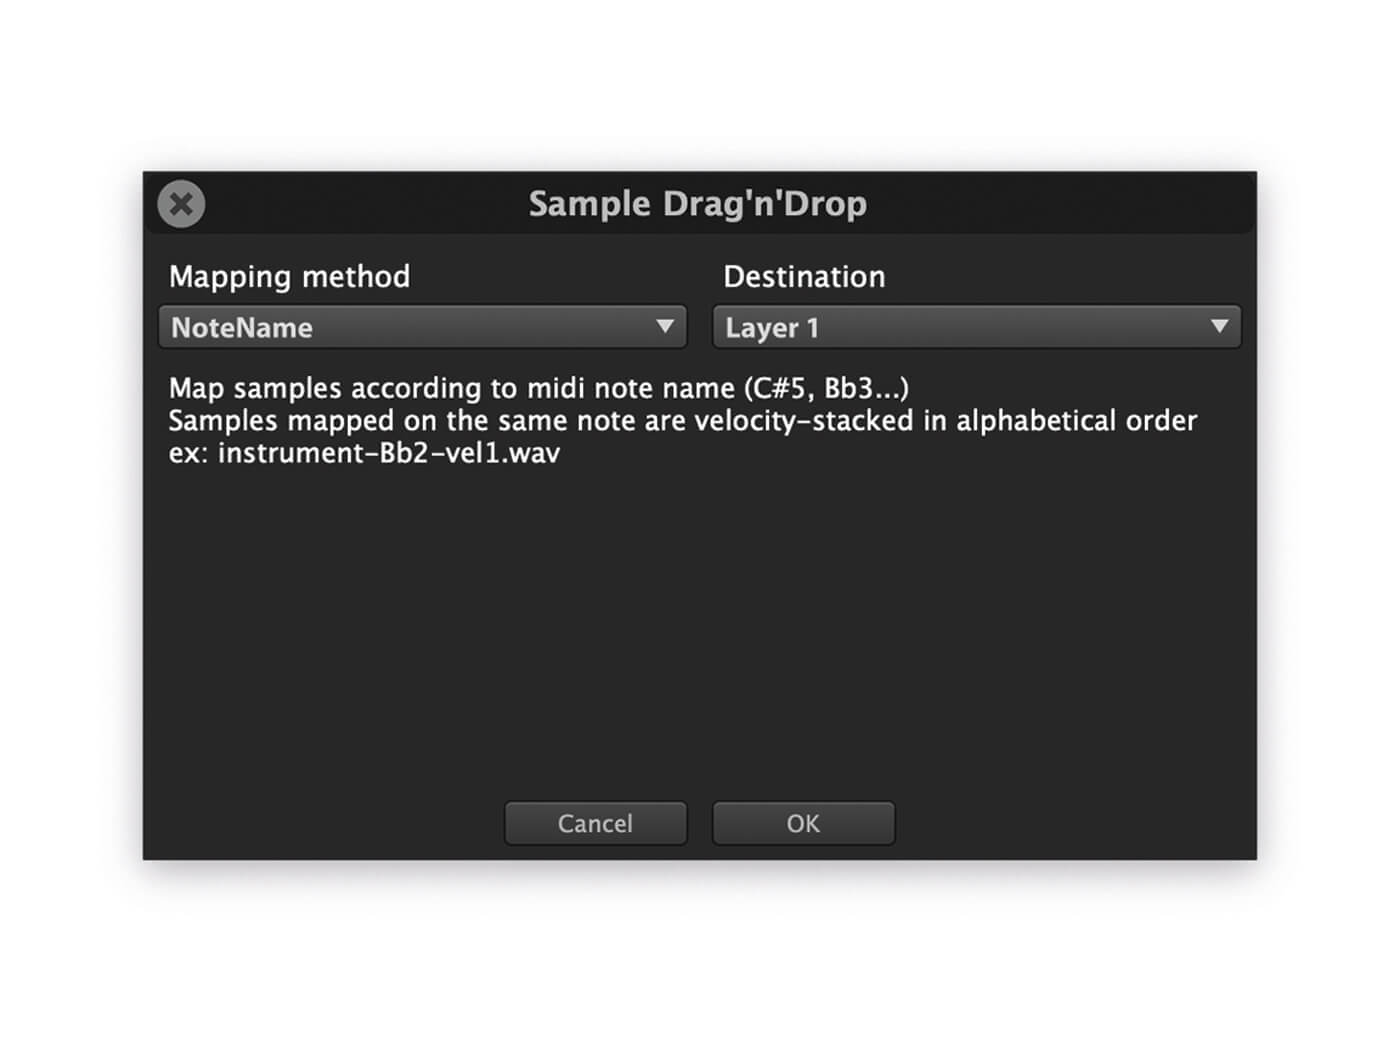
4. The sample drag-and-drop window allows you to select the mapping method and layer. We have named our files in the ‘instrument-note-velocity’ default naming convention. Select it, and Layer 1 as the destination, and press OK.
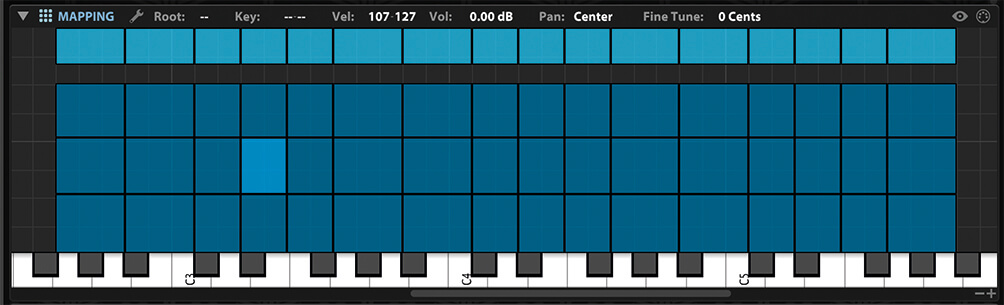
5. This maps our 16 notes onto their keys and places the velocity layers into evenly spaced groups of four. Playing any of these will trigger the sample, but the amp envelope doesn’t sound realistic when releasing a note.
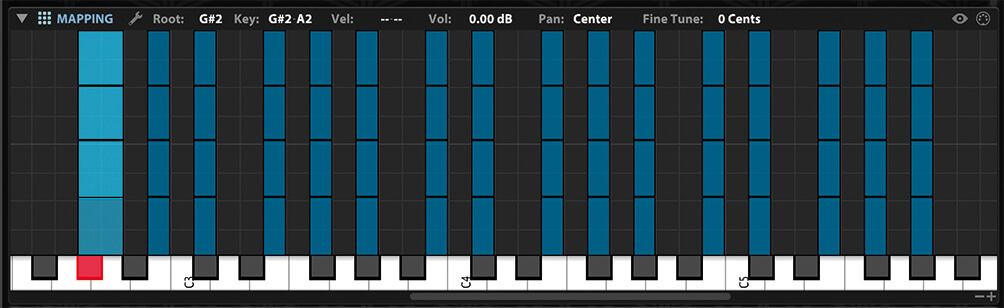
6. We can fill in the missing notes by highlighting each sample and dragging it out to fill the gaps. Start by highlighting all four samples that make up the lowest G#/A♭ and drag the edge out one semi-tone to the right (up in pitch).
![]()
LIST EDITOR In addition to editing the sample instrument from the GUI, it’s possible to edit the range of each sample from the List Editor. Any edits here will also appear in the GUI, so it’s still possible to visualise what is going on in your instrument.
7. Take the next set of four samples that make up the B and drag the edge of those one semitone to the left. The next missing note in the scale, a C, could be created from either the B pitched up or the C#/D pitched down.
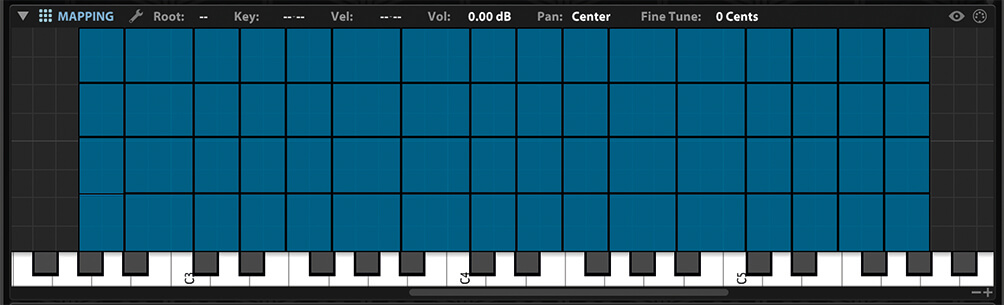
8. At the extremes of the range, the lowest and highest samples could be stretched out to fill as much as you require – but remember, the further you pitch-shift the notes, the less realistic they are likely to sound.
9. You should be able to play just over three octaves from your keyboard, with different velocities triggering different strengths. We can tune this to your playing style, if you want the loudest sample to trigger on the loudest of velocities.

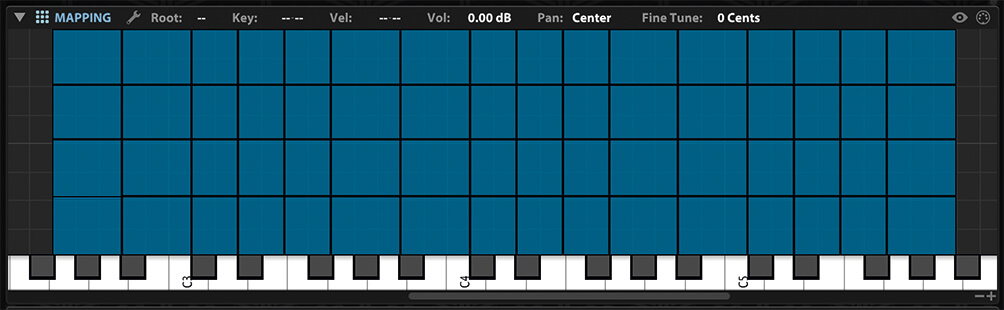
10. Fill in the missing space by highlighting the third-loudest velocity layer and dragging the top of these up to meet the top velocity layer. You could further fine-tune this by adjusting the first and second velocity layers.
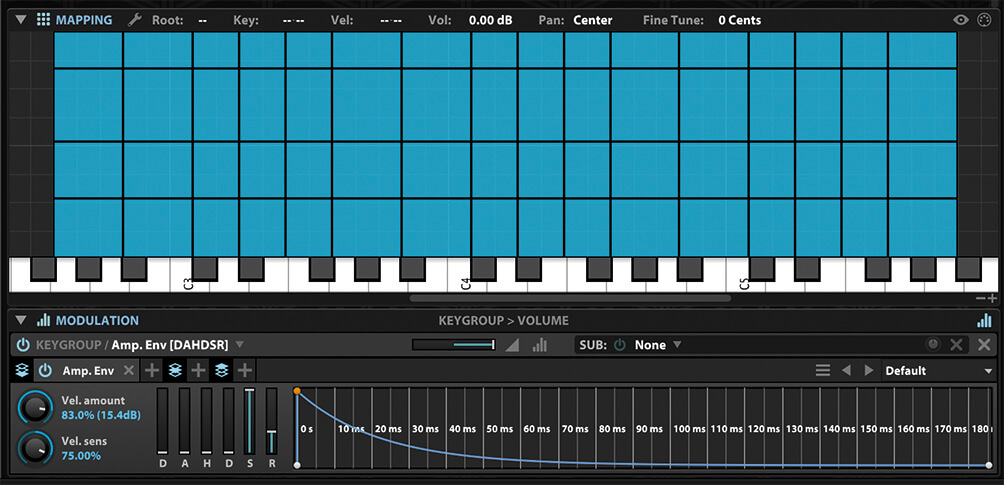
11. Now highlight all of the sample layers in the mapping editor and scroll down to the amp envelope in the Modulation section.
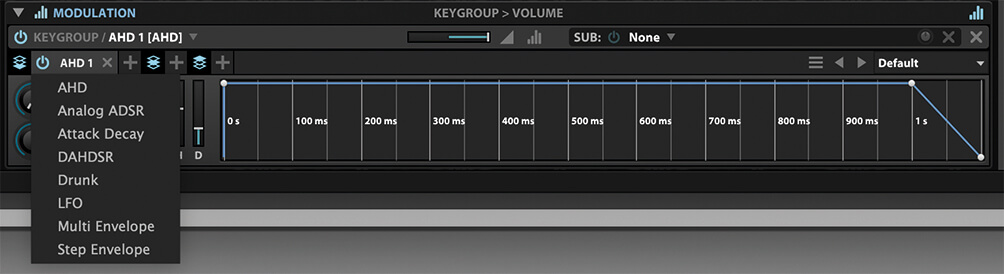
12. Because of the nature of percussive instruments like the balafon, a full DAHDSR envelope isn’t necessary. Notes will ring out unless muted or hit again. Let’s swap the DAHDSR envelope for a simpler AHD envelope.
![]()
AUTOMATIC KEY RANGES Rather than choose for yourself which notes extend onto which other notes for pitch-shifting, it’s possible to get Falcon to determine this itself. Highlight all the notes and select Auto Extend Key Ranges from the right-click pop-up menu.

13. The default position seems to work, with 0 attack and a lengthy Hold parameter. But we can save on system resources in polyphonic performances if we reduce the Hold to something a little more realistic.
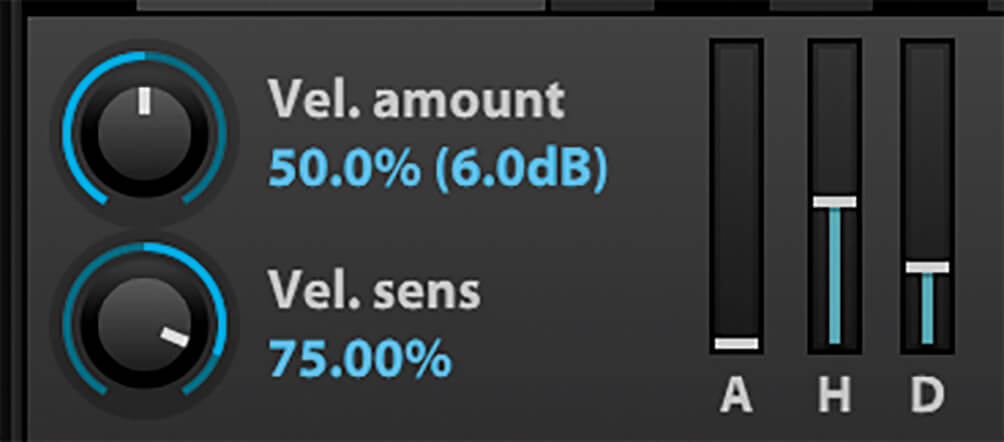
14. We can improve the dynamic expressiveness of the instrument further if we increase the Velocity Amount parameter of the AHD envelope. This ties the strength of the velocity to the strength of the played signal.
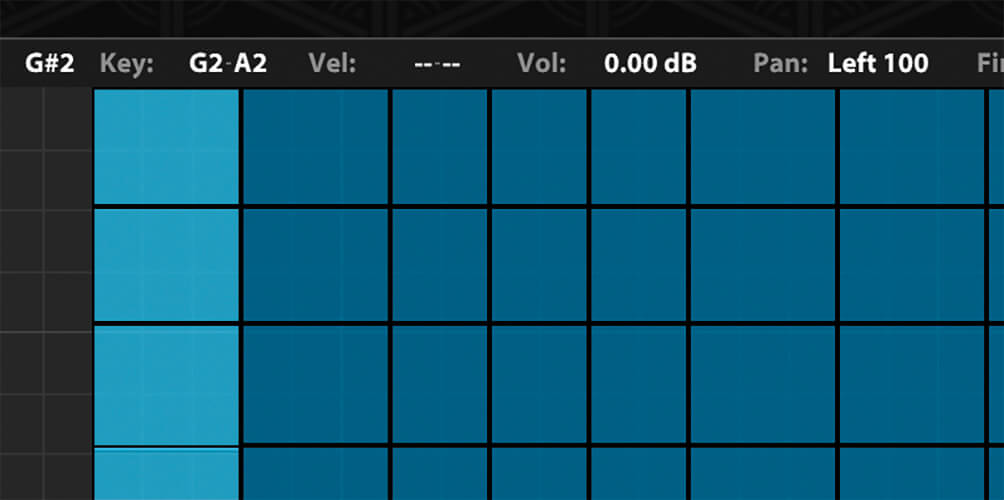
15. The samples we’ve used were recorded in stereo, so the bass notes will naturally be slightly further to the left than the higher notes. If you’ve recorded your samples in mono, assign each note its own stereo position.
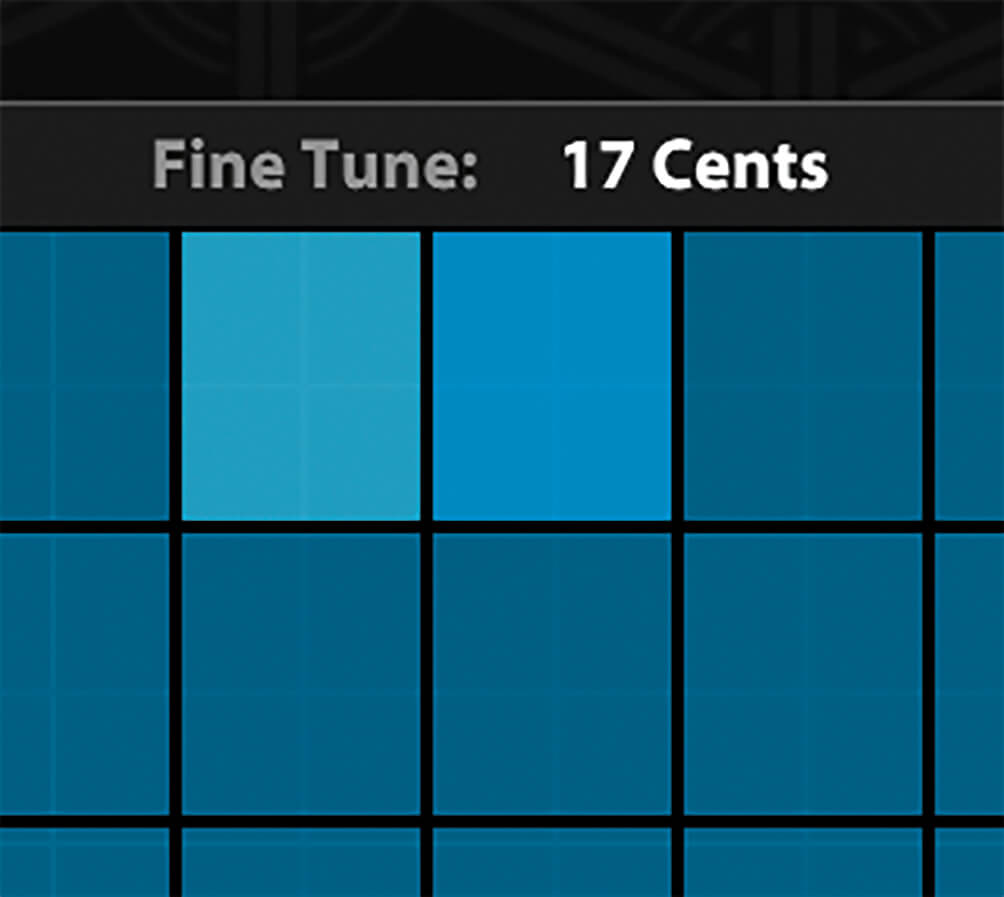
16. Similarly, if any of the notes you’ve recorded were not perfectly in tune when you began, you can adjust the fine pitch of individual samples from the mapping editor.
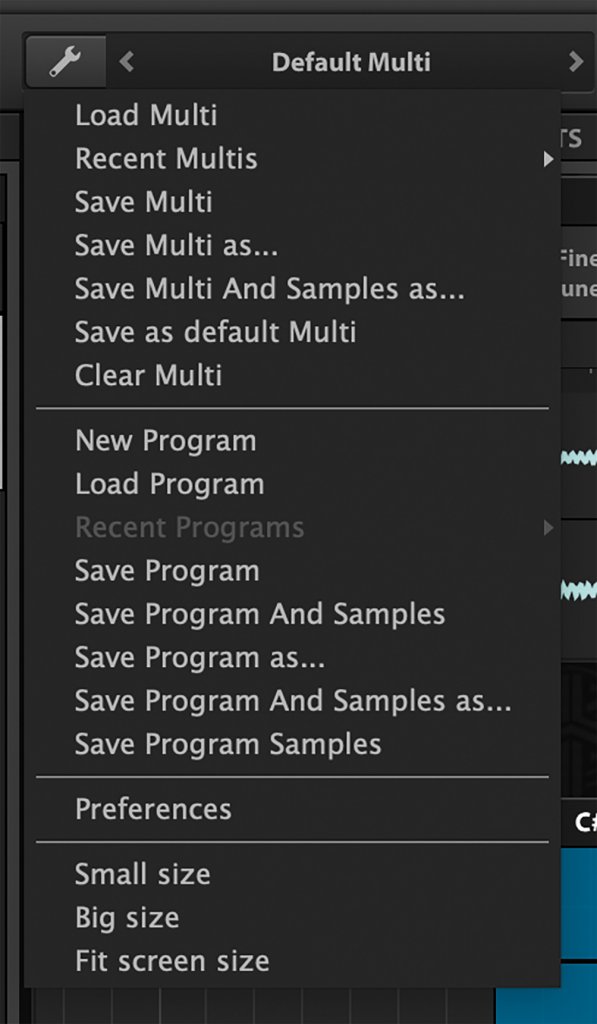
17. With your instrument built, it’s time to save it. Click on the spanner icon at the top of the Falcon GUI and select ‘Save Program and Samples As’.
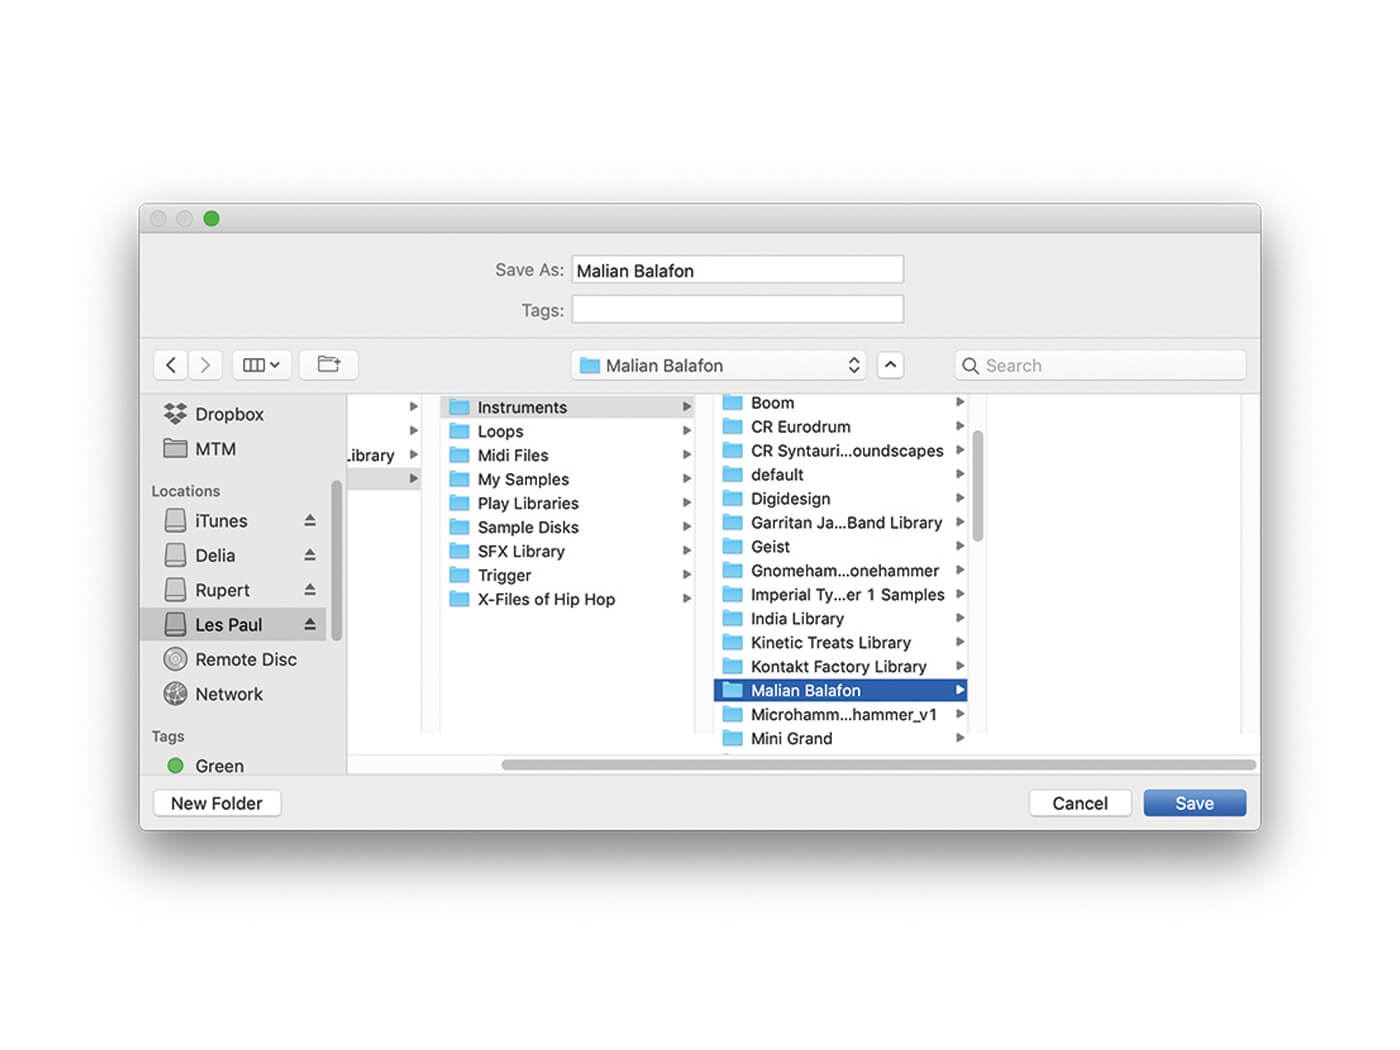
18. Save the program in a suitable location on your drive, and give it a suitable name. You will now be able to recall it, ready for use in your next project.