How To Create Tape Emulation Effects in u-he Satin
Making music in the box is fast and efficient, but the distinctive sound of old school techniques still has a lot to offer. High-quality tape emulation effects such as u-he’s excellent Satin plug-in allow you to recreate some of the magic of the analogue era… How To Create Tape Emulation Effects: step-by-step 1. Most tape […]

Making music in the box is fast and efficient, but the distinctive sound of old school techniques still has a lot to offer. High-quality tape emulation effects such as u-he’s excellent Satin plug-in allow you to recreate some of the magic of the analogue era…
How To Create Tape Emulation Effects: step-by-step
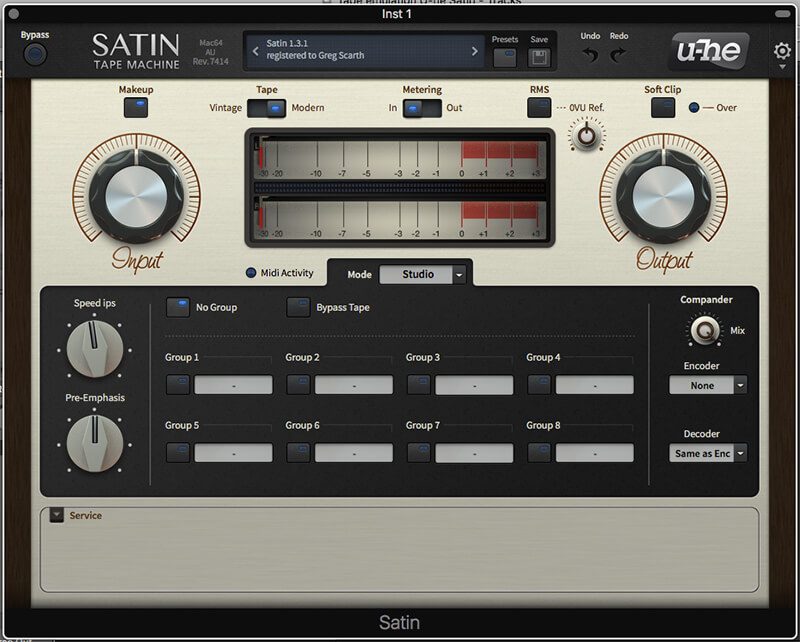
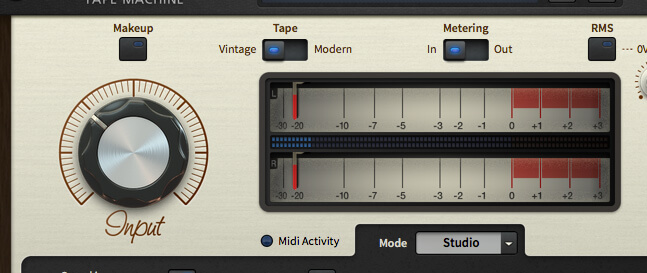
1. Most tape emulation plug-ins are modelled on professional multi-track tape machines from the 1970s and 80s. Satin’s interface is fairly typical of what you’ll find in a number of similar effects: the key parameters are input and output gain, tape speed and a panel of ‘Service’ settings including hiss, crosstalk and bias.
2. Many of the popular tape emulation plug-ins can recreate delay and flanging effects associated with vintage tape machines, but we’re going to stick to the basic sound of the tape itself here. It’s a smooth, distinctly analogue effect which is hard to achieve with other plug-ins.
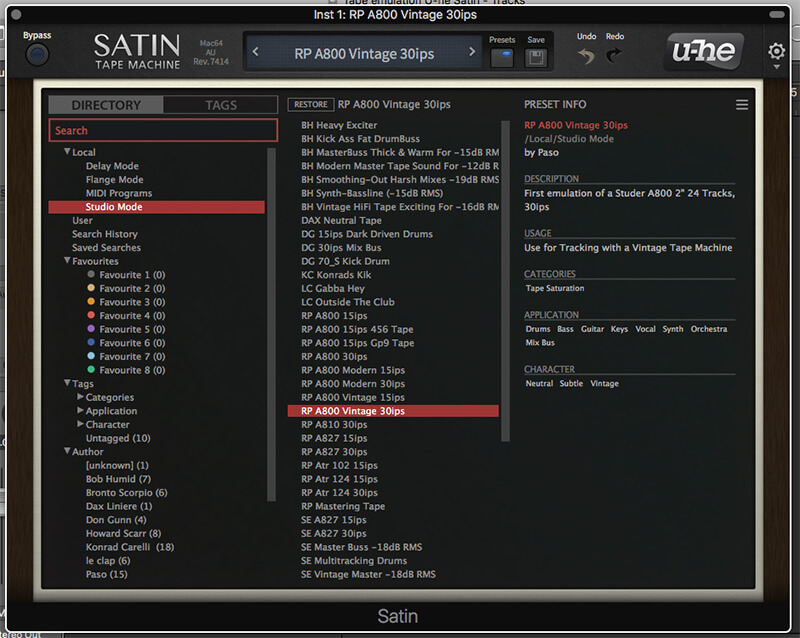
3. In simple terms, tape emulation is a combination of compression and saturation, but the results can sound very different depending on the material you feed into it. Start with a simple preset (we’ve chosen RP A800 Vintage 30ips) and try a range of sources such as vocals, individual drum tracks and complete mixes to see how the emulation affects the sound.
4. Before digging into the more subtle parameters, it’s worth getting to grips with the basics. The two most important controls are the input gain and the tape speed. Adjust the input to control how hard the signal hits the virtual tape; higher input levels result in more saturation and compression. Push it to extremes and the signal will distort heavily, which can also work well on some sounds.
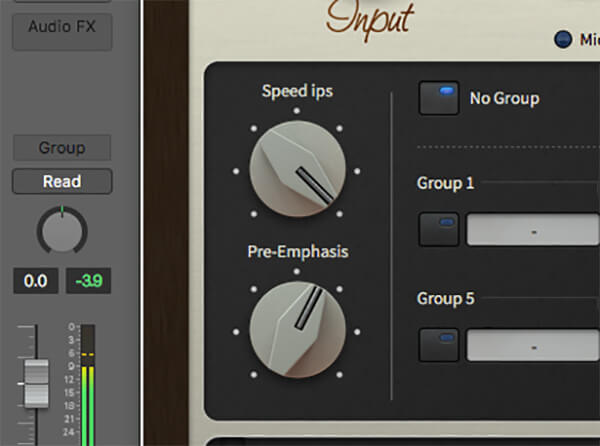
5. Higher tape speed (measured in inches per second or ‘ips’) generally results in a clearer, less coloured sound and lower noise. 30ips is a good starting point for more subtle effects and 15ips is good for a more lo-fi sound. Anything less is likely to colour the frequency response quite heavily and introduce lots of hiss.

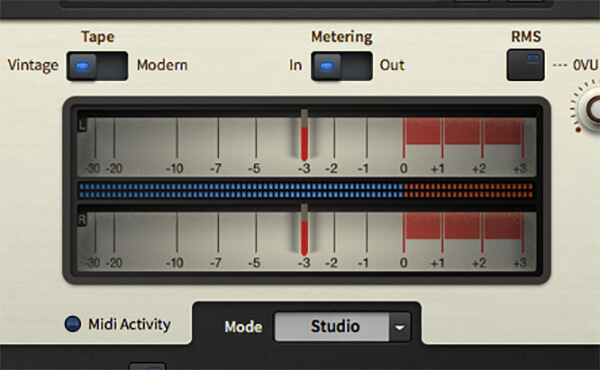
6. Satin also offers you the choice of two virtual tape formulations: Vintage and Modern. Many of the plug-in’s presets attempt to recreate the specific sounds of particular brands of tape, but this basic setting allows you to switch between mellower effects (Vintage) and slightly more hi-fi versions (Modern).
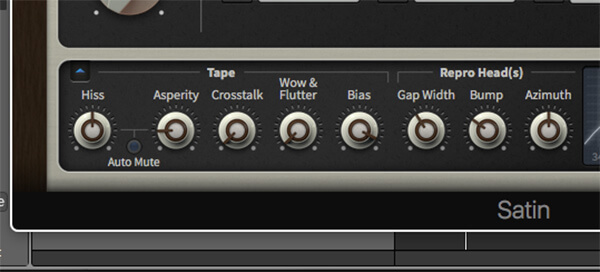
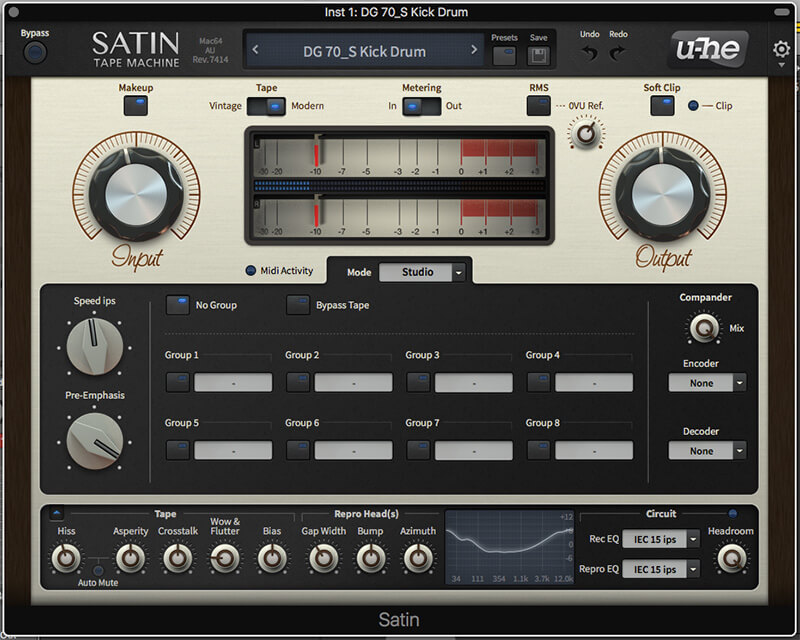
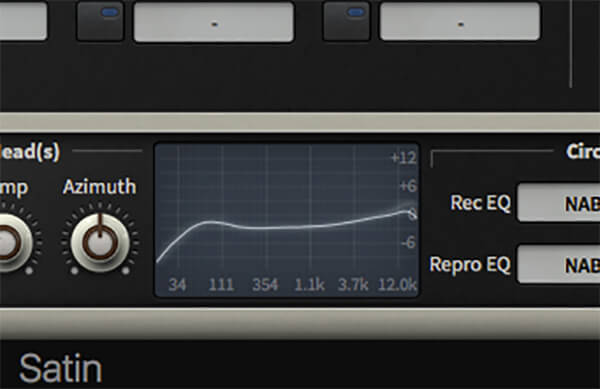
7. The Service controls allow you to introduce some of the flaws and foibles inherent to the tape format. Hiss is self-explanatory (and a little bit can actually sound good), but the technical intricacies of adjustments to repro head gap width and azimuth angle are best known to the handful of tape ops still working in studios.

8. Keep an eye on the frequency response curve in the lower section of the plug-in window for a visual representation of the changes you make to parameters. Note that this applies to all parameters, not just the Service settings. Switching from Vintage to Modern tape settings results in a flatter frequency response, for instance.
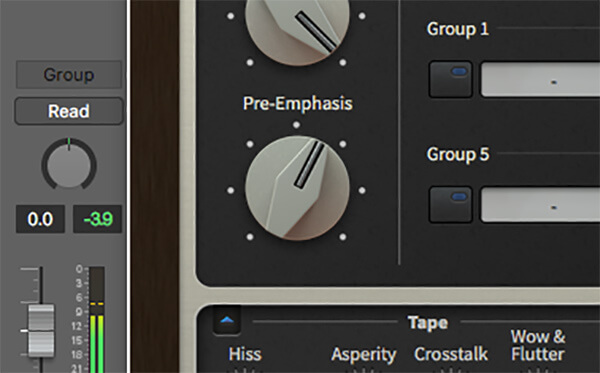
9. One of the weaknesses of tape is that the high and low ends of the frequency response can be quite weak. Satin’s Pre-Emphasis control allows you to compensate for this, solving the ‘gap loss’ problem which rolls off the upper and lower frequencies. More Pre-Emphasis gives a flatter frequency response.
10. Adding tape emulation to every track of your project can quickly overwhelm the mix. It’s useful to consider the way in which tape affected the sound of classic recordings. A small amount of colouration on every track is usually preferable to an overdose on one or two sounds. Try winding the gain up or speed down until you just hear the effect, then backing them off a touch.
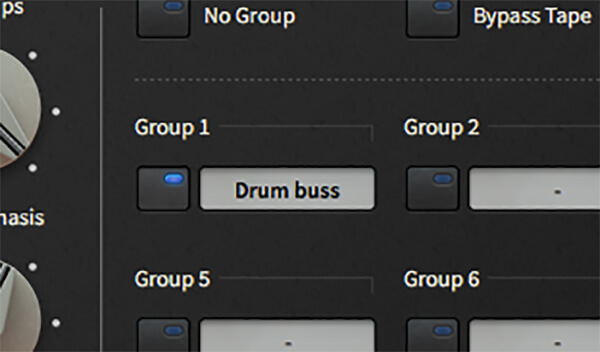
11. The better tape plug-ins on the market allow you to link instances of the effect together, imitating the effect of a recording spread across a multi-track tape. Assign tracks to Satin’s eight groups in Studio Mode to hear the effect on your project. Again, subtlety is often the best approach here, dialling back the input gain until the effect is barely audible but adding a cohesion to the overall mix.
12 . Finally, remember that tape emulation can be applied to the master bus as well as individual tracks. A/B testing is important here to ensure you’re not being seduced by the plug-in’s compression. Use the bypass button to ensure you’re not losing low-end punch or harming the frequency balance of your mix.