FL Studio Tutorial – Beat Juggling with Performance Mode
In a new series of tutorials we examine the intricacies of FL Studio – recently upgraded to version 12.1 and fast becoming one of the world’s most popular DAWs. In this first installment Arlo Giunchi talks us through juggling beats while in performance mode… Performance mode was added to FL Studio primarily as a live […]
In a new series of tutorials we examine the intricacies of FL Studio – recently upgraded to version 12.1 and fast becoming one of the world’s most popular DAWs. In this first installment Arlo Giunchi talks us through juggling beats while in performance mode…
Performance mode was added to FL Studio primarily as a live performance tool and has since been seen in numerous YouTube videos and live performances. The following tutorials explain how it can be used for creative beat juggling in an actual live situation or during song production.
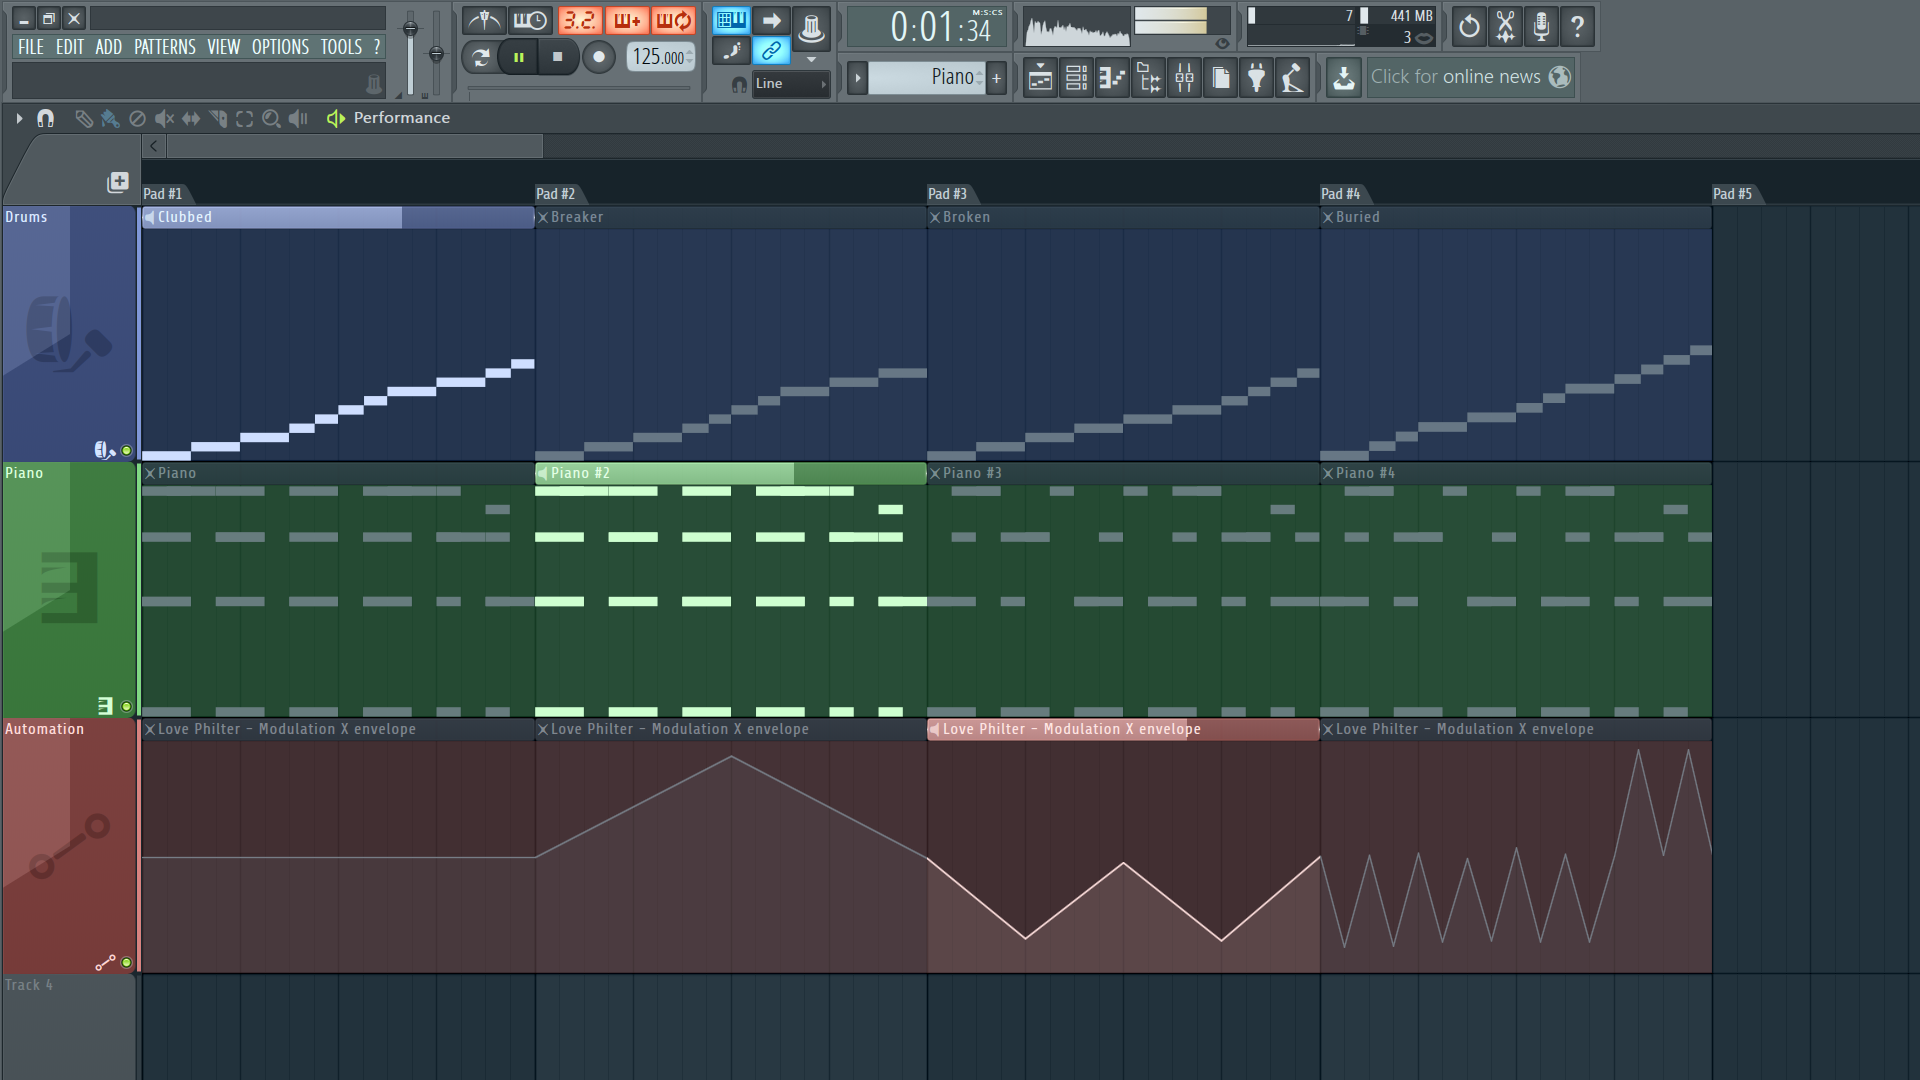
Essentially performance mode in FL Studio is the ability to trigger any audio, pattern or automation clip in the playlist directly, each playing independently of the project time line. These can be set to loop, play as one shots or other special playback modes such as marching clips.
Control can be achieved by simply clicking clips with the mouse, pressing keys on your typing keyboard, playing notes on a MIDI controller keyboard, pressing on a multi-touch screen or via one of the supported hardware controllers. The Novation Launchpad S is an ideal example along with others such as the Livid BASE or even the DJ TechTools MIDI Fighter 3D. LED feedback of the available clips and which are playing is displayed.
Many also include custom note and controller layouts so you can combine your clip triggering with melodic lines, finger drumming or parameter automation directly on the same device. Scene mode on hardware devices will trigger multiple clips via a single press, while snap mode can change or bypass the current trigger quantization value for creative changes.
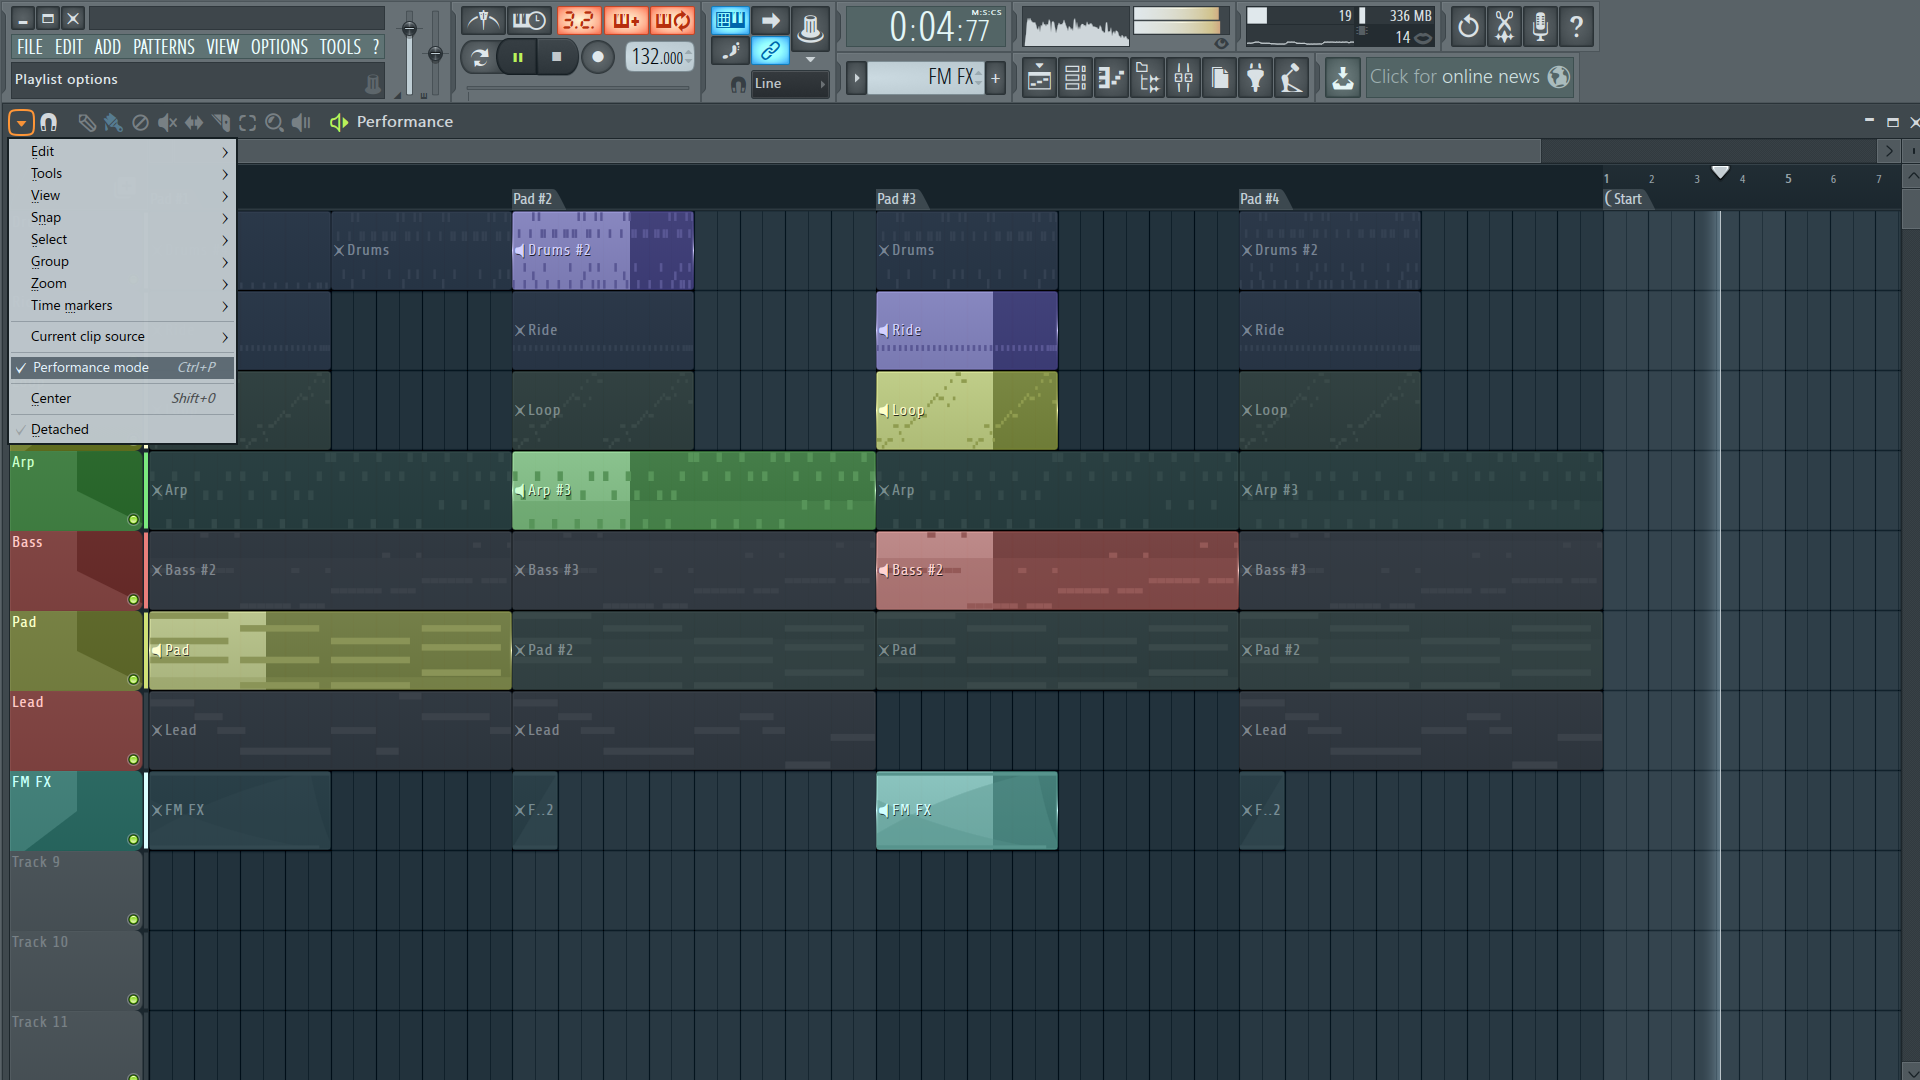
Instead of being placed in a separate window or tab as in Ableton Live, the area where you trigger your clips is just another part of the normal playlist. Anything before your Song start marker can be triggered. Additional markers define columns of pads on external controllers. The orientation of the clips are horizontal, matching each playlist track.
Not only an actual performance feature, the playback order of clips can be recorded to the playlist, and be used as a real time song arrangement tool. The clip juggling described in the following 2 tutorials can be recorded. This pattern clip triggering can then be merged to a new pattern clip from playlist options. This means easier arrangement later or it can be moved back into the performance zone to continue the process.
Born to Perform
Importantly performance mode plays the actual clips and not the source audio channels or note patterns. This means you could have the same pattern edited to different lengths or start points and each can be triggered independently of each other. Chop a one bar drum loop into small segments for example and each will play separately. Slice a chord progression pattern clip into its component chords to rearrange them on the fly.
Using auto position sync, clip playback starts from the position inside the clip relative to the song time, effectively a ‘legato’ mode. This allows you to always start a clip in the correct ‘phase’ with your song and other playing clips, for example if the first clip is playing its third bar and you trigger the second clip, the second clip will continue playback from its third bar instead of from its start.
Inspired by the sample chopping software MLR on the Monome grid controller, march and wrap mode recreates a similar function popularized by Daedelus. Chop audio, patterns or automation clips into segments that can be triggered in any order, letting the loop continue from that point.
Trigger a clip on one pad zone and once it has finished the clip on the next pad zone will play. For example, chop a drum loop clip into eight segments and place each on eight different pad zones on the same track. Now you have access to eight different start points within that one drum loop. Trigger one and the rest of the clip segments play in sequence, repeating the loop.
Performance Mode Set-Up.
Performance mode can be set up manually or automatically. Tools > Macros > Prepare for Performance mode will add 16 pad zone markers, a song start marker to the beginning of the playlist and enable performance mode in playlist options.

Drag or create clips in this performance zone to be able to trigger them. Highlight a section of the time line and use Ctrl+Insert to add more space for markers to the performance zone. Use Playlist Options > Markers > Add one > Every 4 bars to add more zones. In an existing project you can add markers in the playlist. Right click one and set it to the start marker type. Now the clips before this marker can be triggered in performance mode.
Click Here For Step-by-Step
