Building beats with Groove Agent SE in Cubase
For a bundled plug-in included in most versions of Cubase, Groove Agent SE is a surprisingly powerful and flexible beat-building toolbox applicable to all styles and genres.
Most DAWs come bundled with an endless assortment of effects and instruments. Many of these, it’s fair to say, are of the bread-and-butter variety. They’re tools that will be useful in a wide range of recording scenarios but are relatively primitive examples of their ilk. In Cubase’s case, however, the majority of the bundled plug-ins are actually rather impressive. Nowhere is this more true than with Groove Agent SE, included in Cubase Elements, Artist and Pro.
At first blush, Groove Agent SE looks fairly straightforward. It’s a set of trigger pads and an editing area. But, as is often the case with free plug-ins, appearances can be deceiving. Groove Agent SE is, in fact, a veritable drum and rhythm powerhouse. It integrates exceptionally well with Cubase (and Nuendo), complementing the DAW with a surprisingly versatile drum toolset.
Agents and kits
Groove Agent SE can host two different drum engines, referred to as agents. Beat Agent is the more conventional of the two, and is most like a traditional MPC-style hardware drum sampler, to the extent that it can actually import some MPC file types. Samples are assigned to the trigger pads – which are themselves associated with a MIDI note, of course – and are passed through a conventional sample-and-synthesis signal path featuring envelopes, filters, etc. Each pad can hold multiple velocity-switched samples, and sample start, end and loop points can all be modified from within Groove Agent SE.
The second engine, Acoustic Agent, approaches things in much the same way as virtual drum-kit instruments such as Superior Drummer and BFD do. Here, each drum instrument (kick, snare, etc) has multiple velocity switches, and each velocity layer has multiple articulations (that is, alternative samples that are played in turn so that no two consecutive hits sound identical).
Each close-mic’d drum hit sample is accompanied by samples recorded through overhead mics and room ambience mics, and you can even simulate the kick drum sound bleeding into the snare mics. All of this serves to create a very realistic and believable acoustic drum-kit emulation but it also limits how deeply you can dive into editing and personalising an Acoustic Agent kit.
Patterns
As well as being a drum sampler, Groove Agent SE also packs pattern-playback capabilities, accessible by switching the trigger pads into Pattern mode. Many but not all of the bundled kits have patterns associated with them that can be loaded along with the kit but you can also load kits and patterns as separate entities.
When in Pattern mode, each pad can have either a MIDI pattern or a Style assigned to it. MIDI patterns are the most straightforward. Many are bundled with Cubase and you can easily drag in patterns from the timeline, and you can store MIDI patterns in Groove Agent SE’s user folder so that they are available in all of your sessions. Groove Agent SE’s MIDI player allows you to apply a bit of drum-machine-style timing modification to the pattern too, such as applying varying strengths of swing and quantising to a pattern.
Styles package together multiple variations of a pattern, and are controlled via an interface that allows you to select which variation to use, and adjust the intensity and complexity of the resulting pattern. Groove Agent SE comes with a moderate collection of styles, and while it doesn’t provide the tools for creating and packaging your own Style files, Steinberg does sell a wide range of reasonably priced Groove Agent Style packages.
Well padded
Groove Agent SE organises its 16 trigger pads into banks – eight each for both Instrument and Pattern pad modes, for a total of 128 drum trigger pads and 128 pattern trigger pads. As mentioned, pads are associated with MIDI notes but there are only 128 of these to share out among potentially 256 trigger pads. In most circumstances this isn’t a problem because it would be unusual to be working with so many instruments and patterns that you run out of MIDI notes to assign the pads to.
Also, instruments tend to be assigned to notes starting at C1 and rarely need to extend much beyond C5, leaving plenty of notes free for use by pattern pads. Therefore, in most circumstances, you can use the same MIDI port and channel for triggering both instruments and patterns.
Working this way can become clumsy, though, even if you aren’t maxing out on pad assignments. Thankfully, Groove Agent SE provides a few solutions: each instance of Groove Agent SE creates two MIDI ports, instrument and pattern, which you can route MIDI tracks to; alternatively, instruments and patterns can be assigned to separate MIDI channels within the same MIDI port.
Let’s load up Groove Agent SE and see how to work with its kits, patterns and pads.
Using Groove Agent SE in Cubase: step-by-step
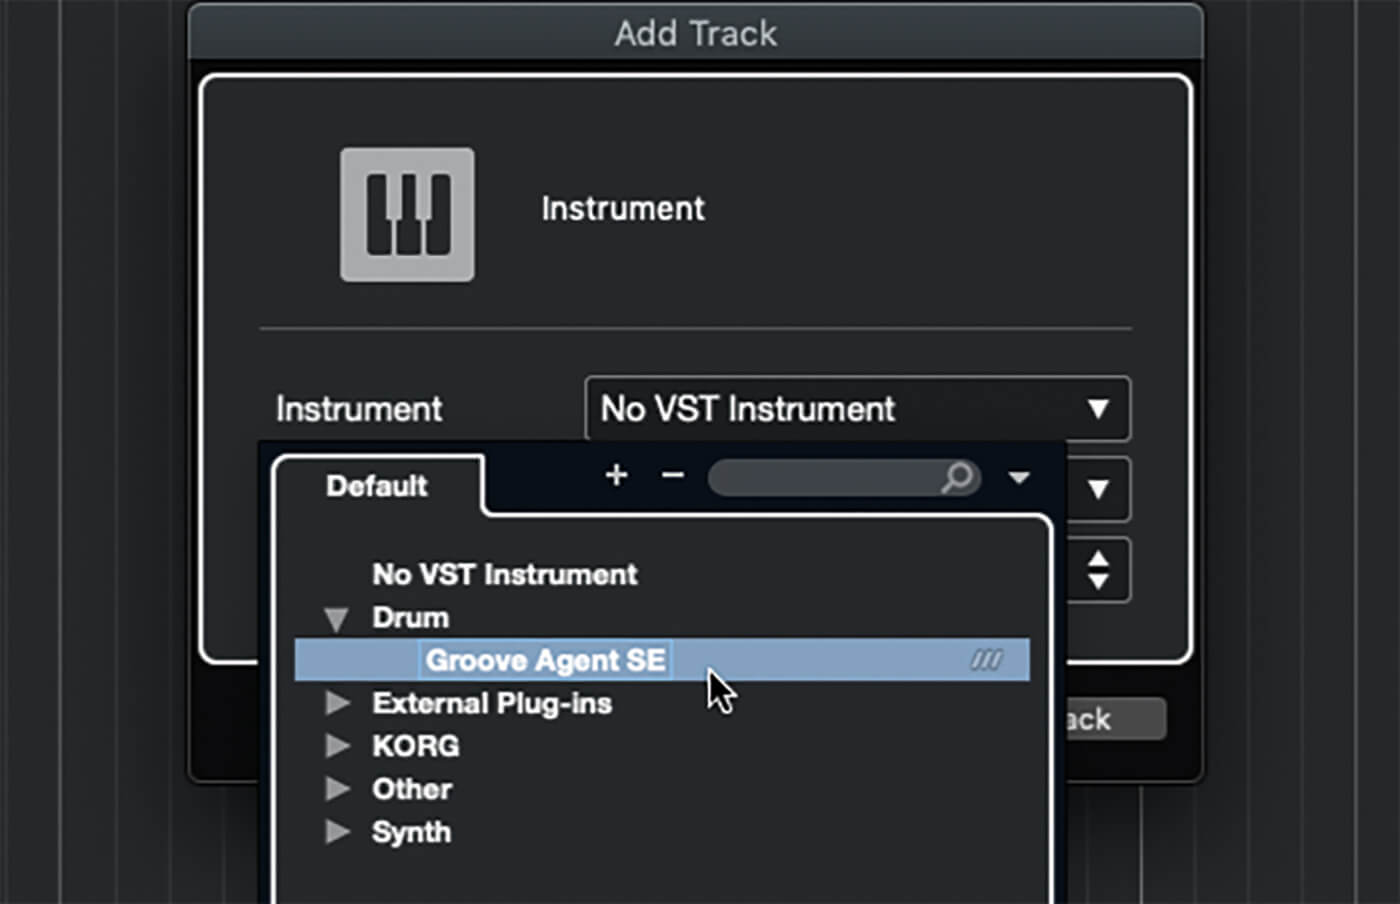
1. Launch Cubase and create a new empty project. Right-click in the empty tracklist area and select Add Instrument Track from the pop-up menu. In the Add Track panel, select Groove Agent SE as the instrument and click Add Track.
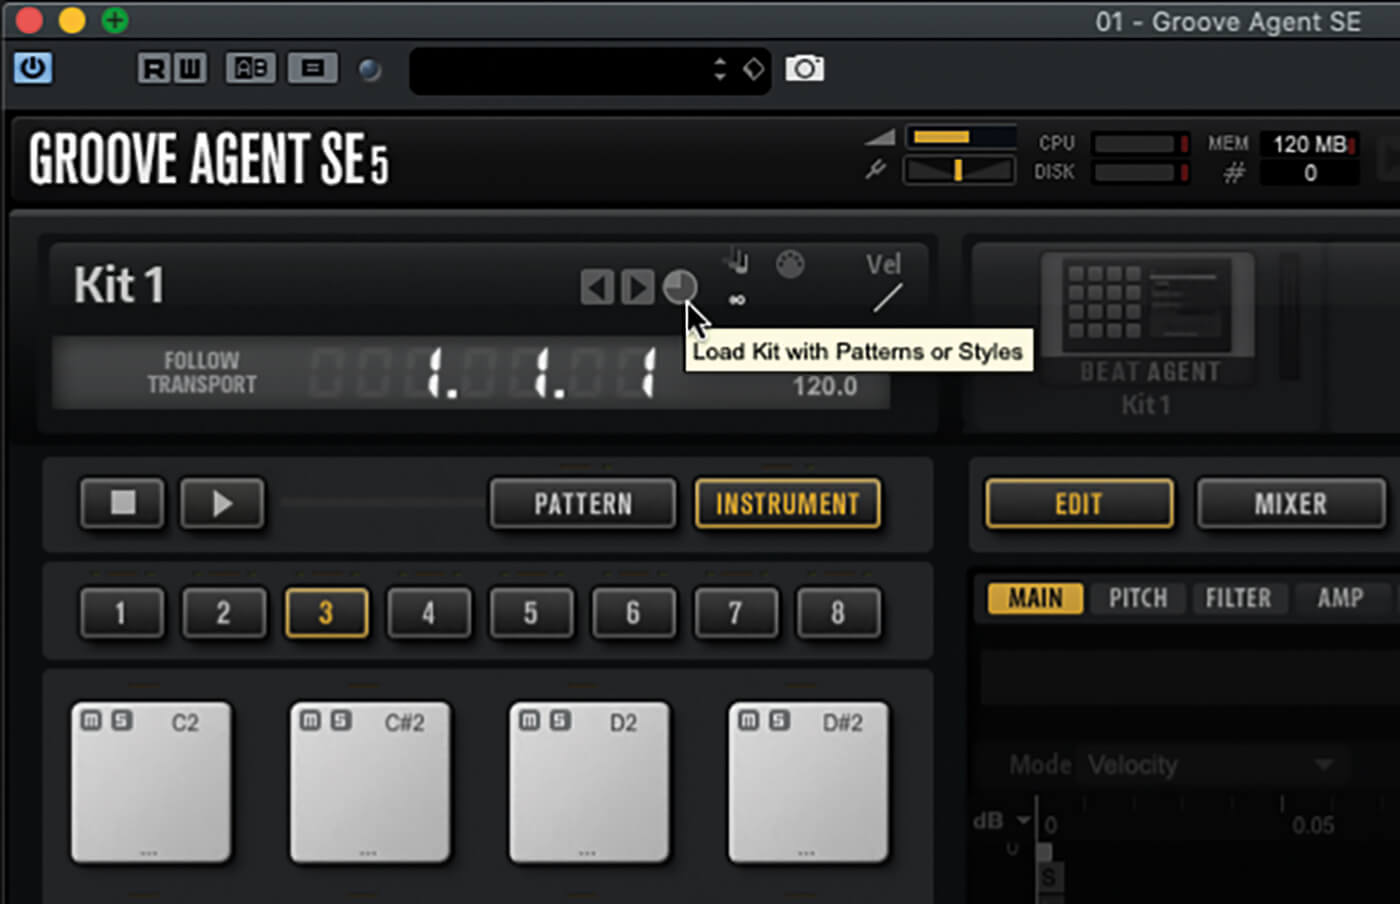
2. In Groove Agent SE’s control panel, locate the kit name field, positioned above the trigger pads. Make sure the circular icon next to the field is not lit (when lit, Groove Agent SE will load any patterns associated with any kit you load).

3. Click the kit name field, which currently reads Kit 1, to open the kit browser. Locate Grooving Future Kit, double-clicking its name to load it (you could choose another but ensure it’s a Beat Agent kit).
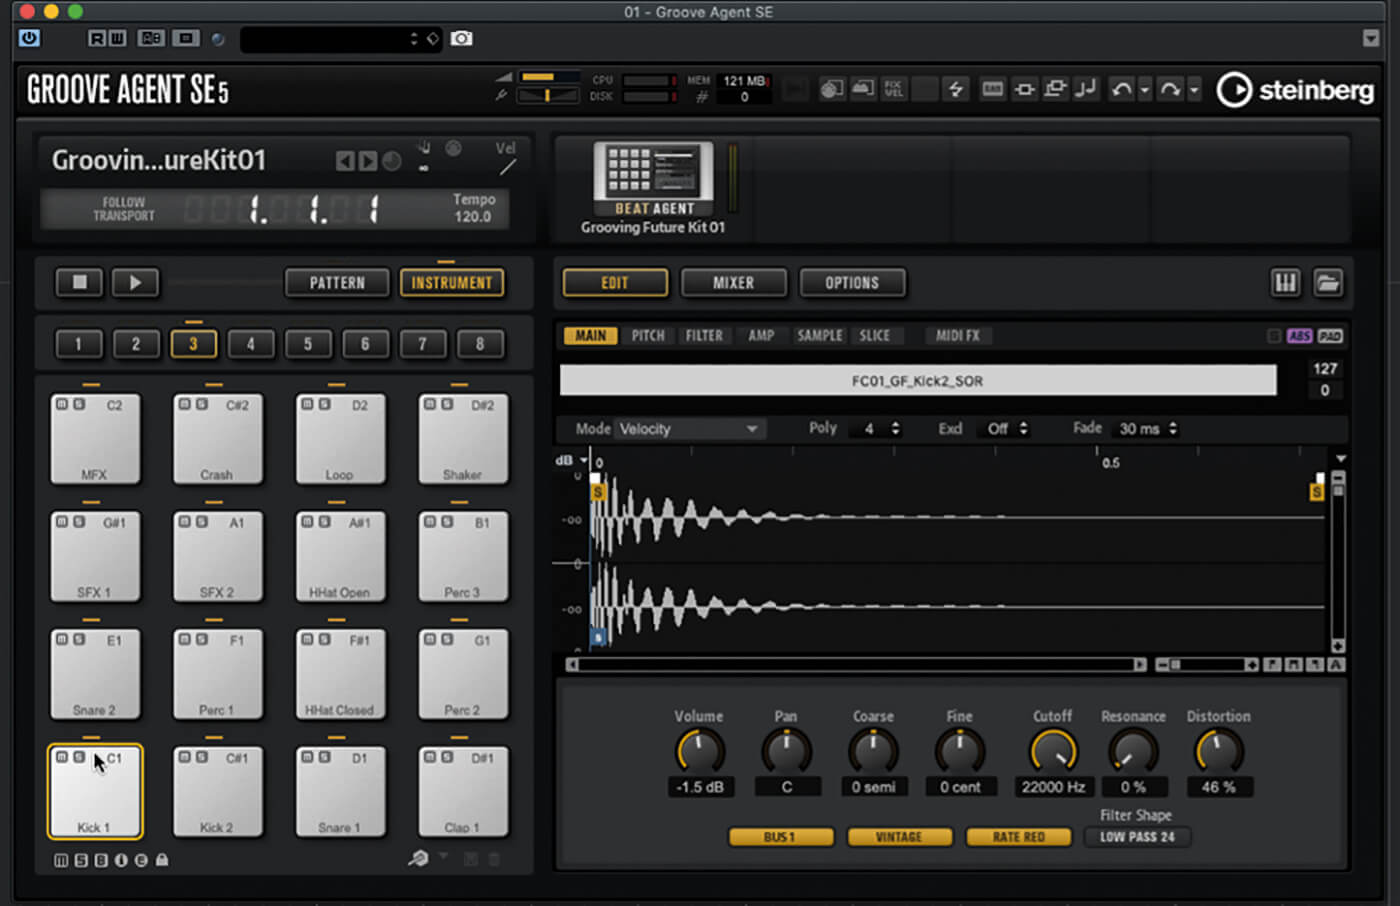
4. Clicking a pad will trigger its sound, and show details of its associated sample(s) in the right-hand area of Groove Agent SE’s panel. Notice that the position you click on the pad affects the velocity of the triggered note.
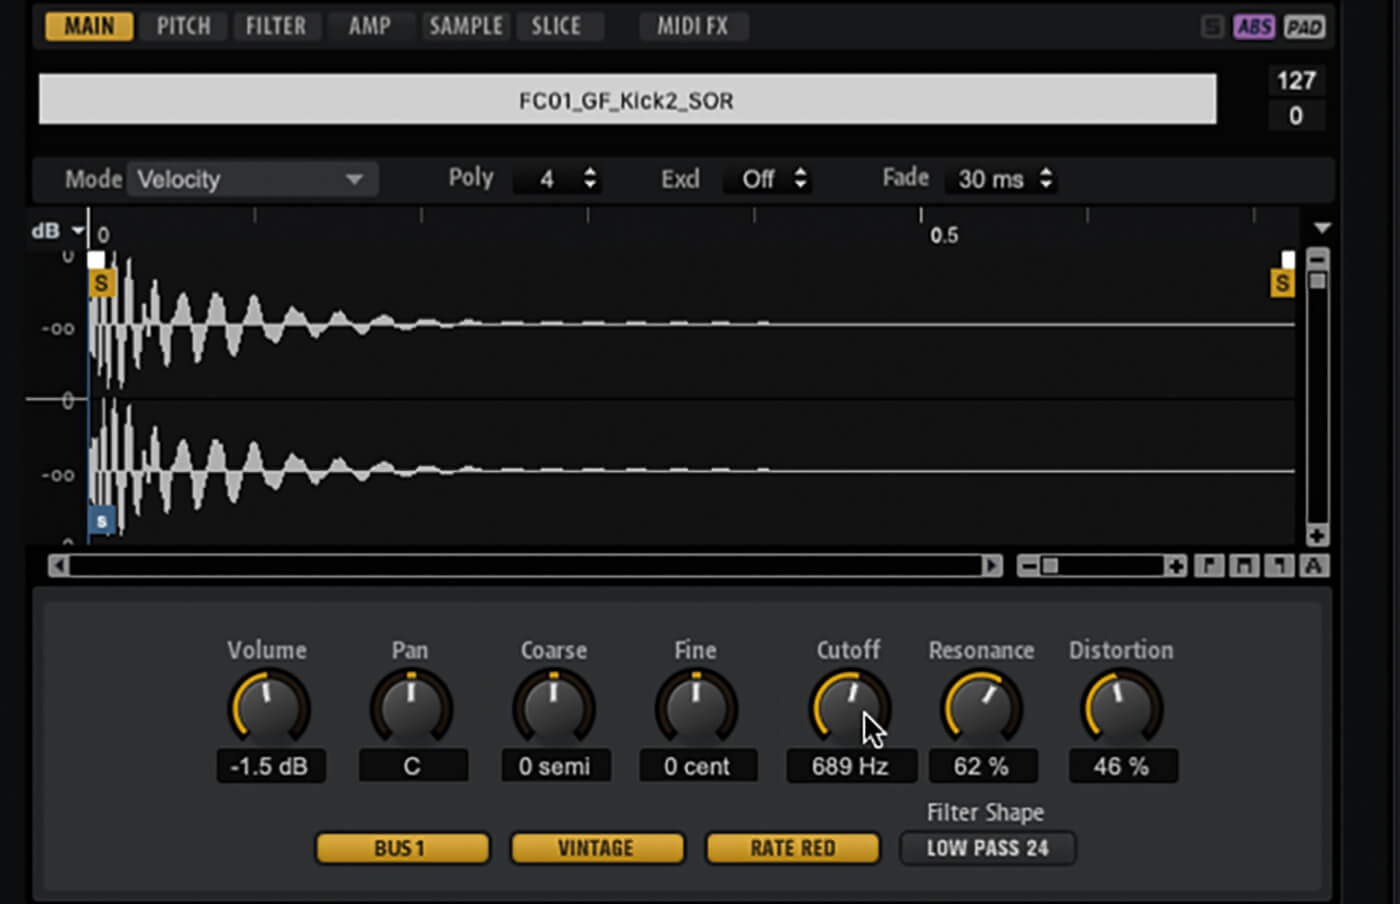
5. In the right-hand area of Groove Agent SE’s window, ensure that Edit mode is enabled. The main tab provides quick access to common parameters, while the Pitch, Filter and Amp tabs are envelopes that control those parameters. Familiarise yourself with the options within these tabs.

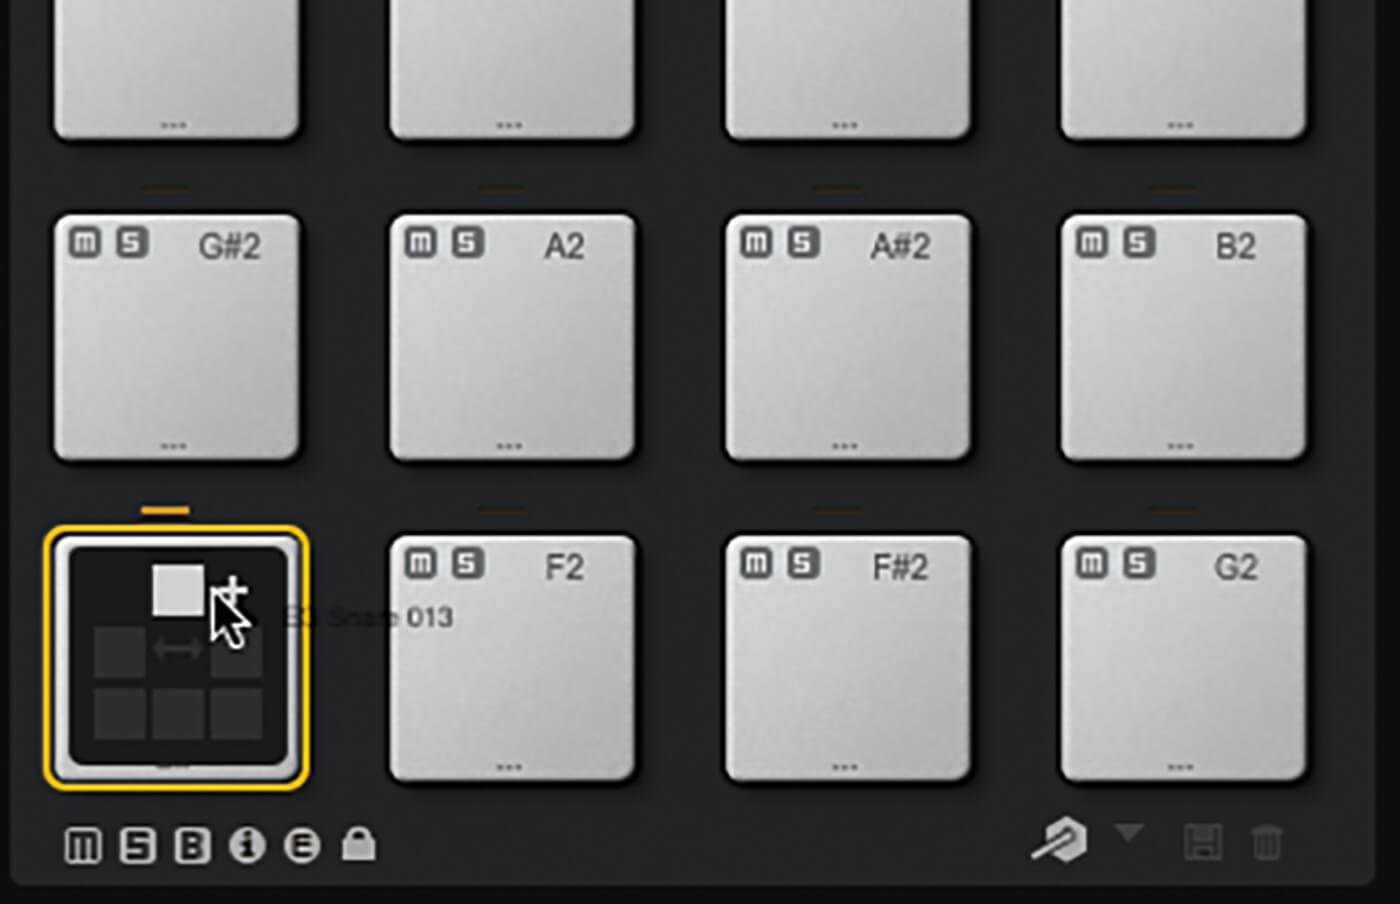
6. Change to pad bank 4 by clicking the 4 button located above the pads. Open Cubase’s right-hand zone and use the browser to locate some drum hit samples. Drag and drop a sample to the lower third of an empty pad.
![]()
GROOVE AGENT PRESETS Groove Agent’s kits, styles and MIDI patterns can all be loaded, edited and saved independently, as can the configuration of banks of pattern pads. To load/save everything at once, use VST Presets, accessed from the field at the top of all plug-in windows.
7. Drag a second sample to the same pad, this time dropping it in the upper third. This creates a new velocity split on the pad, assigning the new sample to the upper split. You can add up to 32 samples per pad.
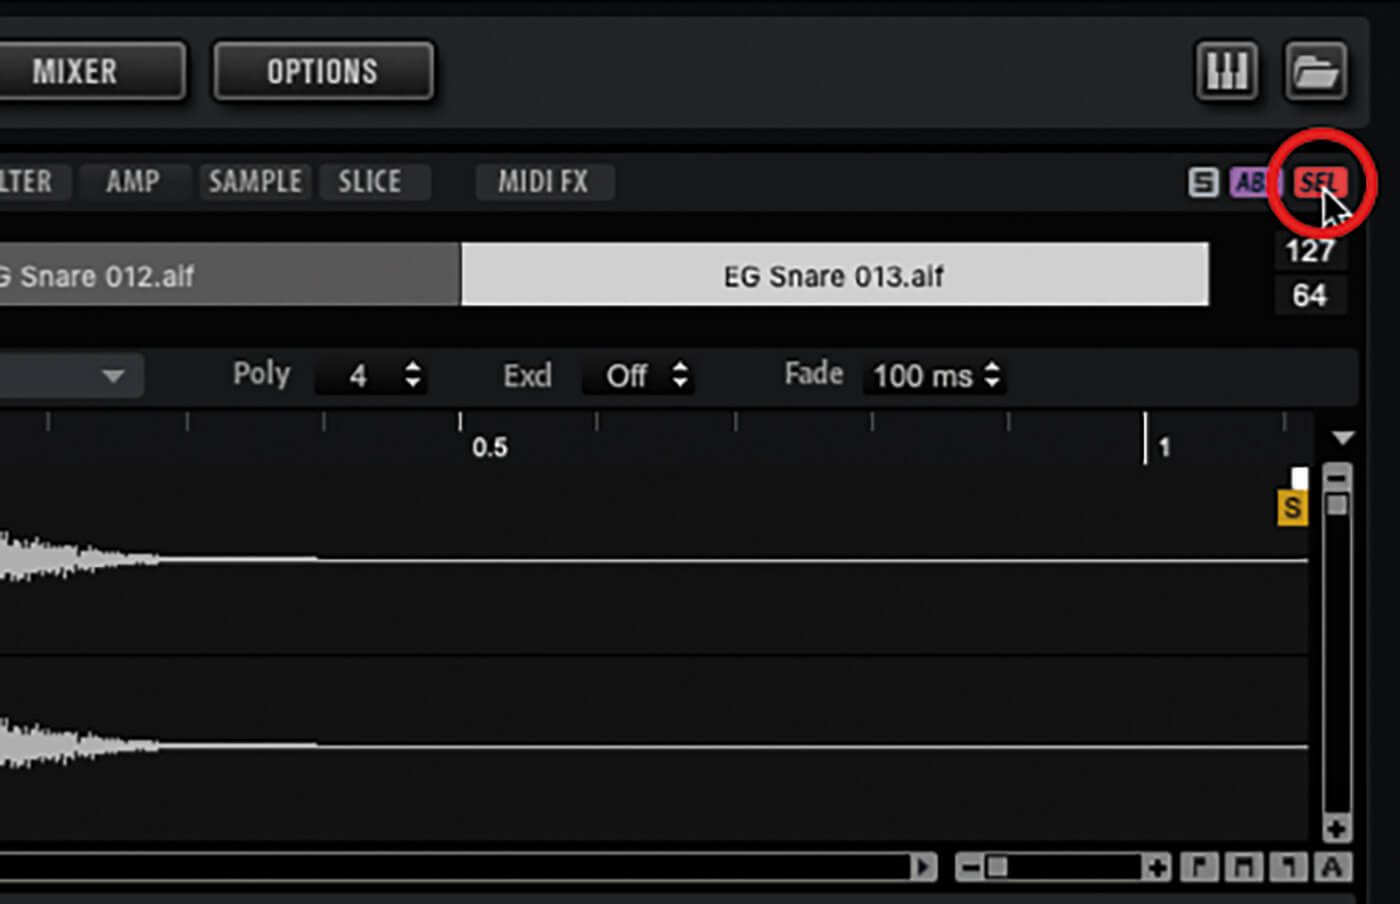
8. Tweak the sample’s settings to taste. Editing can be performed in Pad mode, where changes are applied to all samples associated with a pad, or Sel mode, where only the currently selected sample is affected. Switch modes using the button highlighted in the image.
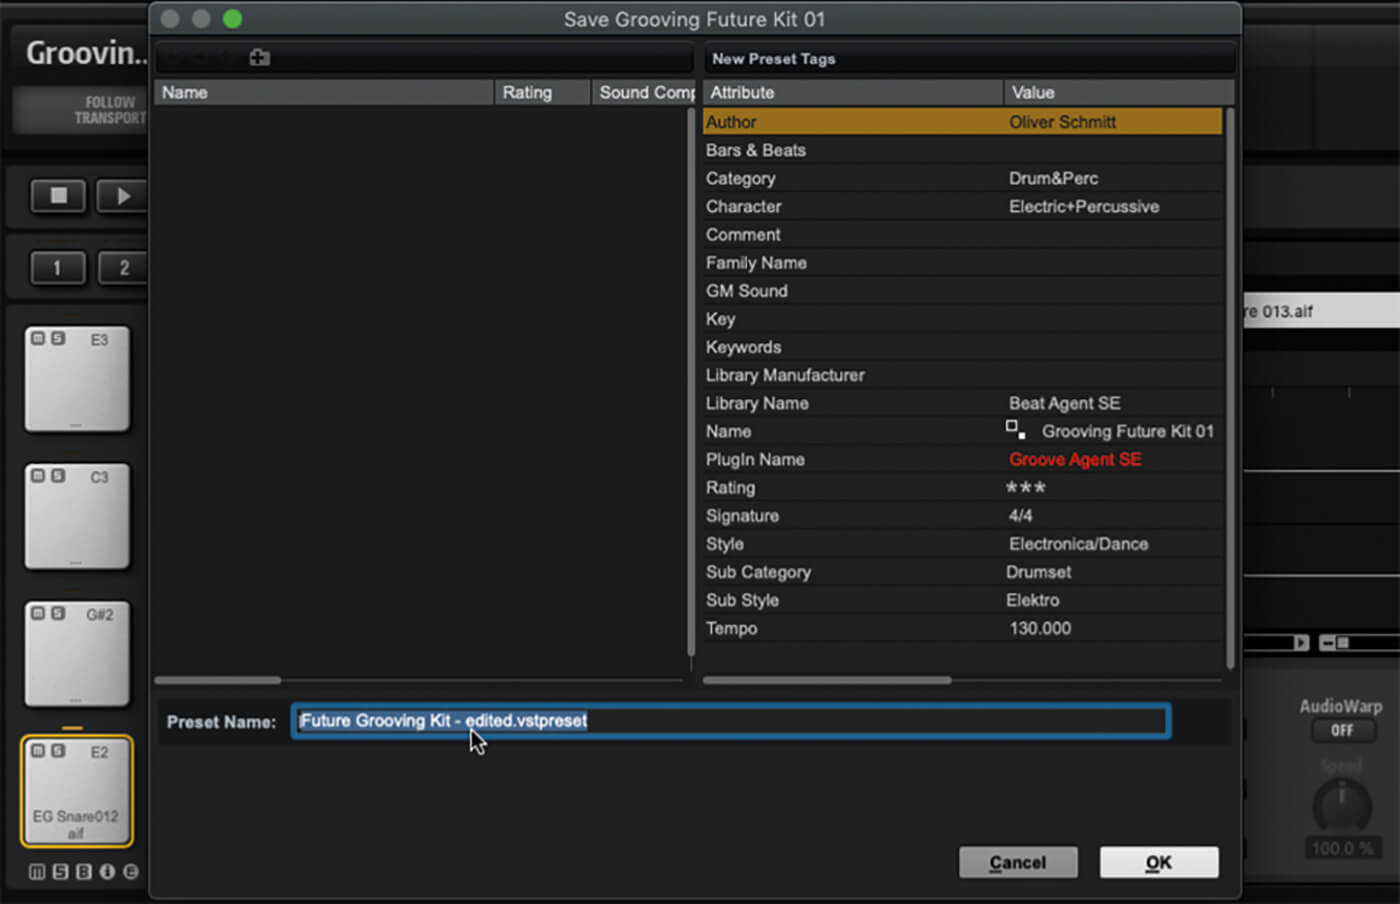
9. When you’ve finished editing your kit, right-click on the kit name and select Save Kit As…. Enter a name. The kit is stored in Groove Agent SE’s user preset folder.
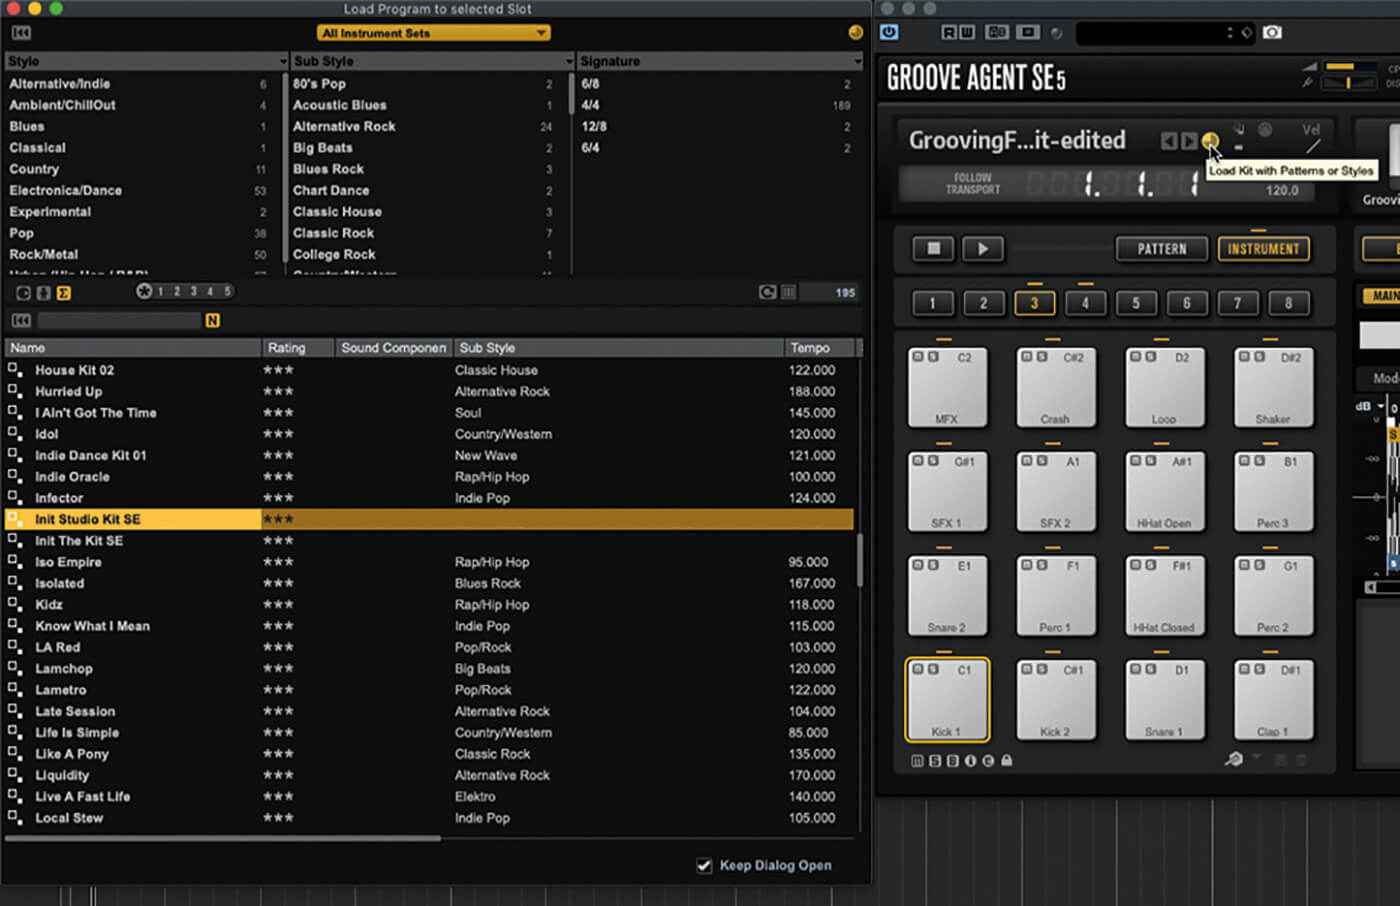
10. Click the kit name to open the browser, and use it to locate and load Init Studio Kit SE, which uses the Acoustic Agent sound engine. Rather than an editing panel, you now have an image of a drum kit.
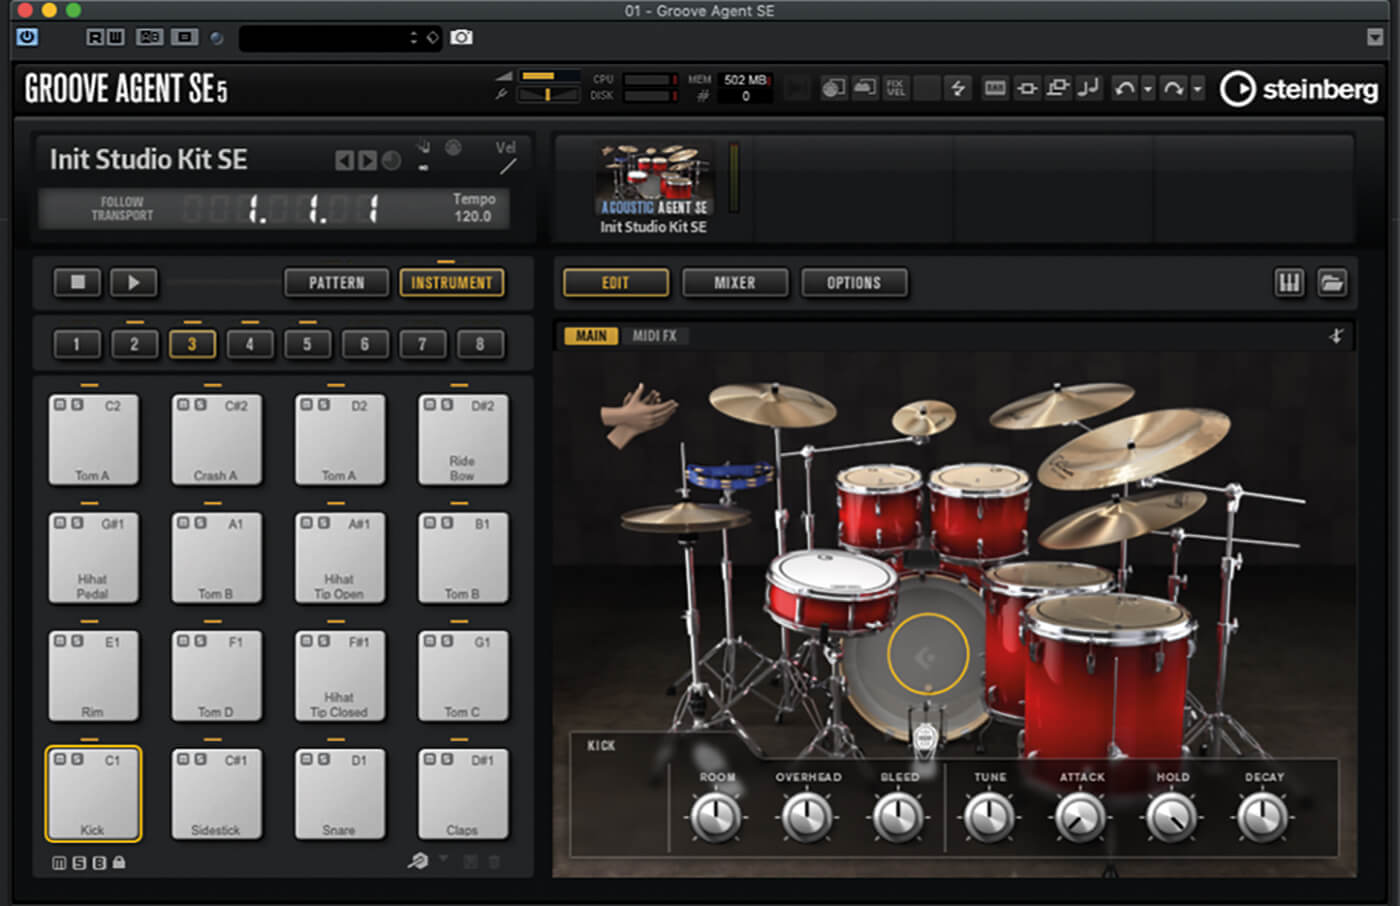
11. Clicking a drum in the image previews it and shows its adjustable parameters. Explore what can (and can’t) be edited. Click the Pattern button to switch the pads into Pattern mode, then select the first pad.
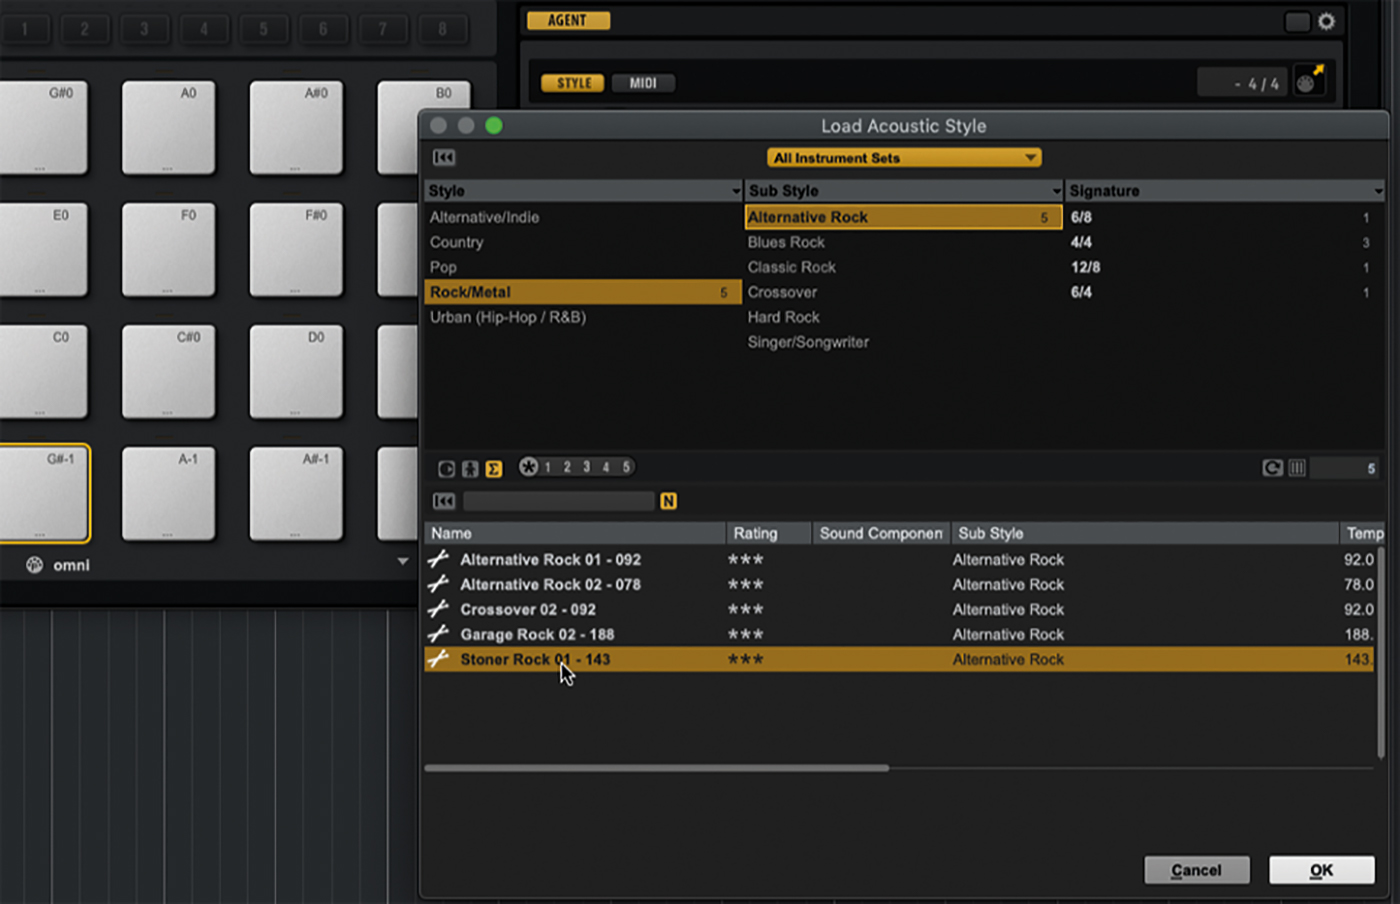
12. Select the Style tab in the right-hand panel. Move to the right of the tab buttons to reveal the Select Style menu. Click this and then load a style from the browser that opens.
![]()
PAD COLOURING Navigating up to 256 pads can be confusing. Thankfully, pads can be coloured according to instrument types or groups of patterns. To do this, right-click on a pad and choose the desired colour from the Set Colour submenu.
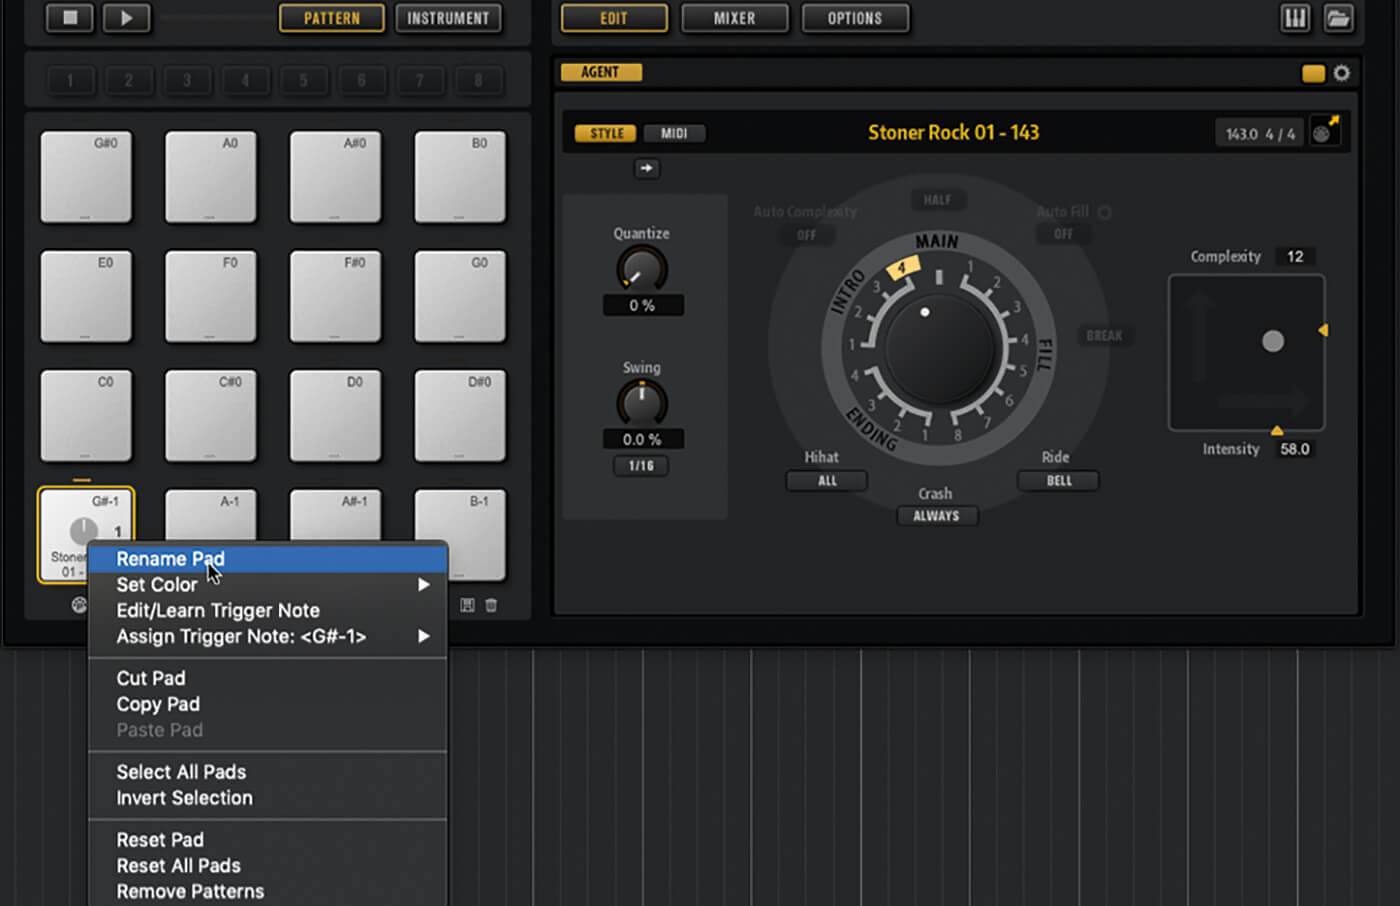
13. Trigger the pattern by clicking the pad. Play around with the style settings to see how they impact the pattern produced. Create an intro pattern, right-click on the pad, select Rename Pad, and enter a suitable name.
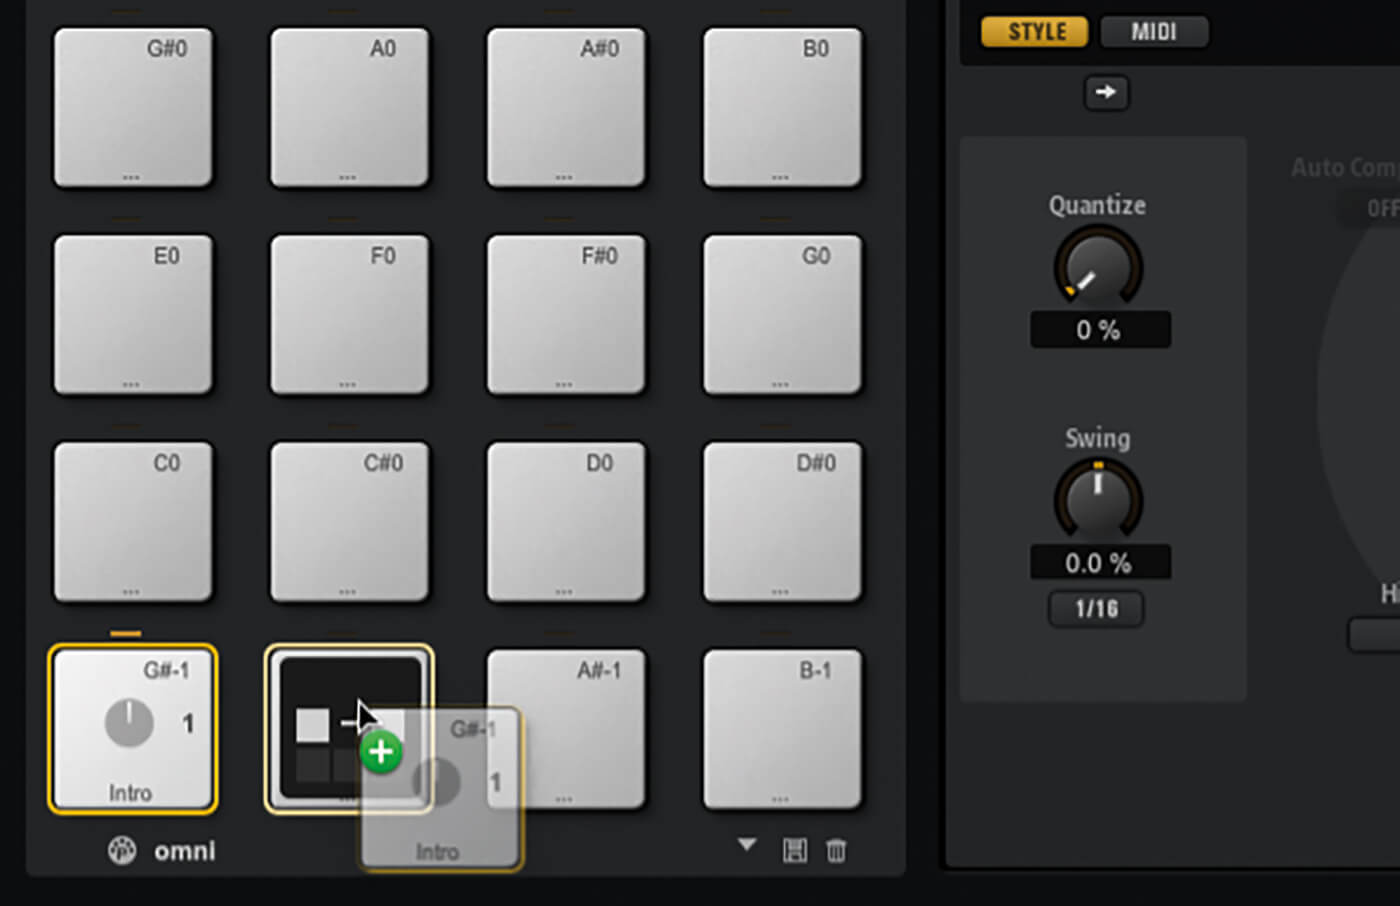
14. Hold down Alt/Ctrl and drag the active pad to a new pad – this copies one pad to another. With the new pad selected, change the style settings to create a main pattern and rename the pad.
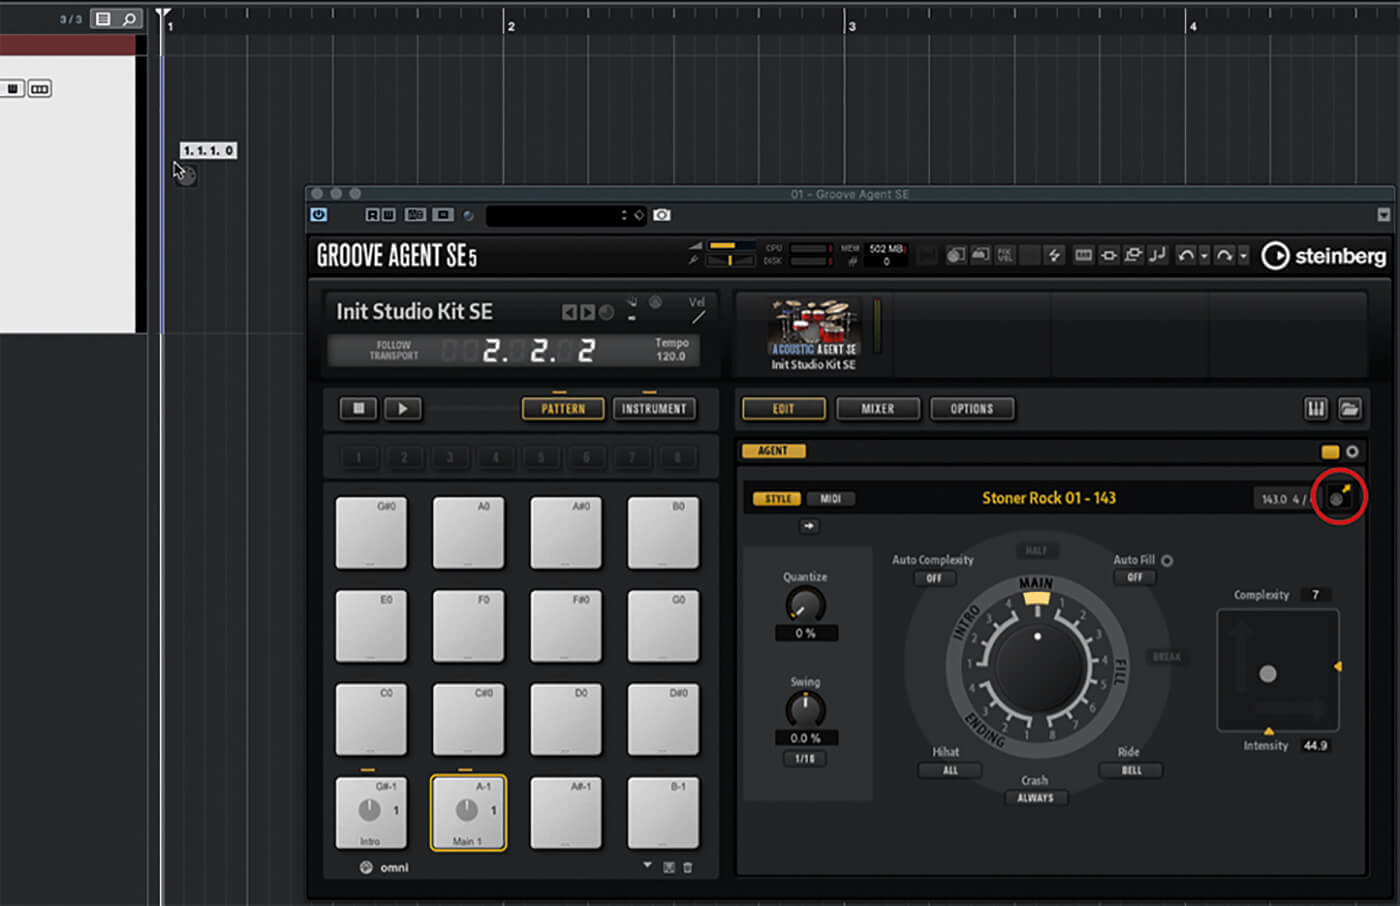
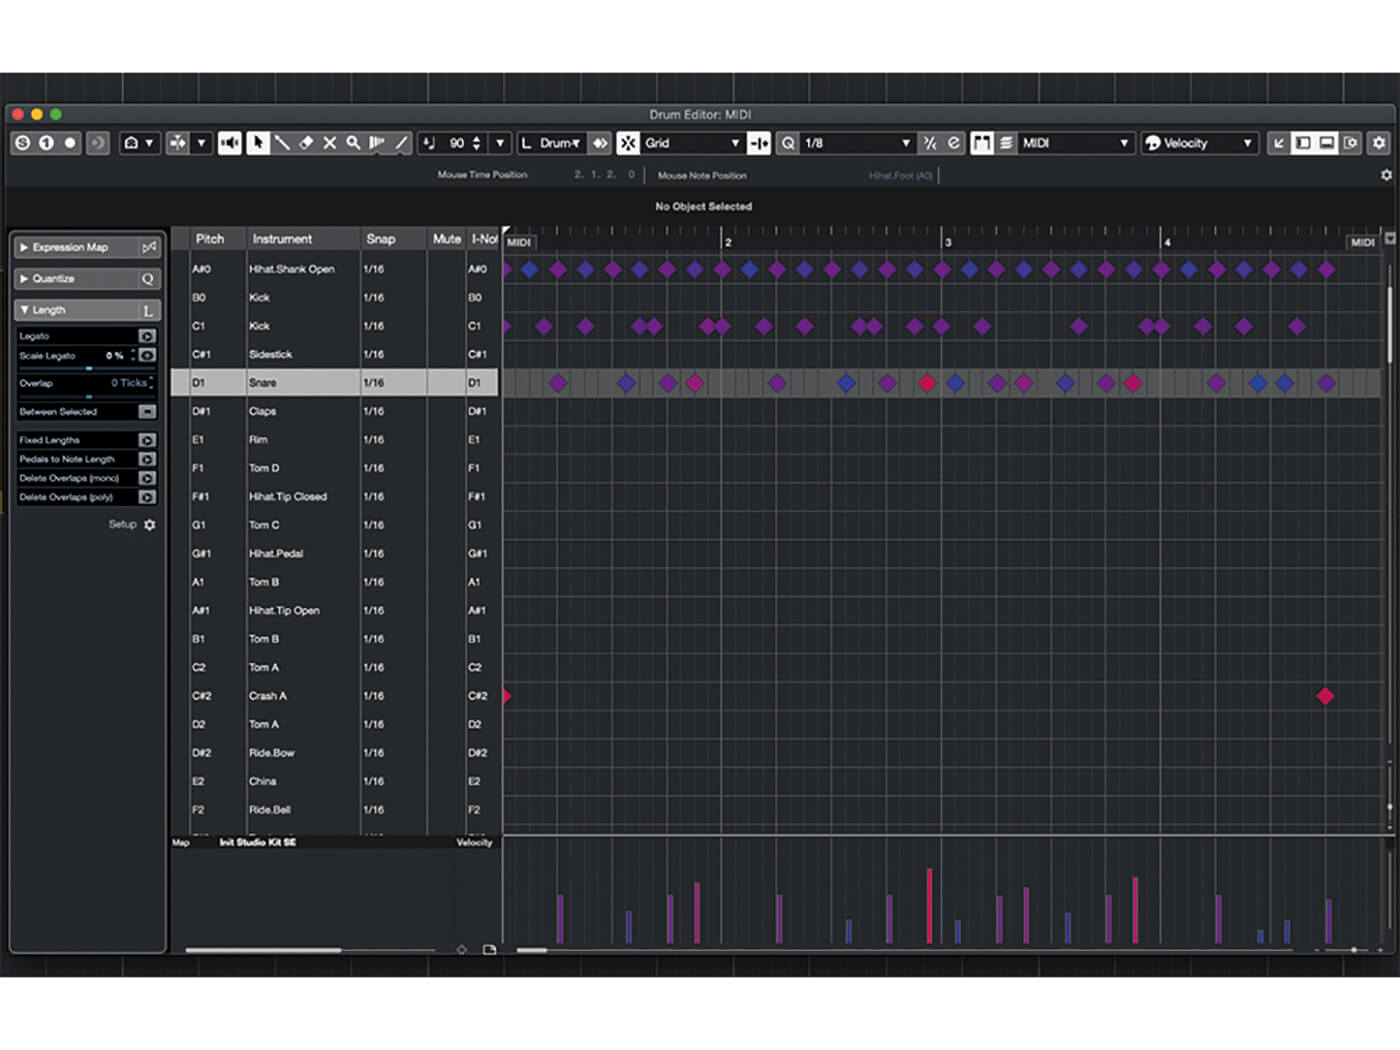
15. Click the MIDI icon next to the style name and drag it to the timeline to create a new MIDI track containing the pad’s current pattern. With the track selected, open the Inspector, click the Drum Map field, and select Create Drum Map from instrument.
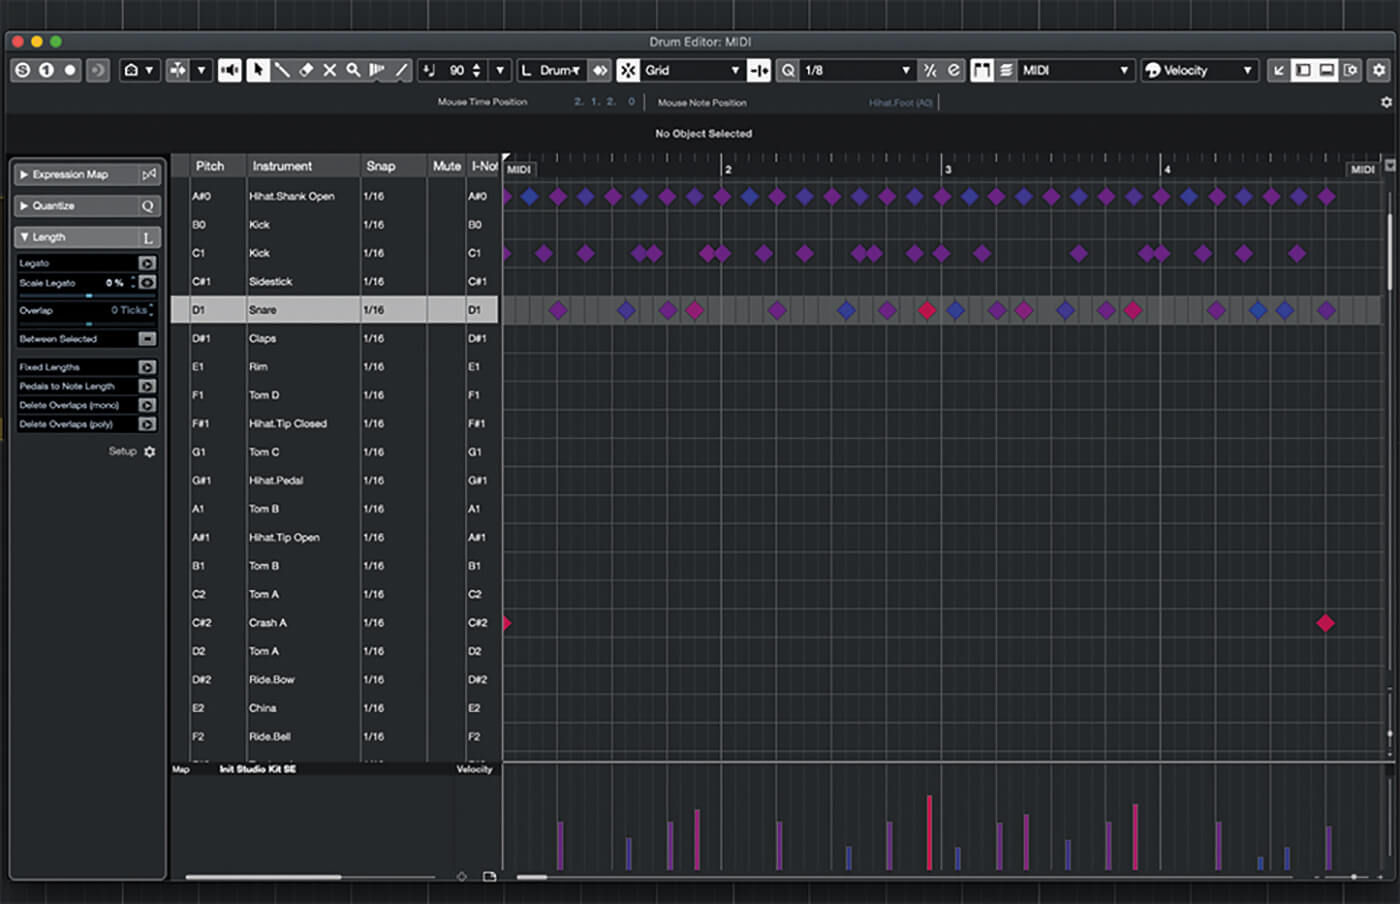
16. Double-click the new MIDI part to open it in the Drum Editor. Make some manual adjustments to the pattern and close the editor. Now, drag and drop the MIDI part onto an empty pattern pad in Groove Agent SE, then mute the MIDI track.
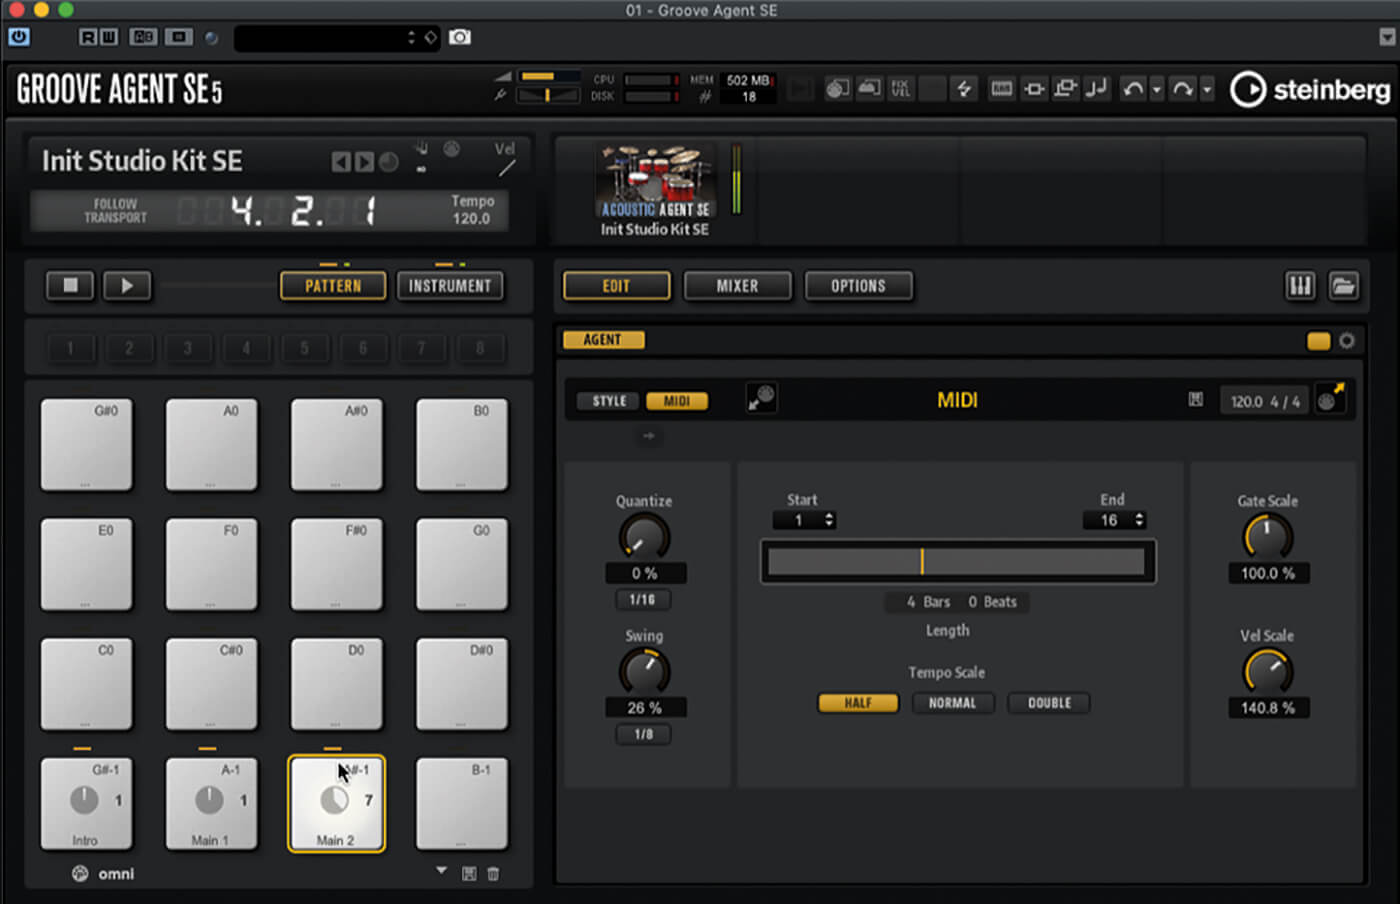
17. The newly created pad uses Groove Agent SE’s MIDI pattern player. Experiment with the settings to see how they impact on the way the pattern plays. You can use this technique to tweak style patterns or to create banks of your own bespoke patterns.

18. Click the MIDI icon below the pattern pads. This tells the pads to respond only on their own dedicated MIDI port. Create a new MIDI track in Cubase and route its output to Groove Agent SE’s pattern port. Record pattern trigger notes on this track.
For more Cubase tutorials and workshops, click here.