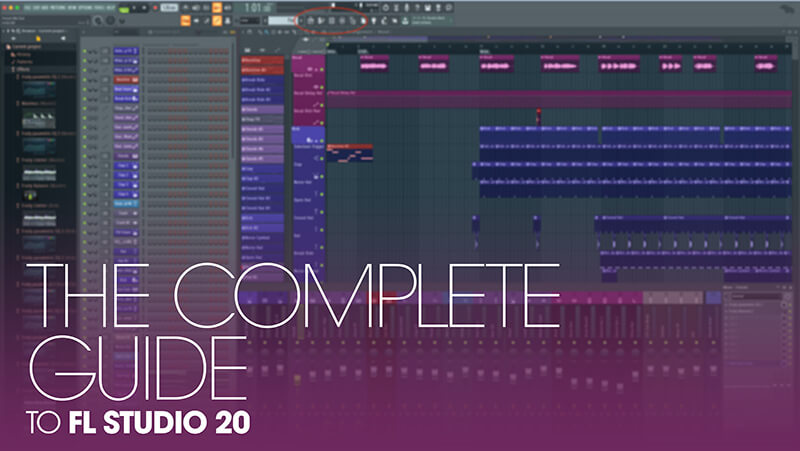
The Complete Guide to FL Studio 20
If you’ve been tempted to start using FL Studio, or are a Mac user who is just joining the fold because of the latest version, then you have come to the right place. Here’s the MusicTech complete guide to FL Studio! We’ve just reviewed FL Studio 20 and believe that it’s so good that there […]

If you’ve been tempted to start using FL Studio, or are a Mac user who is just joining the fold because of the latest version, then you have come to the right place. Here’s the MusicTech complete guide to FL Studio!
We’ve just reviewed FL Studio 20 and believe that it’s so good that there will be a great many more users interested in adopting it. Not only that, but FL 20 represented the DAWs first introduction to the Mac platform so there will be a lot of Mac owners considering the jump too.
Either way, if you are new to FL then you have come to the right place. At first it might seem like a difficult DAW to get your head around, because it does things in rather different ways to other similar software. But that’s why we’ve put this guide together. It’s not necessarily aimed at newcomers to DAW music making – although they will get benefits from following the workshop – but more at people cross-grading from other platforms.
So if you are a used to using any other DAW, we’ll explain how FL Studio relates to those and how its unique approach will have you making music in minutes, so let’s get going!
The grand tour
FL Studio 20 comprises five main areas, each switched on and off using five icons (the first five of the 10) in the centre of the top part of the screen. Hover your mouse over each and the information about it will be displayed top left of the screen but we’ll run through them here as they are the very heart of how you make music in FL Studio.
The first is the Browser which contains all of the ingredients – samples, sounds, instruments, effects and so on – that you will use in your song. The second is the Channel Rack that contains Patterns of these beats and notes which, when put together, make the song arrangement. These Patterns are arranged on the Playlist, the large central area of the GUI and one other DAW users will recognise as being where the song arrangement comes together. The difference is that this song arrangement is put together with individual Patterns, created in the Channel Rack, and these can exist on any track – they are not tied down to one track as in most DAWs.
Beat Patterns tend to be created in the Channel Rack using a traditional step sequencer – just highlight the beat you want to play as it cycles around. If you want to play melodies, you still use the Channel Rack but then employ the fourth important element, the Piano Roll, to play notes in traditionally across a virtual keyboard (or draw then in as you might on a conventional DAW). Finally, once the Patterns created in the Channel Rack are arranged on the Playlist, they can be mixed with the final element, the Mixer, which can be adjusted in size, track colour, you name it.
The following workshop will show how these five main areas interact in a lot more detail so you can understand the FL Studio way and how you can quickly start making music. We’ve used the ‘Newstuff’ demo song to show you some of the features, and next time around we’ll look at making a tune from scratch. Join us for part 2 then, and in the mean time check out our review of FL Studio 20 here.
The complete guide to FL Studio 20: Step-by-step
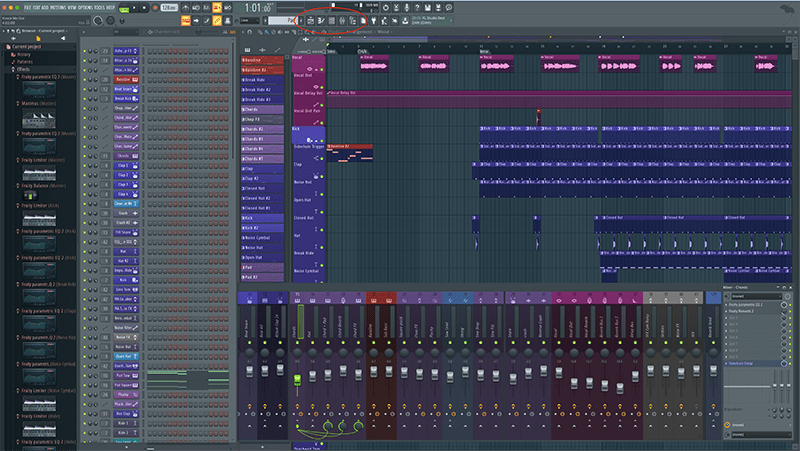
1. Here’s one of FL Studio’s demo songs loaded up. Looks quite complex doesn’t it? but don’t worry FL Studio newbies, it can all be explained with the five icons ringed in red: the Playlist, Piano Roll, Channel Rack, Mixer and Browser.
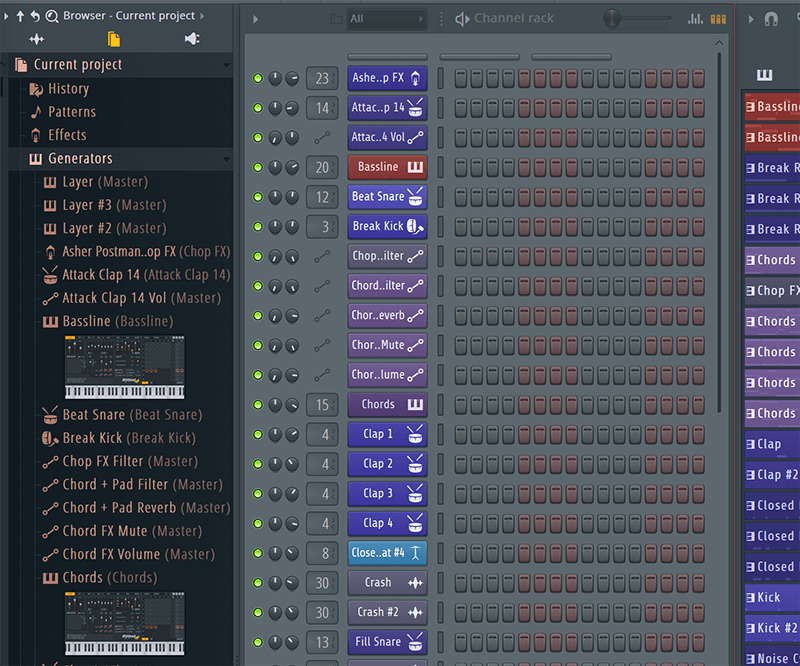
2. Click the Browser icon (fifth in from the left) and the ingredients in your song will be revealed (or hidden) to the left of the screen. This includes raw samples, Patterns, instruments and effects. It’s all on view or can be hidden within collapsable folders. You can also display user locations to show your own sample collection.
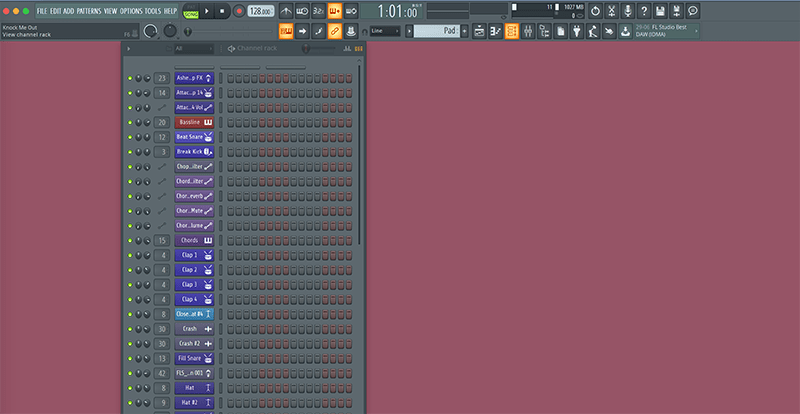
3. Here we’ve hidden all of the other FL Studio details so you can see the Channel Rack, the place where all the Patterns for a song are created with the elements from the browser. It’s a hugely powerful device to create all the beats and melodies you could ask for.
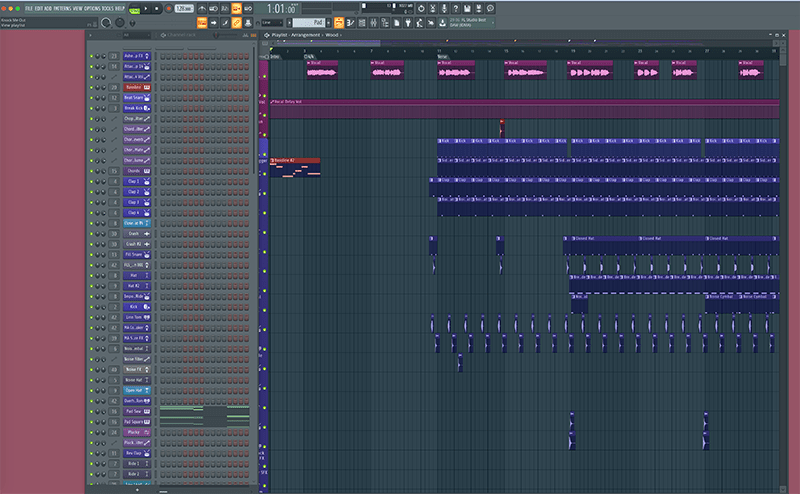
4. Now we’ve clicked on the first icon to show the Playlist, where the song arrangement is put together. Other DAW users, think this as your arrangement window, only in FL Studio you don’t have to put specific data on specific tracks to trigger the right sounds.
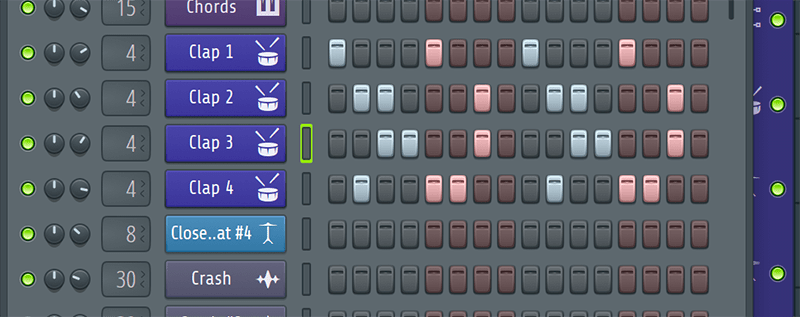
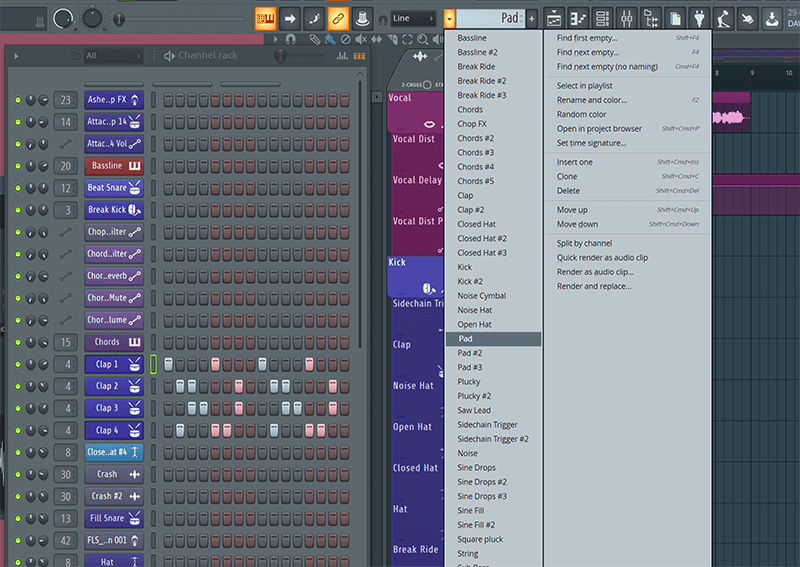
5. Returning back to the Channel Rack, here is how you create a typical set of Patterns, this time for a Clap sound. Simply highlight the beat where you want the clap to trigger as it cycles around as you play.
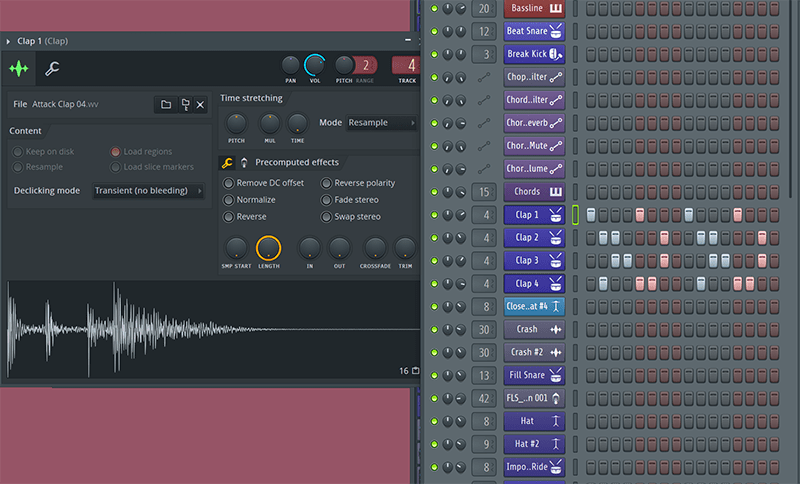
6. If you want to change the sound of the clap, simply hit the icon on the left (Clap 1, 2, etc) and a window opens, allowing you to change the sample, its pitch, volume of other parameters instantly.
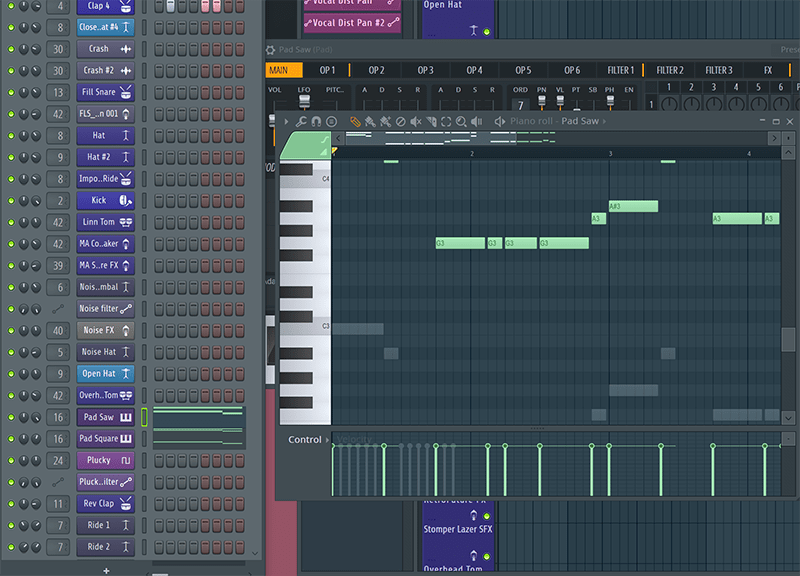
7. For melodic Patterns you have to select the Piano Roll editor (Control click the part, or show using one of the five icon buttons – see main text) and then either record or edit the notes as you would on a standard piano roll editor.
8. Now you have created both beat and melody Patterns you can see every Pattern within this drop down menu and also to the left of the Playlist.
9. Once you are happy with the Pattern(s) you have created you can now create an arrangement by simply selecting the Patterns and dragging them into the Playlist wherever you wish. Here we’ve clicked on and are dragging a Step Filter Pattern.
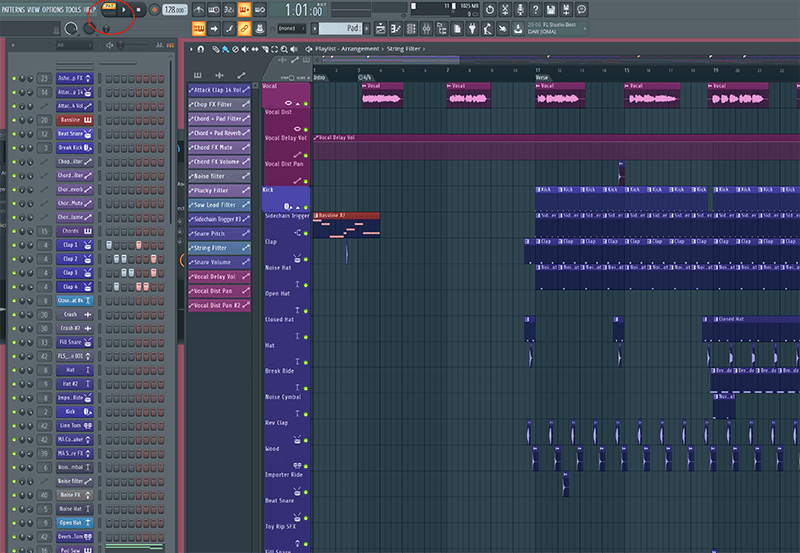
10. Here’s the final song. One thing to note that up until now we’ve been playing individual Patterns with the orange PAT Play icon highlighted so that they play as single Patterns. Now you need to click below it so the Green SONG icon lights so hitting Play will play the whole song. (See red circle on screen grab.)
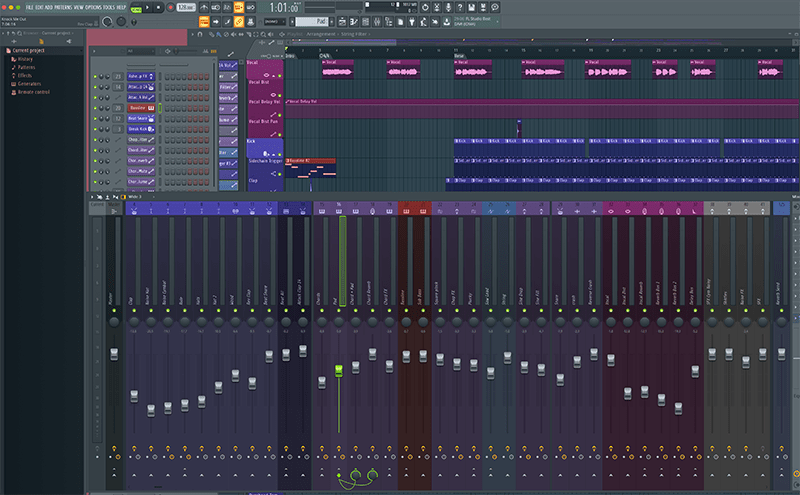
11. The final icon is the Mixer (fourth from left). If you haven’t already then click on it and all the parts can be mixed in terms of volume, panning and which effects are on each track. You can pull it up to make it larger as show here…
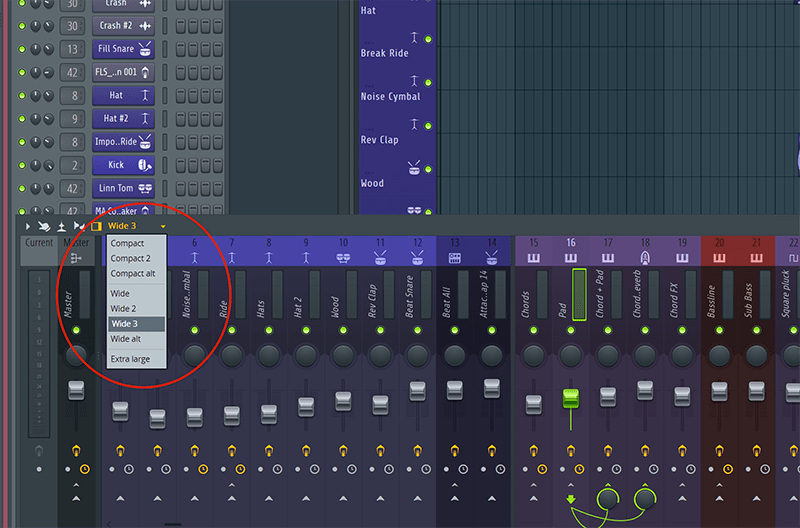
12. Or adjust its width using the drop down menu as shown here (red circle). Next time around we’ll explore each of FL Studio’s main features in more depth to make a tune!