How to master a track in Ableton Live
We’ve all wondered why our mixes don’t quite boast that professional-level sheen, particular those of us who aren’t adept at mastering. Here, we’ll show you what you can do to get your songs sounding more radio-friendly.
Having covered mixing songs in Ableton Live in last month’s tutorial, we’re now moving onto mastering. Mixing is the process of finishing individual tracks and then adjusting equalisation, effects and levels to make the final product sound as good as possible. Following that process comes mastering. You might wonder why there’s a separate stage after the mixing. Surely with everything set, that’s enough? Not quite. Mastering comes after the mix is finished and exported as a stereo file, and provides a producer’s last chance to process and optimise the overall mix. Mastering should take place in a separate project from the clips, plug-ins and other material that comprise the song.
Mastering gives you a clean slate and more or less removes the temptation to keep tinkering with the individual elements of the mix. Mastering is especially important if the product in question is an album, EP or any collection of songs that might have to be brought into line so that they flow smoothly and without any unpleasant surprises or changes along the way.
The final mixdown
As a technical process, mastering needn’t be difficult. It is possible to master your tracks in Live using nothing but the Utility device, as described in the following tutorial. After that, the most important thing is to remember to turn off warping. That’s straightforward and raw workflow. It’s how we like to do things if working on self-created material. The technique of mixing and processing group tracks earlier in the process helps minimise the work required at the mastering stage. It definitely helps to have a vision, an opinion about how much you aim to compress or limit your audio.
The process will be affected by genre. Mastering modern rock and dance music typically involves squashing – losing some dynamics but increasing overall loudness. That’s where working with reference tracks can come in handy; you can see and hear how your tunes are matching up. Apart from limiting, mastering usually involves equalisation, stereo imaging and compression, usually in that order.
EQ can be visualised by looking at Live’s EQ Eight Frequency Display, which pops out into a convenient full-screen view. Remember, however, to rely on your ears, as every track is different. You’ll most likely be trying to bring a set of songs into line, rather than overly cutting or boosting frequencies, though that’s part of it too.
Should a deeper level of repairs be required, make use of EQ Eight’s mid/side processing – separating the common mono elements present in both channels from the unique stereo sounds present in the left/right channels, so you can EQ them separately. Use EQ Eight’s Mode switch to select M/S, then use the Edit switch below it to select either mid or side mode. As you switch between them, you’ll see them overlaid in the frequency display. Being able to mono the lower part of a mix with the turn of a knob is satisfying, and is something that’s easy to hear and understand. At the other end, Utility can enhance the stereo width of the high frequencies by up to 400 per cent.
Frequency juggling
Live’s multi-band dynamics device comes into its own with busy mixes, where more dominant sounds will trigger the compressor and override the rest of the mix. Multiband Dynamics can help you avoid this, and give you better-regulated mixes.
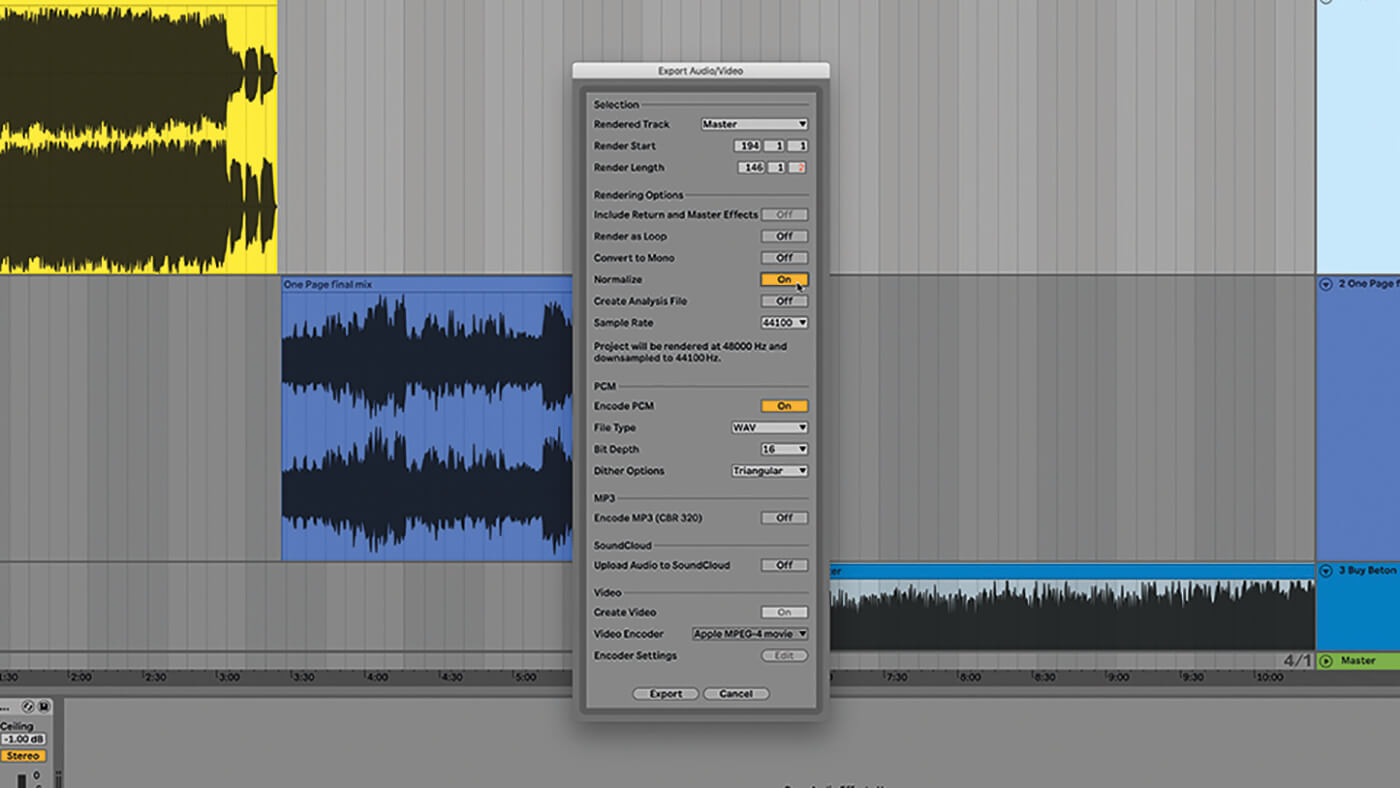
Racks are invaluable with problematic mastering jobs, especially sonically messy mixes such as live recordings where there’s no chance of retrieving individual tracks. With Live, you can use racks, EQs and Multiband Dynamics to split the frequencies for more precise treatments – sometimes going as far as using transient shapers on certain ranges to handle booming low-end or room ambience. It’s best to avoid normalisation when exporting a mastered file though. You’ve just put in the work optimising the volume levels of each track, and normalisation might undo that as it seeks to maximise the level of each waveform to just below the point of distortion. Remember to routinely bounce final stems and mixes as stereo files that can be opened in other software or future versions, just in case.
The before and after differences aren’t always dramatic – but they don’t need to be. Once in a while there will be some troubleshooting but, with a well-prepared mix, it’s more a matter of adding a final polish. There are many online ‘automated’ mastering services but forget those. This is something you should master yourself.
Mastering with Ableton Live: Step-by-step
1. There’s no example Live set for you this time. Follow these steps while referring to a mixed track of your own.
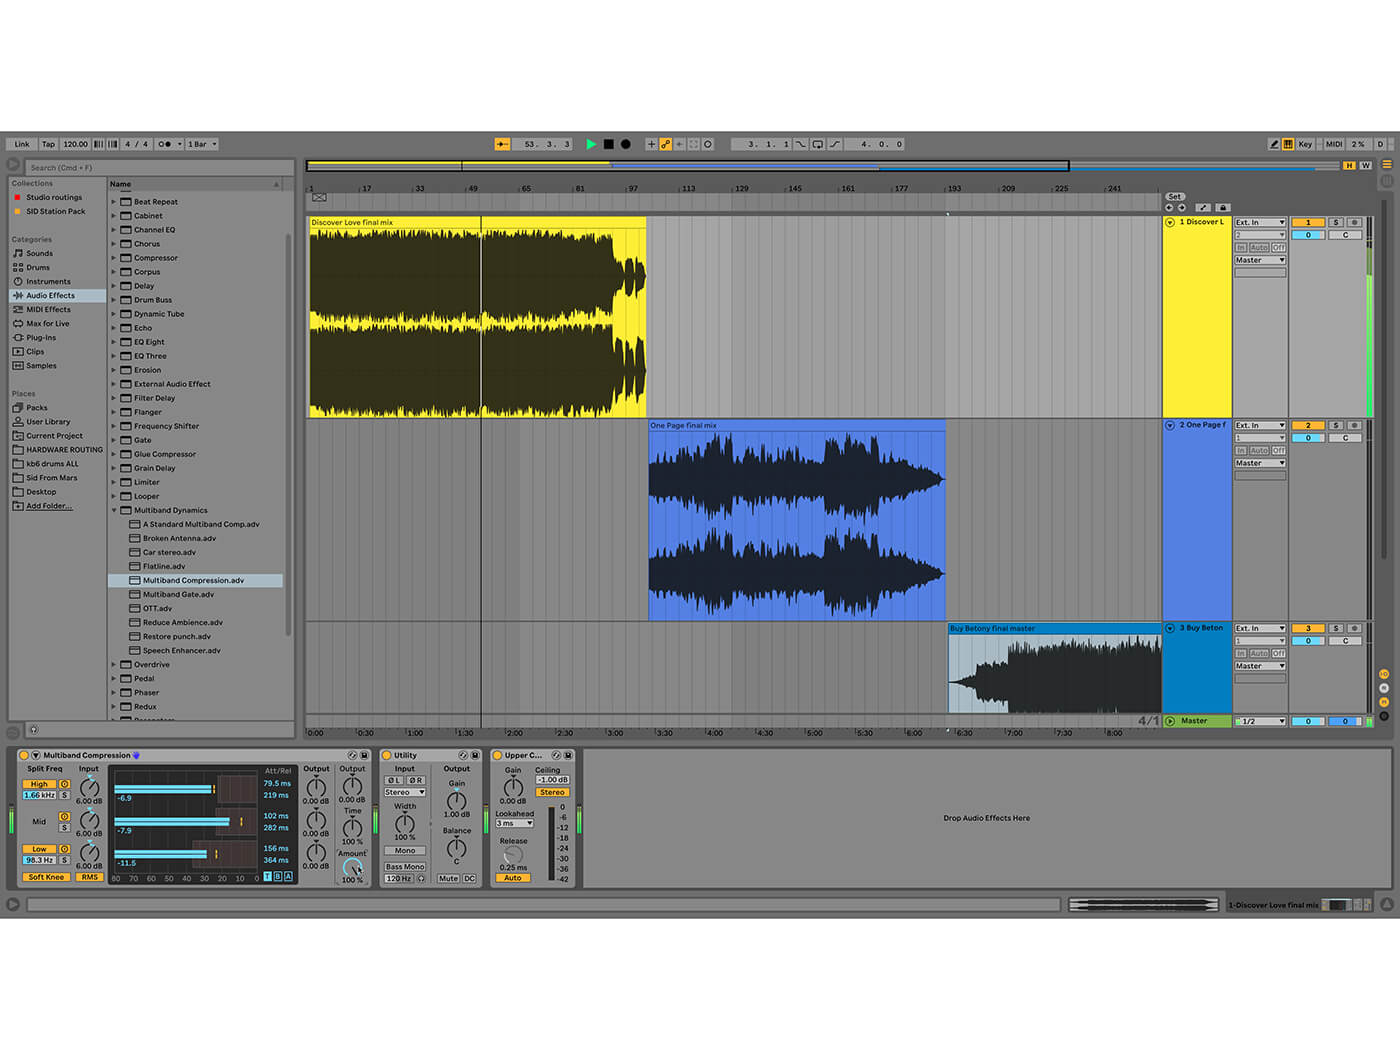
2. There’s a simple way to master your tracks. Let’s say you’re working on an EP with three tunes you want to master. Start a new project and load each song into a separate track. Make sure warp is off for each.
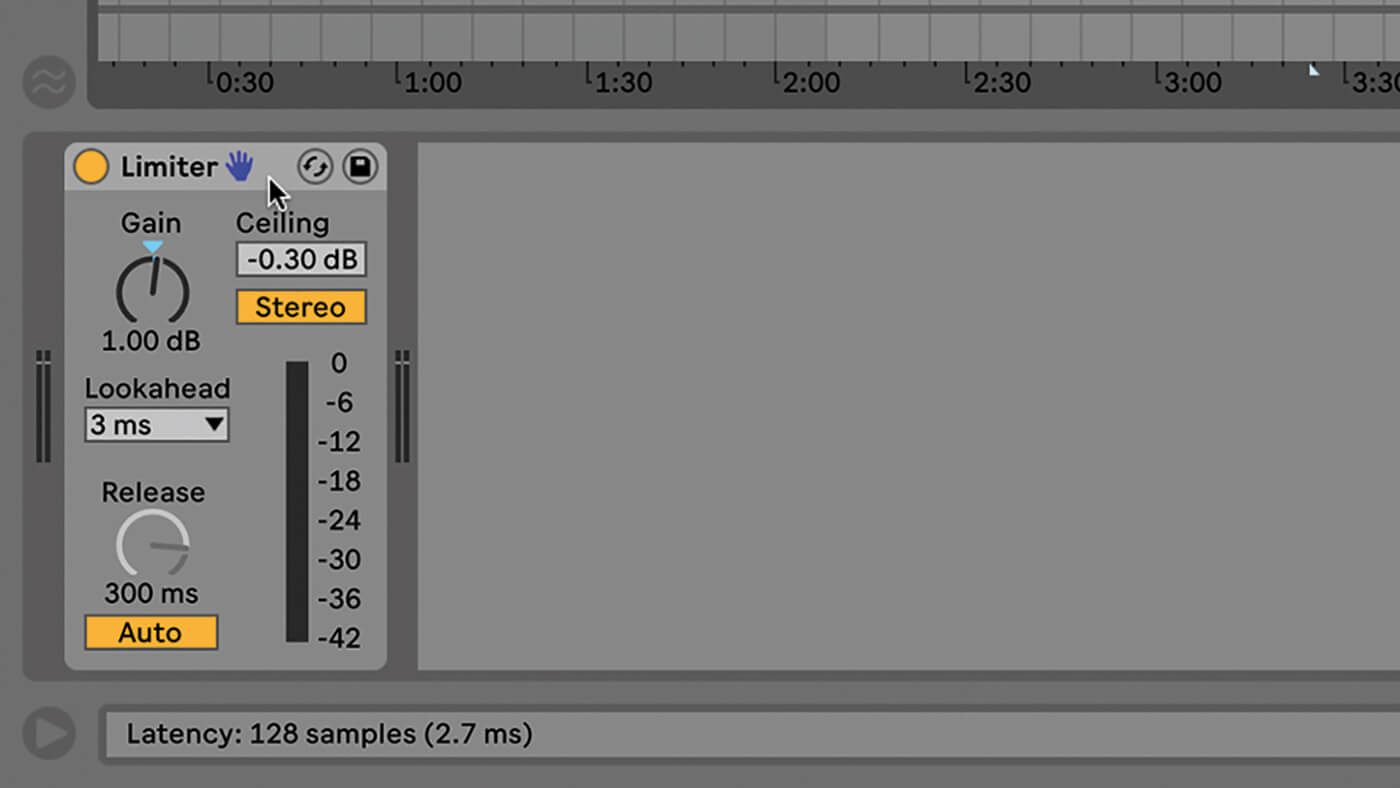
3. Add a limiter to each track (but nothing on the Master track). If you feel you need it, add a reference track by an artist whose music you think is relevant. It could even be a previously mastered track of your own.
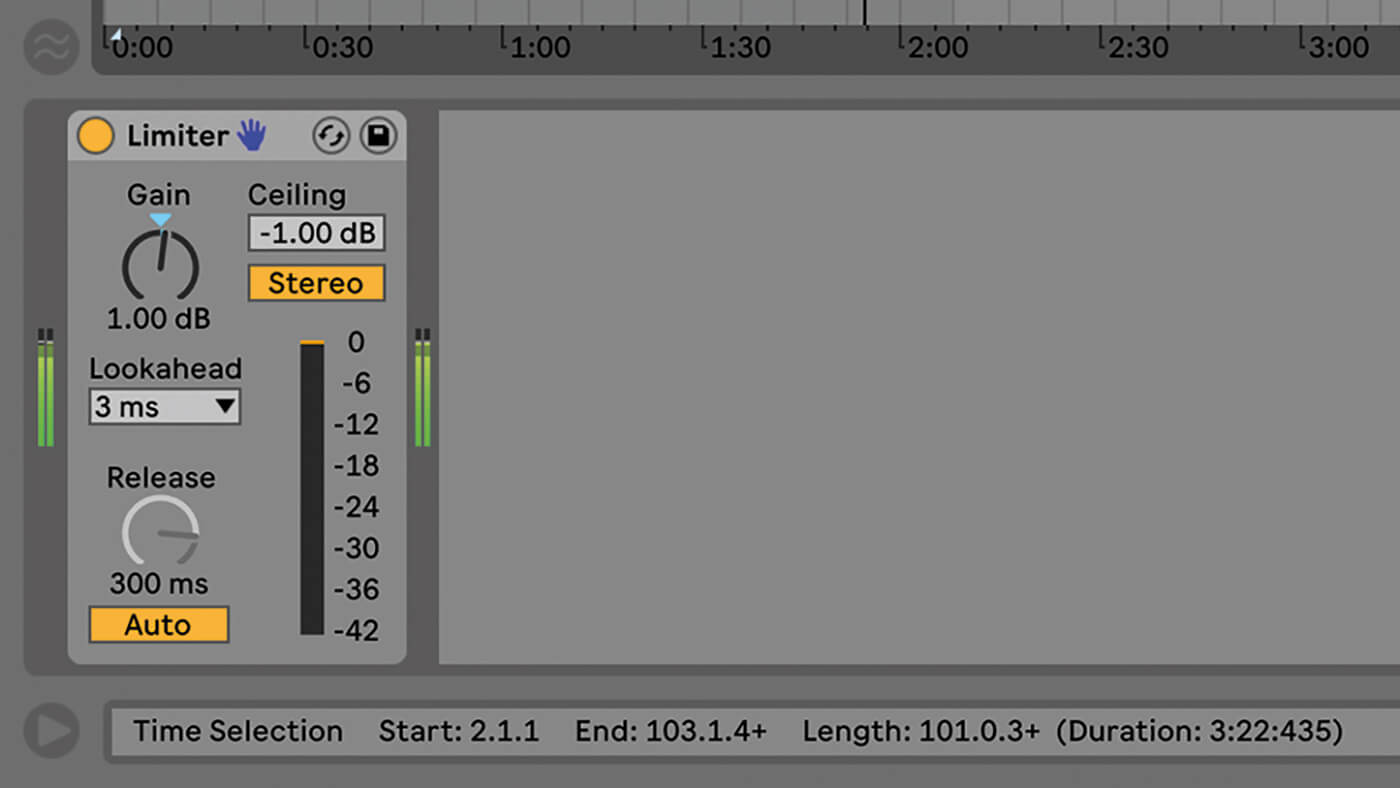
4. Play your tracks one at a time and adjust each track’s limiter so that the song can’t exceed -1dB and therefore distort. But boost the limiter input so you can see an orange bar that shows the limiting being applied.
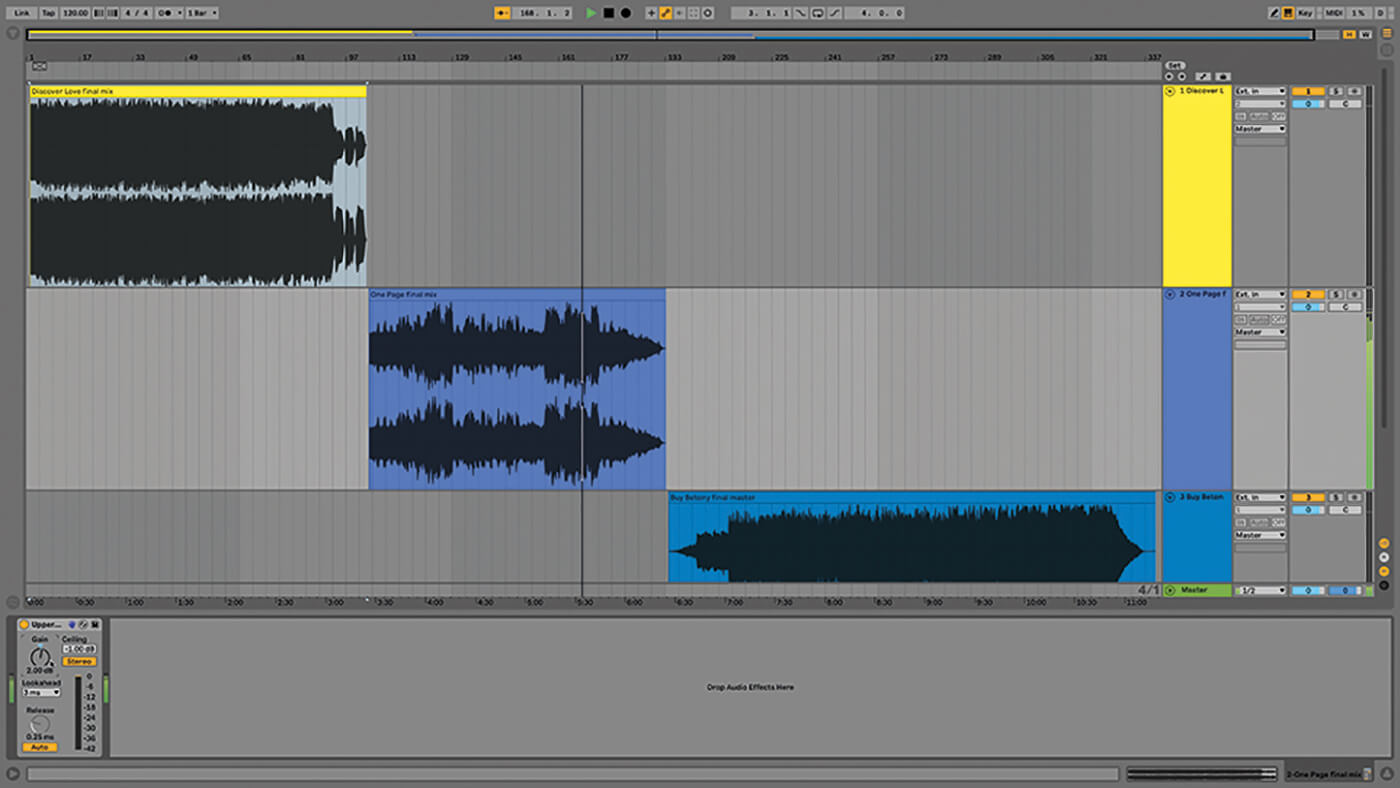
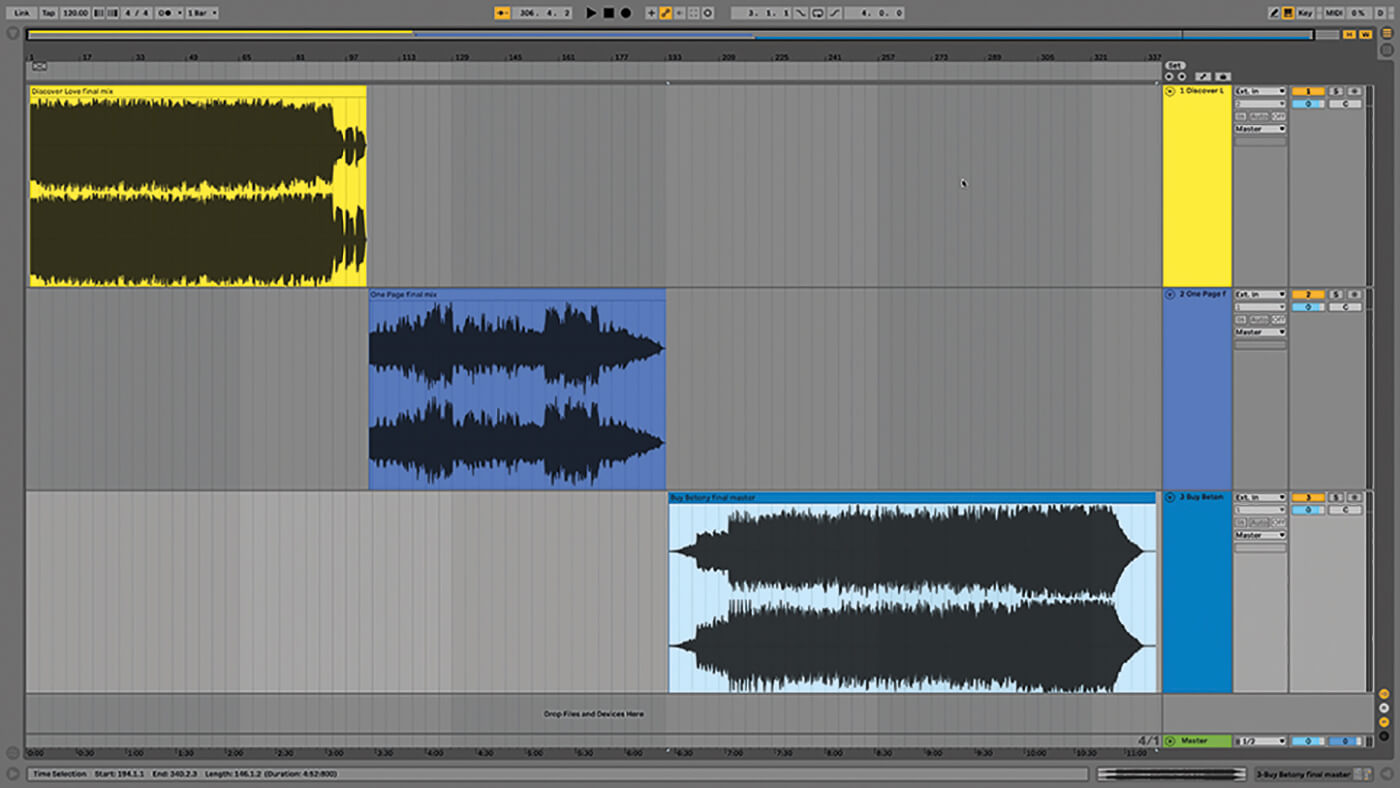
5. As you do this across each track, balance their volumes and determine how much limiting is taking place. With a set of songs, make sure they all have similar loudness levels so there are no surprises for the listener.
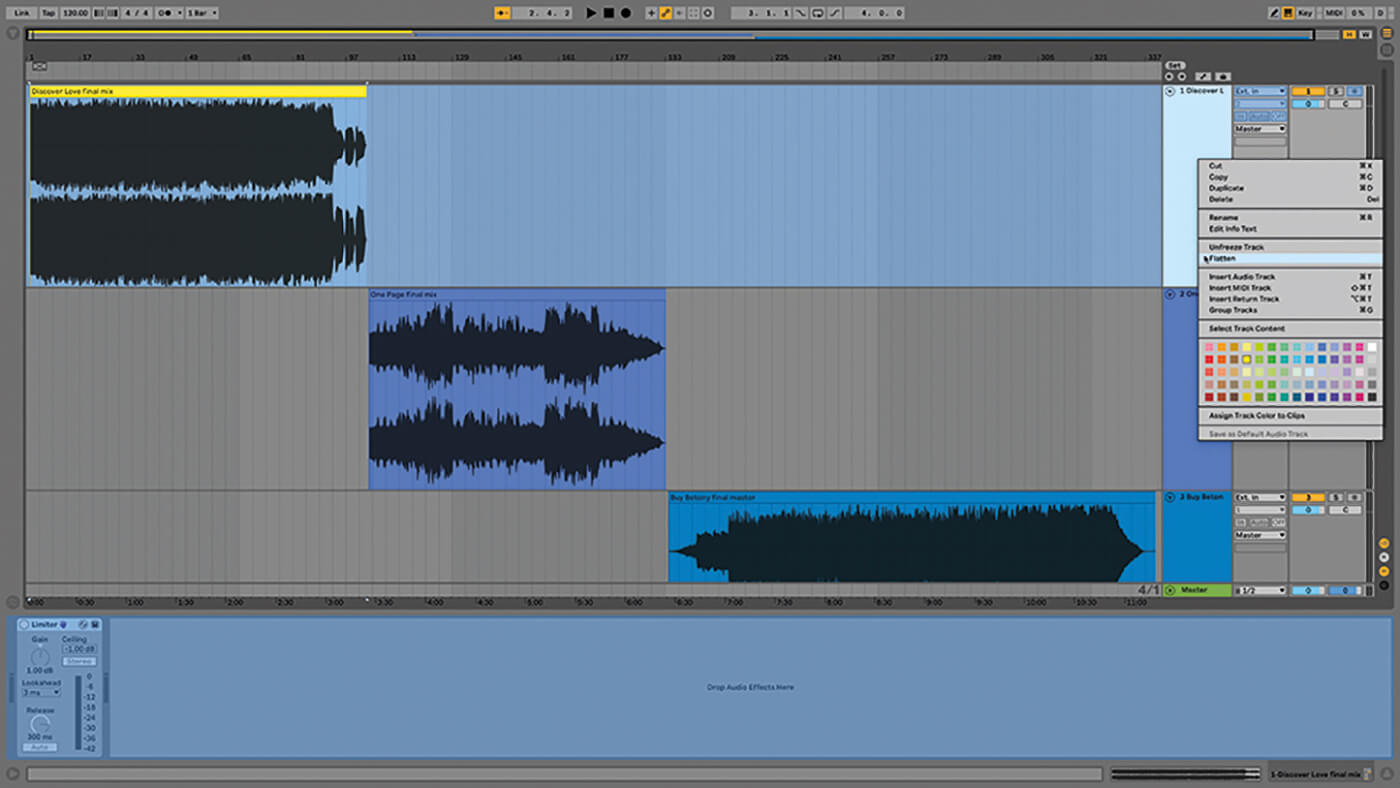
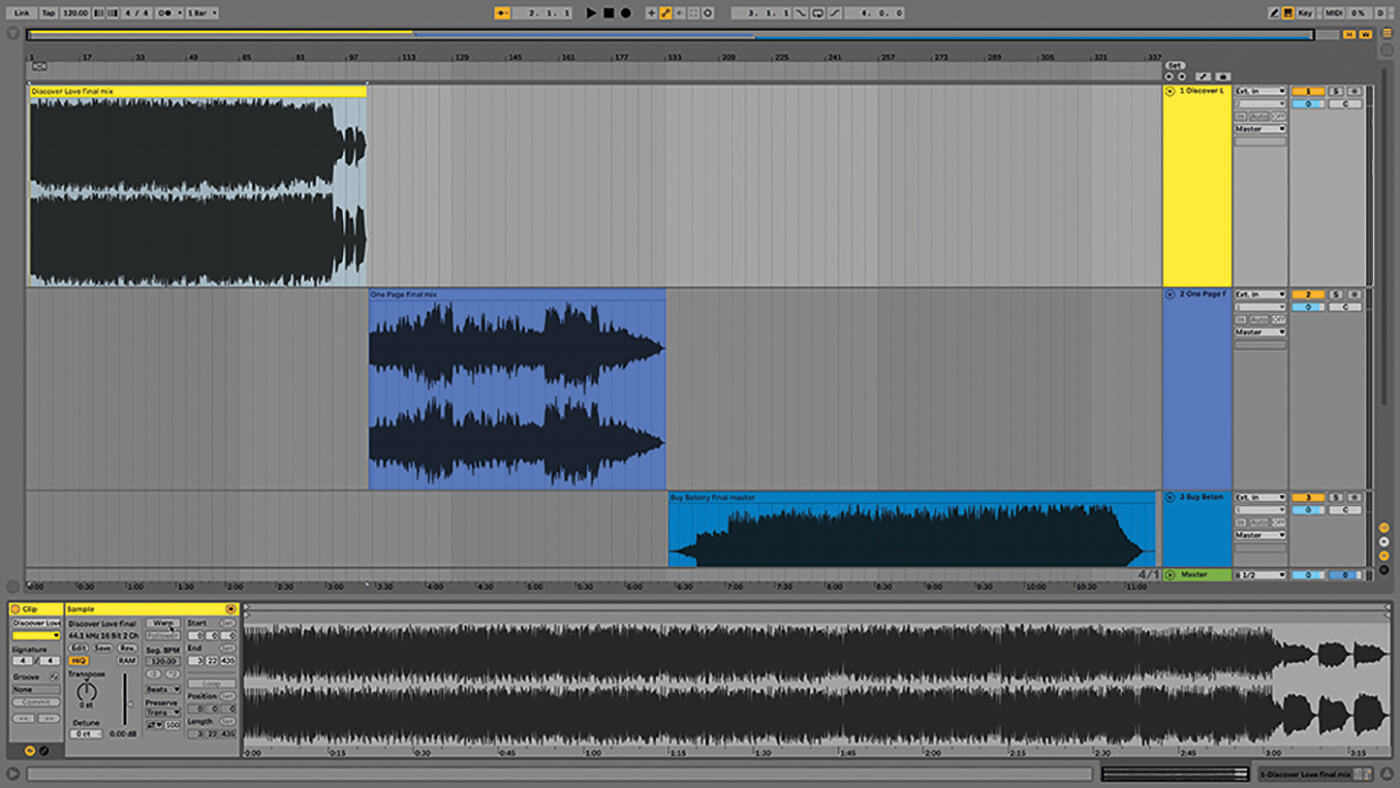
6. Your ears can play tricks on you. To visualise what’s happening, duplicate every track, then freeze and flatten the copies (via Live’s Context Menu). This embeds the limiter into the waveform so you can see what it’s doing.
![]()
LIVE IS KICKING Yes, you absolutely can mix and master in Live. Many will moan at the prospect – but let them. Live has long proven itself capable at these tasks, and each subsequent release has added more features to help you get the jobs done.
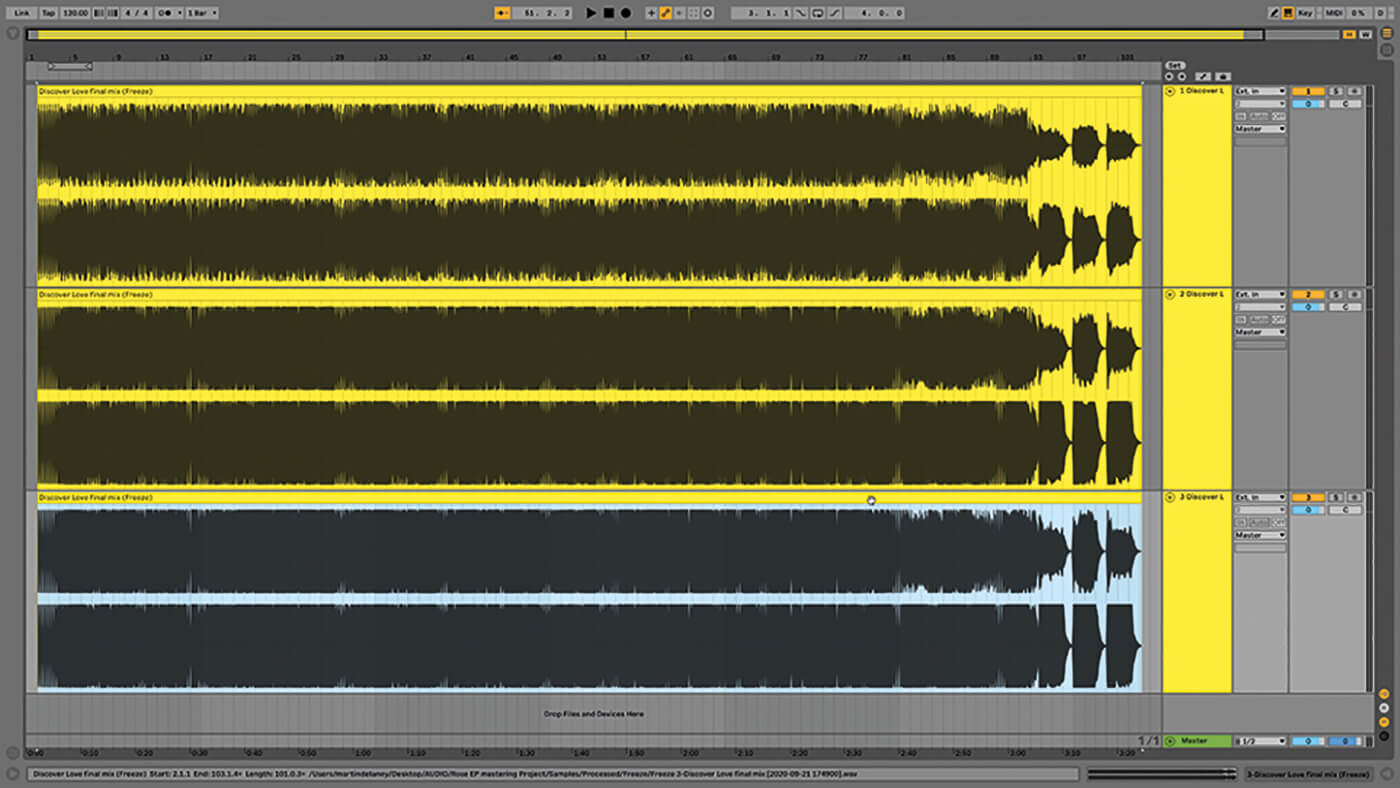
7. You could even repeat this process with different amounts of gain reduction, so you can unfold them all and see what’s up. How much limiting you apply will relate to the genre you’re working in.
8. That done, delete the unwanted flattened tracks to avoid confusion. This process works best if you’re confident with the mixes as they are, and all you’re concerned with is matching levels. The final step is to export the songs.

9. Often, the above steps will be enough to finalise your mix. Mixing groups of tracks and mostly leaving the master track alone at the mixing stage really help with this.
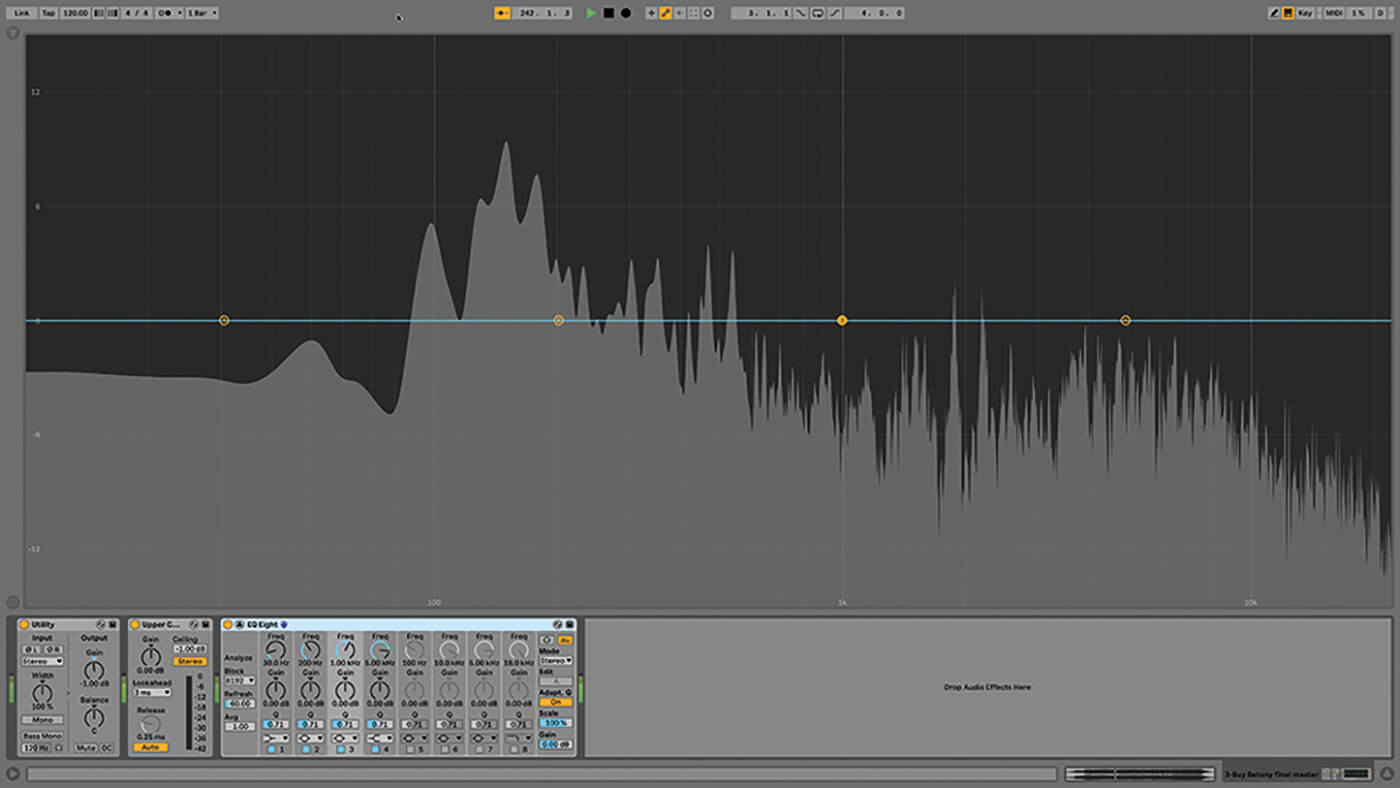
10. However, further processing may be required. EQ is a good place to start. Visualise it by looking at Live’s EQ Eight frequency display. It’s important to use your ears and have a vision for your finished result.
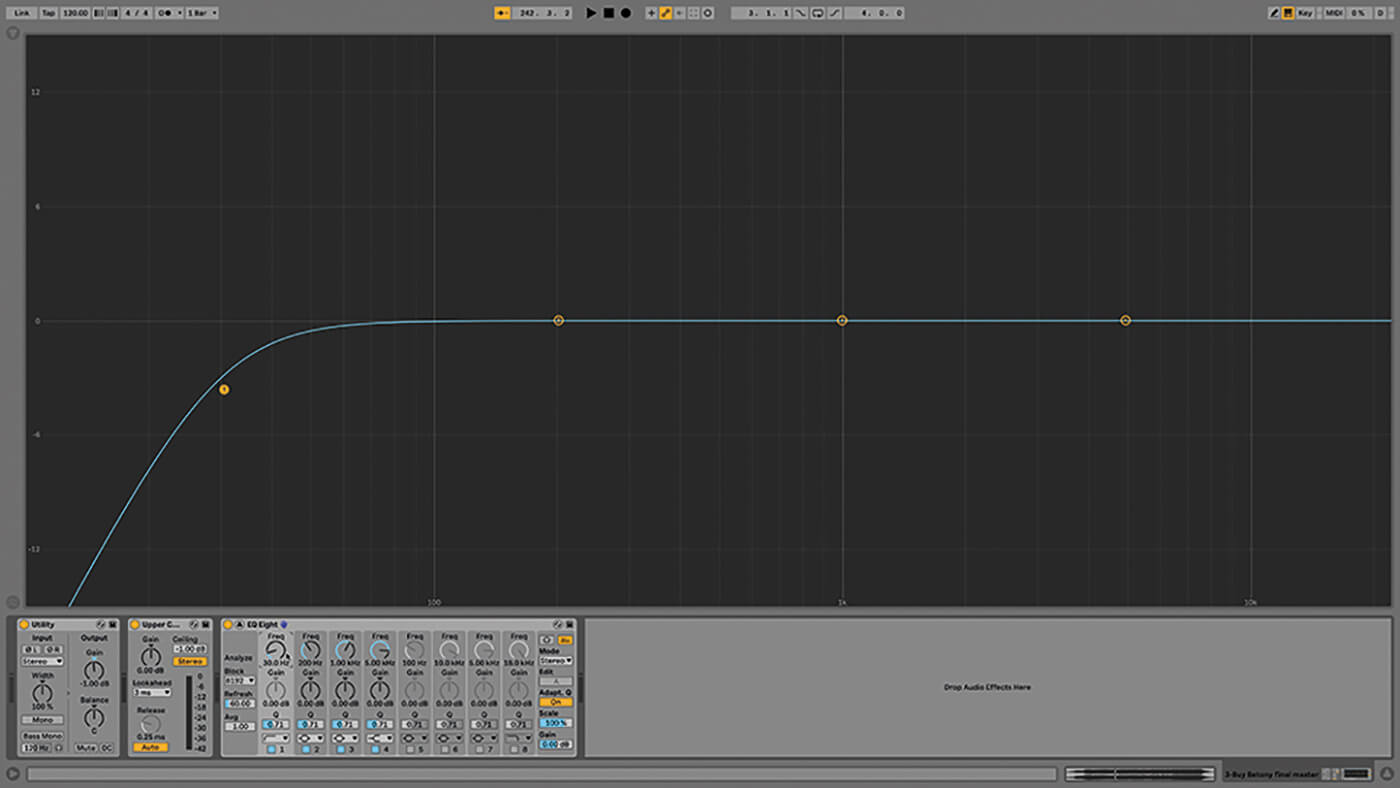
11. Rolling off everything below about 30Hz remains a good habit, as there’s unlikely to be much going on below that range. However, this is also something to try to deal with at the mixing stage.
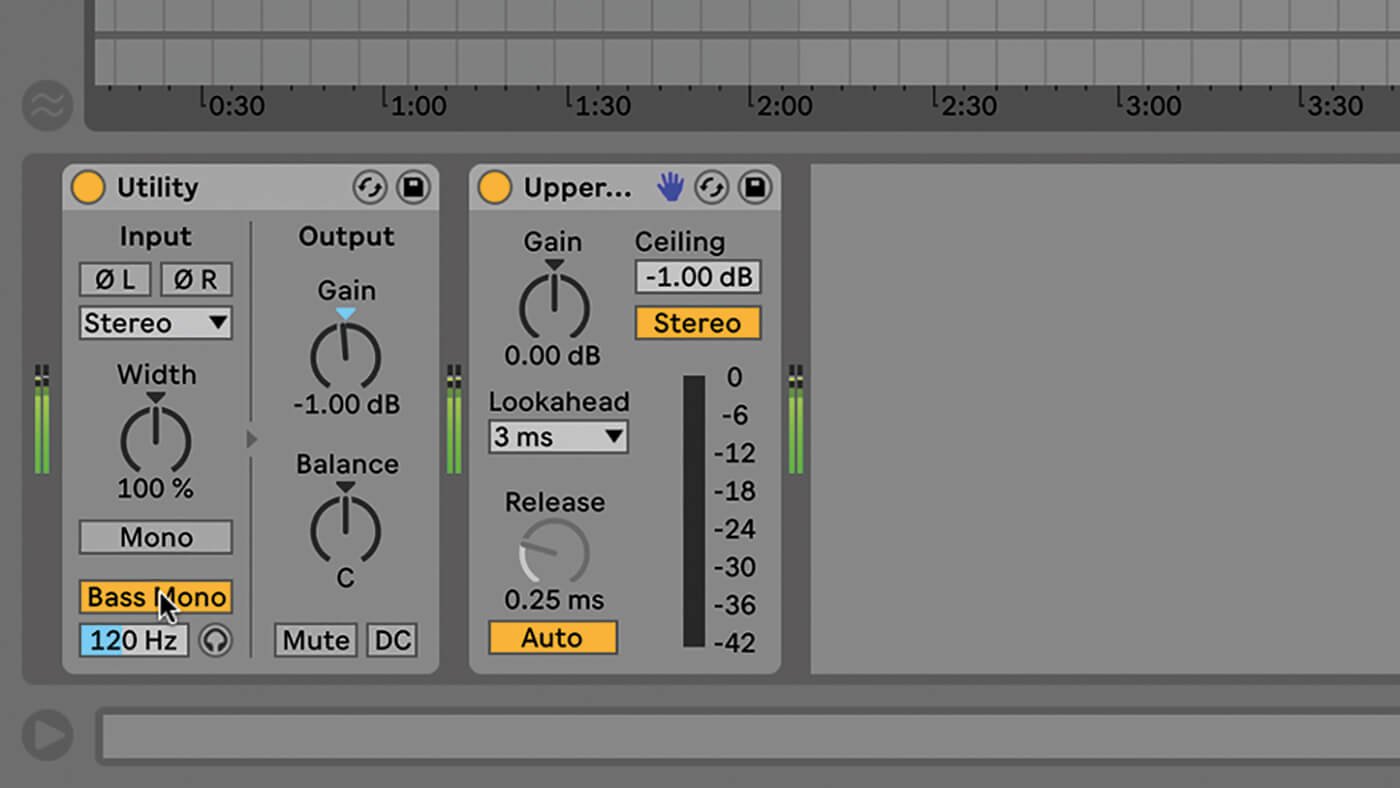
12. Live’s Utility device has a Bass Mono control, which lets you specify the frequency below which the mix becomes mono. It defaults to 120kHz but you must adjust this to suit your material.
![]()
DEEPER UNDERSTANDING It’s important to be able to master your own music and understand what’s involved, just as it’s important to know when to hand your mix off to a professional mastering engineer with the gear and, more importantly, the experience to add that final layer of polish.
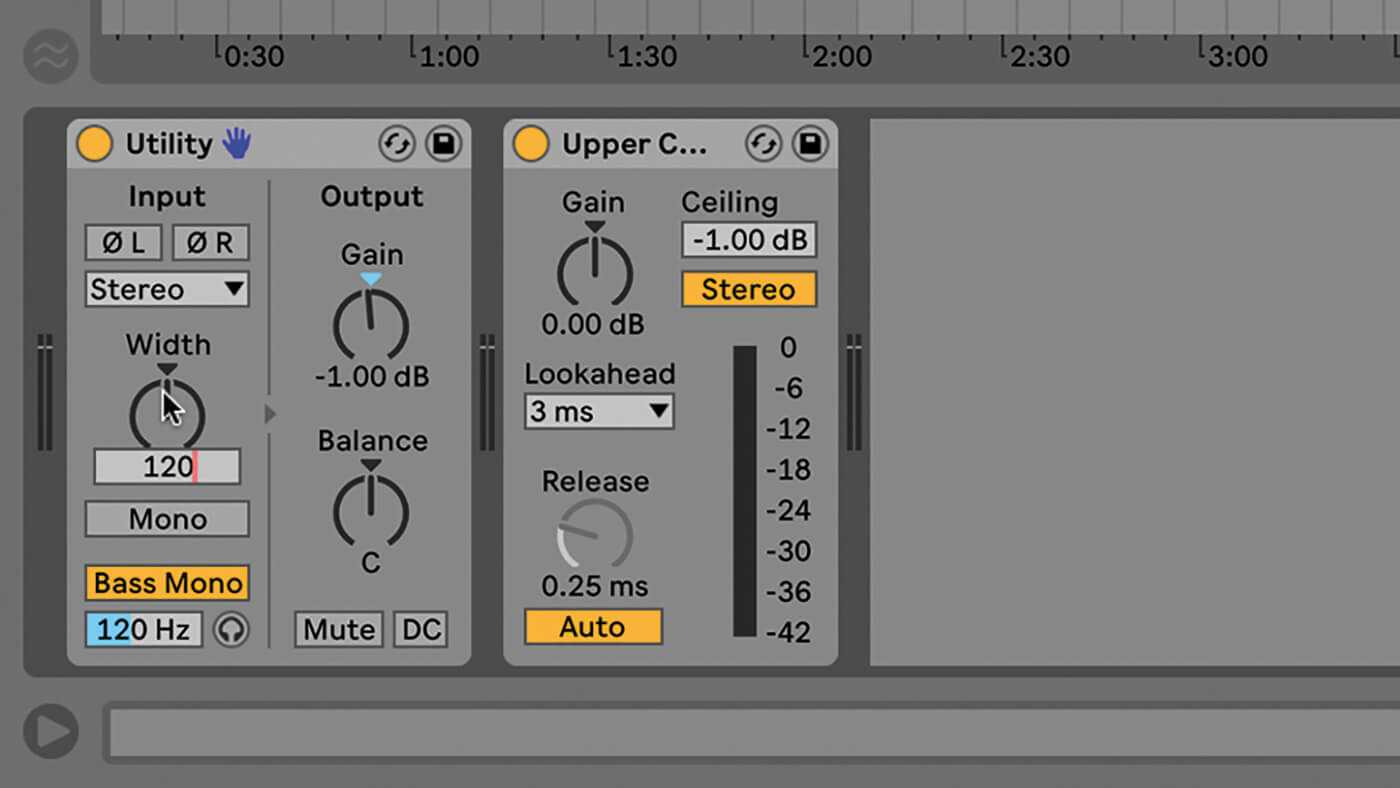
13. Making your low frequencies mono can tighten things up. You could also use Utility to increase stereo width in the higher frequencies. Utility alone is a tremendously useful mixing tool.

14. Live’s greatest mastering tool is the Multiband Dynamics device, which provides a convenient way to split your output into three separate bands and compress each. The presets often need just minor small tweaks.
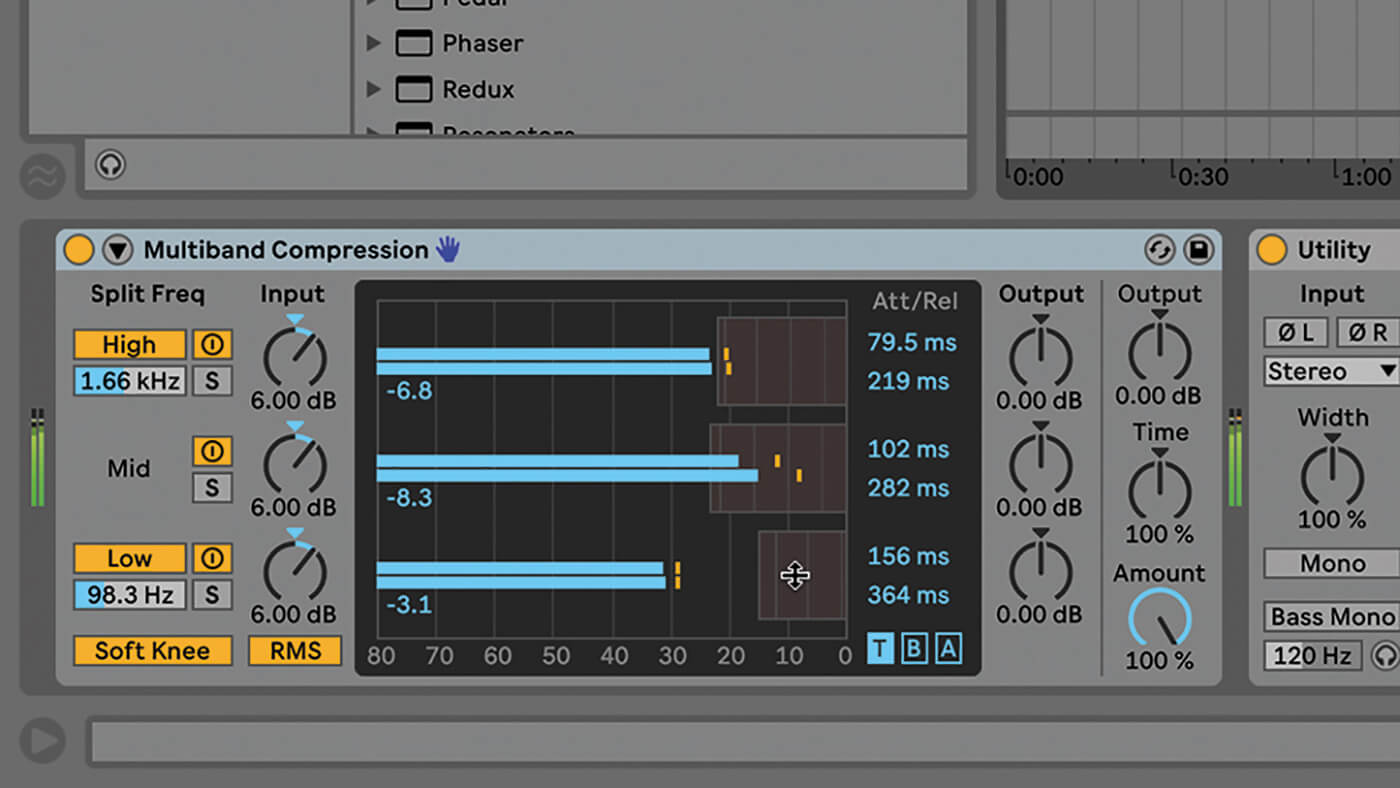
15. The multi-band compression preset is an ideal starting point. Lower the mid volume by dragging the right-hand horizontal bar down, and boost the highs a bit by dragging the relevant bar upwards.
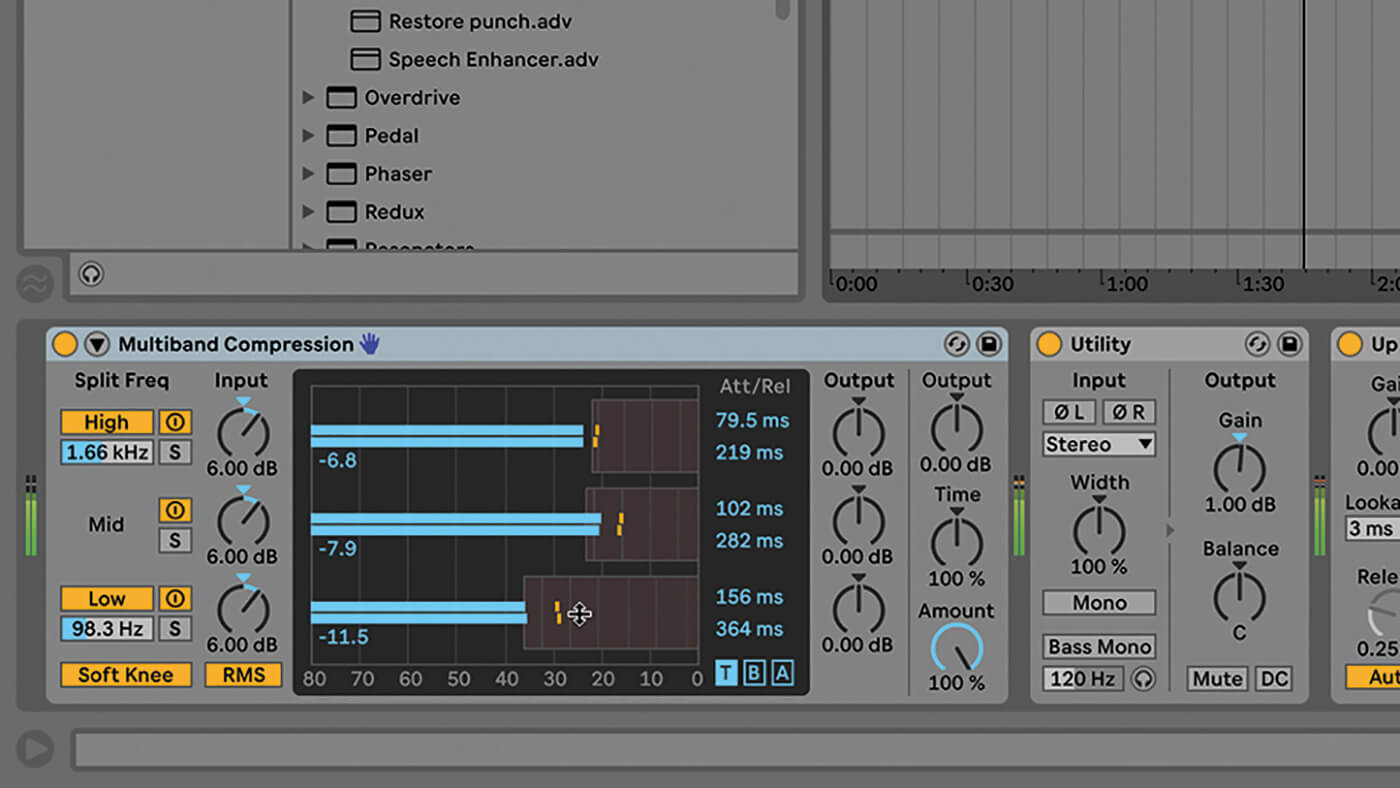
16. As well as adjusting the levels, adjust the compression threshold for each band by dragging the sliders to the left or right. It helps to drag them until the settings are too extreme and you can really hear what’s happening…

17. Then bring it back down or use the amount control mix to lower the compression intensity globally across all of the bands. Multiband Dynamics can really help your mix but don’t overdo it.
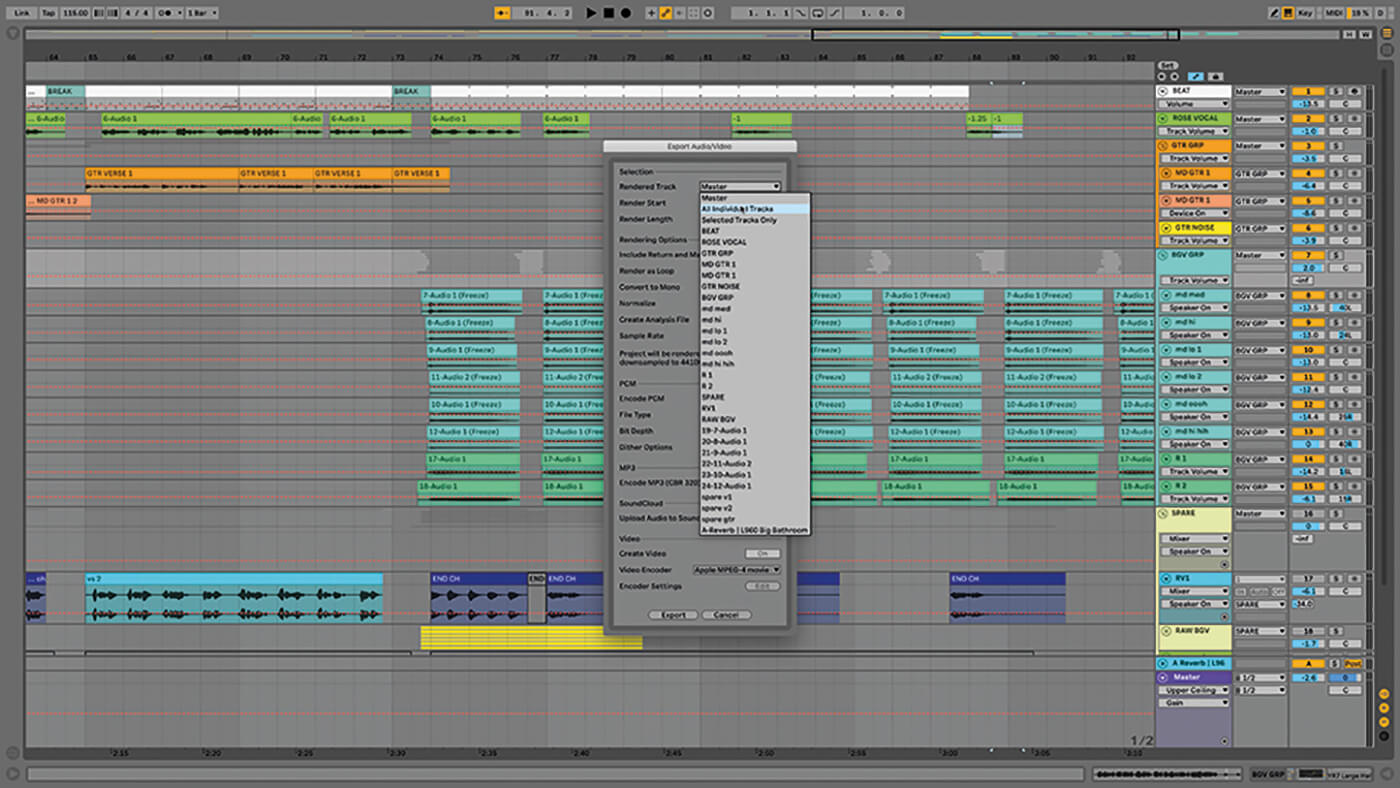
18. When the time comes to export the finished result, stick to 16 bit/44.1kHz unless the client specifies otherwise. It’s good practice to export all final stems and mixes out of Live as stereo files for future-proofing purposes.
For more Live tutorials and workshops, check here.