Beginner’s Guide: Everything you need to know about music production
You’ve probably heard it before, but there’s never been a better time to start making your own music. Here’s how.
Producing music at home is affordable, rewarding, and fun, but getting set up can be a complicated and confusing process if you don’t know where to begin.
- READ MORE: Beginner’s Guide: How to make music for free
In this article, we’re going to cover all the essentials of music production: what it is, what gear you’ll need and the key steps to producing a track.
What is music production?
Music production is an umbrella term. Whether it’s songwriting, arranging, recording, mixing, mastering or anything in between, it can probably be described as music production. Put simply, it’s the entire process, from start to finish, of making recorded music.
The different elements of music production rely not only on skills and knowledge but on specific hardware and software. So, the first step is to consider what gear you’re going to need.
Essential gear you need to begin recording music
Computer
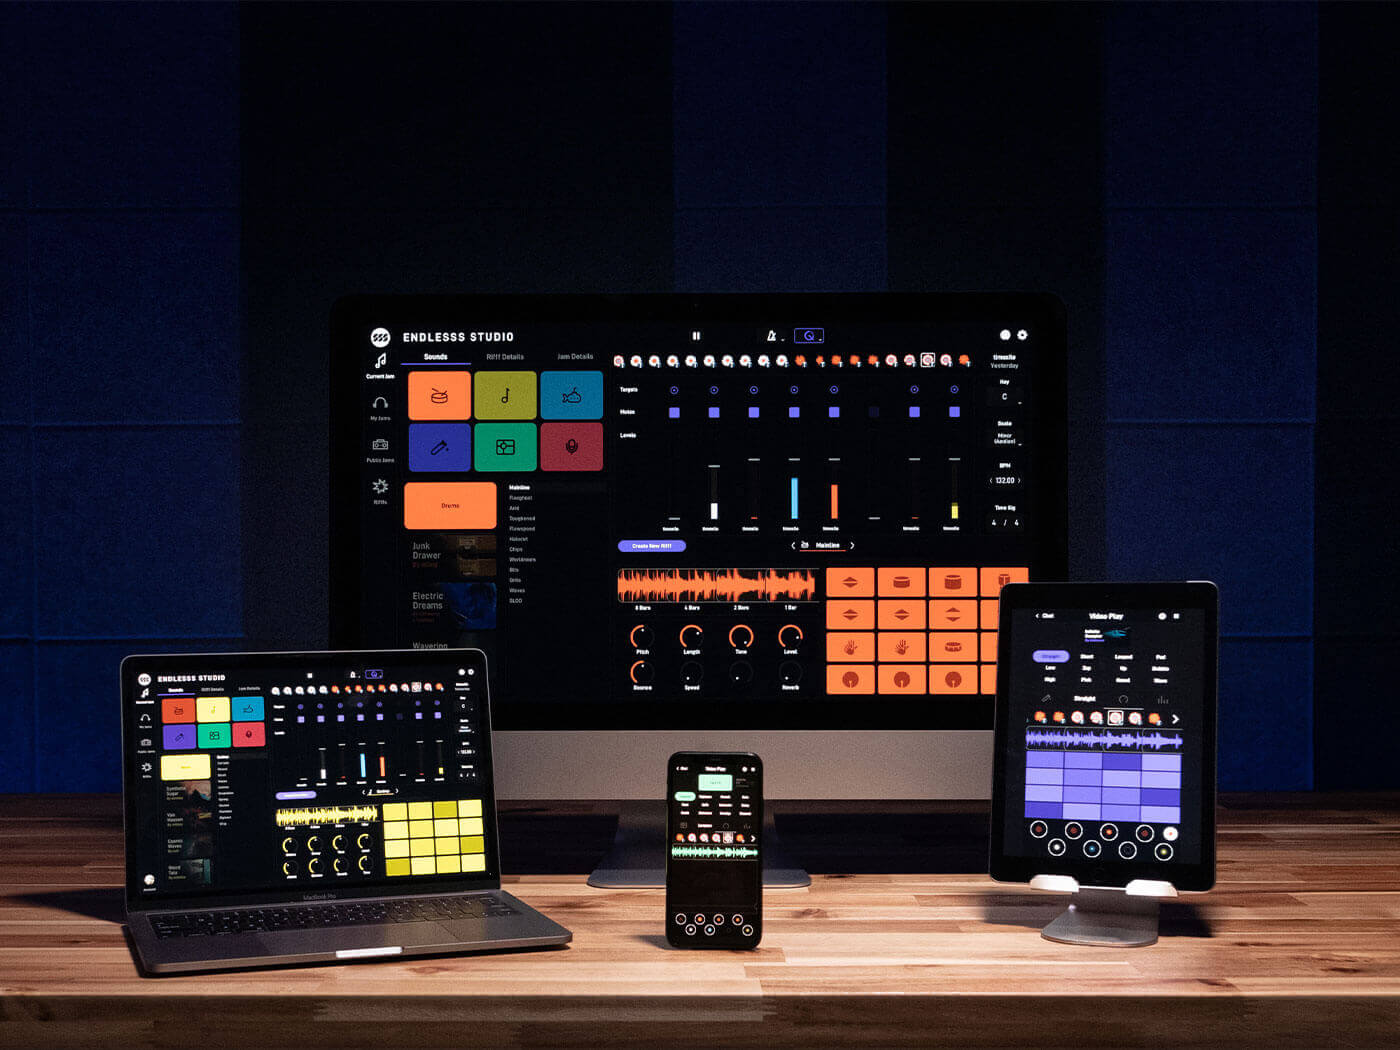
First and foremost you’re going to need some sort of computer. Laptops, tablets and – especially today – smartphones are all viable options for music-making. A desktop computer will still give you the most processing power and screen real estate for your money, but phones are increasingly becoming more workable as music production devices thanks to the emergence of sophisticated and powerful apps.
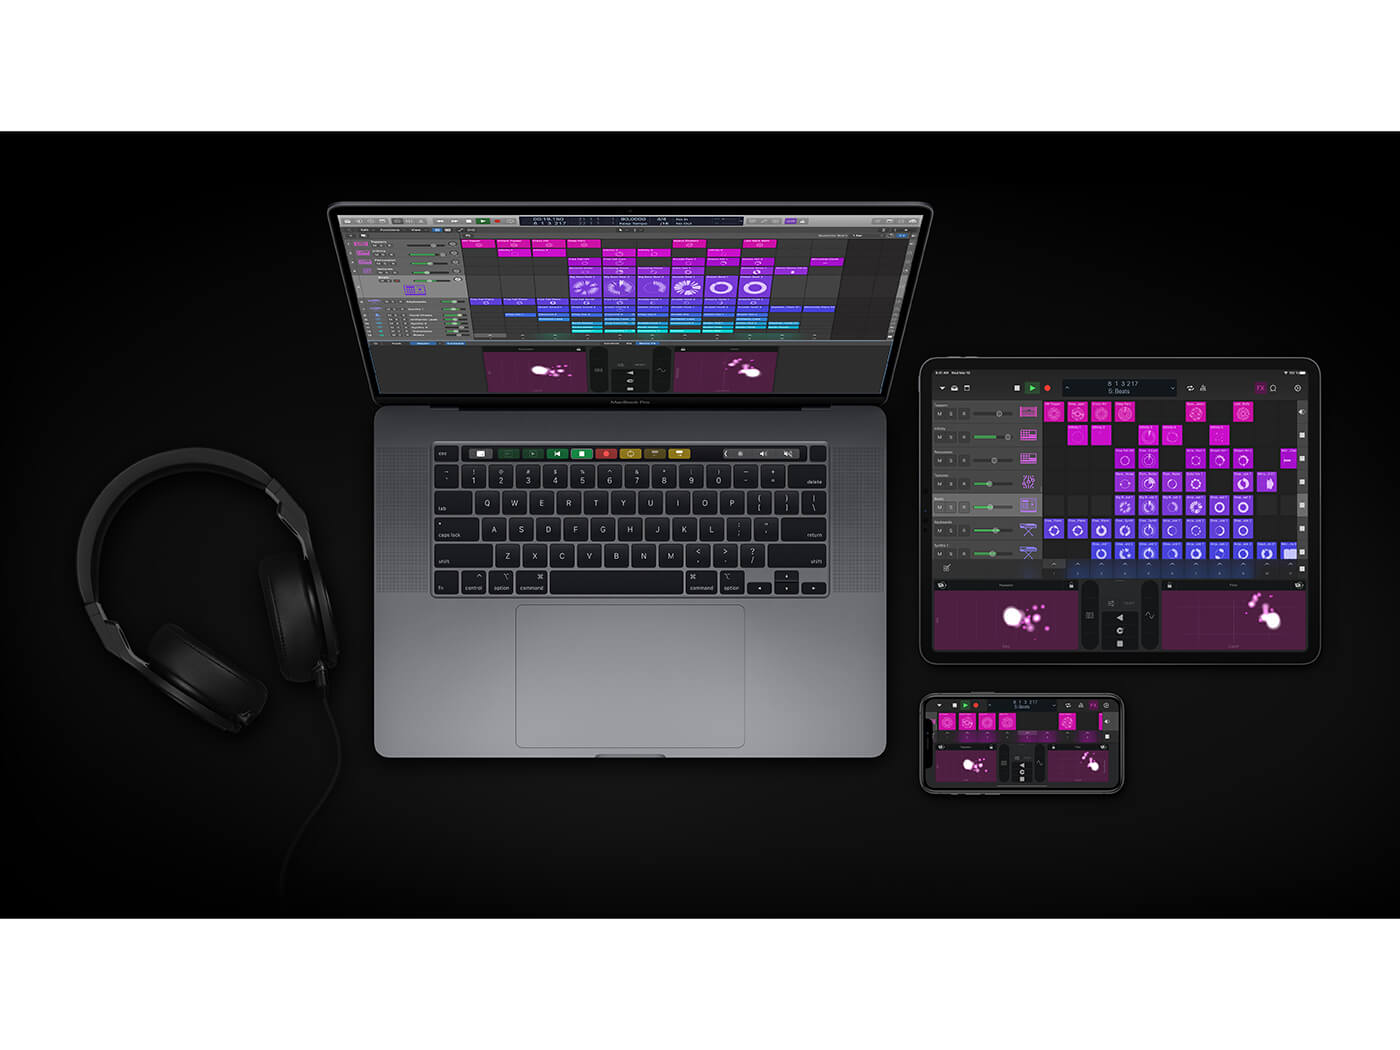
Digital Audio Workstation (DAW)
Next up is a DAW, or a Digital Audio Workstation. This is the software that sits at the heart of modern music production, letting you record, arrange, edit, mix and master your music.
There are many powerful DAWs to choose from, either paid (Ableton Live, Logic Pro, FL Studio) or free-to-use (BandLab, GarageBand). In general, all DAWs feature the same core capabilities – but there are some important differences to be aware of. Some excel at audio recording, some are great for making beats and others work best as live performance tools.
So, before making a commitment, take some time to learn about a DAWs individual strengths and weaknesses. Alternatively, check out our recommendations of the best free DAWs and get started on one of them.
Monitoring equipment: speakers or headphones
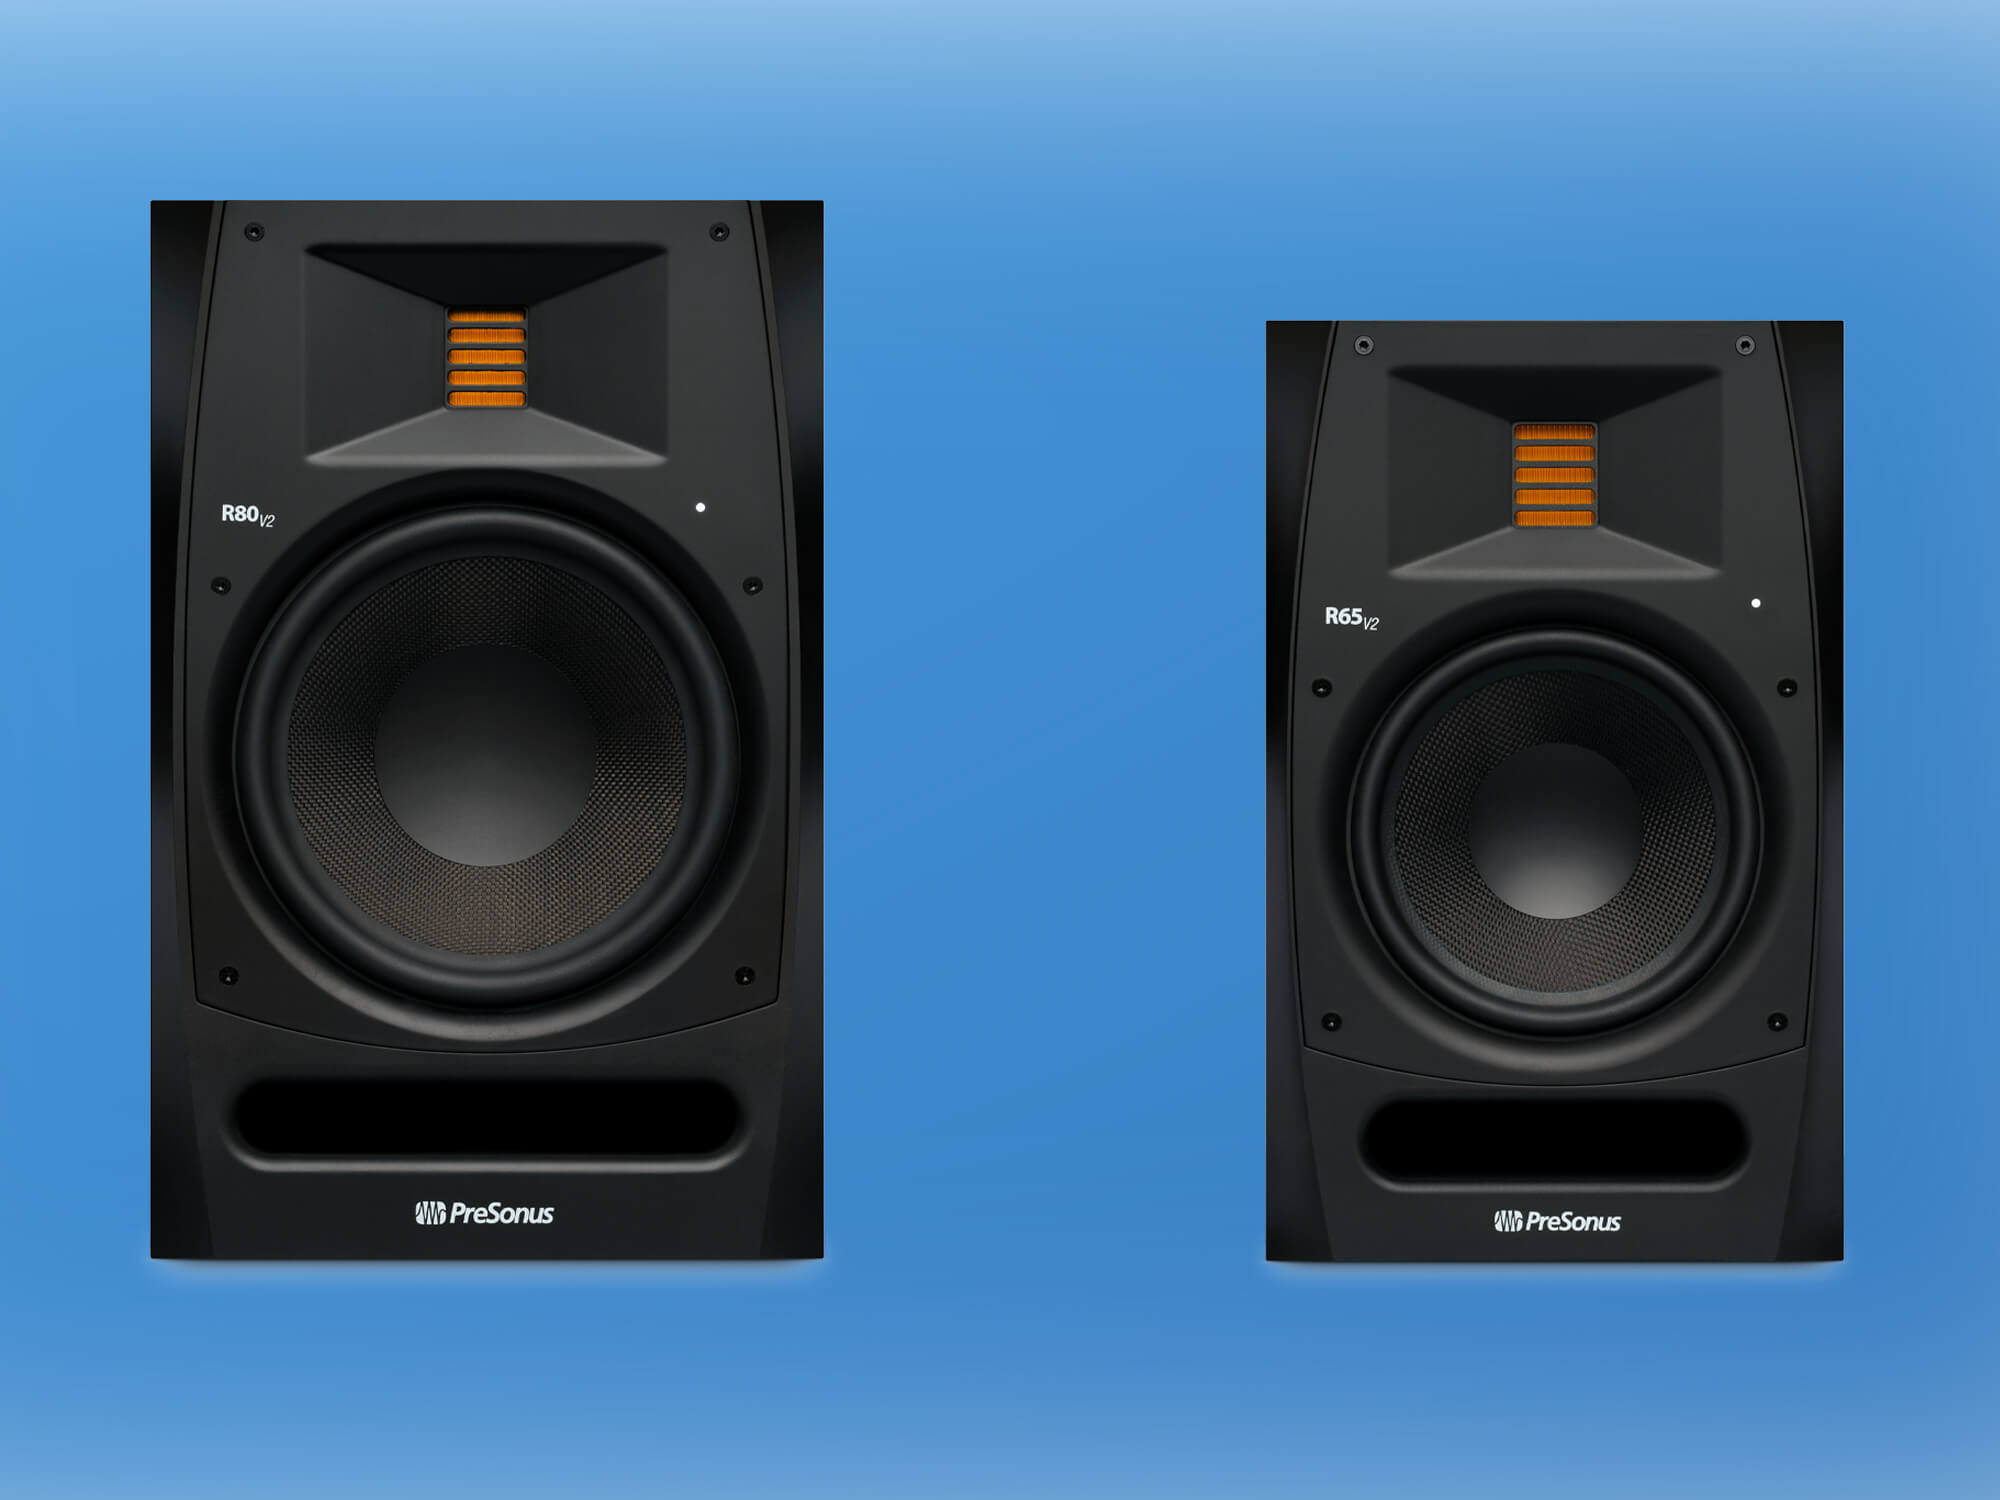
Monitoring speakers are often described as the single most important item in your studio, and for good reason. No matter how good your musical ideas, if you’re creating and mixing on sub-standard speakers then the result is almost certain to be uninspiring. Monitor speakers are different from hi-fi speakers because they tend to have a more transparent sound, rather than a flattering one.
While monitors are undoubtedly the gold standard for playback, good-quality headphones are an excellent place to start if you have space or budget constraints. Choosing the right option needs careful consideration and shouldn’t be rushed, take some time to read up on the pros and cons before investing. You can start with these guides:
- Beginner’s Guide: Everything you need to know about studio monitors
- 10 tips for better monitoring
- Six ways to buy studio monitors
Specialist gear you may need to produce music
While it’s legitimately possible to make a track with nothing more than a computer, a DAW, and a pair of headphones, sooner or later you’re going to want to expand your setup. Exactly what other gear you might need depends largely on the type of music you plan to make.
Audio interface
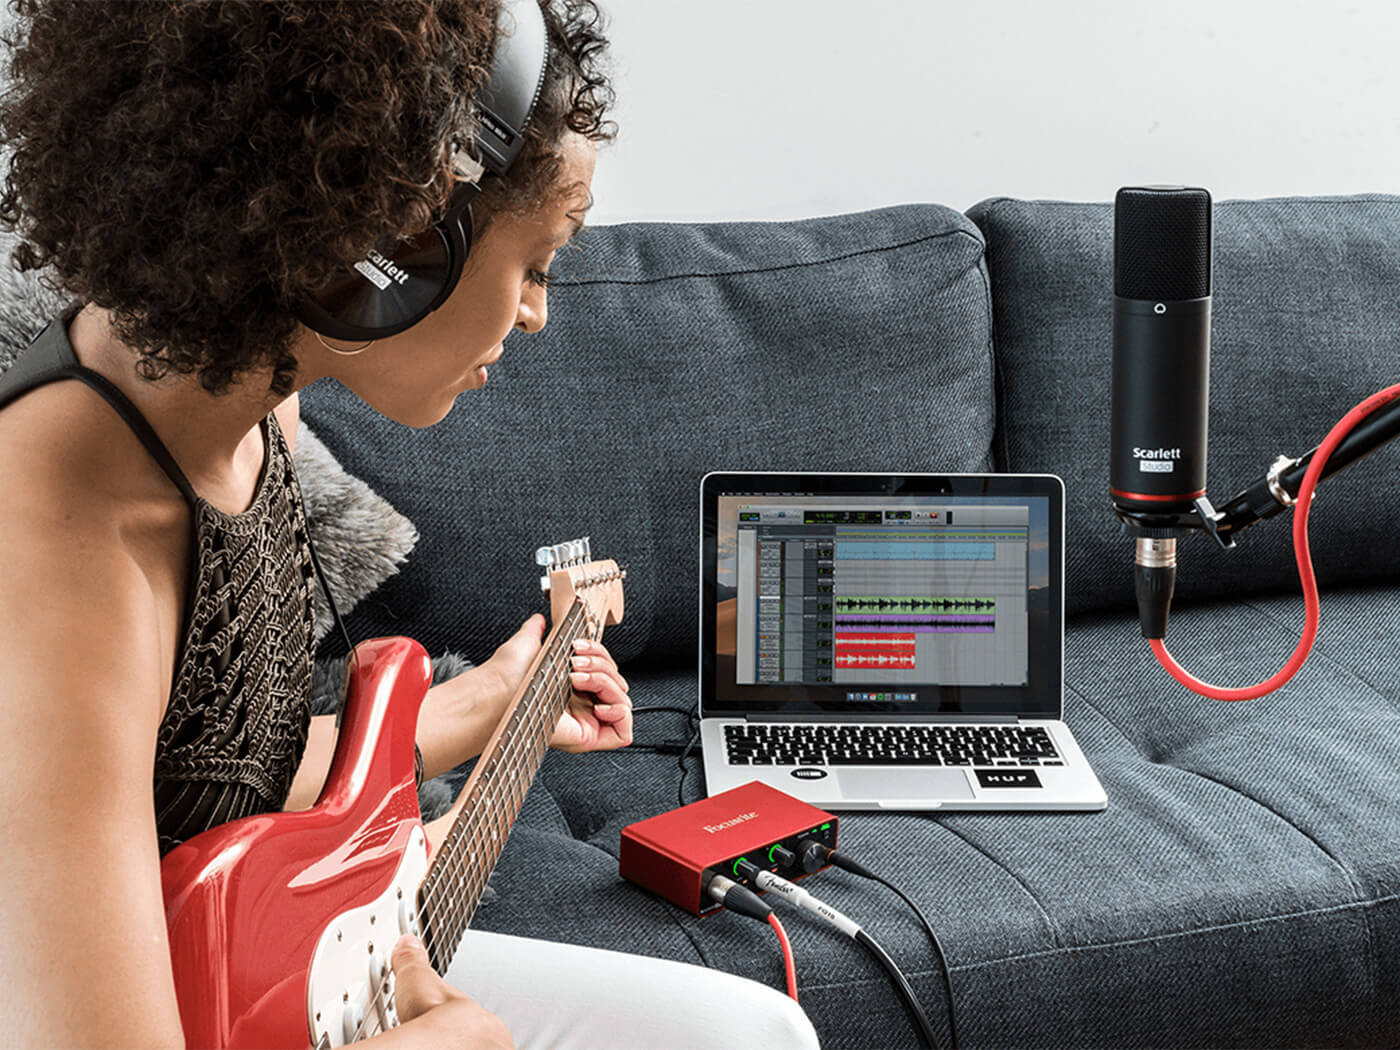
An audio interface sits between your computer and external devices like microphones or studio monitors. It’s the go-between that translates audio signals from a microphone into digital data that can be understood by your computer.
It also does this process in reverse: when you hit ‘play’ on your DAW, an interface will translate that digital information back into an electrical audio signal that can be played by your speakers or headphones. This process is called analogue to digital conversion, and digital to analogue conversion.
If that sounds a bit confusing, just keep this in mind – if you’re planning to record vocals or acoustic instruments then you’re going to need an audio interface.
Sure, your laptop or tablet can in fact capture sound using its inbuilt mic and convert it to digital – but those converters were designed for video calls and not for capturing a detailed musical performance! The quality difference you’ll get from using a dedicated interface will make all the difference when it comes time to mix everything together.
Beyond audio recording, there is also the tricky issue of latency. Latency is the small delay that occurs between pressing a key on your MIDI keyboard (more on that later), or singing a note into a microphone, and hearing the result come back through your headphones. This happens because computers can’t do things instantly; they need a small amount of time to convert and process those digital and analogue signals.
High latency messes with a musician’s sense of timing, and this makes recording live takes difficult, if not impossible. So, if you’ll be recording other musicians, look for interfaces with low or zero-latency monitoring.
It’s also worth taking time to consider how many audio inputs and outputs an interface has: a singer-songwriter may only need one microphone input and an instrument for guitar, but if you want to record a whole band playing together, then you might need eight inputs or more.
Here are some of our recommendations:
- Best mobile audio interfaces for iOS and Android
- Best audio interfaces under $200
- Best audio interfaces under $500
Microphones
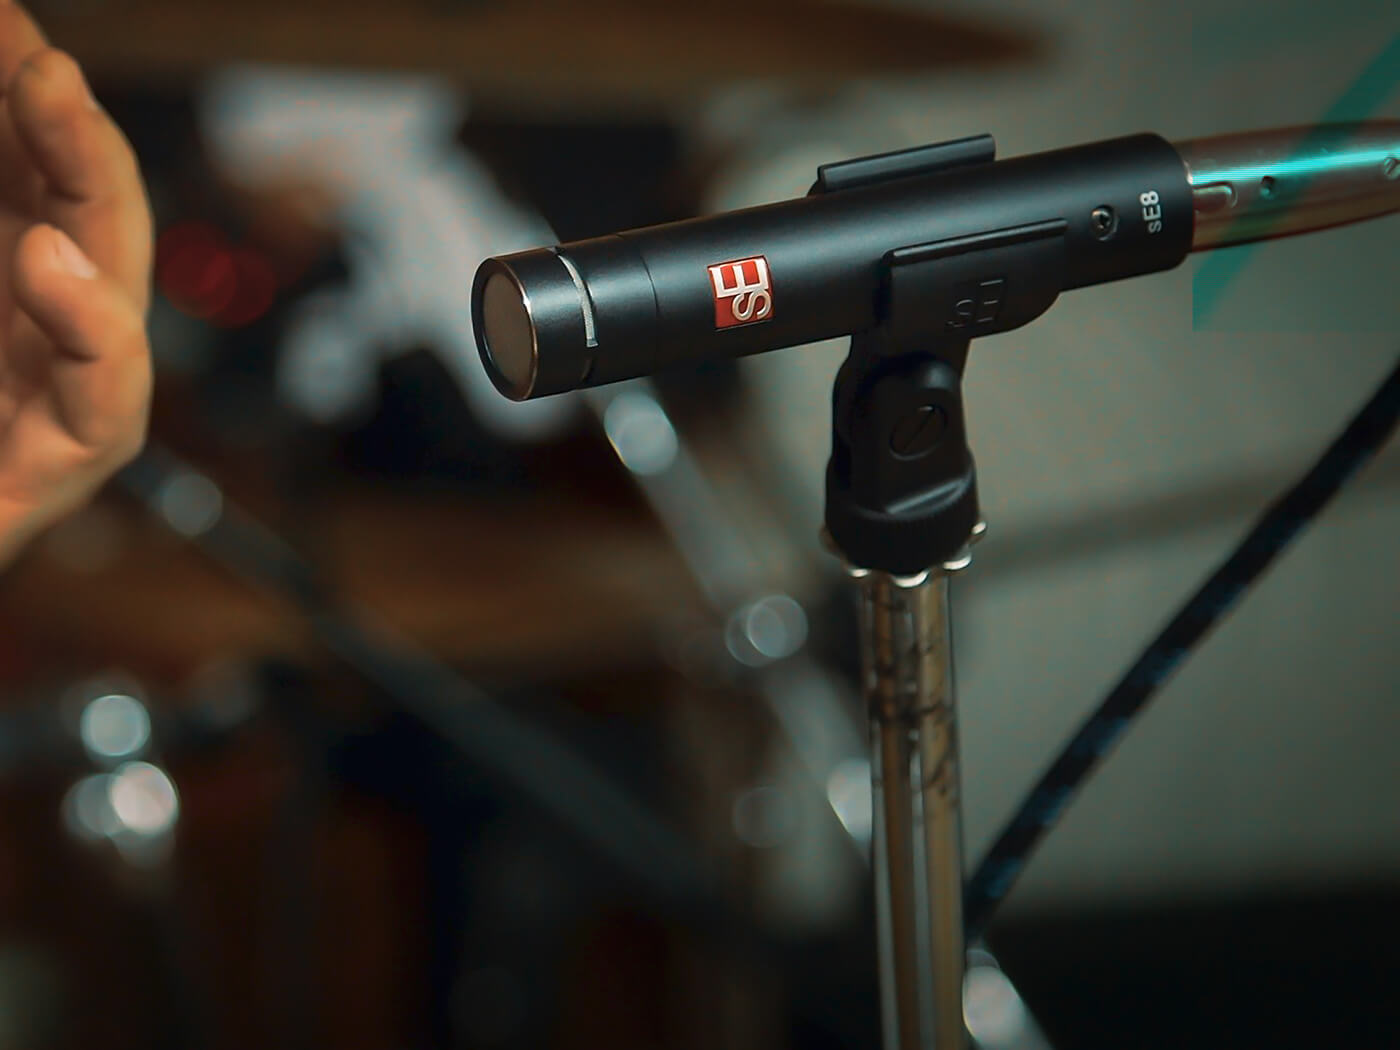
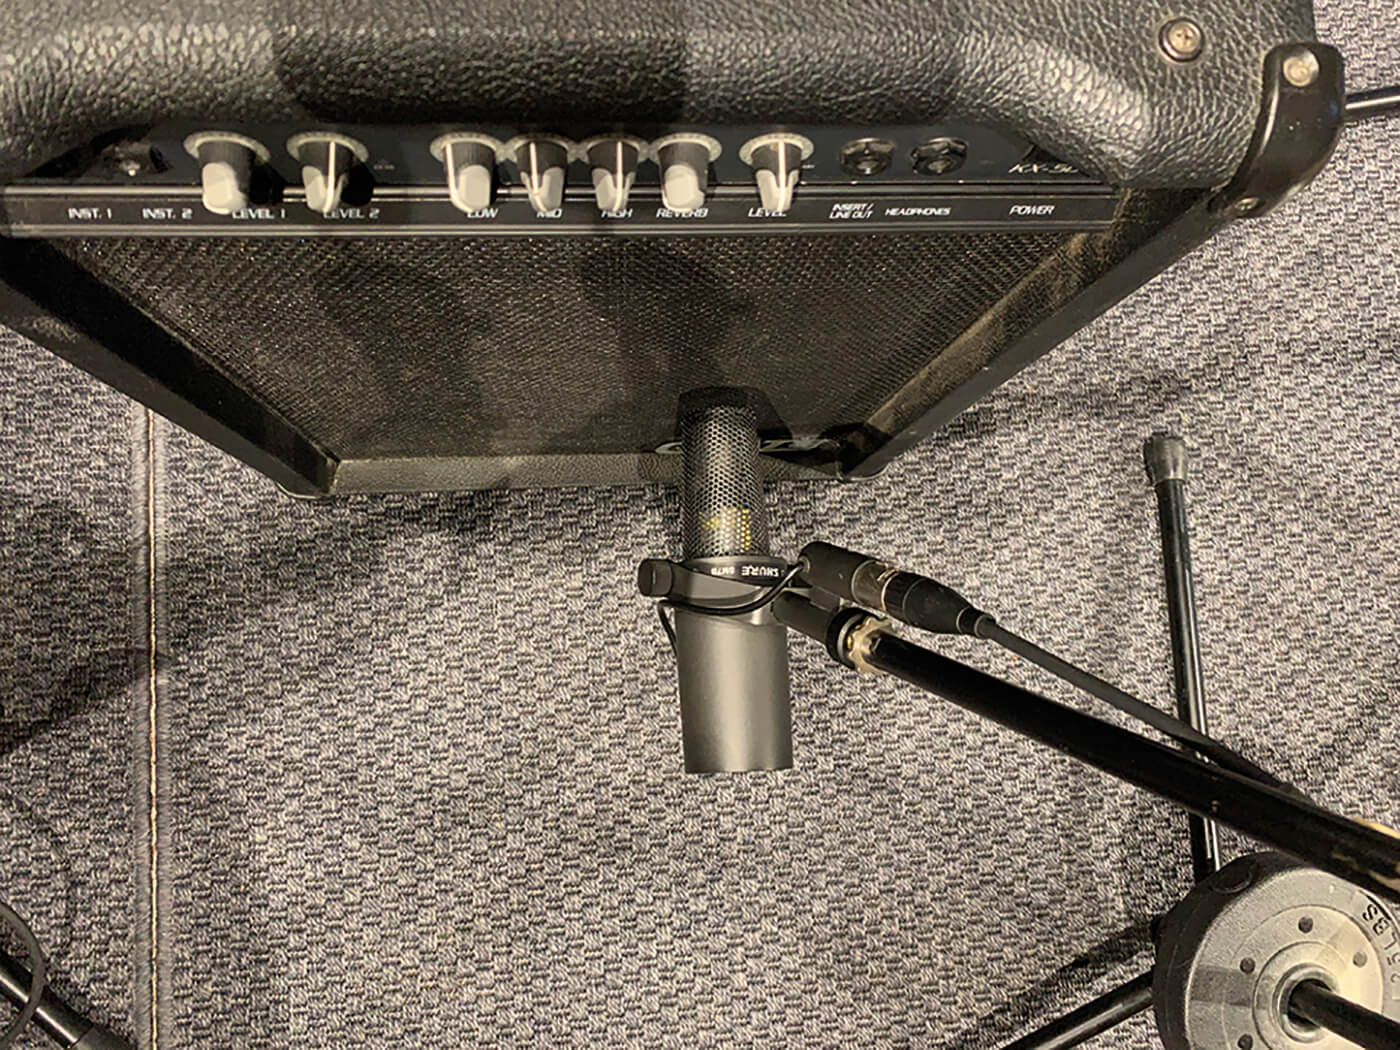
Along with an interface, a microphone is essential if you’re planning to record live musicians. Microphones can vary wildly in quality and price, and knowing which microphone works best for each instrument is an art in itself. We have a full, in-depth guide on everything you need to know about microphones – but read on for the quick-and-dirty version.
The two most popular types are dynamic microphones and condenser microphones. Dynamic mics are great for recording loud things like electric guitars and drums. Condenser mics are much more sensitive. They require a special kind of power source from your interface, called ‘phantom power’ (often denoted by ‘+48V’). This sensitivity makes them ideal for vocal recordings.
Both of these microphone types will connect to your audio interface using an XLR cable. You might be tempted to buy a USB mic that connects straight to your computer, but generally, a mic and an interface together will offer more flexibility and quality.
To get started, try to find the right balance between quality and price. It’s completely possible to get great recordings with a reasonably priced dynamic or condenser microphone, and there’s no need to break the bank at this stage. We’ve got a few recommendations here:
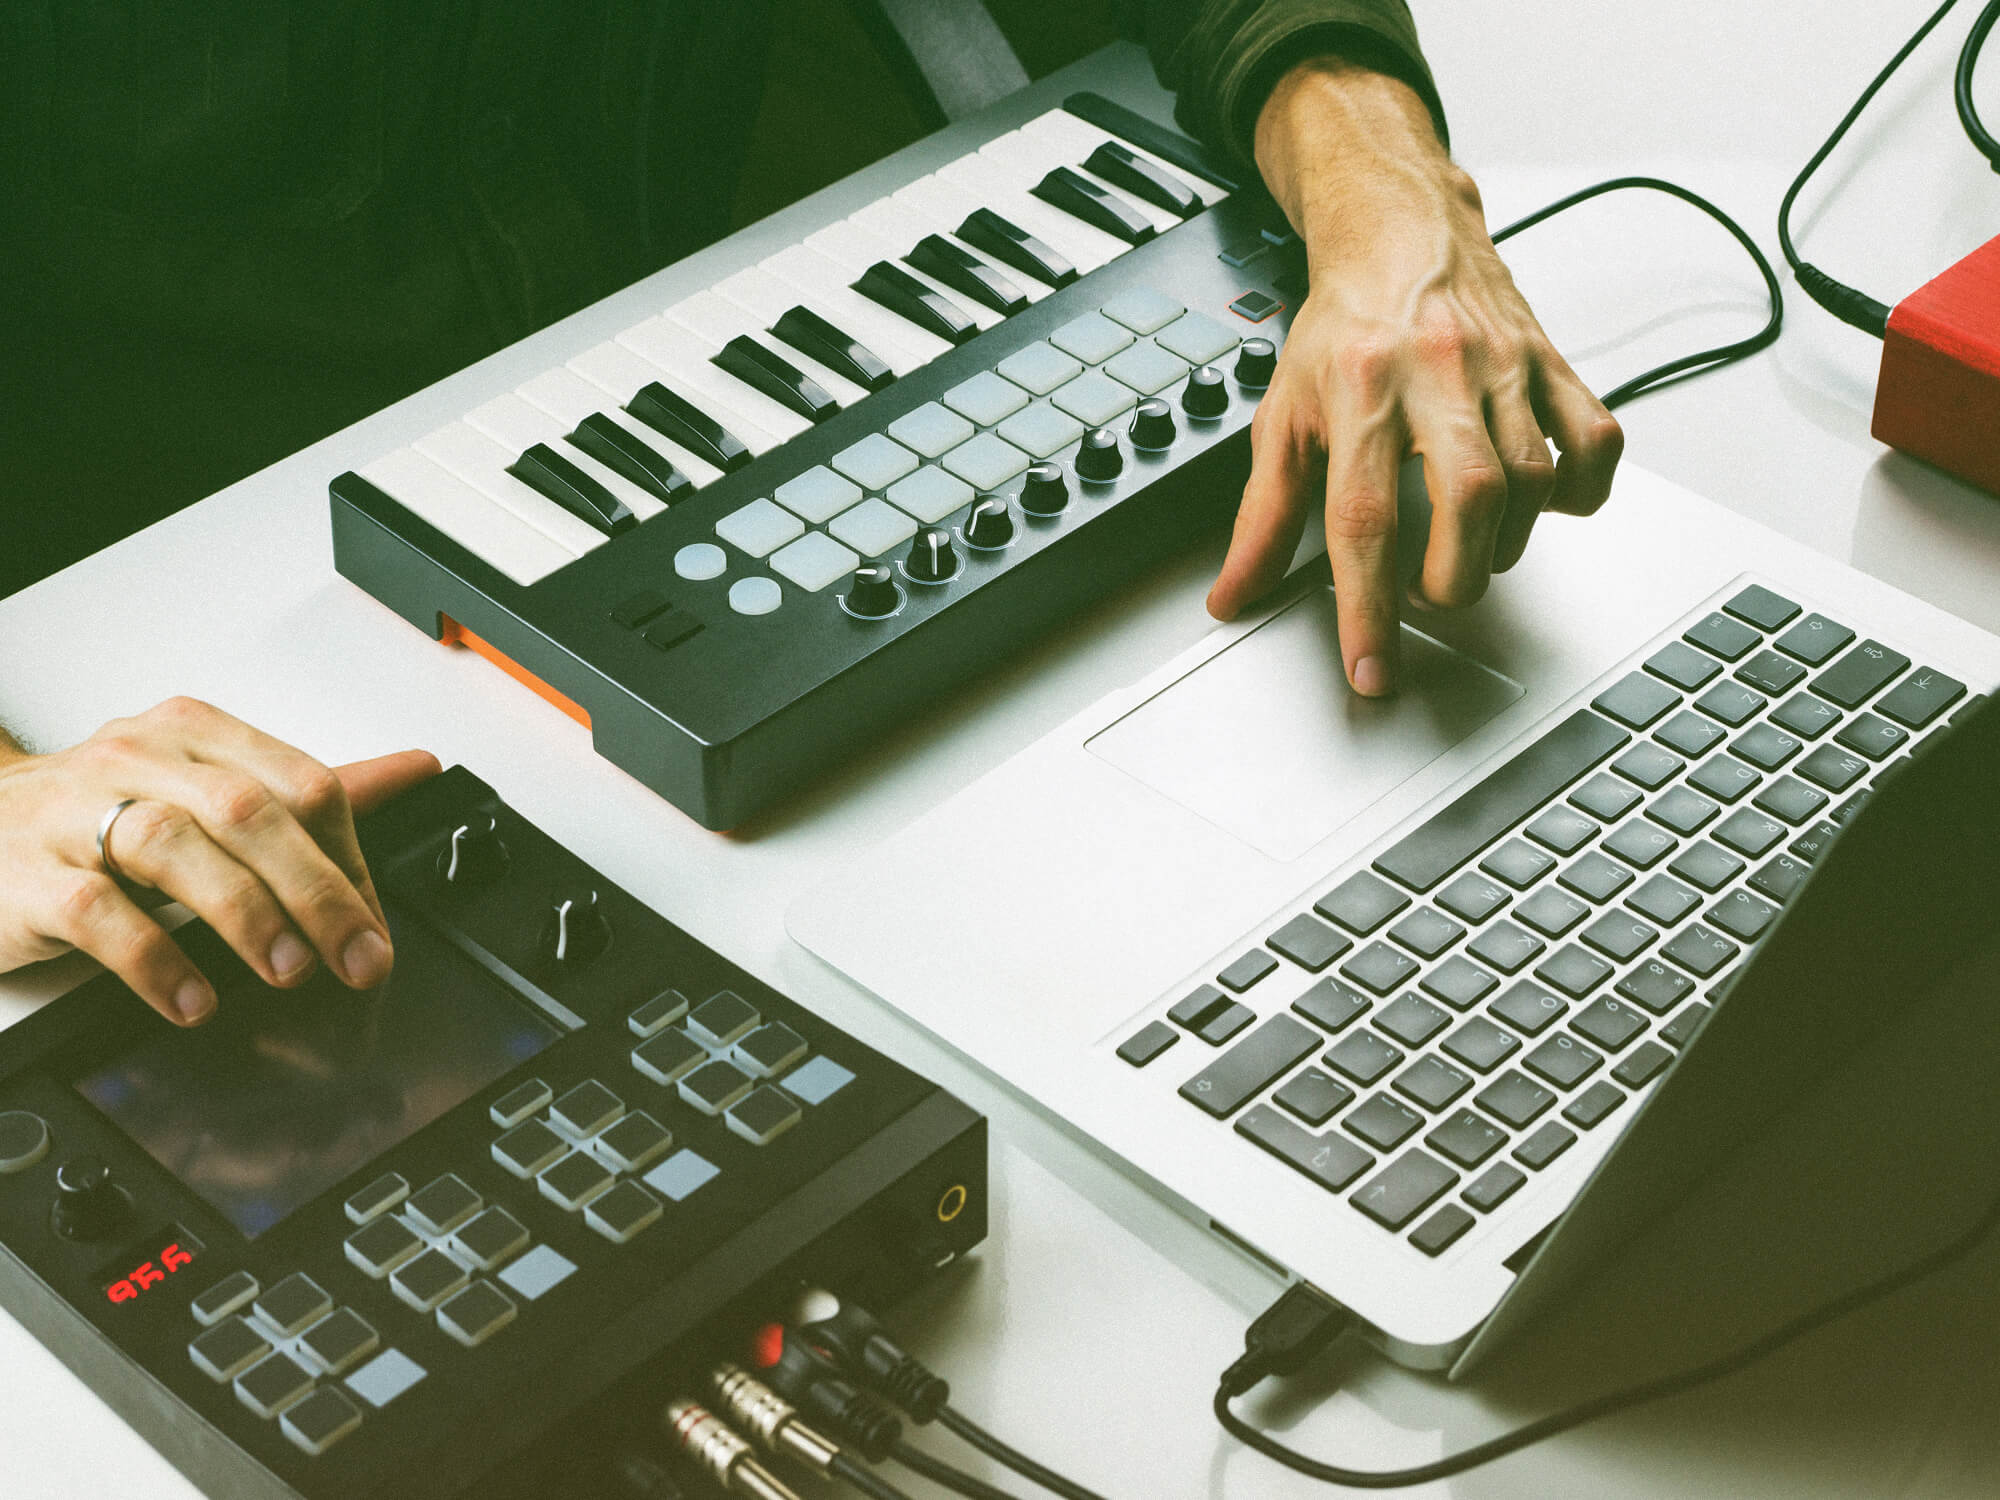
Controllers
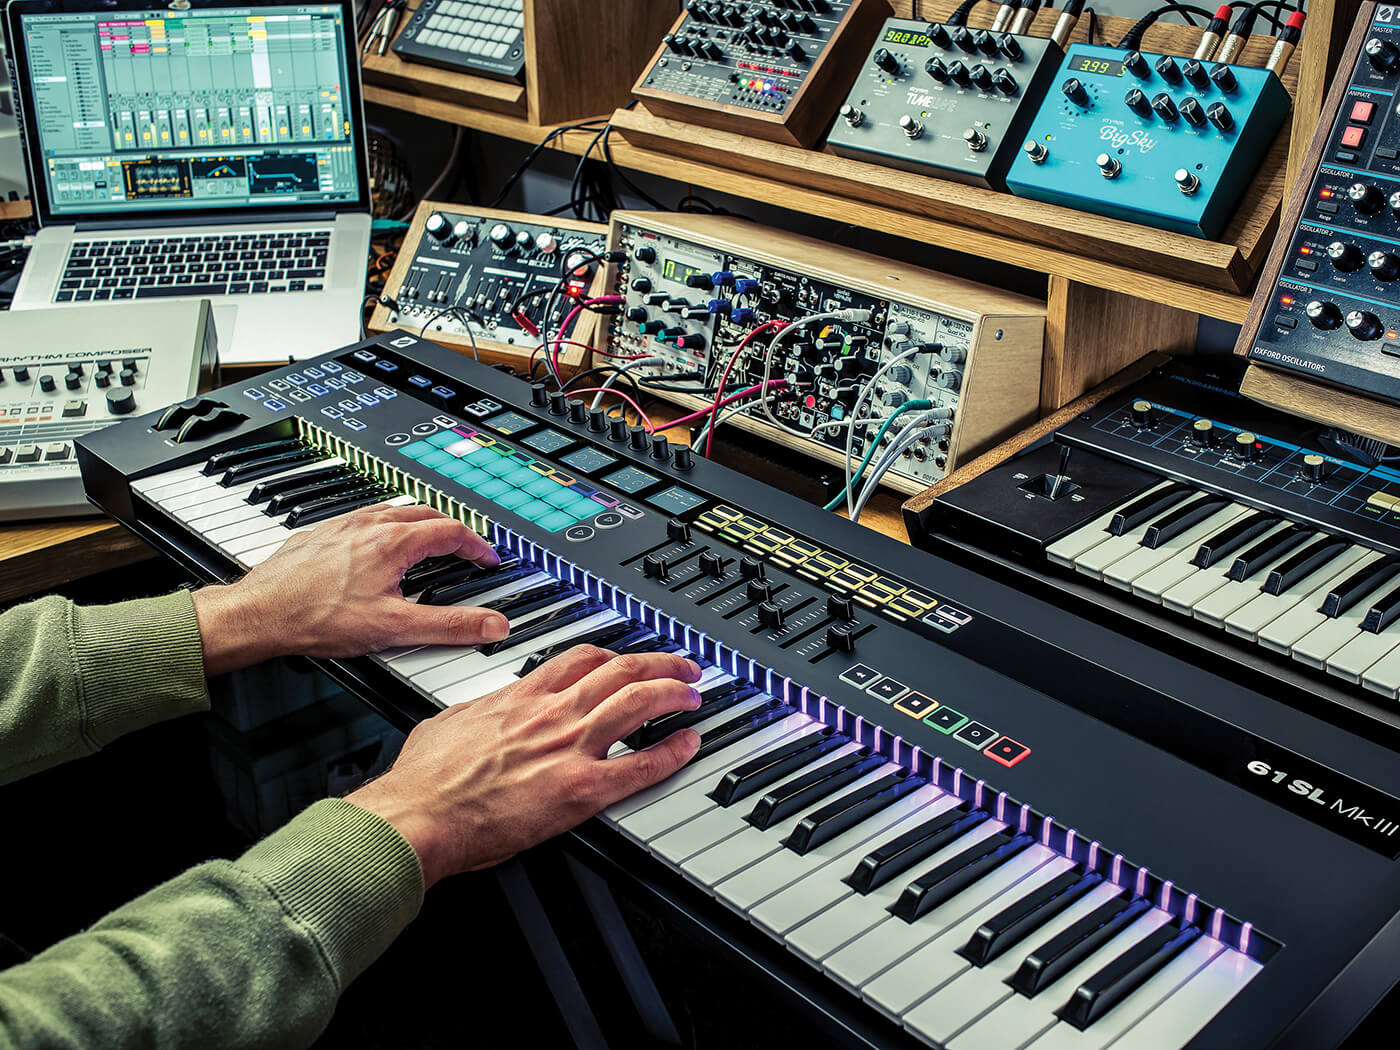
While computers are ubiquitous throughout the music industry, it’s important to remember that they were not designed to be musical instruments. This is where controllers come in.
Controllers bridge the gap between computer and musical instrument, letting you play and control the sounds and virtual instruments within your DAW much more effectively. There are many different controller designs: keyboards to play notes, drum pads to trigger samples, and sliders and dials to control audio effects.
No matter the type, it’s important to remember that you can’t use a controller to make music if it’s not plugged into your computer via a USB or MIDI cable. A controller makes no actual sound; it only sends data (called MIDI data) to your DAW, telling it which note to play or which sample to trigger.
Learn everything you need to know about this equipment type in our exhaustive beginner’s guide to controllers here. To understand how controllers use MIDI to transmit information to and from your computer, scroll down to the recording section.
Virtual instruments
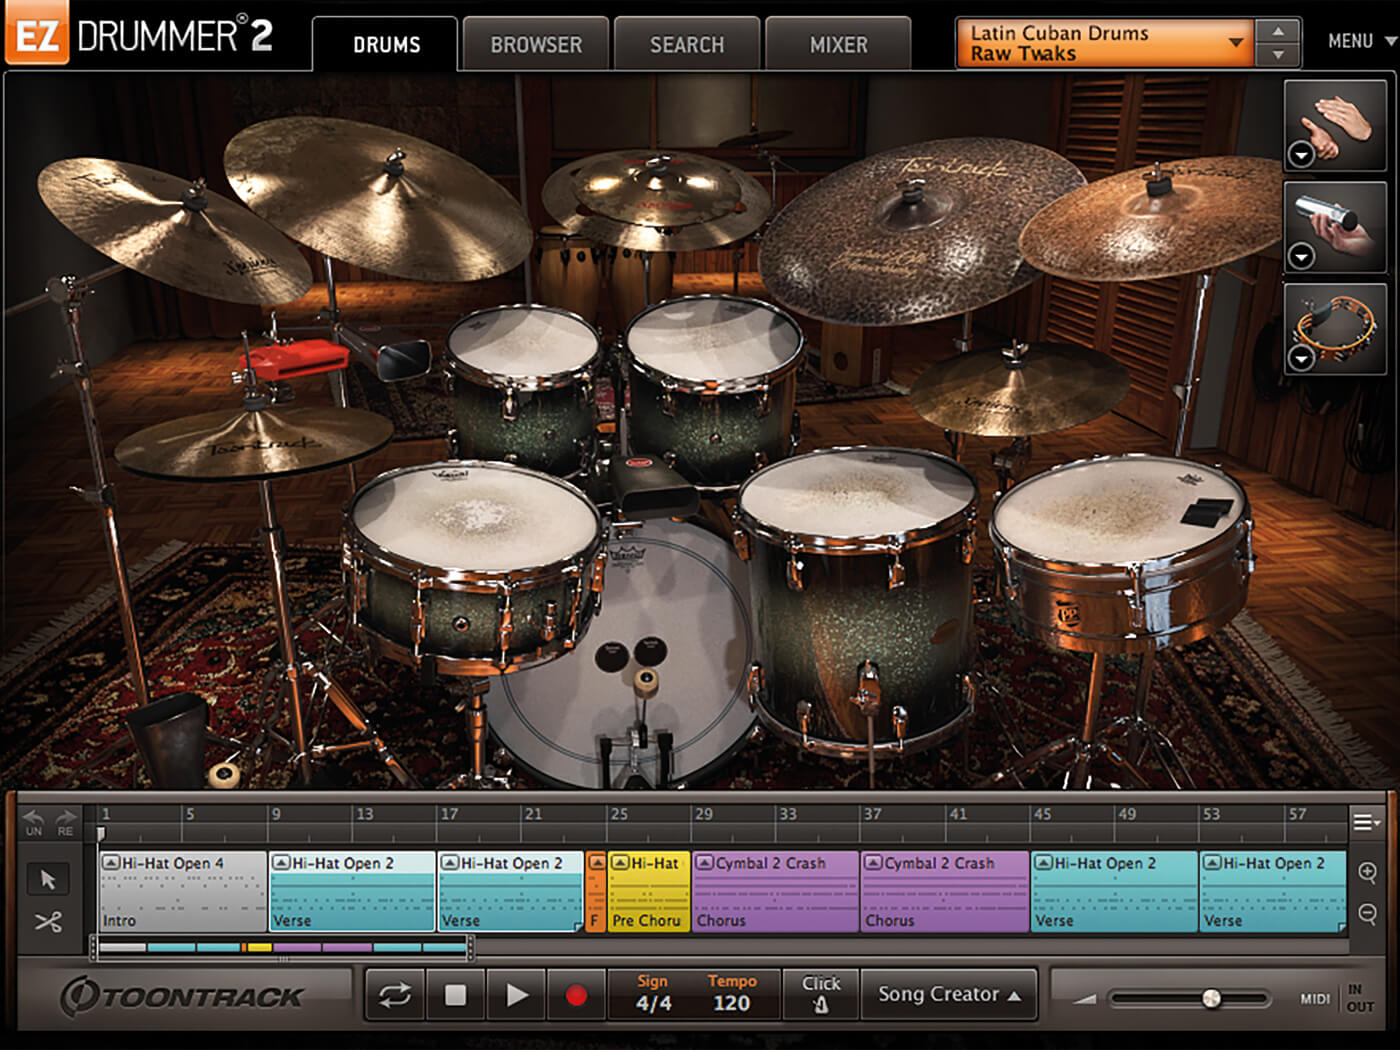
Of course, having all this gear is well and good, but you’ll also need something that makes some noise. Acoustic/electric instruments like guitars and keyboards, as well as external electronic instruments like drum machines and synthesizers are mainstays for bedroom producers and large studios alike.
If you don’t have much space or if you’re on the move, virtual instruments can be a fantastic resource – especially when paired with a controller. These days, most DAWs come bundled with a few virtual instruments and some plug-ins that allow you to start making sounds right out of the gate. Here’s everything you need to know about virtual instruments, but if you’re a novice, you should start by downloading the best free virtual instruments:
And a few paid instruments here:
- Best unusual instruments
- Best vocal instruments
- Best string instruments and libraries
- Best software instruments for sound design
We’ll go through virtual instruments in greater detail in the recording section below.
Samples and loops
You can, of course, make entire tracks with nothing more than samples and loops. DJ Shadow, The Avalanches and DJ Premier – even Kanye West, to an extent – are just three examples of super producers who have built careers on their skills in creatively manipulating samples.
Legalities on copyrights aside, sampling is a quick and easy way to produce music. You can start with our recommendations for the best websites to download free samples, then move on to more detailed tutorials on the practice:
- How to turn free loops and samples into a full song on BandLab
- How to make a track with just one sample
- How to create pitched vocal chops from samples
- How to make the most of Ableton Live’s Sampler
- How to make a sampled drum kit from objects around the house
- How to make unique pads from any sample
- How to create a complex multisample instrument from sounds around the house
What are the stages in music production?
Writing
The work you do on music production will tend to be in service of a song. The song is the most essential element in any production and can help guide the sound of a track. Songwriting is too big a topic to delve into, so you should learn the core principles of songwriting separately. You can write and produce at the same time or produce a song that’s already written.
Session setup
The first thing you’ll want to do is create a new ‘session’ in your DAW. A new session is like a blank document; it’s where you’ll sketch out ideas, record, arrange and so on.
Tempo and key
Before you can get to the fun stuff, you’ll need to take care of some admin regarding your session. Start by setting the tempo or BPM (beats per minute). This is how fast or slowly the underlying pulse of your track will be.
It’s vital to set this at the start if you want to record acoustic instruments; recording at a consistent tempo will keep everyone on the same beat and avoid any awkward timing issues down the road.
Next is setting the key signature of your song. If you’re in an early writing stage then you may not be sure what to set here. Don’t worry, you can always change this later, and there is nothing wrong with jamming around for a while before settling into a key.
Audio settings
Last up is the audio settings. This is where you can make sure the computer is using the correct audio device (your audio interface), and is sending and receiving sound from the right places.
If you’re not using an audio interface, you can probably skip this section for now, as you’ll be using your computer’s built-in speaker outputs.
If you have an audio interface plugged in, ensure that your DAW is using it and not the computer’s built-in sound card. Next, you need to configure your inputs and outputs.
Inputs handle the audio signals coming in to your DAW via the audio interface (e.g. from a microphone). Outputs handle the audio signals coming out from the DAW and sent to your speakers or headphones.
The basic setup goes like this: plug a microphone into input one on your interface, create a new audio track in your session and set its input to ‘one’. When it comes time to record, the audio signal from your mic will come in via input one and get captured onto the track you made.
To listen back to your recording, hit play, and by default, the audio should be sent to outputs one and two – directly to your speakers or headphones.
Of course, things can get a lot more complicated than that. Some interfaces have many inputs and outputs, with lots of options to ‘route’ audio to different places – but the fundamentals are pretty straightforward.
Recording virtual instruments
Virtual instruments exist solely within the computer. All sound comes from the software, and you don’t need a microphone or even an audio interface to use them. Their versatility, portability, and generally high sound quality make them an essential resource in music production.
Virtual instruments generally fall into two categories. The first is synthesised instruments (soft synths). These are purely digital and use algorithms to create all the sounds that you hear.
The second category is sample instruments, which rely upon real recordings of acoustic instruments. These carefully prepared recordings or ‘samples’ are loaded into the virtual instrument, ready to be triggered as you play.
The features and controls of a virtual instrument can vary a lot, so if you find yourself getting confused, try out some presets as a way to get started. Presets are collections of ready-made sounds that you can use right away. They can be a great source of inspiration and will show off what the instrument can do.
Virtual instrument formats
A quick note about the virtual instrument formats: the two most common formats for virtual instruments, and other third-party plug-ins, are VSTi (compatible with both PC and Mac) and AU (compatible only with Mac). Most virtual instruments will come in various formats to cover both platforms. Still, it’s always worth checking to make sure a virtual instrument is supported by both your DAW and operating system before you buy.
Buffer sizes and latency
Computing power is key when using virtual instruments – especially if you’re using many of them in a session. If your computer is struggling to keep up (you’re getting pops, clicks or audio drop-outs), you may need to increase the audio buffer size in your DAW.
The larger the buffer size, the smoother your DAW will handle audio. The smaller the buffer, the harder your computer has to work.
So, you want a large buffer, right? Not exactly.
A large buffer will help your DAW process audio smoothly, but it will also introduce some latency which, as we have already discussed, is a bad thing. The key is to find the right balance between buffer size and an acceptable amount of latency – this is where an audio interface once again comes in handy.
While you don’t need an audio interface to use virtual instruments, having one can help a great deal with latency issues. This is because your computer’s built-in audio drivers (Core Audio on Mac and ASIO on Windows) are not really designed for professional-level audio work. Audio interfaces often come with dedicated audio drivers that are purpose-built for this task. So, if you’re having latency issues, an interface might be something to seriously consider.
Performing with controllers
Virtual instruments sound great, but to get the most out of them you need to be able to properly control and play them.
Many DAWs have features that allow you to use your regular typing keyboard to play notes or beats. This can be very useful when you’re on the move and working on a laptop, but let’s be honest – a typing keyboard is a poor substitute for a piano or drum machine.
A controller is a physical interface that plays like an instrument and is built to have a range of control and sensitivity. So, if you want to capture an expressive, nuanced performance using your virtual instruments, investing in a suitable controller is money well spent.
What is MIDI?
MIDI is what controllers (keyboards, pads) use to communicate with your DAW.
Every time you press down a key on a MIDI keyboard controller, a packet of information is sent to your DAW telling it: a musical note was pressed; which note was pressed; how hard the note was pressed; and if/when the note was released.
Put simply, it’s a way of translating the melodies or beats you play on your controller into something your DAW and virtual instruments can understand.
Should you quantise to fine-tune a performance?
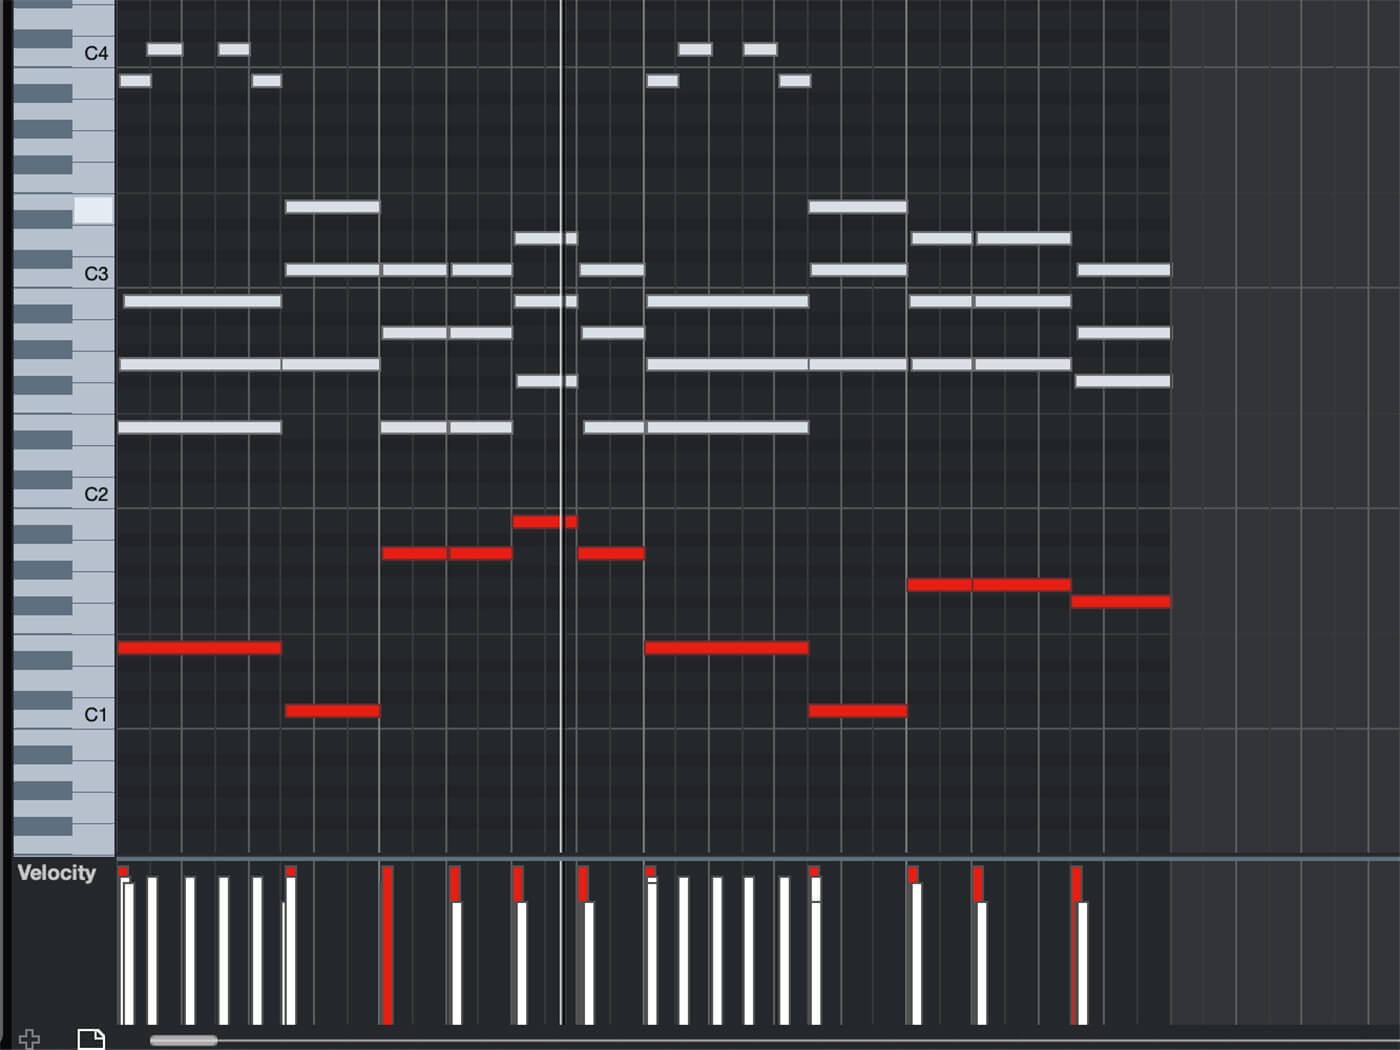
Perhaps one of the best things about working with virtual instruments is the ability to endlessly refine and reshape your performance using tools like Quantise.
Quantisation lets you quickly change the timing of the notes or beats you’ve already recorded. This can mean nudging notes that were played out of time onto the grid. This can be a massive time-saver if you need to fix up a sloppy performance or if you want to get creative and purposely give something a different rhythmic feel.
Of course, this is a tool to use carefully. The fact is, listeners like to hear some fuzzy timing in a performance, and music that is quantised to be perfectly in time can sound robotic and soulless.
Recording external sounds
External sounds such as vocals, acoustic instruments and hardware synthesizers can add authenticity and personality to a track. Even a small-scale recording setup can expand your production process and open up new musical possibilities.
Audio input types and levels
There are three types of audio input that you can plug into your interface: mic, instrument and line.
As the name implies, a mic input is where you can plug in your microphone. An instrument input is where you can plug in your electric bass or guitar. Finally, the line input is used for external electronic instruments such as hardware synths and drum machines. You can also use the line input to plug in other audio gear such as compressors or reverb units.
Each of these inputs has a different volume level. A microphone has the lowest input level; the signal that comes through is too quiet to record by itself, so we have to boost the volume using a preamplifier, usually called a preamp.
The level of an instrument input can also vary, so we can also use a preamp to boost the signal as needed. Line level is the highest input level; it comes into the audio interface at full volume – so we don’t need to make it any louder.
Be careful not to plug a line level signal into a microphone input. Because the signal is already very high, using the preamp will lead to distortion and, in some cases, could even damage your speakers or ear drums.
If your audio interface has a microphone input, it is likely to have a built-in preamp. But always make sure to check this before you buy – some interfaces will only have preamps for the first few channels, and may not have them for every input.
Getting the right input level
Whatever you’re trying to record, the goal is always to get the right input level – not too loud, not too quiet. You can adjust how much signal is being fed into an input using the ‘Gain’ dial, usually located on the front of your interface.
It’s essential to do this before you hit the record button. If you finish a great take and then realise that your microphone had the wrong input level, then you’ll probably have to start all over again.
Pick a quiet place
Our ears are very good at blocking out sounds that aren’t important to us – but microphones pick up everything.
Background noise can easily ruin a good take, so you want to try and find the quietest place possible to record in. A room with bookshelves and carpeting can make for a great live recording room, while even a bedroom closet can work as a vocal recording booth. Wherever you choose, a good trick is to record 10-20 seconds of silence in the space. Listen back to the recording on headphones and see if you’re picking up any unwanted sounds.
Pop filters
If you’re planning to record vocals, there’s one extra piece of equipment that can’t be missed: a pop filter.
When we sing, a great deal of air comes out of our mouths and, for a sensitive vocal microphone, this can be a big problem. The puffs of air that come out when we sing can hit the microphone, creating a low thump sound that will spoil a delicate vocal performance.
A pop filter sits between the singer and the microphone. It breaks up these puffs of air, ensuring you get a clean recording. Many vocal microphones will come with a pop filter included, but they are easy to make from scratch if you don’t have one. Just bend a wire coat hanger into a circle and stretch some stockings over it – voila! You’ve got a DIY pop filter.
If you’ve got a specific recording project in mind – check out some of our detailed recording guides for vocals, guitar, drums and more.
The basics of audio editing: mixing and mastering
Audio editing is commonly used to tighten up timing or as a creative method of structuring a song. There are two main methods: the first involves cutting up your recordings in your DAW and rearranging them. This is commonly called ‘split-and-slip’ editing, which refers to splitting the audio file and then slipping it into the correct place.
The second method is to time-stretch (slow down or speed up) different sections of an audio track. This can be a lot quicker and easier than cutting up the audio, but it can also lead to a loss of audio quality.
Most studio engineers still choose to use ‘split and slip’ editing to ensure the highest possible quality. A professionally produced track can feature thousands of individual edits, all of which will be completely undetectable to the casual listener.
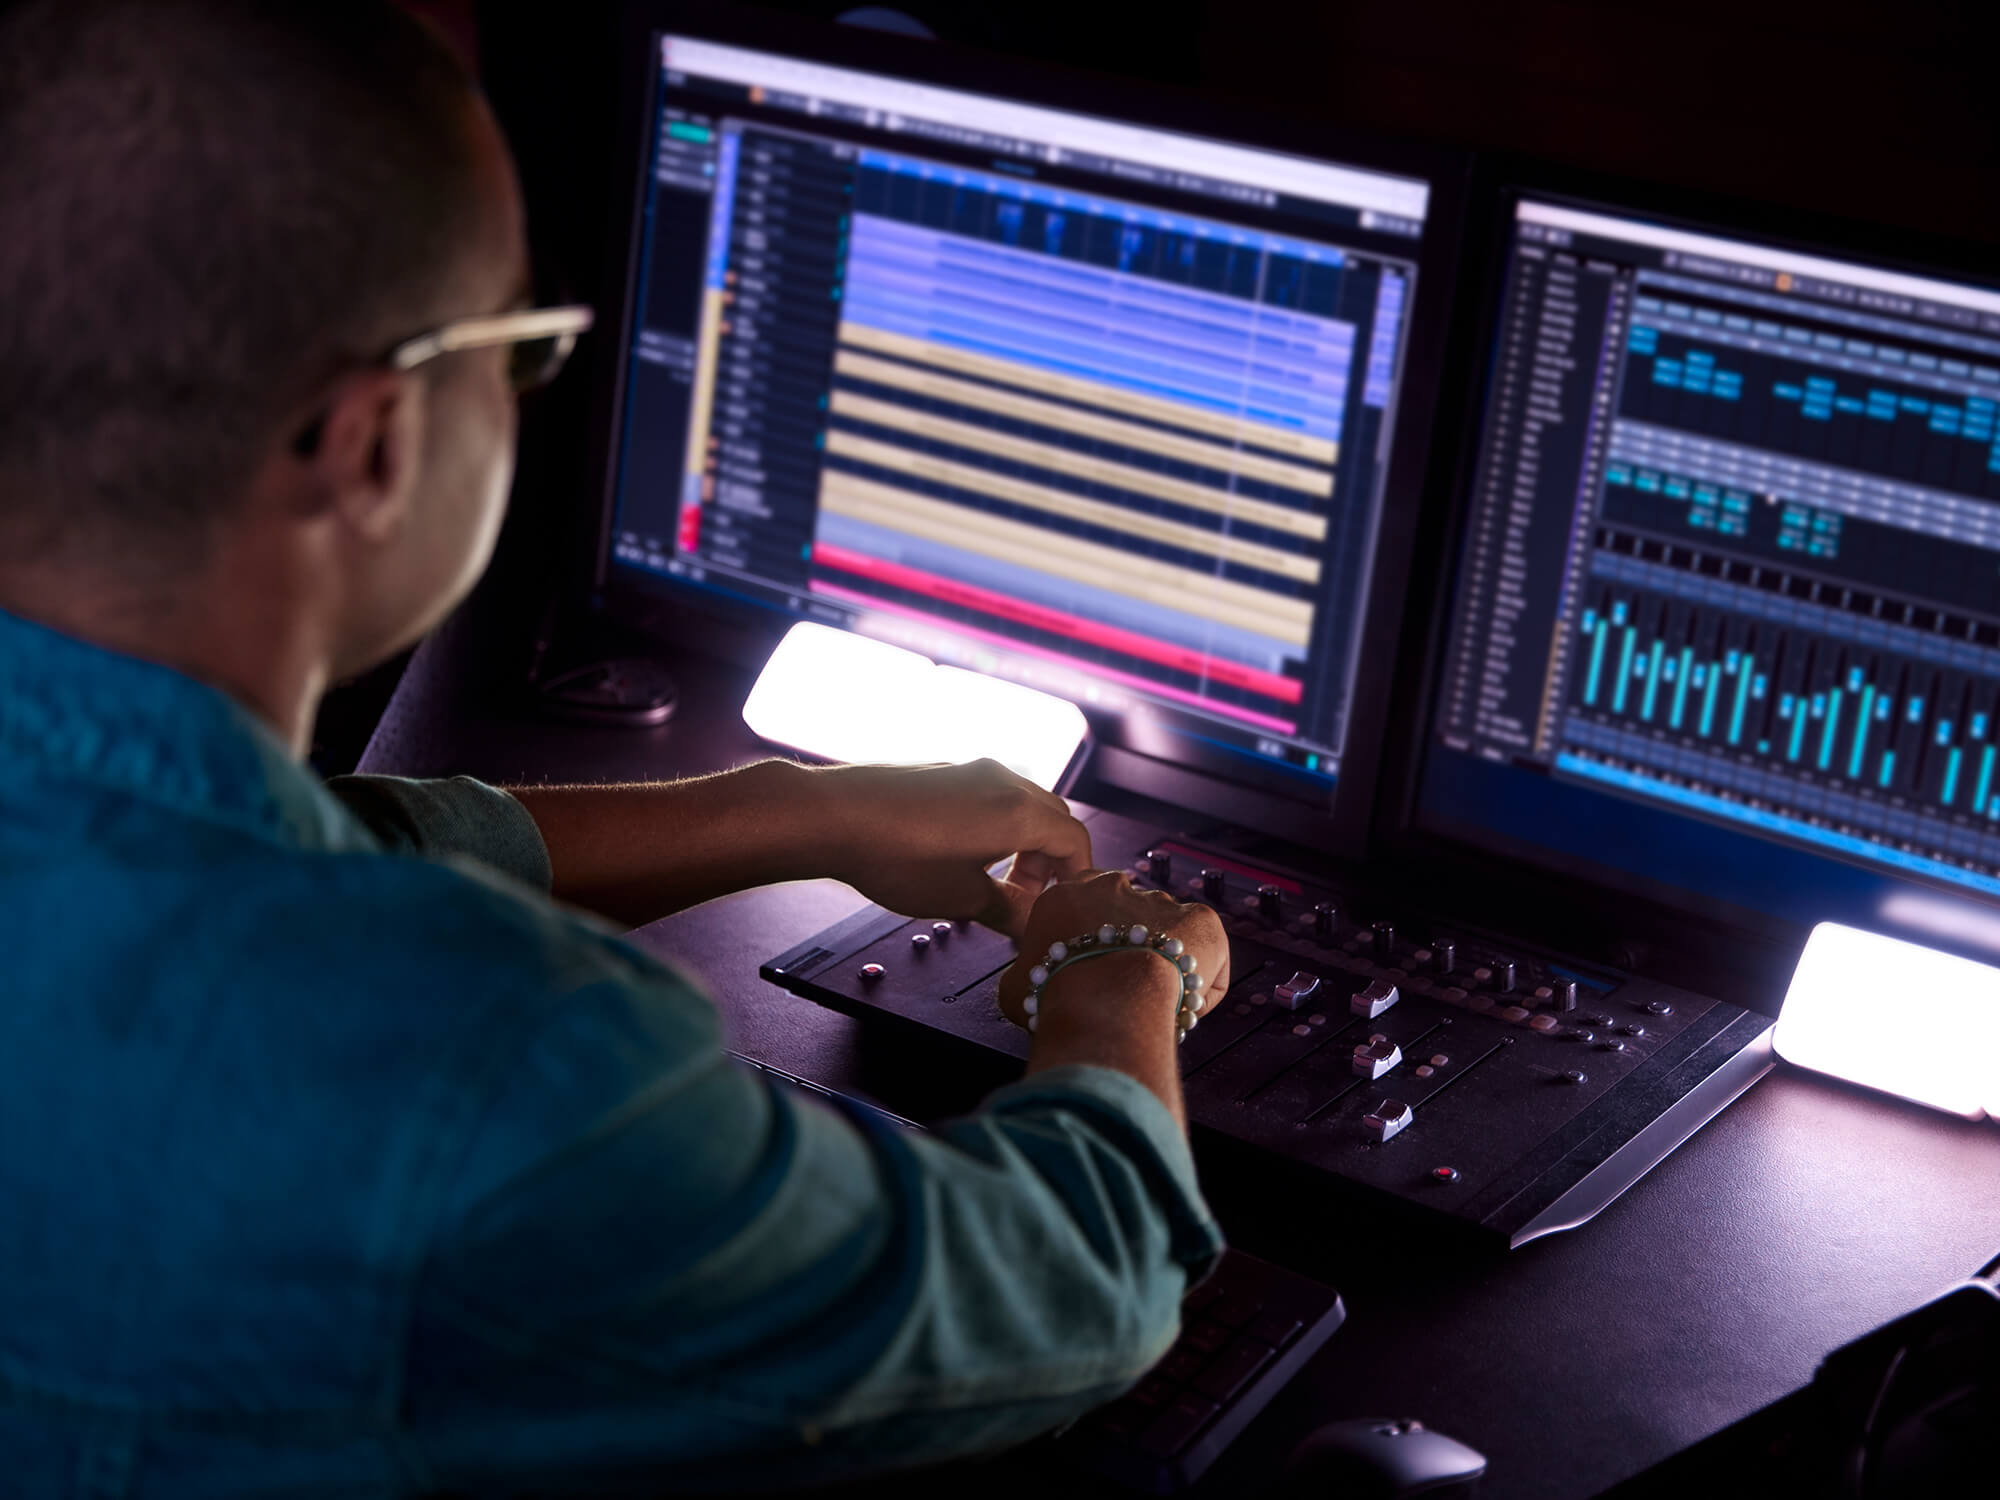
What is the goal of mixing?
Mixing is where all the different instruments and sounds in your track get balanced, blended and shaped into something that sounds (almost!) finished. By the end of the mixing process, a song shouldn’t sound like a rough collection of ideas and elements – it should be glued together by a single identity.
Mixing generally happens after the production (songwriting, recording etc.) is finished and, technically, they are thought of as separate. However, there is a lot of creativity involved in mixing, and the line between what is ‘production’ and what is ‘mixing’ can be very blurred.
What are the fundamentals of mixing?
Volume and peaking
At the most basic level, mixing involves balancing sound levels against each other: the vocals shouldn’t be too quiet, the drums shouldn’t be too loud, and so on.
If any instrument, or the track overall, is too loud, you get what’s called ‘peaking’. Peaking happens when a digital audio recording is too loud for the computer to handle. When this happens, it distorts – and not the good kind of distortion you might get from your guitar pedals.
The consensus is that the digital distortion from peaking sounds bad, and you want to avoid it. This is why each track in your DAW comes with a ‘meter’: a colour coded bar that shows you how loud your audio is. If your audio peaks, then the meter turns bright red – a clear warning sign!
Stereo panning
Mixing also involves moving sounds between the left and right speaker to create a ‘stereo image’. This gives the instruments a sense of space and makes the track feel wider and deeper. Try this out using the pan control, which you’ll find on every audio track.
Shaping the ‘tone’ of the instruments
The mix is also where you start to shape the quality of the sound; adding more bass, making the piano sound ‘bright’ or the guitar sound ‘punchy’. This can transform a track, and it’s one of the most creative parts of mixing.
If we want to change the character of a sound we need to use ‘plug-in’ effects. A plug-in is a piece of software that generally does one specific thing. For example, a delay plug-in will add an echo to your sound, and a pitch-shifting plug-in would let you change the pitch of a singer’s voice.
Multiple plug-ins can be added to a track in your session and most DAWs come with a library of different plug-ins that you can try out.
Bouncing (or exporting) tracks
‘Bouncing’ refers to exporting the finished output from your mix session. The track needs to be finished in the correct format – a high-quality, stereo, WAV or AIFF audio file. Bouncing your track as a low-quality MP3 might be OK to show a friend – but it will be no good for the final step in the music production process: mastering.
Mastering
Mastering is the final step in the music production process. This is where the finishing touches are added to make things sound as good as possible. The mastering process generally involves tweaks to the stereo image, some EQ to balance out the treble and bass frequencies, and some compression and limiting to make sure the track is as loud as it should be.
All of that might sound pretty similar to what happens in the mix stage of production. The difference is that where mixing fundamentally shapes the balance and tone of each instrument, mastering is all about adding the extra polish that separates a good mix from a professionally produced track. The goals are loudness, a consistent character (across an album or EP), and that the end product will sound good no matter what speakers it’s played on.
Should you try and master your own music?
Probably not. Well, maybe, but probably not.
The simple fact is, it’s tough to do well. It takes mastering engineers many years to gain the knowledge, experience, and gear necessary to properly master music. In the short term, mastering your own music probably won’t get you the results you’re hoping for.
There is another good reason to send your mixes to be mastered by an engineer: objectivity.
By the time you finish a mix, you’ve listened to the song hundreds of times. It’s almost impossible to be objective about how things sound. This is why, in the world of professional audio production, mastering is totally separated from mixing.
Once a mix is finished, the track is sent off to be mastered by someone else, in a different studio, maybe even in another country. A mastering engineer comes to a song with a fresh set of ears and an independent perspective on how to make things better.
Having said all that, if you do want to build up your mastering skills, a good way to start is by using an automated mastering service such as Landr or BandLab Mastering to give your ears a benchmark.
So, we’ve looked at all the essentials you need to get started with music production. Of course, a lot depends on what you want to produce and how you plan to go about it – so if you’re looking to delve deeper into a specific area make sure to check out some of our other guides.
Beyond that, the next step is to get busy making something. There’s no substitute for hands-on experience when it comes to music, so try things out, turn it up loud, and have fun!
For more guides, click here.